Table of Contents
Advertisement
Advertisement
Table of Contents

Related Manuals for Jensen MP6212


Summary of Contents for Jensen MP6212
- Page 1 MP6212 MP6212 Instruction Manual...
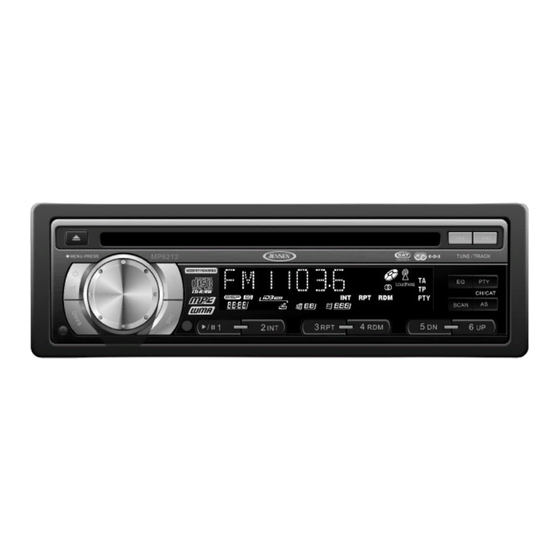
- Page 3 MP6212 INTRODUCTION Congratulations on your purchase of the Jensen MP6212 Mobile Receiver. It’s a good idea to read all of the instructions before beginning the installation. We recommend having your Jensen MP6212 installed by a reputable installation shop. Features CD / MP3 / WMA •...
-
Page 4: Installation
1. Disconnect Battery Before you begin, always disconnect the battery negative terminal. NOTE: If the MP6212 is to be installed in a car equipped with an on- board drive or navigation computer, do not disconnect the battery cable. If the cable is disconnected, the computer memory may be lost. -
Page 5: Kit Installation
MP6212 Using the Mounting Sleeve Slide the mounting sleeve off the chassis. If it is locked into position, use the removal tools (supplied) to disengage it. Check the dashboard opening size by sliding the mounting sleeve into If the opening is too small, carefully cut or file as necessary until the sleeve easily slides into the opening. -
Page 6: Iso Installation
If removal keys are inserted at an angle, they will not lock properly and will not release the unit. Technical Assistance If you require assistance, contact Technical Support at 1-800-323-4815 from 9:00am to 6:00pm EST Monday through Friday. MP6212... - Page 7 MP6212 WIRING Antenna Connect the antenna plug from the existing antenna cable (some vehicles require an adaptor). Satellite Radio Audio In R (Red) Aux-in L (White) Ground Connect to ground terminal or clean, unpainted part of chassis. Memory/Battery Connect to battery or 12 volt power source that is always live.
-
Page 8: Front Panel Release
MP6212 FRONT PANEL RELEASE The front panel release button (4) releases the mechanism that holds the front panel to the chassis. Detaching the Front Panel To detach the front panel, first press the front panel release button to release the left side of the panel. Next, grasp the released side and pull it off the chassis. -
Page 9: Operation
MP6212 OPERATION Power Press the power button (2) to turn the unit on. Press and hold the power button again to turn the unit off. NOTE: LCD panels may take longer to respond when subjected to cold temperatures for an extended period of time. In addition, the visibility of the numbers on the LCD may decrease slightly. - Page 10 In these circumstances, pressing the RESET button will clear the system and return the unit to normal operation. RESET RESET BUTTON MP6212...
-
Page 11: Tuner Operation
MP6212 TUNER OPERATION The MP6212 allows you to receive channels in U.S.A. or EUROPE mode. See “Frequency Spacing” on page 8 to learn how to change the tuner options. MP6212 MOSFET POWERED Select a Band Press the BAND button (3) to change between three FM and two AM bands. - Page 12 After 2 seconds of inactivity, the radio will automatically scan and play the first station it locates in the selected category. NOTE: PTY is a new broadcast technology that may not be extensively available in your area. MP6212...
-
Page 13: Cd Player Operation
MP6212 CD PLAYER OPERATION Insert and Eject CD Insert a CD, label side up. To stop CD play and eject the CD, press the eject button (1). NOTE: The unit is designed for play of standard 5” (12 cm.) compact discs only. -
Page 14: Mp3/Wma Operation
(or optional remote control) as described below. Many types of software are available for converting audio files into MP3/WMA formats. Jensen recommends Nero or Roxio Easy CD Creator. Depending on the media type and recording method, some CD-R/RWs may be incompatible with this unit. -
Page 15: Track Select
Folder Search, File Search or Folder Select as shown below. The MP6212 player will only recognize three folder levels and does not display folders containing only other folders. In the example above, the unit will display folders 3, 4, 6, and 8, but not 2 and 7 since they do not contain any tracks directly. - Page 16 MENU button to begin the search. 4. If only two characters are entered and there is more then one file that begins with these characters, turn the rotary encoder to navigate the files or folders. 5. Press MENU to confirm and play the file. MP6212...
-
Page 17: Satellite Radio Operation
MP6212 SATELLITE RADIO OPERATION ® Listeners can subscribe to XM Radio on the Web by visiting www.xmradio.com, or by calling (800) 967-2346. Customers should have their Radio ID ready (see “Displaying the Identification (ID) Code”). Customers can receive a limited number of free-to-air channels without activation. - Page 18 Turn the rotary encoder to move through the available categories. Press the MENU button (5) to select the displayed category. Once a category is selected, turn the rotary encoder to select stations in the current category. Press MENU to select the displayed channel. MP6212...
-
Page 19: Remote Control
MP6212 REMOTE CONTROL The remote control will allow you to control the basic functions of the MP6212. MUTE MENU SEARCH AF/REG BAND / TOP DISP Operating Range The remote control sensor (19) is located to the right of the SRC button. -
Page 20: Care And Maintenance
3. Discs should be kept in their storage cases when not in use. 4. Do not expose discs to direct sunlight, high temperatures or high humidity for long periods. 5. Do not stick paper, tape or CD labels on disc surfaces, as internal damage may occur. or NERO burning MP6212... -
Page 21: Troubleshooting
MP6212 TROUBLESHOOTING Problem Cause Corrective Action Does not operate No power to yellow Check connection with test (display does not wire; no power to red light; check vehicle fuse with light) wire test light Inline fuse blown Replace fuse No power to unit... -
Page 22: Specifications
MP6212 SPECIFICATIONS *Specifications subject to change without notice. CEA Power Ratings Power output ....18 watts RMS X 4 channels into 4-ohms @ < 1% THD+N Signal to noise ratio. -
Page 23: Limited Warranty
CD or Multimedia Radios/Headunits Audiovox Electronics Corporation (“the Company”) is committed to quality and customer service, and are pleased to offer you this Warranty. Please read it thoroughly and contact the Company at 1-800- 323-4815 with any questions. Who is covered? The Company extends this warranty to the original retail purchaser of products purchased through an authorized Audiovox retailer in the U.S.A., Puerto Rico or Canada. - Page 24 Audiovox Electronics Corporation Hauppauge, NY 11788 Technical Assistance: 1-800-323-4815 www.jensen.com © 2007 Audiovox Ver. 020907 Printed in China...