Chamberlain LiftMaster LA412 Installation Manual
Residental c solar vehicular swing gate operator
Hide thumbs
Also See for LiftMaster LA412:
- Owner's manual (48 pages) ,
- Owner's manual (44 pages) ,
- Instruction manual (52 pages)
Table of Contents
Advertisement
VEHICULAR SWING GATE OPERATOR
MODEL
LA412
LA4121PKGDC
Single Arm Package
LA412DC
Primary 12 VDC Actuator Arm for single
swing gate applications
LA412DCS
Secondary 12 VDC Actuator Arm for dual
swing gate applications
RESIDENTIAL DC
UL325
compliant
SOLAR
INSTALLATION
MANUAL
THIS PRODUCT IS TO BE INSTALLED AND
SERVICED BY A TRAINED GATE SYSTEMS
TECHNICIAN ONLY.
Visit www.liftmaster.com to locate a
professional installing dealer in your area.
This model is for use on vehicular passage
gates ONLY and not intended for use on
pedestrian passage gates.
This model is intended for use in Class I
vehicular swing gate applications.
UL991
compliant
Advertisement
Table of Contents
Troubleshooting

Related Manuals for Chamberlain LiftMaster LA412


Summary of Contents for Chamberlain LiftMaster LA412
- Page 1 THIS PRODUCT IS TO BE INSTALLED AND LA4121PKGDC SERVICED BY A TRAINED GATE SYSTEMS Single Arm Package TECHNICIAN ONLY. Visit www.liftmaster.com to locate a LA412DC professional installing dealer in your area. Primary 12 VDC Actuator Arm for single swing gate applications...
-
Page 2: Table Of Contents
OBSTRUCTION TEST ................28 LARGE METAL CONTROL BOX ...............48 PROGRAMMING ACCESSORIES REMOTE CONTROLS (NOT PROVIDED) ..........29 WARRANTY LIFTMASTER INTERNET GATEWAY (NOT PROVIDED) ..................30 TEMPLATE FOR POST BRACKET MOUNTING ERASE ALL CODES .................30 ERASE LIMITS ..................30 TO REMOVE AND ERASE MONITORED ENTRAPMENT PROTECTION DEVICES ....................30... -
Page 3: Usage Class
SAFETY USAGE CLASS CLASS I – RESIDENTIAL VEHICULAR GATE OPERATOR A vehicular gate operator (or system) intended for use in garages or parking areas associated with a residence of one-to four single families. CLASS II – COMMERCIAL/GENERAL ACCESS VEHICULAR GATE OPERATOR A vehicular gate operator (or system) intended for use in a commercial location or building such as a multi-family housing unit (five or more single family units), hotel, garages, retail store, or other buildings... -
Page 4: Safety Installation Information
SAFETY SAFETY INSTALLATION INFORMATION Vehicular gate systems provide convenience and security. Gate The Stop and/or Reset (if provided separately) must be located in systems are comprised of many component parts. The gate the line-of-sight of the gate. Activation of the reset control shall not operator is only one component. -
Page 5: Gate Construction Information
SAFETY GATE CONSTRUCTION INFORMATION Vehicular gates should be installed in accordance with ASTM F2200: Standard Specification for Automated Vehicular Gate Construction. For a copy, contact ASTM directly at 610-832-9585 or www.astm.org. GENERAL REQUIREMENTS 3.1.2 All openings shall be designed, guarded, or screened from the bottom of the gate to the top of the gate or a minimum of 72 in. -
Page 6: Introduction
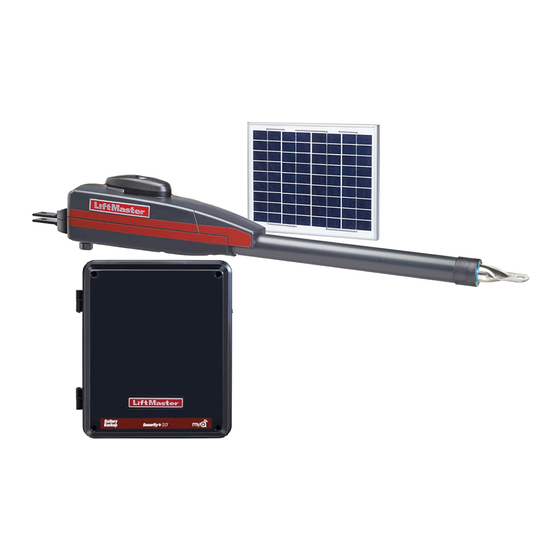
INTRODUCTION CARTON INVENTORY NOT SHOWN: Documentation packet and hardware bag LA412DCS ONLY Pull-to-Open Bracket Wire Nuts (6) Post Bracket Pull-to-Open Bracket Watertight Connector (2) Post Bracket Standard Control Box with 2 Batteries Gate Bracket 12V 10W Solar Panel Model SOLPNL10W12V (1) Gate Bracket Connector Junction Box... -
Page 7: Specifications
INTRODUCTION SPECIFICATIONS This model is intended for use in vehicular swing gate applications: Usage Classification Class I Main AC Supply N/A - Solar Only System Operating Voltage 12 Vdc Battery Run / Solar Charge Accessory Power 12 Vdc, 500mA max for ON + SW (switched) Solar Power Max 12 Vdc at 30 watts max. -
Page 8: Site Preparation
INTRODUCTION SITE PREPARATION Check the national and local building codes BEFORE installation. TRENCH LOOPS Trench and install conduit. Before trenching, contact underground Loops allow the gate to stay open when vehicles are obstructing the utility locating companies. Conduit must be UL approved for low gate path. -
Page 9: Overview Of Typical Installation
INTRODUCTION OVERVIEW OF TYPICAL INSTALLATION Identify your installation type (refer to the Appendix in the back of the manual for more information). All the illustrations on the following pages display a typical Left-Hand Gate installation with a pull-to-open bracket. For Push-to-Open applications refer to the Appendix. SINGLE GATE NOTE: One or more non-contact sensors shall be located where the... -
Page 10: Installation
INSTALLATION IMPORTANT SAFETY INFORMATION To prevent SERIOUS INJURY or DEATH from a moving gate: • Pinch points must be guarded at all times. Install enclosed-style gate • Entrapment protection devices MUST be installed to protect anyone tracks and roller guards. who may come near a moving gate. -
Page 11: Attach Brackets To Operator
INSTALLATION STEP 1 ATTACH BRACKETS TO OPERATOR 1. Insert the key into the lock on the release lever and turn it 180° counterclockwise. 2. Turn the release lever 180° counterclockwise. The operator is now in manual mode. 3. Assemble gate post bracket by placing pull-to-open bracket on top of post bracket. -
Page 12: Determine Mounting Location
INSTALLATION STEP 2 DETERMINE MOUNTING LOCATION MEASURING AND MARKING FOR THE GATE BRACKET Before proceeding, begin with the gate in the fully closed position. There are two methods for determining the proper location of the post brackets: • Paper template (Located on the back page of this manual. Must be cut out.) •... -
Page 13: Position The Operator
INSTALLATION STEP 3 POSITION THE OPERATOR NOTE: The post bracket assembly can be mounted several places on the gate post. 1. Open the gate to desired open position (no greater than 100°) and hold operator against gate. 2. Place the operator arm against gate post at the desired position. Temporarily secure gate post bracket with clamp. -
Page 14: Secure The Brackets
INSTALLATION STEP 4 SECURE THE BRACKETS POST BRACKET The gate operator (arm) must be level. 1. Mark holes for the post bracket. Remove the clamp and the operator, set aside. 2. Drill adequate holes in the gate post. 3. Secure the post bracket to the gate post using hardware. GATE BRACKET The gate operator (arm) must be level. -
Page 15: Install The Control Box
INSTALLATION STEP 5 INSTALL THE CONTROL BOX WALL OR COLUMN MOUNT For Large Metal Control Box installation, refer to the following page. STANDARD CONTROL BOX The control box MUST be mounted within 5 feet (1.52 m) of the gate 9 1/8" operator. - Page 16 INSTALLATION STEP 5 continued... INSTALL THE CONTROL BOX WALL OR COLUMN MOUNT LARGE METAL CONTROL BOX (XLSOLARCONTDC) The control box MUST be mounted within 5 feet (1.52 m) of the gate operator. Mount the control box as high as possible for best radio reception.
-
Page 17: Earth Ground Rod
INSTALLATION To reduce the risk of SEVERE INJURY or DEATH: • ALL electrical connections MUST be made by a qualified individual. • ANY maintenance to the operator or in the area near the operator • DO NOT install ANY wiring or attempt to run the operator without MUST NOT be performed until disconnecting the electrical power (AC consulting the wiring diagram. -
Page 18: Dual Gates Only
INSTALLATION STEP 8 DUAL GATES ONLY There are two options for dual gate communication: wired or wireless. Follow the directions according to your application. Do not use wired and wireless communication simultaneously. Wired dual gate applications will have a longer battery standby time than wireless applications. Wireless dual gates will require the installation of two control boxes, one for each operator arm. - Page 19 INSTALLATION STEP 8 continued... DUAL GATES ONLY WIRED DUAL GATES INSTALL A SECOND OPERATOR ARM Extension Install a second operator arm by following installation steps 1-4. White Cable INSTALL THE EXTENSION CABLE AND JUNCTION Operator Yellow Cable Before digging, contact local underground utility locating companies. 1.
- Page 20 INSTALLATION STEP 8 continued... DUAL GATES ONLY (Control Board) WIRED DUAL GATES Connector Watertight WIRE THE SECONDARY OPERATOR ARM TO THE Connector Connector Nut CONTROL BOARD Extension Cable 1. Choose a knockout in the bottom of the control box. 2. Insert the extension cable through the watertight connector. 3.
-
Page 21: Install Entrapment Protection
INSTALLATION To prevent SERIOUS INJURY or DEATH from a moving gate: • Entrapment protection devices MUST be installed to protect anyone • Locate entrapment protection devices to protect between moving who may come near a moving gate. gate and RIGID objects, such as posts or walls. •... - Page 22 INSTALLATION STEP 9 continued... INSTALL ENTRAPMENT PROTECTION There are three options for wiring the entrapment protection devices Close Photoelectric Sensors depending on the specific device and how the device will function. Refer to the wiring diagram or the specific entrapment protection device manual for more information.
-
Page 23: Install Solar Panel(S)
INSTALLATION STEP 10 INSTALL SOLAR PANEL(S) SELECT SITE FOR SOLAR PANEL(S) The solar panel(s) must be located in an open area clear of obstructions and shading for the entire day. The solar panel(s) comes with a 10 foot (3 m) cable. If a location near the control box cannot be found, an additional cable will be required. The LA412DC Solar Gate Operator is not supported in northern climates where temperatures reach below -4°... - Page 24 INSTALLATION STEP 10 continued... SOLAR ZONES NOT AVAILABLE INSTALL SOLAR PANEL(S) NOT AVAILABLE SOLAR USAGE GUIDE SOLAR GATE CYCLES PER DAY (SINGLE GATE) BATTERY SYSTEM CONFIGURATION ZONE 1 ZONE 2 ZONE 3 CURRENT (6 Hrs sunlight/day) (4 Hrs Sunlight/day) (2 Hrs Sunlight/day) DRAW (mA) 7AH batteries 33AH batteries...
- Page 25 INSTALLATION STEP 10 continued... INSTALL SOLAR PANEL(S) The location of the panel(s) is critical to the success of the installation. In general, the panel(s) should be mounted using the provided angle bracket facing due south. Use a compass to determine direction. The solar panel(s) should be mounted in an area clear of all obstructions and shading from buildings and trees.
-
Page 26: Power Wiring
INSTALLATION STEP 10 continued... INSTALL SOLAR PANEL(S) INSTALL THE SOLAR PANEL 1. Position solar bracket on mounting surface. Mark and drill holes. 2. Insert two bolts into the track located on the back of the solar panel(s). Mounting Surface 3. Slide bolts in track away from bolt hole and align both bolts. 4. -
Page 27: Finish Install
INSTALLATION STEP 12 FINISH INSTALL 1. Turn the release lever clockwise 180° back to the engaged position. This engages the motor. The illustration shows the release lever in the engaged position. 2. Turn the key clockwise 180°. This locks the release lever. The Release Lever operator is now engaged. -
Page 28: Limit Setup Leds
ADJUSTMENT LIMIT AND FORCE ADJUSTMENT continued... For dual gate applications the limits will have to be set for each operator. The gate MUST be attached to the operator before setting the limits and force. INITIAL LIMITS AND FORCE ADJUSTMENT If a mistake is made while programming the limits press the reset button to start over. -
Page 29: Obstruction Test
ADJUSTMENT LIMIT AND FORCE ADJUSTMENT continued... FINE TUNE THE FORCE TEST The REVERSAL FORCE DIAL on the control board is used for fine tuning BUTTONS the force in cases where wind or environmental changes may affect the XMITTER NETWORK gate travel. RSAL Based on the length and weight of the gate it may be necessary to make additional force adjustments. -
Page 30: Programming
PROGRAMMING REMOTE CONTROLS (NOT PROVIDED) A total of 50 Security✚ 2.0™ remote controls and 2 keyless entries (1 LEARN PIN for each keyless entry) can be programmed to the operator. When XMITTER programming a third keyless entry to the operator, the first keyless entry will be erased to allow the third keyless entry to be programmed. -
Page 31: Liftmaster Internet Gateway (Not Provided)
The status as shown by the LiftMaster Internet Gateway app will be either “open” or “closed”. The gate operator can then be controlled through the... -
Page 32: Operation
OPERATION CONTROL BOARD OVERVIEW SET OPEN Button: The SET OPEN button sets the OPEN limit. See Adjust Limits section. SET CLOSE Button: The SET CLOSE button sets the CLOSE limit. See Adjust Limits section. MOVE GATE Buttons: The MOVE GATE buttons will either open or close the gate when the operator is in Limit setting mode. See Adjust Limits section. BATT FAIL: •... -
Page 33: Manual Release
OPERATION MANUAL RELEASE In case of a power failure, the operator can be disengaged from the gate. With an operator, the release action may sometimes feel stiff/jerky, which is normal and has no effect on function. NOTE: It is normal for the operator to run slow right after a disconnect or complete loss of AC/ battery power (the operator will need to run a complete open and close cycle). -
Page 34: Operator Alarm
OPERATION OPERATOR ALARM If a contact sensor detects an obstruction twice consecutively the alarm will sound (up to 5 minutes) and the operator will need to be reset. When the inherent force of the operator (RPM/current sensor) detects the following (twice consecutively) the alarm will sound (up to 5 minutes) and the operator will need to be reset: A. -
Page 35: Accessory Wiring
ACCESSORY WIRING EXTERNAL CONTROL DEVICES EXIT (2 Terminals) This input is a soft open command (maintained switch does not override (control board) external safeties and does not reset alarm condition). Used for exit probe, Exit telephone entry, external exit loop detector, or any device that would command the gate to open. -
Page 36: Locks
ACCESSORY WIRING LOCKS (control board) MAGLOCK (2 Terminals, N.C. and COM) Maglock Relay contact output, Normally - closed (N.C.) output for maglocks. Relay activates prior to motor activation and during motor run. Relay is off when motor is off. NOTE: For AC power install a Siemens S10K30 MOV (Metal Oxide Varistor) or equivalent. -
Page 37: Maintenance
NOTE: The operator should be on a separate fused line of adequate capacity. • ALL maintenance MUST be performed by a LiftMaster professional. • NEVER let children operate or play with gate controls. Keep the •... -
Page 38: Troubleshooting
TROUBLESHOOTING To protect against fire and electrocution: For continued protection against fire: • DISCONNECT power (AC or solar and battery) BEFORE installing or • Replace ONLY with fuse of same type and rating. servicing operator. ERROR CODES NOTE: When cycling or disconnecting power (ac/dc) to the control board, it is recommended that you unplug the J15 plug. TO VIEW THE ERROR CODES OPEN, CLOSE, &... - Page 39 Loop Error - Failure or missing exit loop (SHORT Check loop wiring throughout connection. May be a short in the loop, or OPEN - LiftMaster Plug-in Loop Detector only) or an open connection in the loop. Loop Error - Failure or missing shadow loop Check loop wiring throughout connection.
- Page 40 TROUBLESHOOTING ERROR CODES continued... Some errors are saved in the error code history and some are not. If an error is not saved it will briefly appear on the error code display as it occurs, then disappear. Code Error Meaning Solution Saved Wireless edge triggered more than 3 minutes...
-
Page 41: Control Board Leds
TROUBLESHOOTING CONTROL BOARD LEDS STATUS LEDS INPUT LEDS INPUT OFF state SBC INPUT Input inactive POWER AC charger or Solar power Input active available BLINK Input active on other operator BATT Not charging FIRE DEPT Input inactive CHARGING Three stage battery charging INPUT Input active TIMER... -
Page 42: Troubleshooting Chart
TROUBLESHOOTING TROUBLESHOOTING CHART SYMPTOM POSSIBLE CAUSES SOLUTIONS Operator does not a) No power to control board a) Check AC and battery power run and error code b) Open fuse b) Check fuses display not on. c) If on battery power only, low or dead batteries c) Charge batteries by AC or solar power or replace batteries d) Defective control board d) Replace defective control board... - Page 43 TROUBLESHOOTING TROUBLESHOOTING CHART continued... SYMPTOM POSSIBLE CAUSES SOLUTIONS Gate closes, but a) Vehicle loop detector active a) Check all vehicle detector inputs for an active detector will not open. b) Low battery with LOW BATT option set b) Check if AC power is available. If no AC power, then running on batteries and to CLOSE battery voltage must be 11.5 Vdc or higher.
- Page 44 Insufficient panel wattage a) Add more solar panels enough cycles per day b) Excessive accessory power draw b) Reduce the accessory power draw by using LiftMaster low power accessories c) Old batteries c) Replace batteries d) Solar panels are not getting enough...
-
Page 45: Appendix
APPENDIX BRACKET TYPES PULL-TO-OPEN Right-Hand Gate Left-Hand Gate PUSH-TO-OPEN Left-Hand Gate Right-Hand Gate... -
Page 46: Limit Setup With A Remote Control
APPENDIX LIMIT SETUP WITH A REMOTE CONTROL To set the limits using a remote control, first you will need a 3-button remote control that has been programmed for OPEN, CLOSE, and STOP. Refer to the Programming section. INITIAL LIMITS AND FORCE ADJUSTMENT ADJUST THE LIMITS For dual gate applications the limits will have to be set for each If the limits have already been set the operator will exit the limit setting... -
Page 47: Repair Parts
J15 Harness K77-36541 Antenna LA412CONTDC Standard Plastic Control Box (with control board) GATE OPERATOR ARM ITEM PART NUMBER DESCRIPTION LA412 Primary Arm 41ASWG-442SA Release Lever 41ASWG-0594SA Motor with Limit Switch Harness 41ASWG-0014SA Rear Connector 41ASWG-0597SA Cable 12 V with Connector... -
Page 48: Wiring Diagram
WIRING DIAGRAM STANDARD CONTROL BOX To protect against fire and electrocution: LA412 WIRING DIAGRAM ECN: • DISCONNECT power and battery BEFORE installing or servicing Reference: 06-37068 operator. 11/22/13 For continued protection against fire: • Replace ONLY with fuse of same type and rating. -
Page 49: Large Metal Control Box
WIRING DIAGRAM LARGE METAL CONTROL BOX To protect against fire and electrocution: • DISCONNECT power and battery BEFORE installing or servicing operator. For continued protection against fire: • Replace ONLY with fuse of same type and rating. Antenna Coaxial Antenna Cable 12V 33AH Battery Black Photoelectric Sensors... -
Page 50: Accessories
Used to allow the gate operator to push the gate open. REMOTE CONTROLS Model 50-19503 Chamberlain offers a variety of LiftMaster remote controls to satisfy your application needs. Single-button to 4-button, visor or key chain. The SOLENOID GATE LOCK following remote controls are compatible with operators manufactured by The automatic gate lock is a solenoid-driven lock Chamberlain after 1993. -
Page 51: Warranty
Model LA500SLRHARN WARRANTY LIFTMASTER TWO YEAR LIMITED WARRANTY The Chamberlain Group, Inc. warrants to the first purchaser of this product, for the structure in which this product is originally installed, that it is free from defect in materials and/or workmanship for a period of TWO years from the date of purchase. The proper operation of this product is dependent on your compliance with the instructions regarding installation, operation, maintenance and testing. -
Page 52: Template For Post Bracket Mounting
TEMPLATE FOR POST BRACKET MOUNTING 845 Larch Avenue Elmhurst, Illinois 60126-1196 www.liftmaster.com 01-37071 © 2014, The Chamberlain Group, Inc. – All Rights Reserved...