Table of Contents
Advertisement
Available languages
Available languages
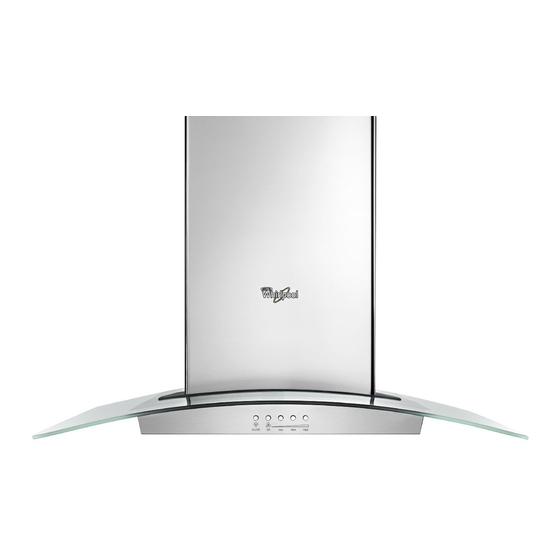
36" (91.4 CM) ISLAND-MOUNT CANOPY
For questions about features, operation/performance, parts, accessories or service, call: 1-800-253-1301
HOTTE DE CUISINIÈRE CONFIGURÉE EN ÎLOT
Instructions d'installation et Guide d'utilisation et d'entretien
Table of Contents/Table des matières............................................................................. 2
IMPORTANT: READ AND SAVE THESE INSTRUCTIONS.
FOR RESIDENTIAL USE ONLY.
IMPORTANT : LIRE ET CONSERVER CES INSTRUCTIONS.
POUR UTILISATION RÉSIDENTIELLE UNIQUEMENT.
LI32MA/W10674117A
RANGE HOOD
Installation Instructions and Use & Care Guide
or visit our website at www.whirlpool.com
In Canada, call 1-800-807-6777 or visit our website at www.whirlpool.ca
36" (91,4 CM)
Au Canada, pour assistance, installation ou service, composer
le 1-800-807-6777 ou visiter notre site Web à
www.whirlpool.ca
Advertisement
Table of Contents

Related Manuals for Whirlpool 36" (91.4 CM) ISLAND-MOUNT CANOPYRANGE HOOD


Summary of Contents for Whirlpool 36" (91.4 CM) ISLAND-MOUNT CANOPYRANGE HOOD
-
Page 1: Range Hood
Installation Instructions and Use & Care Guide For questions about features, operation/performance, parts, accessories or service, call: 1-800-253-1301 or visit our website at www.whirlpool.com In Canada, call 1-800-807-6777 or visit our website at www.whirlpool.ca HOTTE DE CUISINIÈRE CONFIGURÉE EN ÎLOT 36" (91,4 CM) Instructions d’installation et Guide d’utilisation et d’entretien... -
Page 2: Table Of Contents
TABLE OF CONTENTS TABLE DES MATIÈRES RANGE HOOD SAFETY ..............2 SÉCURITÉ DE LA HOTTE DE CUISINIÈRE........17 INSTALLATION REQUIREMENTS ..........4 EXIGENCES D'INSTALLATION ...........19 Tools and Parts ................4 Outils et pièces................19 Location Requirements..............4 Exigences d’emplacement............19 Venting Requirements..............5 Exigences concernant l'évacuation ...........20 Electrical Requirements ...............6 Spécifications électriques ............21 INSTALLATION INSTRUCTIONS ..........7 INSTRUCTIONS D’INSTALLATION..........22... -
Page 3: Important Safety Instructions
IMPORTANT SAFETY INSTRUCTIONS WARNING: TO REDUCE THE RISK OF A RANGE TOP WARNING: TO REDUCE THE RISK OF FIRE, ELECTRIC GREASE FIRE: SHOCK, OR INJURY TO PERSONS, OBSERVE THE FOLLOWING: Never leave surface units unattended at high settings. Boilovers cause smoking and greasy spillovers that may Use this unit only in the manner intended by the ignite. -
Page 4: Installation Requirements
INSTALLATION REQUIREMENTS Tools and Parts Location Requirements Gather the required tools and parts before starting installation. IMPORTANT: Observe all governing codes and ordinances. Read and follow the instructions provided with any tools listed here. Have a qualified technician install the range hood. It is the installer's responsibility to comply with installation clearances specified on the Tools needed model/serial rating plate. -
Page 5: Venting Requirements
Installation Dimensions Venting Requirements Vent system must terminate to the outside, except for non- vented (recirculating) installations. Do not terminate the vent system in an attic or other enclosed area. Do not use 4" (10.2 cm) laundry-type wall caps. Use metal vent only. Rigid metal vent is recommended. Do not use plastic or metal foil vent. -
Page 6: Electrical Requirements
Non-vented (recirculating) Roof Venting Electrical Requirements Observe all governing codes and ordinances. Ensure that the electrical installation is adequate and in conformance with National Electrical Code, ANSI/NFPA 70 (latest edition), or CSA Standards C22.1-94, Canadian Electrical Code, Part 1 and C22.2 No. 0-M91 (latest edition) and all local codes and ordinances. -
Page 7: Installation Instructions
INSTALLATION INSTRUCTIONS Prepare Location Lay out the vent duct system before installing the range hood Range Hood Mounting Screws Installation to determine the best routing for the vent duct. It is recommended that the vent system be installed before 1. Determine and mark the centerline on the ceiling where the the range hood is installed. -
Page 8: Assemble Range Hood
CAUTION: To reduce the risk of fire and electric shock, install this range hood only with the In-Line Smart Kit manufactured by Whirlpool, Part Number W10692945. For installation see the In-Line Smart Kit installation instructions. See the “Assistance or Service” section to order. -
Page 9: Make Electrical Connection
2. Install 16 - 4.2 x 8 mm screws and tighten to secure. 4. Run home power supply cable through strain relief, into terminal box. A. Mounting screws Connect Vent System 1. Install vent system. 2. Push duct over the exhaust outlet. Seal all connections with vent clamps. -
Page 10: Install Duct Covers
Install Duct Covers NOTE: Remove the film from the duct covers. 3. Slide the upper duct covers up the frame to the ceiling and secure to the upper horizontal support with 2 - 3.5 x 6.5 mm 1. Assemble the upper duct covers together and install the duct screws. -
Page 11: Complete Installation
NOTE: When assembling the rear lower duct cover to the front 8. Secure the lower duct cover to the range hood canopy using lower duct cover, the flange (both sides) must be placed over the 4 - 4.2 x 8 mm screws. plastic clip to secure the lower duct covers together at the bottom. -
Page 12: Range Hood Use
RANGE HOOD USE The range hood is designed to remove smoke, cooking vapors and odors from the cooktop area. For best results, start the hood Range Hood Controls before cooking and allow it to operate several minutes after the cooking is complete to clear all smoke and odors from the kitchen. The hood controls are located on the front of the canopy. -
Page 13: Range Hood Care
RANGE HOOD CARE Cleaning IMPORTANT: Clean the hood and grease filters frequently Non-Vented (recirculating) Installation Filters according to the following instructions. Replace grease filters before operating hood. The charcoal filter is not washable. It should last up to 6 months Exterior Surfaces: with normal use. -
Page 14: Wiring Diagram
WIRING DIAGRAM Ambient Light Switch Push Button Switch Function Position Operation Push Button Switch Position 3 Function Position Position 2 No Connection Position 1 Auto Brown - Yellow Lamps (L - La) Brown - White Low Speed (L - 1) Brown - Red Med Speed (L - 2) -
Page 15: Assistance Or Service
1-800-253-1301 or visit our website at www.whirlpool.com. For further assistance Our consultants provide assistance with: If you need further assistance, you can write to Whirlpool Scheduling of service. Whirlpool designated service Canada LP with any questions or concerns at: technicians are trained to fulfill the product warranty and Whirlpool Brand Home Appliances provide after-warranty service, anywhere in the United States. -
Page 16: Warranty
DISCLAIMER OF REPRESENTATIONS OUTSIDE OF WARRANTY Whirlpool makes no representations about the quality, durability, or need for service or repair of this major appliance other than the representations contained in this warranty. If you want a longer or more comprehensive warranty than the limited warranty that comes with this major appliance, you should ask Whirlpool or your retailer about buying an extended warranty. -
Page 17: Sécurité De La Hotte De Cuisinière
SÉCURITÉ DE LA HOTTE DE CUISINIÈRE Votre sécurité et celle des autres est très importante. Nous donnons de nombreux messages de sécurité importants dans ce manuel et sur votre appareil ménager. Assurez-vous de toujours lire tous les messages de sécurité et de vous y conformer. Voici le symbole d’alerte de sécurité. - Page 18 IMPORTANTES INSTRUCTIONS DE SÉCURITÉ AVERTISSEMENT : POUR MINIMISER LE RISQUE AVERTISSEMENT : POUR RÉDUIRE LE RISQUE D'UN FEU DE GRAISSE SUR LA CUISINIÈRE : D'INCENDIE, CHOC ÉLECTRIQUE OU DOMMAGES CORPORELS, RESPECTER LES INSTRUCTIONS Ne jamais laisser un élément de surface fonctionner à SUIVANTES : puissance de chauffage maximale sans surveillance.
-
Page 19: Exigences D'installation
EXIGENCES D'INSTALLATION Outils et pièces Exigences d’emplacement Rassembler les outils et pièces nécessaires avant d’entreprendre IMPORTANT : Observer les dispositions de tous les codes et règlements en vigueur. l’installation. Lire et observer les instructions fournies avec chacun des outils de la liste ci-dessous. Confier l'installation de la hotte à... -
Page 20: Exigences Concernant L'évacuation
Dimensions d’installation Exigences concernant l'évacuation Le système d'évacuation doit décharger l'air à l'extérieur, excepté pour les installations sans décharge à l'extérieur (recyclage). Ne pas terminer le conduit d'évacuation dans un grenier ou dans un autre espace fermé. Ne pas utiliser une bouche de décharge murale de 4" (10,2 cm) normalement utilisée pour un équipement de buanderie. -
Page 21: Spécifications Électriques
Pas de décharge à Décharge à travers le toit Spécifications électriques l’extérieur (recyclage) Observer les dispositions de tous les codes et règlements en vigueur. S'assurer que l’installation électrique est correcte et qu'elle satisfait aux exigences de la plus récente édition de la norme National Electrical Code, ANSI/NFPA 70, ou de la norme CSA C22. -
Page 22: Instructions D'installation
INSTRUCTIONS D’INSTALLATION Préparation de l'emplacement Installer le système d’évacuation avant la hotte pour Installation des vis de montage de la hotte déterminer le meilleur passage pour le circuit d'évacuation. Il est recommandé que l'installation du circuit d'évacuation 1. Déterminer l'emplacement d'installation de la hotte et en soit réalisée avant celle de la hotte. -
Page 23: Assemblage De La Hotte
électrique, installer cette hotte de cuisinière uniquement avec l'ensemble de ventilateur déporté intelligent fabriqué par A. Supports verticaux Whirlpool, pièce numéro W10692945. B. Hauteur verticale Pour l'installer, consulter les instructions d'installation de l'ensemble de ventilateur déporté intelligent. Voir la section Installation de la hotte “Assistance ou service”... -
Page 24: Raccordement Électrique
3. Ôter l'opercule arrachable du boîtier de connexion et installer Installation de la hotte un serre-câble de ½" (homologation UL ou CSA). 1. À l’aide d'au moins 2 personnes, soulever la hotte et la fixer en emboîtant les supports verticaux sur les attaches à ressort du support horizontal supérieur monté... -
Page 25: Installation Des Cache-Conduits
Installation des cache-conduits AVERTISSEMENT REMARQUE : Enlever la pellicule des cache-conduits. 1. Assembler les parties supérieures des cache-conduits ensemble et installer les cache-conduits autour du cadre de support. Le trou le plus gros sur les rebords de la partie supérieure du cache-conduit doit se trouver à l'extérieur du trou le plus petit sur le rebord en contact de l'autre partie supérieure du cache-conduit. - Page 26 3. Faire glisser la partie supérieure des cache-conduits en haut 6. Installer la partie inférieure du cache-conduit (arrière) à du cadre vers le plafond et les fixer au support horizontal l'auvent de la hotte de cuisinière. Écarter la partie inférieure supérieur à...
-
Page 27: Achever L'installation
8. Fixer la partie inférieure du cache-conduit à l'auvent de la hotte de cuisinière en utilisant 4 vis de 4,2 x 8 mm. Achever l'installation 1. Pour les installations sans décharge à l'extérieur (recyclage) uniquement, installer les filtres à charbon par-dessus les filtres métalliques. -
Page 28: Entretien De La Hotte
ENTRETIEN DE LA HOTTE Nettoyage IMPORTANT : Nettoyer fréquemment la hotte et les filtres à Filtres d'installation sans décharge à l’extérieur graisse en suivant les instructions suivantes. Réinstaller les filtres (recyclage) : à graisse avant de faire fonctionner la hotte. Surfaces externes : Le filtre à... -
Page 29: Schéma De Câblage
SCHÉMA DE CÂBLAGE Fonctionnement du Interrupteur de l’éclairage d’ambiance commutateur du Fonction Position bouton-poussoir Commutateur du Position 3 Marche Fonction Position bouton-poussoir Position 2 Arrêt Pas de connexion Arrêt Position 1 Auto Marron - Jaune Lampes (L - La) Marron - Blanc Vitesse basse Ph Neu Terre (L - 1) -
Page 30: Assistance Ou Service
Pour plus d’assistance Consulter la page de garantie du présent manuel. Si vous avez besoin de plus d’assistance, vous pouvez soumettre par écrit toute question ou préoccupation à Whirlpool Si vous avez besoin de pièces de rechange Canada à l’adresse suivante : Si vous avez besoin de commander des pièces de rechange,... -
Page 31: Garantie
EXONÉRATION DE RESPONSABILITÉ DANS LES DOMAINES NON COUVERTS PAR LA GARANTIE Whirlpool décline toute responsabilité au titre de la qualité, de la durabilité ou en cas de dépannage ou de réparation nécessaire sur ce gros appareil ménager autre que les responsabilités énoncées dans la présente garantie. Si vous souhaitez une garantie plus étendue ou plus complète que la garantie limitée fournie avec ce gros appareil ménager, adressez-vous à... - Page 32 6/14 ® /™ ©2014 Whirlpool. Used under license in Canada. All rights reserved. Printed in Mexico W10674117A Utilisé sous licence au Canada. Tous droits réservés. Imprimé au Mexique...