Table of Contents
Advertisement
Available languages
Available languages
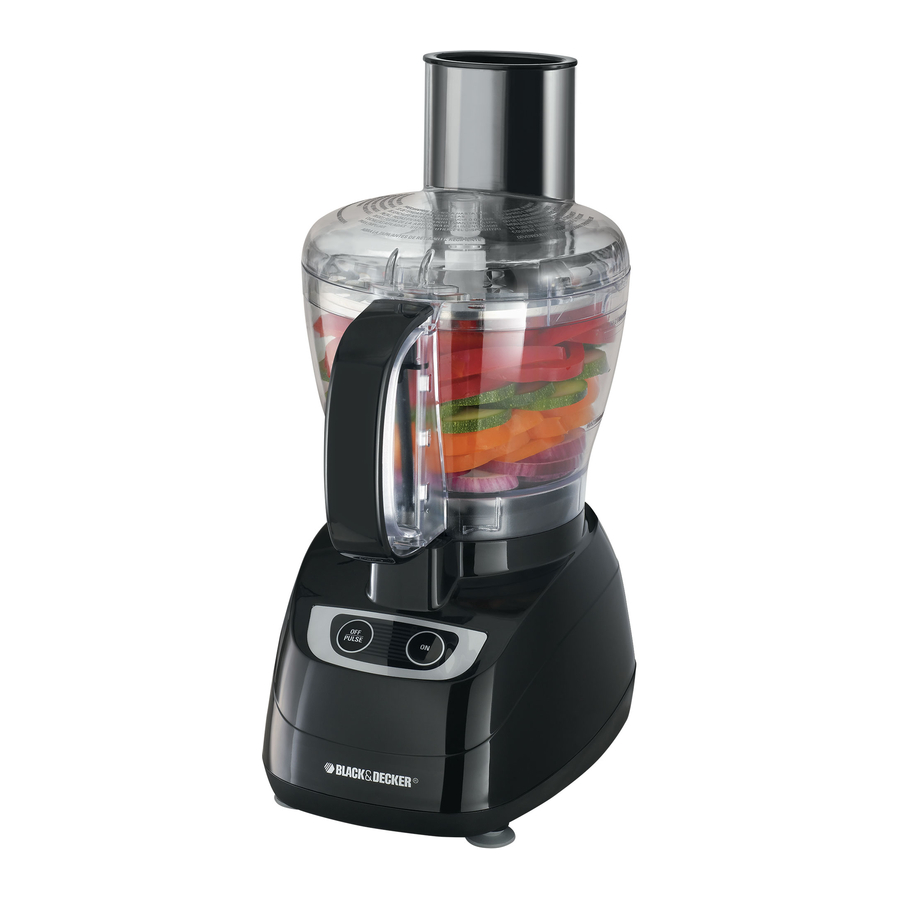
Food Processor
8-Cup
Procesador de alimentos
Customer
Care
USA 1-800-231-9786
accessories/parts (USA)
1-800-738-0245
For online customer service
and to register your product, go to
www.prodprotect.com/applica
ModelS/ModeloS
❍ FP1600B
❍ FP1700B
Line:
de 8 tazas
Servicio
para el cliente:
México 01-800 714-2503
accesorios/partes (ee.UU)
1-800-738-0245
Para servicio al cliente y para
registrar su garantía, visite
www.prodprotect.com/applica
Advertisement
Table of Contents

Related Manuals for Black & Decker FP1600B


Summary of Contents for Black & Decker FP1600B
-
Page 1: Food Processor
Food Processor 8-Cup Procesador de alimentos de 8 tazas Customer Care Line: Servicio para el cliente: USA 1-800-231-9786 México 01-800 714-2503 accessories/parts (USA) accesorios/partes (ee.UU) 1-800-738-0245 1-800-738-0245 For online customer service Para servicio al cliente y para and to register your product, go to registrar su garantía, visite www.prodprotect.com/applica www.prodprotect.com/applica ModelS/ModeloS ❍ FP1600B ❍ FP1700B... -
Page 2: Important Safeguards
please Read and save this use and Care Book. IMpORtaNt saFeGuaRds When using electrical appliances, basic safety precautions should always be followed, including the following: ❍ Read all instructions. ❍ To protect against risk of electrical shock do not immerse cord, plugs or appliance in water or other liquid. ❍ Close supervision is necessary when any appliance is used by or near children. ❍ Unplug from outlet when not in use, before putting on or taking off parts and before cleaning. ❍ Avoid contacting moving parts. ❍ do not operate any appliance with a damaged cord or plug or after the appliance malfunctions, or is dropped damaged in any manner. Return appliance to the nearest authorized service facility for examination, repair or electrical or mechanical adjustment. or, call the appropriate toll-free number on the cover of this manual. ❍ The use of attachments not recommended or sold by the manufacturer may cause fire, electric shock or injury. ❍ do not use outdoors. ❍ do not let cord hang over edge of table or counter. ❍ Keep hands and utensils away from moving blade or disc while processing food to reduce the risk of severe injury to persons or damage to the food processor. A scraper may be used, but must be used only when the food processor is not running. -
Page 3: Electrical Cord
saVe tHese INstRuCtIONs. this product is for household use only. Note: The maximum rating is based on the chopping blade. other attachments may draw significantly less power. pOLaRIzed pLuG This appliance has a polarized plug (one blade is wider than the other). To reduce the risk of electric shock, this plug is intended to fit into a polarized outlet only one way. If the plug does not fit fully into the outlet, reverse the plug. If it still does not fit, contact a qualified electrician. do not attempt to modify the plug in any way. taMpeR-ResIstaNt sCReW Warning: this appliance is equipped with a tamper-resistant screw to prevent removal of the outer cover. to reduce the risk of fire or electric shock, do not attempt to remove the outer cover. -
Page 4: Product Overview
† 1. Food pusher Model Fp1600B (part # 07255ezB) Model Fp1700B (part # 07255ezH) † 2. 8-cup processing workbowl cover (part # 77916) † 3. stainless steel slicing and shredding disk (part #77919) † 4. disk stem (part # 77917) †... -
Page 5: Control Panel
CONtROL paNeL The controls are located on the front of the base (B). Press oFF/PUlSe or oN to select a function (see directions below). OFF/puLse CONtROL • Processor should be stored in oFF position and unplugged when not in use. • Use PUlSe for short processing tasks. This lets you control the size and uniformity of foods being chopped. • The oFF/PUlSe button must be pressed and held for the appliance to operate in PUlSe mode. When released, the appliance will stop. • The motor of the processor will run as long as the oFF/PUlSe button is held down. Press the button and then release to allow the blade to stop running and the food to fall to the bottom of the workbowl. • Pulsing gives better control when chopping, mincing, mixing and blending foods. You can control the size of the foods, from coarse to fine. ON CONtROL When the oN control is selected, the processor will run continuously until the oFF/PUlSe button is pressed. How to use This product is for household use only. GettING staRted • Please go to www.prodprotect.com/applica to register your warranty. Important: Handle chopping blade and slicing and shredding disk carefully. they are very sharp. -
Page 6: How To Lock In Position
HOW tO LOCk tHe pROCessOR WORkBOWL IN pOsItION IMpORtaNt: press the OFF/puLse button before placing the workbowl on the base of the processor. 1. Attach center post to workbowl. Place the workbowl on the base with handle turned to the right of the locking mechanism (d) over the unlock symbol 2. Hold handle and rotate workbowl clockwise toward the lock symbol until it clicks firmly into place (e). Note: Be sure to lock the workbowl in place before attaching the chopping blade or the slicing and shredding disk and the cover. HOW tO CHOp IN tHe pROCessING WORkBOWL The chopping blade is used to coarsely or finely chop, mince, mix, and puree foods to a smooth consistency. -
Page 7: Slice/Shred In Workbowl
10. Unplug appliance when not in use. Helpful tips for Chopping • Watch carefully to avoid over-processing foods. • The PUlSe button offers the best control. • For best results, process foods that are about the same size. • do not overload the workbowl. • Never walk away from the processor while it is on. • You may use hot but not boiling liquids. • do not process more 3 cups of liquid in the workbowl at any given time. • To process meat, use no more than 2 cups of ¾-inch cubes. Process using PUlSe in 5 second intervals. • Insert a funnel into the feed chute when adding ingredients such as, oil, flour and sugar. HOW tO sLICe OR sHRed IN tHe WORkBOWL 1. lock workbowl into position (see Illustrations d and e). Place disk stem onto center post in workbowl. 3. Carefully place slicing and shredding disk on top of disk stem with appropriate side up (depending on work to be done) (G). -
Page 8: To Lock Cover
9. Unplug appliance when not in use. Helpful tips When slicing and shredding • Before slicing fruits and vegetables in the processor, cut a thin slice from the bottom of the food to make it flat. • Place the food cut side down in feed chute. • Remove seeds and pits before processing. • Select foods that are firm and not overripe. • Remove the core from hard vegetables such as cabbage. • When slicing thinner vegetables, cut them just short of the length of the feed chute and stand them vertically in feed chute so they are solidly packed and cannot turn or tilt. • Shred hard cheeses at room temperature. • Chill soft and semi-hard cheeses before shredding. • After food has been processed, remove the cover and invert on countertop. Remove the slicing and shredding disc before removing the workbowl from the processor. Place the disk on top of the inverted workbowl cover. HOW tO LOCk tHe COVeR 1. Place cover over workbowl with the small latch to the right of the workbowl’s handle (J). 2. Hold feed chute of workbowl cover and rotate cover clockwise until cover locks into place. -
Page 9: Care And Cleaning
Care and Cleaning This product contains no user serviceable parts. Refer service to qualified service personnel. Note: do not attempt to sharpen the cutting edges of the chopping blade or slicing and shredding disk. They are permanently sharpened at the factory and will be ruined if sharpened. CLeaNING Note: Before cleaning, be sure unit is turned off and cord is unplugged. • Completely disassemble processor parts before washing. • Rinse parts immediately after processing for easy cleanup. Caution: the slicing and shredding disk is very sharp. use caution when handling and storing. • Wipe base and feet with a damp cloth and dry thoroughly. Stubborn spots can be removed by rubbing with a damp cloth and a mild, nonabrasive cleaner. do not immerse base in liquid. • All removable parts can be washed by hand or in a dishwasher. Hand washing of plastic parts will help to maintain the food processor’s appearance. • If washing by hand, fill workbowl with hot, soapy water and rapidly raise and lower the chopping blade or slicing and shredding disk up and down on the center shaft. -
Page 10: Two-Year Limited Warranty
Need HeLp? For service, repair or any questions regarding your appliance, call the appropriate 800 number on cover of this book. Please dO NOt return the product to the place of purchase. Also, please dO NOt mail product back to manufacturer, nor bring it to a service center. You may also want to consult the website listed on the cover of this manual. tWO-YeaR LIMIted WaRRaNtY (applies only in the united states and Canada) What does it cover? • Any defect in material or workmanship provided; however, Applica’s liability will not exceed the purchase price of product. For how long? • Two years from the date of original purchase with proof of such purchase. What will we do to help you? • Provide you with a reasonably similar replacement product that is either new or factory refurbished. -
Page 11: Instrucciones Importantes
por favor lea este instructivo antes de usar el producto. INstRuCCIONes IMpORtaNtes de seGuRIdad Cuando se usan aparatos electricos, siempre se deben respetar las siguientes medidas basicas de seguridad: ❍ Por favor lea todas las instrucciones. ❍ A fin de protegerse contra el riesgo de un choque electrico, no sumerja el cable, los enchufes ni el aparato en agua ni en ningun otro liquido. ❍ Todo aparato electrico usado en la presencia de los ninos o por ellos mismos requiere la supervision de un adulto. ❍ desconecte el aparato del tomacorriente cuando no este en uso, antes de instalarle o retirarle piezas y antes de limpiarlo. ❍ evite el contacto con las piezas moviles. ❍ No use ningun aparato electrico que tenga el cable o el enchufe averiado, que presente un problema de funcionamiento o que este danado. Acuda a un centro de servicio autorizado para que lo examinen, reparen o ajusten o llame gratis al numero correspondiente en la cubierta de este manual. ❍ el uso de accesorios no recomendados por el fabricante del aparato puede ocasionar incendio, choque electrico o lesiones. ❍ No use este aparato a la intemperie. ❍ No permita que el cable cuelgue del borde de la mesa o del mostrador. -
Page 12: Enchufe Polarizado
y falta de experiencia o conocimiento que les impida utilizar el aparato con toda seguridad sin supervisión o instrucción. ❍ Se debe asegurar la supervisión de los niños deben para evitar que usen el aparato como juguete. ❍ No trate de anular el mecanismo de enclavamiento de la tapa. CONseRVe estas INstRuCCIONes. este aparato eléctrico es para uso domestic solamente. Nota: la calificación eléctrica es basada en la cuchilla para picar y otros accesorios pueden extraer menos potencia. eNCHuFe pOLaRIzadO este aparato cuenta con un enchufe polarizado (un contacto es más ancho que el otro). A fin de reducir el riesgo de un choque eléctrico, este enchufe encaja en un tomacorriente polarizado en un solo sentido. Si el enchufe no entra en el tomacorriente, inviértalo y si aun así no encaja, consulte con un electricista. Por favor no trate de alterar esta medida de seguridad tORNILLO de seGuRIdad advertencia: este aparato cuenta con un tornillo de seguridad para evitar la remoción de la cubierta exterior del mismo. - Page 13 † 1. empujador de alimentos Modelo Fp1600B (pieza no. 07255ezB) Modelo Fp1700B (pieza no. 07255ezH) † 2. tapa del recipiente de 8 tazas para procesar alimentos (pieza no. 77916) † 3. disco de acero inoxidable para rebanar y rallar (pieza no. 77919) †...
-
Page 14: Panel De Control
paNeL de CONtROL el control está en la parte delantera de la base (B). Presione PUlSe o oN para escoger una función (ver las instrucciones abajo). CONtROL de apaGadO/puLsO (OFF/puLse) • el aparato debe de permanecer en la posición de apagado (oFF) y desenchufado siempre que no esté en uso. • el dispositivo de pulsación (PUlSe) se recomienda para las funciones cortas; permite supervisar y controlar mejor la uniformidad y textura de los alimentos. • Presione y sostenga el botón de apagado/pulso (oFF/PUlSe). Cuándo se suelta, el aparato para. • el motor del procesador funciona mientras uno presiona el botón de apagado/ pulso (oFF/PUlSe). Presione el botón y luego suéltelo para permitir que las cuchillas dejen de girar y los alimentos puedan caer al fondo del recipiente. • esta función permite mejor control al cortar, picar, mezclar y combinar alimentos. Usted puede controlar el tamaño de los alimentos, de gruesos a finos. CONtROL de eNCeNdeR (ON) Con el control de encender (oN), el procesador funciona continuamente hasta que uno presione el control de apagado (oFF). Como usar este aparato es solamente para uso doméstico. pRIMeROs pasOs • Por favor, visite www.prodprotect.com/applica para registrar su garantía. - Page 15 el poste central es removible: 1. Invierta el recipiente. 2. Agarre las asas exteriores y gire el poste central a la derecha hasta que las asas más bajas queden libres. Saque el poste (C). 3. Para volver a su posición original, coloque el poste central en la apertura más pequeña en el fondo del recipiente y gire hacia la izquierda hasta que las asas encajen en su lugar. COMO aseGuRaR eL ReCIpIeNte eN su LuGaR Importante: presione el botón de apagado/pulso (OFF/puLse) antes de colocar el recipiente en la base. 1. Coloque el recipiente sobre el vástago central de la base, con el asa orientada hacia la derecha del mecanismo de cierre (d) sobre del símbolo de abrir 2. Sujete el asa y gire el recipiente hacia el símbolo de cierre hasta encajar firmemente en su lugar (e).
- Page 16 6. Use el control de pulso (PUlSe), o el control de encender (oN) para procesar los alimentos. Nota: Se recomienda procesar los alimentos en incrementos de segundos a la vez. la función de pulsación permite mejor control y resultados excelentes. 7. Presione el botón de apagado/pulso (oFF/PUlSe) y espere a que las cuchillas dejen de girar antes de quitar la tapa. Gire la tapa hacia la posición de abrir (derecha) para quitarla. Importante: Verifique que las cuchillas hayan dejado de girar completamente antes de quitar la tapa del recipiente. Importante: abra la tapa antes de retirar el recipiente. 8. desprenda el recipiente girándolo a la derecha y retírelo de la base. Nota: Retire el recipiente del aparato antes de quitar la cuchilla para evitar que los alimentos salgan por la apertura del centro del recipiente. 9. Retire con cuidado la cuchilla para picar. 10. desenchufe el aparato cuando no esté en uso. Consejos para procesar alimentos • Supervise de cerca los alimentos para no sobre procesarlos.
- Page 17 4. Coloque la tapa sobre el recipiente y gírela hacia la izquierda hasta encajar en su lugar (ver Ilustración J). 5. llene el conducto de alimentos. Coloque el empujador sobre los alimentos (H). 6. Use el control de pulso (PUlSe) o el control de encender (oN), presione el empujador, firme pero ligeramente para guiar los alimentos a través del conducto de alimentos. Nota: el aplicar demasiada presión no acelera el funcionamiento del aparato. Use el empujador de alimentos solamente como guía y permita que el procesador realice su función. 7. Antes de retirar la tapa, ajuste el control a la posición de apagado (oFF). Para retirar la tapa, gírela hacia la posición abrir cerradura (derecha). Importante: Verifique que el disco de rebanar y rallar haya dejado de girar completamente antes de quitar la tapa del recipiente. Importante: abra la tapa antes de retirar el recipiente.
-
Page 18: Cuidado Y Limpieza
Importante: Como medida de protección, este aparato cuenta con un mecanismo de entrecierre. el procesador no funciona a menos que el recipiente y la tapa estén debidamente instalados. 3. Introduzca el empujador de alimentos en el conducto de alimentos. Nota: el empujador de alimentos se utiliza para guiar los alimentos por el conducto de alimentos y se puede quitar para agregar líquido o alimentos adicionales mientras el procesador está en funcionamiento. Cuidado y limpieza este producto no contiene piezas reparables por el consumidor. Para cualquier tipo de servicio, acuda a personal calificado. Nota: No trate de afilar los bordes cortantes de la cuchilla para picar o el disco para rebanar y rallar. e stos vienen afilados de fábrica y se arruinan si uno trata de afilarlos. - Page 19 ¿NeCesIta aYuda? Para servicio, reparaciones o preguntas relacionadas al producto, por favor llame al número del centro de servicio que se indica para el país donde usted compró su producto. No devuélva el producto al fabricante. llame o lleve el producto a un centro de servicio autorizado. dOs aÑOs de GaRaNtÍa LIMItada (aplica solamente en estados unidos y Canada) ¿Qué cubre la garantía? • la garantía cubre cualquier defecto de materiales o de mano de obra que no haya sido generado por el uso incorrecto del producto. ¿por cuánto tiempo es válida la garantía? • Por dos años a partir de la fecha original de compra mientras que tenga una prueba de la compra. ¿Cómo se obtiene el servicio necesario? • Conserve el recibo original como comprobante de la fecha de compra, comuníquese con el centro de servicio de su país y haga efectiva su garantía si cumple lo indicado en el manual de instrucciones.
- Page 20 póliza de Garantía (Válida sólo para México) duración Rayovac de México SA de CV garantiza este producto por 2 años a partir de la fecha original de compra. ¿Qué cubre esta garantía? esta Garantía cubre cualquier defecto que presenten las piezas, componentes y la mano de obra contenidas en este producto. Requisitos para hacer válida la garantía Para reclamar su Garantía deberá presentar al Centro de Servicio Autorizado la póliza sellada por el establecimiento en donde adquirió el producto. Si no la tiene, podrá presentar el comprobante de compra original. ¿donde hago válida la garantía? llame sin costo al teléfono 01 800 714 2503, para ubicar el Centro de Servicio Autorizado más cercano a su domicilio en donde usted podrá encontrar partes, componentes, consumibles y accesorios. procedimiento para hacer válida la garantía A cuda al Centro de Servicio Autorizado con el producto con la póliza de Garantía sellada o el comprobante de compra original, ahí se reemplazará cualquier pieza o componente defectuoso sin cargo alguno para el usuario final. esta Garantía incluye los gastos de transportación que se...
- Page 21 Por favor llame al número correspondiente que aparece en la lista a continuación para solicitar que se haga efectiva la garantía y donde Ud. puede solicitar servicio, reparaciones o partes en el país donde el producto fué comprado. argentina México Servicio Técnico Articulo 123 # 95 local 109 y 112 Monroe 3351 Col. Centro, Cuauhtemoc, CABA Argentina México, d.F. Tel: 0800 – 444 - 7296 Tel. 01 800 714 2503 servicios@rayovac.com.ar Nicaragua Chile ServiTotal SeRVICIo de MAQUINAS Y de semáforo de portezuelo HeRRAMIeNTAS lTdA. 500 metros al sur. Portugal Nº 644 Managua, Nicaragua, Santiago – Chile Tel. (505) 248-7001 Fonos: 02-6355208 / 02-6341169 panamá email: servicio@spectrumbrands.cl Servicios Técnicos CAPRI Call center: 800-171-051 Tumbamuerto Boulevard Colombia el dorado Panamá Rayovac Varta S.A 500 metros al sur. Carrera 17 Número 89-40 Tel. 3020-480-800 sin costo línea gratuita nacional (507) 2360-236 / 159 018000510012 perú...
- Page 22 Sello del distribuidor: Comercializado por: Rayovac de México sa de C.V Fecha de compra: KM. 14.5 Carretera Puente de Vigas. Modelo: Col. lechería, Tultitlán. estado de México. C.P. 54940 México Tel: (55) 5831-7070 servicio y Reparación Art. 123 No. 95 Col. Centro, C.P. 06050 deleg. Cuauhtemoc servicio al Consumidor, Venta de Refacciones y Accesorios 01 800 714 2503 Código de fecha / date Code 550 W 120 V ~ 60 Hz Importado por / Imported by: RaYOVaC aRGeNtINa s.R.L.
- Page 24 © 2012 Applica Consumer Products, Inc. 2012/11/13e/S...