Pioneer AVH-X7500BT Owner's Manual
Dvd rds av receiver
Hide thumbs
Also See for AVH-X7500BT:
- Owner's manual (70 pages) ,
- Installation manual (53 pages) ,
- Firmware update manual (10 pages)

Related Manuals for Pioneer AVH-X7500BT


Summary of Contents for Pioneer AVH-X7500BT
- Page 1 DVD RDS AV RECEIVER AUTORADIO AV RDS LECTEUR DE DVD RADIO AV RDS CON DVD AVH-X7500BT AVH-X6500DVD Owner’s Manual Mode d’emploi Manual de instrucciones...
-
Page 2: Table Of Contents
Introducing movie operations playing (link search) Using the equalizer About this manual Sound playback operations Using the auto-equalizer After-sales service for Pioneer Switching the media file type Bluetooth Audio Using sonic center control products Operating the DVD menu Sound playback operations... -
Page 3: Precautions
Section Contents Precautions Setting the rear output and subwoofer iPod with lightning connector Thank you for purchasing this PIONEER WARNING controller iPod with 30-pin connector product. Do not attempt to install or service this Using the keyboard To ensure proper use, please read through this product by yourself. -
Page 4: To Avoid Battery Exhaustion
MODEL NO.: AVH-X7500BT backing up. Do not use for entertainment To prevent such functions from being used while IC: 775E-K062 purposes. -
Page 5: The Safety Of Your Ears Is In Your Hands
! Use caution or temporarily discontinue use CANADA module. To ensure continued safety, do not re- in potentially hazardous situations. Pioneer Electronics of Canada, Inc. ! Do not use headphones while operating a move any covers or attempt to gain access to CUSTOMER SATISFACTION DEPARTMENT About this manual the inside of the product. -
Page 6: Protecting Your Unit From Theft
Section Before you start Before you start ! The remote control may not function properly http://www.pioneerelectronics.com in Canada in direct sunlight. http://www.pioneerelectronics.ca 1 Register your product. We will keep the de- Important tails of your purchase on file to help you refer ! Do not store the remote control in high tem- to this information in the event of an insur- peratures or direct sunlight. -
Page 7: What's What
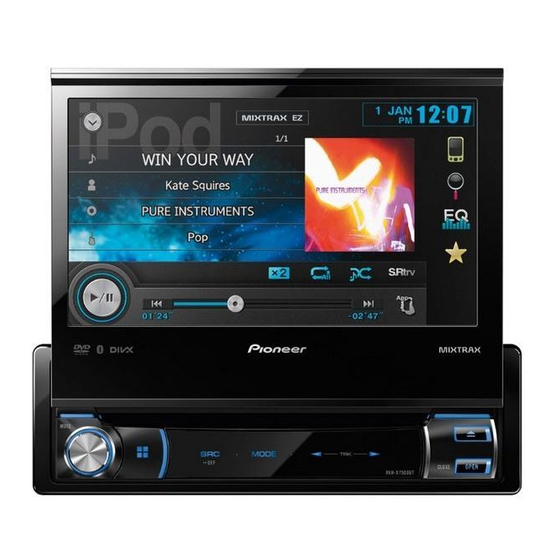
Section What’s what What’s what 5 c/d (TRK) 1 Source icon Head unit Home display Selecting a favorite source. Home display 6 Disc loading slot When the source icon is not displayed, it can be displayed by pressing the home key or 7 OPEN/CLOSE touching 2 Apps key... -
Page 8: Selecting A Source
Compressed audio and audio data (CD- ! Bluetooth Audio – Built-in Bluetooth audio Press to stop playback. DA) such as with CD-EXTRA and MIXED- (Function of AVH-X7500BT) If you resume playback, playback will start MODE CDs ! AUX – AUX ! USB storage device from the point where you stopped. -
Page 9: Common Operations
1 JAN 12:43 display the rear view menu settings/lists Touch panel keys Displaying the rear view image by (Function of AVH-X7500BT) DVD-V 1 JAN 12:43 turning the rear view image on. Starting the Bluetooth telephone When the rear view image is dis- menu. -
Page 10: Changing The Wide-Screen Mode
Section Common operations Basic operations ! Different settings can be stored for each Notes Opening and closing the LCD Setting the automatic open ! This function is enabled for playback on the video source. function panel ! When a video is viewed in a wide screen sources listed below. -
Page 11: Adjusting The Lcd Panel Slide Position
Section Basic operations Basic operations # To return to the original position, press and hold ! When adjusting the LCD panel angle, be Ejecting a disc OPEN/CLOSE. sure to adjust from the flap menu. Forcibly % Press h to eject a disc. # The LCD panel returns to the original position au- adjusting the LCD panel by hand may dam- tomatically, indicated with a beeping sound 10 sec-... -
Page 12: Tuner
Section Tuner Tuner # While storing the tag data on this unit, Tag Tuner operations Basic operations Display the preset screen. Refer to Tuner operations on page 12. flashes. Touch panel keys # The tag information for up to 50 songs can be The preset screen appears in the display. -
Page 13: Disc (Cd/Dvd)
Section Disc (CD/DVD) Disc (CD/DVD) 9 Screen mode key g Audio output key Introducing movie operations Touch to change the fast forward and reverse speed. Changing the screen mode. Switching the audio output, when playing You can use this unit to view DVD/DVD-R/DVD- Refer to Changing the wide-screen mode on video discs recorded with LPCM audio. -
Page 14: Sound Playback Operations
Section Disc (CD/DVD) Disc (CD/DVD) ! You can also switch between subtitle lan- 2 Search key Operating the DVD menu Selecting a chapter using the buttons guages using Video Setup menu. For de- Displaying a list of track titles/file names to 1 Press c or d (TRK). -
Page 15: Random Play (Shuffle)
Section Disc (CD/DVD) Disc (CD/DVD) # Ways to display the menu will differ depending ! If you perform track search or fast forward/ Selecting audio output Notes reverse during Track, the repeat play range ! You can display the menu by touching on the disc. -
Page 16: Playing Divxâ Vod Content
Section Disc (CD/DVD) iPod Note iPod control Moving images operations If part of the recorded information does not dis- This manual applies to the following iPod mod- For iPod with 30-pin connector users play, a scroll key appears on the right side of list. els. -
Page 17: Sound Playback Operations
Section iPod iPod ! Touch panel keys not listed under Moving im- 5 Repeat key 4 Artwork Using this unit’s iPod Selecting the repeat range. ages operations may appear on the display. Starting link search on your iPod when you function from your iPod Refer to Indicator list on page 53. -
Page 18: Shuffle Play
Section iPod iPod — iPod nano 6th generation Switch to iPod video mode. Note Searching the list by alphabet — iPod nano 5th generation Video-related functions are not available to iPod Select a category. — iPod nano 4th generation ROOT with lightning connector users. -
Page 19: Playing (Link Search)
AppRadio Mode Displaying lists related to AppRadio Mode operation ! Pioneer is not liable for any issues that the song currently playing may arise from incorrect or flawed app- This system can switch to the AppRadio Mode, based content. -
Page 20: Appradio Mode
# For iPod with lightning connector users need to set the language setting in this function. (Function of AVH-X7500BT) Setting the App sound mixing When the AppRadio Mode is used, the lan- —... -
Page 21: Usb
Section 1 MIXTRAX EZ key Sound playback operations Basic operations Switching the media file type Starting MIXTRAX EZ. % Touch Media to switch between media You can use this unit to listen to USB audio files. Playing back tracks file types. 2 Information key 1 Connect the USB device. -
Page 22: Bluetooth Audio
Touch panel keys Notes ! When playing back files recorded as VBR (Function of AVH-X7500BT) (variable bit rate) files, the play time will not You can use this unit to listen to Bluetooth audio be correctly displayed if fast forward or re- files. -
Page 23: Using Mixtrax
Section Using MIXTRAX Using MIXTRAX MIXTRAX operation Touch MIXTRAX Setup on the system The fixed sounds and sound effects are set as Touch Custom to easily set the desired sound or menu. combinations as MIXTRAX sounds. sound effect. MIXTRAX is original technology for creating MIXTRAX setting items are displayed. -
Page 24: Streaming Pandoraâ
â Streaming Pandora Streaming Pandora — Connect an iPod with lightning connector to ! Ability of the Pioneer car audio/video products to Pandora operations Touch Pandora Connection repeatedly until the desired setting appears on the RGB input and enable Bluetooth. -
Page 25: Selecting And Playing Pandoraâ Stations/ Shuffle
You can sort the items in the list Abcdefghi 7 Connect key in order of the dates on which the Abcdefghi (Function of AVH-X7500BT) items were created. Starting the connection to Pandora. S.Rtrv You can scroll the titles in the list... -
Page 26: Bluetooth Telephone Operations
Incoming call notice Telephone standby display or off. Indicates that an incoming call has been re- (Function of AVH-X7500BT) ceived and has not been checked yet. 6 Auto-answer key You can use Bluetooth telephone. ! Not displayed for calls made when your Turning automatic answering on or off. -
Page 27: Calling A Number In The Phone Book
Section Bluetooth telephone Bluetooth telephone ! Make sure to adjust the volume to a proper Touch the phone book key to switch to Inverting names in phone book Select Missed Calls, Dialed Calls or the phone book mode. Received Calls. level before disconnecting the cellular phone When your cellular phone is connected to this from the unit. -
Page 28: Switching The Ring Tone
Section Bluetooth telephone Bluetooth telephone % Touch the volume key to select ! Please note that wind blowing through the Making a call by entering Voice control Far-End VOL. vehicle windows and noise coming from out- phone number If your cellular phone is equipped with the voice 1—2—3 side the vehicle can interfere with voice com- control feature, you can use voice commands to... -
Page 29: Settings
Section Settings Audio adjustments ! You cannot display the Audio function menu Menu operations Using fader/balance adjustment Touch Balance on the audio function menu. when the mute function is on. Fader/Balance displays when Rear Speaker is Touch panel keys set to Full on the System Menu. Press the home button to switch to the Touch or to adjust the left/right You can change the fader/balance setting to pro-... -
Page 30: Using The Auto-Equalizer
Section Audio adjustments Audio adjustments Press the home button to switch to the Touch the table to adjust the level of the Adjusting loudness Touch c or d next to Frequency to select home display. equalizer band. the cut-off frequency. Loudness compensates for deficiencies in the Range: +12dB to –12dB 50Hz—63Hz—80Hz—100Hz—125Hz... -
Page 31: Adjusting Source Levels
Section Audio adjustments Setting up the video player Adjusting source levels Setting the subtitle language Registering the code. With SLA (source level adjustment), the volume You can set a desired subtitle language. When levels of each source can be adjusted to prevent available, the subtitles will be displayed in the significant differences between sources. -
Page 32: Setting The Multi-Angle Dvd Display
Section Setting up the video player Setting up the video player ! With some discs, the parental lock may be Touch the video setup key to open the Press the home button to switch to the Press the home button to switch to the video setup menu. -
Page 33: Setting The Divx Subtitle File
Section Setting up the video player System settings Setting the DivX subtitle file Touch DivX® VOD on the Video Setup Switching the auxiliary setting Touch the system key to open the system menu. menu. You can select whether or not to display DivX ex- Activate this setting when using an auxiliary de- Registration Code and Deregistration Code ternal subtitles. -
Page 34: Selecting The System Language
Section System settings System settings # Dimmer can be adjusted from +1 to +48. ! ATT –20dB – Attenuation (ATT –20dB has a Touch the system key to open the system Touch the desired language. # Temperature can be adjusted from +3 to –3. stronger effect than ATT –10dB) menu. -
Page 35: Using The Keyboard
(refer to Using subwoofer output on Clearing Bluetooth memory CAUTION menu. page 30). Pioneer recommends the use of a camera ! Both rear speaker lead outputs and RCA rear Important which outputs mirror-reversed images. Oth- Touch BT Software Update. -
Page 36: Auto Eq (Auto-Equalizing)
Section System settings System settings ! If the microphone is placed in an unsuitable ! Auto EQ changes the audio settings as fol- Touch Camera Polarity on the system Turn the ignition switch to ON or ACC. menu to select the appropriate setting. position the measurement tone may become lows: If the car’s air conditioner or heater is turned on,... -
Page 37: Setting The Video Signal
Section System settings Favorite menu When the car’s interior acoustic characteristics Using the Favorite menu cannot be measured correctly, an error message Display menu columns to register. will be displayed. (Refer to Understanding auto Refer to Menu operations on page 29. EQ error messages on page 52.) # You can customize menus except Video Setup # It takes about nine minutes for auto EQ measure-... -
Page 38: Bluetooth Connection Menu
In If this function is set to on, a connection be- To connect your Bluetooth device to this unit via (Function of AVH-X7500BT) such cases, delete a paired device first. Refer to tween your Bluetooth device and this unit will Bluetooth wireless technology, you need to enter page 38. -
Page 39: Theme Menu
Press the home button to switch to the settings. home display. erly, consult your local Pioneer dealer. About AUX connection methods Touch Screen. Touch the theme key to open the theme Turn the source off. -
Page 40: Resetting The Microprocessor
Section Other functions Connection % Insert the stereo mini plug into the AUX ! The black cable is ground. When installing WARNING input jack on this unit. this unit or power amp (sold separately), ! In some countries or states the viewing of images Refer to Connection on page 42. - Page 41 Section Connection Connection — Secure the wiring with cable clamps or adhe- sive tape. Wrap adhesive tape around wiring that comes into contact with metal parts to protect the wiring. — Place all cables away from moving parts, such as the shift lever and seat rails. —...
-
Page 42: Connecting The Power Cord
Hard-wired remote control adapter can be connected (sold separately). separately)) Microphone input 17 cm (6-3/4 in.) (Function of AVH-X7500BT) Microphone 4 m (13 ft. 1 in.) Please contact your dealer to (Function of AVH-X7500BT) inquire about the connectable This product navigation unit. -
Page 43: When Connecting To Separately Sold Power Amp
Section Connection Connection When connecting to separately sold power amp When connecting the external video component and the display Rear output Rear monitor output RCA cable (sold separately) (REAR OUTPUT) (REAR MONITOR OUTPUT) To video input Display with RCA input jacks (sold 13 cm (5-1/8 in.) To rear separately) -
Page 44: When Connecting With A Rear View Camera
Section Connection Connection When connecting with a rear iPod with lightning connector When connecting with optional This product CD-IV202AV cable view camera When connecting with If you switch the shift lever to REVERSE (R), the Lightning to USB Cable USB/iPod input This product display on this unit will automatically switch to RGB input... -
Page 45: Ipod With 30-Pin Connector
Section Connection Installation ! The cords must not cover up the area shown iPod with 30-pin connector When connecting with optional Notes ! Check all connections and systems before in the figure below. This is necessary to allow CD-IU201S cable When connecting with optional the amplifiers to radiate freely. -
Page 46: Installing The Microphone
Installation ! When reattaching the trim ring, push the Installing the microphone trim ring onto the unit until it clicks. (If the (Function of AVH-X7500BT) trim ring is attached upside down, the trim ring will not fit properly.) CAUTION It is extremely dangerous to allow the micro- phone lead to become wound around the steer- ing column or shift lever. -
Page 47: Additional Information
Section Installation Additional information Install the microphone on the steering Troubleshooting Symptom Cause Action (Refer- column. ence page) Common Playback is The disc is dirty. Clean the disc. Symptom Cause Action (Refer- not possible. ence page) The type of disc Check the disc loaded cannot type. - Page 48 Appendix Additional information Additional information Symptom Cause Action (Refer- Symptom Cause Action (Refer- Symptom Cause Action (Refer- ence page) ence page) Symptom Cause Action (Refer- ence page) ence page) The image The data could Stop playback Nothing is The rear view Connect a rear Playback is The DVD being...
-
Page 49: Error Messages
Action (Refer- When you contact your dealer or your nearest time search features PBC. Video CDs that ence page) Pioneer Service Center, be sure to note the error are not possi- feature PBC. message. Different Re- The disc does Replace the DVD ble. - Page 50 Appendix Additional information Additional information External storage device (USB) Message Cause Action (Refer- Message Cause Action (Refer- Message Cause Action ence page) ence page) Message Cause Action Incompatible The connected Connect a USB Error-02-XX/ The disc is dirty. Clean the disc. Video resolu- The inserted Select a file that...
- Page 51 Then, return to authorized menu is dis- Tag transfer This unit’s tag Check the iPod the USB portable Pioneer Service played, reconnect failed. Re- information and try again. audio player/USB Station. the iPod and reset connect your cannot transfer memory.
-
Page 52: Understanding Auto Eq Error Messages
Message Cause Action Pandora Ap- plication is not compatible ver- disconnect plication is supported. sion of the Pioneer recommends from Please con- The microphone Plug the optional not sup- Pandora applica- the use of a camera PandoraLink. nect the mi-... -
Page 53: Indicator List
Appendix Additional information Additional information Indicator list Indicates that the connected Indicates that the digital format is Shows the composer name. Bluetooth device only supports Linear PCM. Bluetooth audio. Area 1 Area 2 Shows the folder name of the Show the album title when receiv- Indicates the sampling fre- folder containing the MP3/WMA/ ing the tag information. -
Page 54: Handling Guidelines
Appendix Additional information Additional information Handling guidelines USB storage device Condensation may temporarily impair the player’s Shows when this unit has the performance. Let it rest for about one hour to ad- Discs and player song information (tag). Connections via USB hub are not supported. just to a warmer temperature. -
Page 55: Audio Compatibility (Usb)
Appendix Additional information Additional information Playback of CD-R/RW discs may become impossi- About iPod settings DRM rental files cannot be operated until play- Sampling frequency: 32 kHz to 48 kHz ble in case of direct exposure to sunlight, high ! When an iPod is connected, this unit changes back is started. -
Page 56: Ipod Compatibility
(disc) 5.1.1) Regardless of the length of blank sections be- Pioneer accepts no responsibility for data lost ! iPod touch 3rd generation (software version tween the songs from the original recording, com- on the iPod, even if that data is lost while this 5.1.1) -
Page 57: Sequence Of Audio Files
Example of a hierarchy consult your dealer or the nearest authorized ! Heat from the heater may damage the LCD PIONEER Service Station. Do not use the Bluetooth profiles screen, and cool air from the cooler may unit in this condition because doing so may... -
Page 58: License, Warranty Disclaimer & Limitation Of Liability
Apple Inc., registered in RISDICTION TO JURISDICTION. for more information on how to complete your TIES MADE BY PIONEER OR ANY OF ITS LICEN- the U.S. and other countries. registration. SORS, AS APPLICABLE. PIONEER AND ITS Lightning is a trademark of Apple Inc. - Page 59 Appendix Additional information Additional information This code is released under the libpng license. John Bowler The Contributing Authors and Group 42, Inc. libpng versions 1.2.6, August 15, 2004, through Kevin Bracey specifically permit, without fee, and encourage 1.5.0, January 6, 2011, are Copyright (c) 2004, Sam Bushell the use of this source code as a component to Magnus Holmgren...
-
Page 60: Language Code Chart For Dvd
Appendix Additional information Additional information Language code chart for DVD Language (code), input code Navajo, Navaho (nv), Bengali (bn), 0214 Inupiaq (ik), 0911 Tahitian (ty), 2025 Language (code), input code 1422 Japanese (ja), 1001 Dzongkha (dz), 0426 Kurdish (ku), 1121 Kinyarwanda (rw), 1823 Uighur, Uyghur (ug), Tibetan (bo), 0215... -
Page 61: Specifications
Signal-to-noise ratio ..96 dB (1 kHz) (IHF-A network) Display (RCA level) 30 dB) Screen size/aspect ratio ... 7.00 inch wide/16:9 (AVH-X7500BT/AVH-X6500DVD) Signal-to-noise ratio ..80 dB (digital broadcasting) (effective display area: (IHF-A network) Signal-to-noise ratio ..91 dB (1 kHz) (IHF-A network) 154.1 mm ×... - Page 62 Col.Lomas de Chapultepec, Mexico, D.F. 11000 TEL: 55-9178-4270 先鋒股份有限公司 台北市內湖區瑞光路407號8樓 電話: 886-(0)2-2657-3588 先鋒電子(香港)有限公司 香港九龍長沙灣道909號5樓 電話: 852-2848-6488 ã 2013 PIONEER CORPORATION. All rights reserved. ã 2013 PIONEER CORPORATION. Tous droits de reproduction et de traduction réservés. Printed in Thailand Imprimé en Thaïlande <KOKZX> <13A00000> <CRD4711-A/N> UC...