Table of Contents

Related Manuals for IRiver HP-120


Summary of Contents for IRiver HP-120
-
Page 1: Instruction Manual
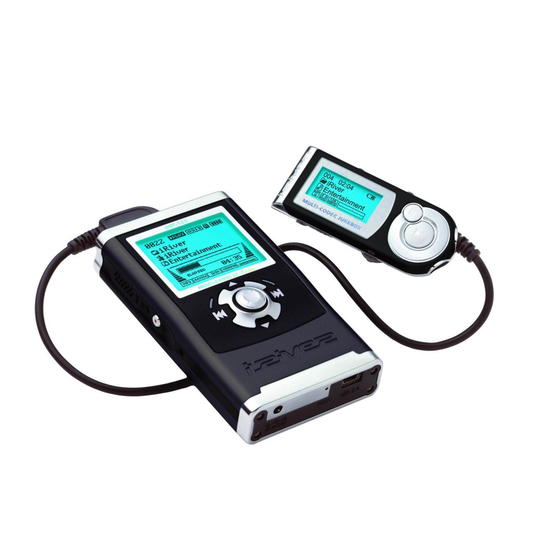
Instruction Manual PORTABLE STORAGE DEVICE & MULTI - CODEC JUKE BOX Model iHP-120 Model iHP-120 Thank you for your purchase. Please read this manual carefully before using your new player. http://www.iRiverAmerica.com http://www.iRiverAmerica.com... - Page 2 THIS DEVICE COMPLIES WITH PART 15 OF THE FCC RULES. OPERATION IS SUBJECT TO THE FOLLOWING TWO CONDITIONS: (1) THIS DEVICE MAY NOT CAUSE HARMFUL INTERFERENCE, AND (2) THIS DEVICE MUST ACCEPT ANY INTERFERENCE, RECEIVED, INCLUDING INTERFERENCE THAT MAY CAUSE UNDESIRED OPERATION.
- Page 3 Limited does not assume any responsibility for errors or omissions in this document or make any commitment to update the information contained herein. iRiver is a registered trademark of iRiver Limited in the Republic of Korea and/or other countries and is used under license.
-
Page 4: Table Of Contents
1. Locating the Controls Front View, Side View... Up/ Down Side, LCD Window... Remote Control... 2. Getting started Using AC Power Adapter... Software Installation... Connecting the iHP to the Host PC... Installing the iHP Device Driver... Using as a Portable Storage Device... Disconnecting the iHP to the Host PC... -
Page 5: Remote Control
UP/ DOWN SIDE LINE INPUT (Optical / Analog) REMOTE LINE OUTPUT DC IN 5.0 V CONTROL/ (Optical / Analog) EARPHONES LCD WINDOW TRACK PLAYBACK NUMBER MODE HOLD TEXT FILE LOAD FOLDER NAME ARTIST NAME TITLE NAME LEVEL METER PLAYBACK INFORMATION FILE FORMAT EQ/SRS BIT RATE... -
Page 6: Using Ac Power Adapter
USING AC POWER ADAPTER Use only the AC Power Adapter supplied with the player. The AC operating voltage of this player is 100~240V, 50~60Hz. Connect the adapter to the 5.0V DC jack on the player and into an AC outlet. RECHARGING METHOD The player will charge automatically when the AC adapter is connected to the player. - Page 7 Once the path has been located, Click “Next”. Click “Finish” The installation of the Device Driver is complete. Chose "Search for the best driver for your device (Recommended)." Click Next. Locate the following path on your computer. C:\Program Files\ iRiver\iHP 100\drivers, click “OK”. Click “Next”...
- Page 8 TO DISCONNECT THE PLAYER FROM THE HOST PC Click the 'Safely Remove Hardware" icon in the System Tray. Click “Stop iRiver iHP-100-Driver(X)” or “Safely Remove TOSHIBA MK1 3GAL USB Disk Drive(X:)”. (Where X is the drive letter assigned to the iHP) Click OK after confirming the “Safe To Remove Hardware”...
- Page 9 Connect the headphones and remote Put the HOLD switch to “OFF”. control as shown below. To select music Press the PLAY/STOP button to : To select previous track turn on the player. Press it again to play. : To select next track To adjust the volume To increase volume To decrease volume...
- Page 10 To activate Navigation To increase volume. 2. To select the previous track or FM station. To increase volume. 4. To select the next track or FM station. To select NAVI/MENU function. 6. Internal Microphone 7. To change to record standby mode or start recording.
-
Page 11: Basic Operation
The remote control operates every function by using 5 buttons. Main unit and Remote control both locked. Only Main unit is locked. Only Remote control is locked. BASIC OPERATION FUNCTION To listen to the next track, push the jog switch to the right. Stop the playback Power Off To listen to the previous track,... - Page 12 INTERVAL REPEAT Play selected interval repeatedly while playing. Press A-B button once to select the beginning <A> Point. Press A-B button again to select the ending <B> Point. A-B interval will be repeated. Navigation mode is useful for quickly searching your files by using ID3 tag information and file name.
- Page 13 2. NAVIGATION USING MUSIC INFORMATION In order to use the navigation by Artist/Album/Genre/ and Title, the DB SCAN setting must be set to YES in the firmware menu, (refer to page 41). Press the NAVI/MENU button. The function selection graphic displays on the LCD. Push the NAVI/MENU handle toward function.
- Page 14 TO UPDATE DB The DB is a DataBase of the songs on your iHP player. It indexes all the Artist, Album, Genre, and Title information as found in the ID tags of your MP3 files. It is important to perform the steps below after loading the iHP player for the first time.
- Page 15 TO MAKE A TEXT FILE You can read text files on your iHP player by creating a "TEXT" folder and copying .TXT files into it. Make a new folder under ROOT Type TEXT as a name of a new folder on the Windows Explorer. folder on the Windows Explorer.
- Page 16 TO SEARCH THE TEXT FILES 1. To Search a Text files generally Push lever to move to the next line during reading the text. Push lever to move to the next page during reading the text. 2. To go to specific position (Useful for large files.) Click the NAVI/MENU button to move the desired position of the text.
-
Page 17: Operating The Fm Tuner
OPERATING THE FM TUNER While playing an Audio File, Press and hold the PLAY/PAUSE button. The FM function picture displays on the LCD. Push the button to select FM frequency. Press the STEREO/PLAY/PAUSE button to select Stereo/Mono. SELECTING FREQUENCY To change frequency, push the switch to the left or the right. -
Page 18: Recording
MEMORY DELETE FUNCTION (Delete saved channels) Select the channel to be deleted at preset mode. Press and hold the memory button. - The next channel will appear when channel deletion is completed. Push the MEMORY button if you want to delete the next channel also. FM Tuner reception may vary in different areas. - Page 19 Push the MENU/NAVI handle toward or push the REC button on the remote control toward BITRATE to select BITRATE TYPE to set recording quality. This is only for MP3 file. When saving as WAV file, the Bitrate generally is 1411Kbps. (44.1 KHz, 16Bit, Stereo) When saving the optical signal with 48KHz as WAV file, the Bitrate is 1536Kbps.
-
Page 20: Playback Mode
The iHP has various playback modes. Please refer to the function controls (see page 44 for details) for user-defined configurations. REPEAT Play a single track repeatedly. Press next track. Play all tracks in the folder and stop. Play all tracks in the folder repeatedly. Play all tracks in the player repeatedly. -
Page 21: Menu
CONFIGURATION Function Control is subject to change with different firmware versions. Users can configure their own settings. Display General Beep Volume Back Light (Battery) Resume Back Light (Adapter) Fade In LCD Contrast(Main) Language LCD Contrast(Remote) Tuner Region Tag Information Load Default Time Firmware Upgrade DB Scan... -
Page 22: Firmware Upgrade
GENERAL BEEP VOLUME Set beep volume level to 0 / 1 / 2 / 3 step. RESUME When ON, player resumes to previous place in song after STOP or Power OFF. FADE IN When activated, volume increases gradually at playback mode to prevent sudden loudness. LANGUAGE (Supports 38 languages) Song title and ID3 tag information is dependent on the version of the PC operating system that was... - Page 23 LCD CONTRAST (Main) Adjust LCD contrast of the player. LCD CONTRAST (Remote) Adjust LCD contrast of remote control. TAG INFORMATION ON : Displays track with ID3 tag information and you can change the configuration of Tag information. OFF : Displays track with file name. The change will take affect when the next track is played.
- Page 24 MODE (PLAYBACK MODE) REPEAT MODE / SHUFFLE MODE You can select a file or directory to listen to repeatedly. You can play the selected mode simultaneously by setting REPEAT MODE / SHUFFLE MODE respectively. (Refer to page 36 for details about each mode) INTRO MODE INTRO MODE plays the beginning 10 seconds of each track.
-
Page 25: Rec Mode
1. Launch WINAMP and add songs to make a list. 2. Click "LIST OPTS" located on the right bottom and click "SAVE LIST" 3. Name the file name (ex: iriver.m3u) and click "SAVE" to save the list. iRiver.m3u My Music.m3u button. - Page 26 Upgrade your firmware at www.iriver.com. What is FIRMWARE? It is the operating system that works in the iHP. iRiver.m3u iRiver provides you with the latest and best features through Firmware Upgrade. My Music.m3u Visit www.iriver.com to upgrade your Firmware. How to UPGRADE? 1.
- Page 27 Supported file types will have the extension MP3, OGG, WMA, ASF and WAV. Folders and files are sorted in alphabetical order. iHP-120 can recognize up to 2000 folders and 9999 files. Track information is displayed either filename or ID3 TAG information. Physical shock can cause bad sectors on the Hard Disk inside the iHP Series.
- Page 28 Should any problem persist after you have checked these symptoms, consult your iRiver dealer or contact support at iRiver.com. Check whether the battery is discharged. Check the operation after connecting AC No Power Adapter. Check whether VOLUME is set to “0”.
- Page 29 Capacity Model No Category Item Specifications Frequency/Range 20Hz~20KHz 20mW(L) +20mW(R) at 16 Headphone output Max. Volume Audio S/N ratio 90dB(L), 90dB(R) (MP3) Frequency Characteristics No. of Channels STEREO(L+R) FM Frequency range 87.5MHz~108MHz 20mW(L) +20mW(R) at 16 Max. Headphone Output Audio Volume (FM TUNER) S/N ratio...