Table of Contents
Advertisement
Advertisement
Table of Contents

Related Manuals for Yaesu FTA-310


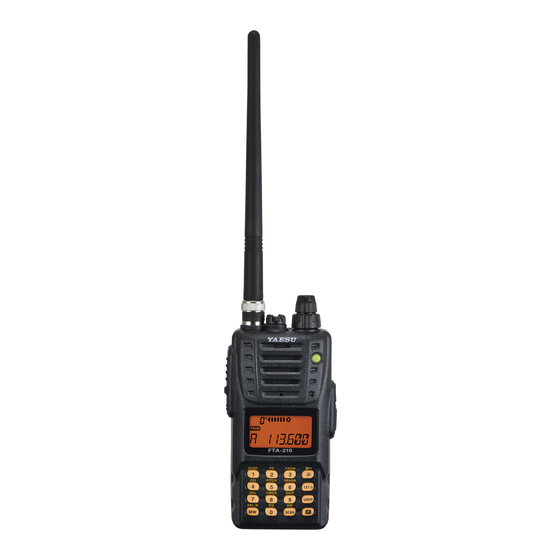
Summary of Contents for Yaesu FTA-310
- Page 1 AIR BAND TRANSCEIVER Operating Manual...
-
Page 2: Table Of Contents
ontents Important Notice! ............1 Advanced Operation ..........17 Introduction ..............2 Tuning Methods ............... 17 Accessories & Options ..........3 Reception of Weather Channel Broadcasts ...... 18 Control & Connectors ..........5 Monitor Switch ..............19 Top Panel ................5 ANL (Automatic Noise Limiter) Feature ...... -
Page 3: Important Notice
FCC RF Exposure Compliance Requirements for Occupational Use Only: The FTA-310 has been tested and complies with the Federal Communications Commission (FCC) RF exposure lim- its for Occupational Use/Controlled Exposure Environment. In addition, it complies with the following Standards and Guidelines: ... -
Page 4: Introduction
PC Programming Kit and your PC. We recommend that you read this manual in its entirety, so as to understand the many features of the FTA-310 com- pletely. Keep this manual handy, so you may use it for reference. -
Page 5: Supplied Accessories
Alkaline Battery Case FBA-25A others may be unavailable in some regions. Consult Operating Manual your YAESU Dealer for details regarding these and any Warranty Card newly-available options. “B” suffix is for use with 100-240 VAC, Type-A Connection of any non-YAESU-approved accessory, plug or “C”... -
Page 6: Accessories & Options
& o ccessorIes ptIons Headset (not supplied) CT-96 Headset Cable PTT Switch (not supplied) An external PTT switch is required for use with an avia- tion headset. E-DC-5B DC Cable w/Noise Filter (Option) FTA-310 O perATing AnuAl... -
Page 7: Control & Connectors
lifting it away from the transceiver body. Turn this (inner) control clockwise to turn the radio Do not allow the FTA-310 to become sub- on and to increase the volume. Counterclockwise merged in water while the plastic cover rotation into the click-stop will turn the radio off. -
Page 8: Front Panel
The secondary functions are activated by pressing the key followed by [ F ] key. The third functions are activated by pressing and holding in the key for 2 seconds. These functions are described in detail on page 8. FTA-310 O perATing AnuAl... -
Page 9: Side Panel
When an external 12-Volt DC power source is avail- able, you may connect the (optional) E-DC-5B Ex- ternal DC Cable here. 1) Do not allow the FTA-310 to become submerged in water while the rubber cover is removed. 2) Do not connect any wire to this jack if that wire is connected directly to a 28-Volt DC source. -
Page 10: Keypad
( Press [ F ] + key ) key mode of the [ F ] key. “Write” Command. threshold level. feature. Third Function Memory “Write” None Activates Scanning. None ( Press and Hold key ) Command. FTA-310 O perATing AnuAl... -
Page 11: Lcd Display
“ V O X ” s y s t e m i s is in use. See page 17. is active. See page 52. “8.33 kHz” in the NAV and active. See page 25. COM band. See page 23. FTA-310 O perATing AnuAl... -
Page 12: Precautions
Precautions Belt Clip Installation The FTA-310 is capable of two-way communica- Connect the hanger to the rear of the FTA-310, with tion on channels used for critical aviation safety the notch pointing directly up, using the supplied communications. Therefore, it is important that this screw (Fig 1). -
Page 13: Before You Begin
Do not attempt to open any of the rechargeable Ni-MH packs, as personal injury or damage to the Ni-MH pack could occur if a cell or cells become accidentally short-circuited. Fig 3 Fig 4 FTA-310 O perATing AnuAl... -
Page 14: Battery Charging
3. If the transceiver and battery pack are inserted correctly, the RED indicator on the CD- 28 will glow. A fully- discharged pack will be charged completely in 12 hours. PA-48 CD-59 CD-28 DC 11 V ~ 16 V FTA-310 O perATing AnuAl... -
Page 15: Low Battery Indication
Installing the FBA-25A Alkaline Battery Case The supplied FBA-25A Battery Case allows operation of the FTA-310 using six “AA” size Alkaline batteries. When installing batteries, insert the (–) end first, then press in the (+) end so the battery snaps into place. Al- ways replace all six batteries at the same time, paying attention to the polarity indicated inside the case. -
Page 16: Basic Operation
Install a charged battery pack onto the transceiver, as described previously. rotate the (inner) VOL- To attach the supplied antenna to the FTA-310, UME knob out of the grasp the base of the antenna firmly, and exert a click-stop. -
Page 17: Squelch Adjustment
Press downward on the VOLUME knob to save resume normal (quiet) monitoring. your new setting. Press the PTT switch to exit the Menu (“SET”) mode. FTA-310 O perATing AnuAl... -
Page 18: Accessing The 121.5 Mhz Emergency Frequency
VOLUME knob. Operating Advice: Use of Internal Microphone Your FTA-310 is extensively sealed against water ingress, so as to ensure reliable op- eration even if it has become submerged. This unique construction includes waterproof- ing seals around the microphone and speaker enclosure, requiring that care be exercised when speaking into the internal microphone. -
Page 19: Advanced Operation
(USA version only) COM bands using the DIAL Ten Weather Channels are pre-programmed at the selector, the Keypad, or the scanner. The FTA-310 has factory. The FTA-310 will two VFOs which are called VFO-A and VFO-B. Press automatically scan this spe-... -
Page 20: Reception Of Weather Channel Broadcasts
“- WX -” will appear on the display. setup the Alert function when receiving the Weather The FTA-310 will now scan quickly through the Alert signal via Menu Item 20 “WXAF,” if desired. See ten standard Weather Channels, and will stop on the page 52 for details. -
Page 21: Monitor Switch
To turn the ANL feature off, To return to normal operation, press the MONITOR repeat the above step; the switch momentarily. “ ” icon will disappear from the display. FTA-310 O perATing AnuAl... -
Page 22: Temperature/Battery Voltage Display
Temperature/Battery Voltage Display W h e n t h e FTA-310 display “current tem- The FTA-310 can measure the current temperature in- perature,” pressing the side the transceiver’s case and current battery voltage. )] key to switch ... -
Page 23: Lock Function
LOCK Function Beep On/Off The lock function prevents accidental changes to the The FTA-310’s key/button beeper provides convenient frequency setting and the keypad controls. audible feedback whenever a button is pressed. Each key and button has a different beep pitch, and each func- ... -
Page 24: Receive Battery Saver Setup
ABS: Automatic Battery Saver, based on activity on the receiver. An important feature of the FTA-310 is its Receive Bat- tery Saver, which “puts the radio to sleep” for a time The setting of 1:5 will promote the greatest conserva- interval, periodically “waking it up”... -
Page 25: Changing The Channel Steps
8.33/25 kHz per step. quency; see the chart below. However, the operator The FTA-310 is set up with default channel steps of “25 (pilot, tower, control, etc) will call out the frequency kHz” (NAV and COM bands). If you need to change the according to what the display indicates. -
Page 26: Pitch Control
USR: The received audio is shaped per a user- configured audio response programmed via The FTA-310 includes a feature that lets you choose Menu Items 26 “UP_L,” 27 “UP_M,” and 28 four special receiver audio responses to allow the most “UP_H.”... -
Page 27: Vox Operation
The FTA-310 provides for adjustment of the VOX Gain To activate the VOX system using the Menu System: Press the [ F ] key, then press downward on the via the Menu, to prevent accidental transmitter activa- tion in a noisy environment. -
Page 28: Pa Operation
The FTA-310 also provides for adjustment of the “Hang-Time” of the VOX system (the transmit-receive The PA mode allows the FTA-310 to be used as a Pub- delay after the cessation of speech) via the Menu. The lic Address System when an optional MH-44 Micro- default delay is 1.0 second. - Page 29 PTT switch. When the PTT switch is off, you may monitor the sound around the transceiver (the monitor will pick up the background sound using the FTA-310’s internal microphone). When you have made your selection, press down-...
-
Page 30: Timer Operation
If you select the “Count Down” timer, rotate the DIAL knob to set the values for the timer (1 minutes The FTA-310 is provided a “Stop Watch” timer and a - 60 minutes). “Count Down” timer. These can be used for a variety of ... - Page 31 Notes FTA-310 O perATing AnuAl...
-
Page 32: Memory Operation
“CH- Memory System Operation XXX” and a channel The FTA-310’s Main Memory system allows the user number will blink on to store, label, and recall channel frequencies which the LCD. -
Page 33: Recalling The Memories
[ SCAN ( DW )] key. For example, to recall memory channel #14, press [ 1 ] [ 4 ] [ SCAN ( DW )] . FTA-310 O perATing AnuAl... -
Page 34: Scanning Operation
The FTA-310 allows you to scan automatically in the one second after the signal disappears, after which 1 , Main Memory, “Book” Memory, or Weather scanning will resume. Channel 2 modes. It pauses on signals encountered, so While the scanner remains paused on a frequency, you can talk to the station(s) on that frequency, if you like. - Page 35 You can also designate a frequency reaches the COM Band (118.000 ~ 136.975 channel to be skipped while MHz) via manual scanning, the FTA-310 will switch to scanning. When the receiver the automatic scanner mode. is halted on a channel that...
-
Page 36: Dual Watch Operation
Priority channel will each be polled Dual Watch first, then start the Scanner. for a 500 ms interval, as the FTA-310 looks for activity : The “priority” Channel is defined as the last-used on each channel. -
Page 37: Priority Dual Watch Operation
( D W ) ] . T h e “ ” icon will appear on the display. While receiving on the “cur- rent” (non-Priority) channel, pressing the PTT button once causes the radio to switch to FTA-310 O perATing AnuAl... -
Page 38: Vor Navigation
General VOR Equipment NAV Band ( 108.000 - 117.975 MHz ) COM Band (118.000 - 136.975 MHz) DVOR MODE CDI MODE FTA-310 O perATing AnuAl... -
Page 39: To Select The Dvor Mode
To Select the DVOR Mode When entering the NAV band (108.000 - 117.975 MHz), the FTA-310 selects the DVOR mode auto- matically. The “C ” field will appear ourse ndICator at the upper left corner on the display, and the “... -
Page 40: Flying To A Vor Station
Flying to a VOR Station The FTA-310 can indicate the deviation from the direct course to a VOR station. Select a VOR station on your aeronautical chart and turn the DIAL selector knob (or enter the frequency The Aircraft is “ON COURSE”... - Page 41 The Aircraft is “ON COURSE” The Aircraft is “OFF COURSE” FTA-310 O perATing AnuAl...
-
Page 42: Entering A Desired Course
Note 1: To get back on course, fly right more than the number of The FTA-310 can also be configured to indicate the de- degrees indicated by the Course Deviation Arrow. viation from the desired course, not only the deviation Note 2: from the path to the VOR station. -
Page 43: Position Cross-Checking
DVOR mode. The course indicator will show the chart. Your aircraft is located at the point where the course deviation from the VOR radial. Note the ra- lines intersect. dial you currently are on. Cross-checking Position FTA-310 O perATing AnuAl... -
Page 44: Split Operation
NAV band frequency. Note: You have now stored the separate transmit fre- quency, but you have not yet activated the split-frequen- cy function; go on to the next section. FTA-310 O perATing AnuAl... -
Page 45: Programming The User Key Assignment
K rogrammIng tHe ssIgnments Default FTA-310 functions have been assigned to “Pri- Press downward on the VOLUME knob momentari- mary” (press) and “Third” (press and hold in) function ly, then rotate the DIAL knob to select the function of the front panel’s [ USER ] key at the factory. -
Page 46: Field Programming Mode
2 seconds; you will now see a blinking “A” on the may want to use frequently while the FTA-310 is in the LCD. To attach an alpha/numeric name (label) to Field Programming mode. -
Page 47: Cpu Resetting
To clear all memories and other settings to factory de- faults: Turn the radio off. Press down and hold in the VOLUME knob, and the MONITOR button, while turning the radio on. FTA-310 O perATing AnuAl... -
Page 48: Menu ("Set") Mode
(“on” to “oFF,” default settings be changed, however, until you are thor- etc.). oughly familiar with the operation of the FTA-310. 1. Press the [ F ] key, then 5. Press down on the VOL- press down on the VOL-... - Page 49 25 kHz / 8 kHz ( 8.33 kHz ) STEP Selects the synthesizer steps on the Air band. 25 kHz Selects the Tone Pitch (equalizer) circuit of the audio amplifier in the receiver. oFF / MD1 / MD2 / MD3 / USR FTA-310 O perATing AnuAl...
- Page 50 Memory channel (the Memory channel number will automatically when scanning resumes. return to “001”). Important Notice: An “erased” channel cannot be re- stored, and “CH-001” cannot be erased, as it is used for “Priority Channel” operation. FTA-310 O perATing AnuAl...
- Page 51 “birdie” should it fall on a desired frequency. Consult incoming calls will be slowed somewhat. your YAESU dealer for details regarding this function. ABS: Automatic Battery Saver, based on activity on 09 [ PRTM ] the receiver.
- Page 52 Available Values: on/oFF Default Setting: DW Default Setting: oFF “DW” mode: The FTA-310 will activate the Dual Watch This controls the status of the radio’s internal micro- feature when you press [ F ] [ SCAN phone when an external microphone (such as the MH- ( DW )] .
- Page 53 Default Setting: oFF The Time-Out Timer shuts off the transceiver after con- tinuous transmission exceeds the programmed time. 17 [ DIMM ] Function: Setting of the display brightness level. Available Values: LV1 ~ LV4 Default Setting:LV3 FTA-310 O perATing AnuAl...
- Page 54 Function: Selects the VOX delay (“hang”) time. ceiver (the monitor will pick up the background Available Values: 05/10/15/20 (x0.1 sec) sound using the FTA-310’s internal microphone). Default Setting: 10 (x0.1 sec) FTA-310 O perATing...
- Page 55 K: Keypad (includes pressing the VOLUME knob function) default setting enhances the audio in the lower D: DIAL selector knob frequency range, and reduces the level of the P: PTT switch higher-frequency components. (Other selections are combinations of these lock-out choices) FTA-310 O perATing AnuAl...
- Page 56 Better than 0.8 µV (for 6 dB S/N with 1 kHz, 30 % modulation) Selectivity: >8 kHz/–6 dB Adjacent CH. Selectivity: <25 kHz/–60 dB AF Output (@7.2 V): 0.8 W @ 16 Ohms, 10 % THD FTA-310 O perATing AnuAl...
-
Page 57: Specifications
Better than ±10 ppm (+14 ºF to + 140 ºF [–10 ºC to +60 ºC]) Modulation System: Low Level Amplitude Modulation Spurious Emission: >60 dB below carrier Int. Microphone Type: Condenser Ext. Mic. Impedance: 150 Ohms Specifications are subject to change without notice or obligation. FTA-310 O perATing AnuAl... -
Page 58: Troubleshooting
Please confirm the connections and connector sizes are correct. Headset Note: Earphone (speaker) Impedance: 8 or above MIC Impedance: 150 ±20% PTT pressed: Ground PTT not pressed: Open FTA-310 O perATing AnuAl... -
Page 59: Book Memory Channel List
123.000 Air Traffic Control General Use Unicom-Heliports ARTCC 04 136.075 UNICOM 7 123.050 Air Traffic Control General Use Unicom-Heliports ARTCC 05 136.125 UNICOM 8 123.075 Air Traffic Control General Use - - - ARTCC 06 136.150 FTA-310 O perATing AnuAl... - Page 60 STO VMT 127.600 TLV ATIS 132.500 SUNDSVALL VOLMET VIENNA(Schwechat) SDL VMT 127.800 VIE ATIS 122.950 TEL AVIV(BEN GURION RADIO) WARSAW(Okecie) TLV VMT 126.800 WAW ATIS 120.450 VIENNA(VOLMET WIEN AUSTRIA) ZURICH VIE VMT 126.000 ZRH ATIS 128.525 FTA-310 O perATing AnuAl...
- Page 61 FTA-310 O perATing AnuAl...
- Page 62 FTA-310 O perATing AnuAl...
- Page 63 Part 15.21: Changes or modifications to this device not expressly approved by YAESU MUSEN could void the user’s authorization to operate this device.
- Page 64 Copyright 2012 YAESU MUSEN CO., LTD. All rights reserved. YAESU MUSEN CO., LTD. Tennozu Parkside Building 2-5-8 Higashi-Shinagawa, Shinagawa-ku, Tokyo 140-0002 Japan No portion of this manual may be YAESU USA reproduced without the permission of 6125 Phyllis Drive, Cypress, CA 90630, U.S.A.