Table of Contents

Related Manuals for Radio Shack 43-337


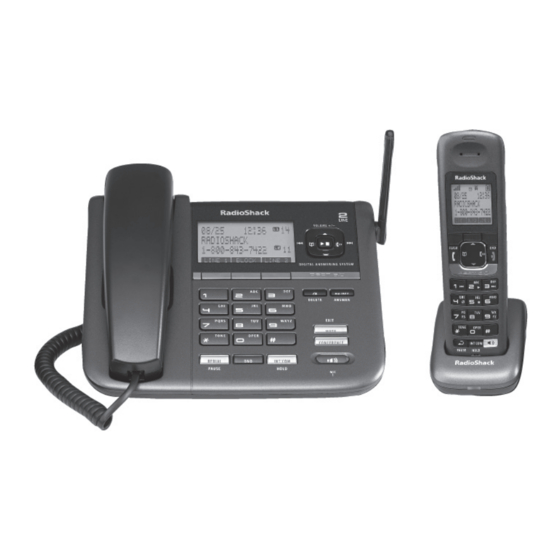
Summary of Contents for Radio Shack 43-337
- Page 1 43-337 User’s Guide Answering System • Caller ID 2-Line Corded/Cordless Phone Thank you for purchasing your 2-Line Corded / Cordless Phone from RadioShack. Please read this user’s guide before installing, setting up, and using your new phone.
-
Page 2: Table Of Contents
Contents Contents Package Contents ....................4 Important Safety Instructions ................4 Installing Your Phone ..................5 1 Attach the Stand ......................5 2 Connect the Phone Base .................... 5 3 Test the Telephone Line Connection ................7 4 Set Up the Accessory Handset ................... 7 5 Test the Cordless Handset Connection .............. - Page 3 Using Multi-station Features ................29 Expanding Your Phone ....................29 Using Multi-Station Conference Calling ..............29 Using Privacy Mode ..................... 29 Using Call Transfer ....................... 30 Using the Intercom ...................... 30 Using Special Features ..................31 Using Your Phone During a Power Failure ..............31 Finding a Lost Handset ....................
-
Page 4: Package Contents
Package Contents Package Contents • Cordless Handset (1) • Base (1) • Corded (Base) Handset (1) • Coiled Handset Cord (1) • Charger (1) • Modular Cord (1) • AC Adapters (2) (for the base and for the charger) • Ni-MH Battery Pack (1) (inside handset) •... -
Page 5: Installing Your Phone
Installing Your Phone Installing Your Phone Attach the Stand Before you attach the stand, you have to decide if you want the phone to rest on a desk or hang on a wall. For desktop use 1. Turn the stand so the word DESK is right-side up (it will be on the right). - Page 6 2. Connect the base AC adapter to the AC IN 7.8V jack and route the cord as shown: For desktop use For wall mount use DES K WA LL WA LL DE SK DE SK WA LL 3. Connect the included two-line telephone cord to the TEL LINE 1/2 jack. If your phone company uses a separate phone jack for each line, Connect the...
-
Page 7: Test The Telephone Line Connection
Test the Telephone Line Connection 1. Pick up the corded handset from the base. The phone should pick up line 1 automatically and change the display to show , and you should hear Talk a dial tone. 2. When you get a dial tone, make a test call. If... - Page 8 5. Place the cover over the battery compartment and slide it up into place. 6. Connect the charger AC adapter to the charger’s AC IN 8V jack and set the plug into the notch as shown. 7. Plug the other end of the adapter into a standard 120V AC power outlet.
-
Page 9: Test The Cordless Handset Connection
Recycle rechargeable batteries Placing rechargeable batteries in the trash can be harmful to the environment. Instead, recycle old rechargeable batteries at your local RadioShack store free of charge. RadioShack participates in the RBRC © battery recycling program, and is committed to preserving the environment and conserving natural resources. -
Page 10: Getting To Know Your Phone
Getting to Know Your Phone Getting to Know Your Phone Parts of the Base If the key name is spelled out on the key itself, it’s not labeled in the drawing below. Handset clip Hook switch Display PHONEBOOK/LEFT PLAY/STOP CALLER ID/ RIGHT DOWN Soft keys... - Page 11 Key name What it does (and icon) - In standby: increase the ringer volume for line 1 or line 2. - During a normal call: increase the earpiece volume. - During a speakerphone call or while a message is playing: UP ( increase the speaker volume.
-
Page 12: Parts Of The Handset
Parts of the Handset Message waiting LED, visual ringer Earpiece Display Soft keys TALK/FLASH PHONEBOOK/ LEFT CALLER ID/ DOWN RIGHT 12-key dial pad REDIAL/ PAUSE SPEAKER INTERCOM/ HOLD Microphone Charging contacts Handset keys and how they work Key name What it does (and icon) - In standby: increase the ringer volume for line 1 or line 2. -
Page 13: Reading The Displays
Key name What it does (and icon) - In standby: open the redial list. REDIAL ( )/PAUSE - While entering a phone number: insert a 2-second pause. - In standby: decrease the ringer volume for line 1 or line 2. - During a call: decrease the call volume. - Page 14 The table below shows the possible icons and what they mean. Since the icons appear based on what you’re doing with the phone, you won’t ever see all of these icons at the same time. Base Icon Handset Icon What it means The accompanying information (in use, on hold, etc.) applies to line 1.
-
Page 15: Using The Soft Keys
Using the Soft Keys Soft keys are controlled by the software: they will automatically change their function depending on what you’re currently doing: Soft keys with the phone in standby On the base On the handset SUN 12:00A SUN 12:00A 12/31/08 Handset #1 New CID: 4... - Page 16 • Sometimes, the current function of a soft key can duplicate the function of a regular key. If this happens, you can press either key. • When this manual refers to a soft key, it uses the soft key’s description printed on a black background.
-
Page 17: Entering Text On Your Phone
Entering Text on Your Phone When you want to enter text into your phone (for example, a name in the phonebook), use the twelve-key dial pad to enter the letters printed on the number keys. Here’s how it works: • The phone enters the letters in the order they appear on the key. For example, if you press the number key 2 once, the phone enters the letter Press 2 twice for , and three times for... -
Page 18: Using The Menus
Using the Menus Using the Menus The menus are designed to be as easy as possible. Some users don’t even need the manual once they know how to perform these actions: To open the menu, press To close the menu: <Options>... -
Page 19: The Handset And Base Setup Menu
The Handset and Base Setup Menu When you open the menu on a handset, this menu is called Handset Setup On the base, this menu is called . Each of these options can be set Base Setup separately for each station. (A station can be any cordless handset or the base.) Menu option: Use it to: (Handset only) Turn on T-coil mode to reduce noise on some... -
Page 20: The Global Setup Menu
The Global Setup Menu The settings on this menu are separate for each line: changing the settings for line 1 will not affect line 2, and vice versa. However, the settings for each line apply to all stations whenever they use that line. Before changing these settings, make sure the phone is in standby and all handsets are within range of the base. -
Page 21: Making And Answering Calls
Making and Answering calls Making and Answering calls Working with Two Lines When performing common tasks, you can let the station use the primary line, or you can manually choose a particular line for each task. Using the primary line makes common tasks much simpler, but you will need to assign a primary line to each station (see below). - Page 22 Assigning a primary line You can assign a primary line to each station; the station connects to its primary line whenever it goes off hook (that is, when you press TALK /FLASH or SPEAKER ). Whenever you want, you can bypass the primary line assignment by manually choosing line for your current task.
-
Page 23: Using The Speakerphone
Using the Speakerphone Both the handset and the base have a speakerphone. To use the base speaker, press SPEAKER instead of using the corded handset. To use the handset speaker, press SPEAKER instead of TALK /FLASH. To... From the base From a handset make a call: Dial the number, and then Press SPEAKER ( Press SPEAKER (... -
Page 24: Using The Caller Id And Redial Lists
Using the Caller ID and Redial Lists Using the Caller ID and Redial Lists You have to subscribe to Caller ID to use Caller ID features: contact your telephone provider for more information. Caller ID list information • When a call comes in, the phone displays the caller’s number and name (if available) along with which line is receiving the call. -
Page 25: Caller Id And Redial Menu Options
Caller ID and Redial Menu Options With the phone in standby, open the CID or the redial list. Find the entry you want and press OPTIONS. Choose one of the following: Menu option: Use it to: Add the selected CID/redial list entry to this station’s phonebook. The phone creates a new phonebook entry, then prompts you to edit the name and Store into PB phone number;... -
Page 26: Using The Phonebook
Using the Phonebook Using the Phonebook Each station can store up to 100 entries in its phonebook, and each entry can have two different phone numbers. If you want to... Operation open the phonebook Press PHONEBOOK ( )/LEFT. scroll through the Press DOWN to scroll through the phonebook from A to Z or UP to entries scroll from Z to A. -
Page 27: Setting Up Your Phonebook
Setting Up Your Phonebook Creating a new entry 1. Open the phonebook with the phone in standby, and press NEW. Edit Name appears. Enter the name (up to 16 characters) you want to use for this entry. (See “Entering Text on Your Phone” on page 17.) Press when you have fi... -
Page 28: Phonebook Menu Options
Phonebook Menu Options Open the phonebook with the phone in standby, and press OPTIONS to open the phonebook menu. From the main phonebook screen, you have three options: Menu option: Use it to: Create New Add an entry to your phonebook. (See “Creating a new entry” on page 27.) Copy the whole phonebook to another station. -
Page 29: Using Multi-Station Features
Using Multi-station Features Using Multi-station Features The expandable base works together with the accessory handsets to give you some useful multi- station features. (A station can be any cordless handset or the base.) You must have at least one cordless handset to use the features in this section. Expanding Your Phone •... -
Page 30: Using Call Transfer
Using Call Transfer You can transfer an outside call to any other station. To... From the base From a cordless handset 1. Press INT’COM/HOLD to put the call on hold. 2. Select the station you want to transfer the call to, or select to page all the stations at the same time. -
Page 31: Using Special Features
Using Special Features Using Special Features Using Your Phone During a Power Failure Because it includes a corded handset, your phone can perform several of its functions during a power failure. The following features will operate during a power failure (all other features are disabled): •... -
Page 32: Using Call Block
Using Call Block If you subscribe to Caller ID, you can block incoming calls by adding numbers to the call block list. • When either line receives a call, the phone compares the received phone number to the numbers on the call block list. If the phone number is on the list, the phone replaces the caller’s name with Call Blocked and disconnects the call. -
Page 33: Using The Alarm Feature
Using the Alarm Feature You can set 3 different alarms on each cordless handset so your phone can remind you of important events. When an alarm is set, the alarm icon ( ) appears on the top of the screen. Setting an alarm 1. -
Page 34: Using Voice Message Notifi Cation
When an alarm rings When the day and time on the phone matches the day and time of an alarm setting, the handset sounds the selected tone and displays the alarm screen. • The alarm will ring for one minute. To turn off the Alarm alarm, press END. -
Page 35: Using The Answering System
Using the Answering System Using the Answering System Each line has a separate answering system. Whenever you access the answering system, the phone prompts you to choose a line. After that, any settings or operations will affect only the answering system for that line. -
Page 36: Getting Your Messages
Ans. Setup menu options You can change the answering system options separately for each line. When you select the Ans. Setup menu, the phone prompts you to select Line 1 Line 2 . Then, you can choose one of the following options to change the answering system settings for that line: Menu option: Use it to:... - Page 37 • The icons on the handset’s number keys and display show you which number key activates each answering system command; these commands correspond to the answering system keys on the base: Icon Command Name Handset key Base key Play PLAY/STOP Stop PLAY/STOP Repeat...
-
Page 38: Screening Your Calls
Screening Your Calls Another feature your answering system gives you is call screening. While the system is taking a message, you can hear the caller on the base speaker (if you turn on Call Screen ) or from a handset. To... -
Page 39: Additional Information
Additional Information Additional Information Troubleshooting If you have any trouble with your phone, try these simple steps fi rst. If… Try… - Checking the telephone cord connection. No stations can make or - Disconnecting the base AC adapter. Wait a few minutes, and then receive calls. - Page 40 If… Try… I can’t get two cordless - Making sure both handsets are registered to this base. handsets to talk to the - Making sure no station is in Privacy Mode. (See “Using Privacy Mode” caller. on page 29.) The phone keeps - You may have to change the line mode.
- Page 41 Noise or static on the line Interference is the most common cause of noise or static on a cordless phone. Here are some common sources of interference: Do you use a T-coil hearing aid? • electrical appliances, especially microwave If you have a hearing aid equipped with ovens a telecoil (T-coil) feature, the interaction •...
-
Page 42: Resetting And Registering Handsets
Resetting and Registering Handsets If you are having trouble with a cordless handset or if you want to replace one, you need to clear the registration information from the base and the handset: Do you have the base the handset is registered to? 1. -
Page 43: Handling Liquid Damage
Handling Liquid Damage Moisture and liquid can damage your phone. • If the handset or base is exposed to moisture or liquid, but only the exterior plastic housing is affected, wipe off the liquid, and use as normal. • If moisture or liquid has entered the plastic housing (i.e. liquid can be heard in the phone or liquid has entered the handset battery compartment or vent openings on the base), follow these steps: Handset... -
Page 44: Glossary
Glossary Accessory Handset..An extra handset that can register to and be used with an expandable phone base. All accessory handsets must be registered to a base. Base ....... The main part of the phone. It connects to your phone line and lets you make and receive calls. -
Page 45: Fcc Information
FCC Information Any changes or modifi cations not expressly approved by the party responsible for compliance could void the user’s authority to operate this device. This equipment complies with Part 68 of the FCC rules and the requirements adopted by the ACTA. On the bottom of this equipment is a label that contains, among other information, a product identifi... - Page 46 • Connect the equipment into an outlet on a circuit different from that to which the receiver is connected. • Consult the dealer or an experienced radio/TV technician for help. Product 2-Line Corded/Cordless Phone Model 43-337 Responsible RadioShack Party 300 RadioShack Cir. Fort Worth, TX 76107...
-
Page 47: Limited Warranty
Limited Warranty RadioShack warrants this product against defects in materials and workmanship under normal use by the original purchaser for ninety (90) days after the date of purchase from a RadioShack-owned store or an authorized RadioShack franchisee or dealer. RADIOSHACK MAKES NO OTHER EXPRESS WARRANTIES. - Page 48 43-337 User’s Guide Protect the environment by recycling your used electronics. Go to E-CyclingCentral.com to fi nd an electronic recycling center near you. ©2009. RadioShack Corporation. Printed in Vietnam 08A09 All rights reserved. RadioShack and RadioShack.com are UNZZ01099BA(0) 43-337 trademarks used by RadioShack Corporation.