Table of Contents
Advertisement
This product is eligible for the AVCCAM
3 Year Warranty Repair Program. For
details, see page E-5.
1
Volume
Note that Operation Instructions Vol.1 describes basic operations
of the Memory Card Camera-Recorder.
For instructions on advanced operations of the Memory Card
Camera-Recorder, refer to Operating Instructions Vol.2 (pdf file)
contained in the supplied CD-ROM.
Before operating this product, please read the instructions carefully and save this manual for
future use.
M0710TU0 -PS
Operating Instructions
Memory Card Camera-Recorder
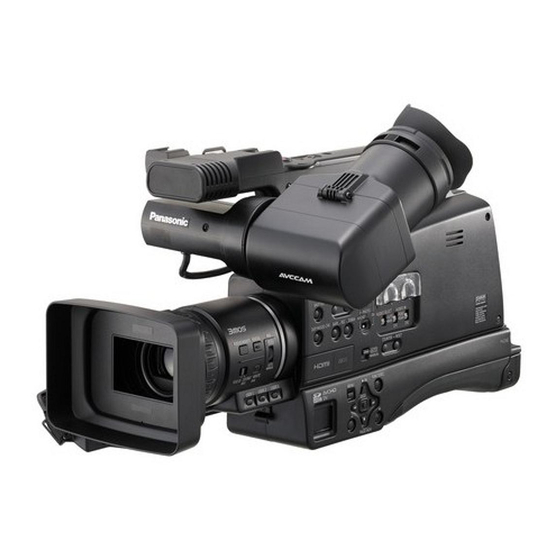
AG-HMC81E
Model No.
Vol.1
ENGLISH
VQT2Y44 (E)
Advertisement
Table of Contents

Related Manuals for Panasonic AVCCAM AG-HMC81E


Summary of Contents for Panasonic AVCCAM AG-HMC81E
- Page 1 3 Year Warranty Repair Program. For Operating Instructions Vol.1 details, see page E-5. Memory Card Camera-Recorder AG-HMC81E Model No. Volume Note that Operation Instructions Vol.1 describes basic operations of the Memory Card Camera-Recorder. For instructions on advanced operations of the Memory Card Camera-Recorder, refer to Operating Instructions Vol.2 (pdf file)
-
Page 2: Read This First
Read this first! indicates safety information. WARNING: CAUTION: • To reduce the risk of fire or electric shock, • Danger of explosion or fire if battery is mistreated. do not expose this equipment to rain or • Do not leave the battery in an automobile moisture. -
Page 3: Caution For Ac Mains Lead
Fuse If you lose the fuse cover the plug must not be used until a replacement cover is obtained. A replacement fuse cover can be purchased from your local Panasonic Dealer. EEE Yönetmeliğine Uygundur. EEE Complies with Directive of Turkey. - Page 4 Panasonic products and batteries manufactured by other companies and certified by Panasonic. (Batteries which do not support this function cannot be used). Panasonic cannot in any way guarantee the quality, performance or safety of batteries which have been manufactured by other companies and are not genuine Panasonic products.
-
Page 5: To Remove The Battery
ENGLISH Pursuant to at the directive 2004/108/EC, article 9(2) Panasonic Testing Centre Panasonic Service Europe, a division of Panasonic Marketing Europe GmbH Winsbergring 15, 22525 Hamburg, F.R. Germany AVCCAM 3 Year Warranty Repair Program* GERMAN Thank you for purchasing this Panasonic AVCCAM device. - Page 6 SDHC Logo is a trademark of SD-3C, LLC. “AVCHD” and the “AVCHD” logo are trademarks of Panasonic Corporation and Sony Corporation. This product has been manufactured under license from Dolby Laboratories. Dolby and the double-D symbol are trademarks of Dolby Laboratories.
-
Page 7: Table Of Contents
Contents Volume 1 (This Book) Read this first! ..........E-1 Basic Operations ....E-29 Operating precautions ......E-7 Turn on/off the camera ......E-29 Precaution for use ........E-9 Tally lamp ..........E-29 SD Memory Cards compatible with Using the cursor button ......E-30 this product ..........E-11 Basic operations ........E-30 (SD speed class 6)....E-13 Menu screen operations ......E-30... -
Page 8: Operating Precautions
Operating precautions Do not allow any water to get into the camera- • The AC adaptor may make some noise when you recorder when using it in the rain or snow or at are using it, but this is normal. the beach. - Page 9 What to remember when throwing memory cards away or transferring them to others Formatting memory cards or deleting data using the functions of the unit or a computer will merely change the file management information: it will not completely erase the data on the cards. When throwing these cards away or transferring them to others, either physically destroy them or use a data deletion program for computers (commercially...
-
Page 10: Precaution For Use
Panasonic makes no guarantees for your recordings. • Please understand that Panasonic makes no guarantees for your recordings in cases where images and/ or sound were not recorded as you intended due to problems with the camera-recorder or SD/SDHC Memory Cards. - Page 11 Connecting the IEEE1394 cable Always heed the following instructions when connecting the IEEE1394 cable (not included.) (If it is connected incorrectly, this may lead to the failure of this camera or external devices.). • Connect or disconnect the IEEE1394 cable after switching off the power of all connected devices. Devices with an earth terminal should be earthed (or connected to a shared GND) when using them.
-
Page 12: Sd Memory Cards Compatible With This Product
It is recommended that you use SD Memory Cards or SDHC Memory Cards of SD speed class 2 or above, or the following Panasonic SD Memory Cards (correct as of August 2010). Speed class 4 or above is required for recording in PH mode or HA mode. SDXC Memory Cards cannot be used with this product. - Page 13 When shooting in DV mode, it is necessary to use SD Memory Cards or SDHC Memory Cards of speed class 6 or above. It is recommended that you use the following Panasonic SD Memory Cards (as of August 2010). SDXC Memory Cards cannot be used with this product. Card type...
-
Page 14: (Sd Speed Class 6
Precaution for use (continued) This product (SDHC-compatible device) is compatible both with SD Memory Cards and with SDHC Memory Cards. SDHC Memory Cards may be used with SDHC Memory Card-compatible devices, but cannot be used with devices that are only compatible with SD Memory Cards. (Always check the relevant product’s operating instructions when using SDHC Memory Cards with other devices.) SDHC-compatible device... -
Page 15: Compatibility Of Recorded Video
Shooting video in DV mode It is not compatible with AV devices fitted with a Panasonic SD Memory Card slot (DIGA, VERA, TV, digital video camera). Video is recorded in AVI Type 2 file format and can be played back on computers using AVI Type2- compatible media players. -
Page 16: Outline
Outline Using this Camera This camera is mounted with a 1/4.1-type MOS sensor x 12, and is a shoulder type camera recorder that uses SD/SDHC memory cards for recording media. It can record and play back SD images (DV mode) in addition to recording and playing back HD images (AVCHD mode) with 1080 and 720 scan lines. -
Page 17: Editing And Saving With External Devices
Editing and saving with external devices SD/SDHC Memory Card (class 4 or above for PH and HA modes) PC (Pages 51, 122 of Vol.2) AVCHD mode USB 2.0 Printer (Page 47 of Vol.2) USB 2.0 MODE Video device / TV / monitor CAMERA (Pages 51, 52 of Vol.2) HDMI cable (optional) -
Page 18: Accessories
Accessories AC Adaptor AC power supply cables Wireless remote Battery (For areas other than control and battery the U.K.) (CR2025) (For the U.K.) DC cable Eye cup Shoulder strap CD-ROM → See “Fitting the eye → See “Attaching the cup”. (Page E-27) shoulder strap”. -
Page 19: Optional Accessories
Optional accessories • Battery VW-VBG260 (7.2 V, 2640/2500 (typ./min.) mAh: equivalent to accessory battery) VW-VBG6 (7.2 V, 5800/5400 (typ./min.) mAh: compatible with supplied battery charger) • Tele conversion lens VW-T4314H (See below for attachment instructions.) • Wide conversion lens VW-W4307H (See below for attachment instructions.) Using tele conversion lenses, wide conversion lenses Remove both the lens hood and lens hood (inner) before attaching an optional VW-T4314H tele conversion lens or VW-W4307H wide conversion lens. -
Page 20: Description Of Parts
Description of parts Front side and rear side 11 12 POWER VIDEO COMPONENT LINE LINE AUDIO CH 1 AUDIO MIC+48V MIC+48V CH 1 CH 2 CH 2 14 15 1 Handle zoom switch (Page E-38) 9 Viewfinder (Page E-31) 2 Handle zoom lever (Page E-38) 10 Accessory shoe 3 Handle START/STOP button 11 START/STOP button (Page E-36) -
Page 21: Right Side
Right Side 18 19 MONITOR MODE AUDIO LEVEL CAMERA SHUTTER SPEED SEL PHOTO AVCHD BARS ZEBRA DISP / MODE CHK AUDIO SELECT AUDIO IN AUTO FRONT REAR COUNTER RESET/ TC SET AUTO MONITOR MANUAL MODE AUDIO LEVEL CAMERA SPEED SEL SHUTTER 36 37 PHOTO... -
Page 22: Left Side
Description of parts (continued) Left side VIDEO OUTPUT COMPONENT VIDEO CAMREMOTE ZOOM FOCUS IRIS LINE LINE AUDIO CH 1 AUDIO MIC+48V MIC+48V CH 1 CH 2 CH 2 50 OUTPUT switch (Pages 52, 89 of Vol.2) 56 MIC + 48 V ON/OFF switch (Pages 19, 69 of Vol.2) 51 VIDEO terminal (BNC)/ COMPONENT OUT (Y/P... -
Page 23: Remote Control
Remote control To use the remote control, set the IR REMOTE item on the OTHER FUNCTIONS menu to ON. The default setting for this item is OFF. (Page 110 of Vol.2) 1 EXT. DISPLAY button (Pages 49, 85 of Vol.2) 2 DATE/TIME button (Pages 49, 85 of Vol.2) START/ PHOTO... -
Page 24: Preparation
Preparation Recharging the battery Recharging ■ The battery does not come ready charged when Charging time and available recording time the camera is purchased. Charge the battery (Approx.) before use. Maximum Battery Voltage/ Charging It is recommended that you keep one extra battery continuous model capacity... - Page 25 ■ Remaining battery capacity displays • Keep metal objects (such as necklaces and When using Panasonic-manufactured batteries hairpins) away from the battery. compatible with this product, the remaining battery Short-circuiting may occur across the capacity is displayed in minutes. terminals, causing the battery to heat up, 90min.
-
Page 26: Power Sources
Power sources Using the battery Installation Removal Insert the battery until it clicks into place. Set the POWER switch to OFF, and check that the mode lamp is off. Remove the battery while pressing the battery release button. • The lock can be released and the battery removed. -
Page 27: Adjusting The Grip Belt
Adjusting the grip belt Adjust the grip belt to suit your hand, and hold it • When loosening the belt, please take care so correctly. that the belt does not come away from the grip belt stopper. Open the belt cover and loosen the belt. Grip belt stopper Work your hand through the grip belt and fasten the belt. -
Page 28: Detaching And Attaching The Lens Hood
Detaching and attaching the lens hood Detaching the lens hood Attaching the lens hood • Turn the lens hood counterclockwise to detach it. • Orient the lens hood with the arrow mark on top, rotate the hood counterclockwise (approx. 14˚) to align the arrow with the one on the camera, and then slide the hood onto the camera. -
Page 29: The Remote Control
The remote control Insert the battery Remote control usable range Push the catch in the direction shown by The distance between the remote control and the arrow ① to remove the holder. unit’s remote control sensor: Within approx. 5 m Angle: Approximately 15°... -
Page 30: Basic Operations
Basic Operations Turn on/off the camera While pressing the lock release button, move the Mode lamp POWER switch to ON or OFF. CAMERA Turn on the camera: The mode lamp (CAMERA) lights red (camera mode), and the camera enters recording standby PHOTO IN AVCHD mode. -
Page 31: Using The Cursor Button
Using the cursor button This unit has a cursor button for selecting menu items and performing play back operations. Basic operations The following describes operations on the menu screen and selection of files on the thumbnail view screen etc. ENTER cursor button Select an item by pressing the up, down, right, or left button of the cursor button and enter... -
Page 32: Using The Viewfinder
Using the viewfinder This camera has a viewfinder which uses a Adjust the diopter adjustment lever until retractable 69 mm (2.7 inch) LCD. images in the viewfinder are clear. • The brightness and hue may differ between the images appearing on the viewfinder (LCD monitor) and those displayed on a TV monitor. -
Page 33: Using As A Lcd Monitor
Using as a LCD monitor Emphasizing outlines Open the eye piece to use as a LCD monitor. When EVF DTL is assigned to one of the USER buttons 1 to 3, you can press that button to Opening the eye piece emphasize the outlines of images in the viewfinder Open the eye piece while pressing the lock button and make focus alignment easier. -
Page 34: Adjusting The Screen Display
Using the viewfinder (continued) Adjusting the screen display • The viewfinder display can be in color or black and white. (See the setup menus, SW&DISP Set the POWER switch to ON. (Page E-29) SETUP screen, EVF COLOR.) The resolution is the same for both of them. Press the MENU button. -
Page 35: Setting The Calendar
Setting the calendar The CLOCK SET value is recorded in the contents Setting the clock (clip), and affects the sequence of playback of the Set the POWER switch to ON. (Page E-29) thumbnails. The “SET DATE AND TIME” message appears when you turn on the camera for the first Press the MENU button. -
Page 36: Basic Shooting Operations
Basic shooting operations Preparing for recording • Do not perform any of the following operations while the SD Memory Card ACCESS lamp is Set the camera’s power switch to OFF. flashing. (Page E-29) Performing these operations may damage the • Check that the mode lamp is off. -
Page 37: Shooting In Auto Mode
Shooting in auto mode Select the recording mode (AVCHD mode or DV mode) with the MODE switch. Turn the POWER switch to ON. (Page E-29) • Check that the mode lamp (CAMERA) is lighted red. Switch the AUTO/MANUAL switch to AUTO Mode lamp to select auto mode. -
Page 38: Checking Photos Taken (Rec Check
Basic shooting operations (continued) Checking photos taken (REC CHECK) • The images shot from when shooting starts until it is stopped are recorded as one clip. Press the REC CHECK/PHOTO SHOT button • When recording is paused after a short period, (Page E-19) while in recording standby mode. -
Page 39: Using The Zoom Function
Using the zoom function This camera has a 12 x optical zoom function. Use • With the HANDLE ZOOM item in the setting the zoom lever, handle zoom lever or assign zoom menu SW&DISP SETUP screen, you can reset functions to the FOCUS ring to perform zoom the speed allocated to the handle zoom switch operations. -
Page 40: Using The Setup Menus
Using the setup menus Use the setup menus to change the settings to Select the item you want to set with the up suit the scenes you are shooting or what you are or down button of the cursor button, and recording. -
Page 41: Using The Function Menu
Using the Function Menu Press the ENTER button when the item has been set. The Function Menu is an expanded function of the setting menu that allows you to configure WHITE Press the FUNC/EXEC button to close the BALANCE, SYNCRO SCAN, SELF TIMER, Function Menu. -
Page 42: Setup Menu Structure
Setup menu structure CAMERA mode menu Video recording menu SCENE FILE FILE SELECT (Page 101 of Vol.2) LOAD/SAVE/INIT DETAIL LEVEL V DETAIL LEVEL DETAIL CORING CHROMA LEVEL CHROMA PHASE COLOR TEMP MASTER PED A.IRIS LEVEL GAMMA KNEE MATRIX SKIN TONE DTL RECORD SETUP REC FORMAT (Page 103 of Vol.2) -
Page 43: Photo Mode Menu
PHOTO mode menu DV IN mode menu Photo recording menu DV IN menu CAMERA SETUP I.EXPOSURE RECORD SETUP 1394 TC REGEN (Page 102 of Vol.2) DETAIL LEVEL (Page 103 of Vol.2) CHROMA LEVEL TC PRESET A.IRIS LEVEL 1394 UB REGEN SKIN TONE DTL UB MODE UB PRESET... -
Page 44: Pb Mode Menu
Setup menu structure (continued) PB mode menu Clip playback menu Photo playback menu (AVCHD mode only) PLAY SETUP REPEAT PLAY PHOTO SETUP SCENE PROTECT (Page 106 of Vol.2) RESUME PLAY (Page 106 of Vol.2) DPOF SET DELETE OPERATION CLIP PROTECT (Page 106 of Vol.2) (AVCHD mode only) SW&DISP SETUP... -
Page 45: Specifications
Specifications [General] Shutter speed settings CAMERA mode: Supply voltage: DC 7.2 V Preset (when the battery is used) 50i/50P mode: DC 7.3 V 1/50, 1/60, 1/120, 1/250, 1/500, 1/1000, (when the AC adaptor is used) 1/2000 seconds Power consumption: 25P mode: 1/25, 1/50, 1/60, 1/120, 1/250, 1/500, Recording time: 11 W 1/1000, 1/2000 seconds... - Page 46 Specifications (continued) DV mode: DV Mode: Recording Format Video signal DV format compliant 576/50i File format Video output AVI Type2 Analog component output × 3 (BNC) Recording media Y: 1.0 V [p-p], 75 Ω SD Memory Card: : 0.7 V [p-p], 75 Ω 512 MB, 1 GB, 2 GB Composite output ×...
- Page 47 [Other inputs/outputs] Card reader function (no copyright protection support) USB Type B connector USB 2.0-compliant, PictBridge-compatible CAM REMOTE Super mini jack (2.5 mm diameter) (ZOOM S/S) Mini jack (3.5 mm diameter) (FOCUS, IRIS) DV (DV mode only) 6-pin (IEEE1394 format compliant), digital input/ output [Viewfinder] LCD monitor...
-
Page 48: Index
Index Number 1394 TC preset mode ........73 Nonlinear editing ..........53 AC adaptor ......... E-7, E-23, E-25 Optical Image Stabilizer ......11, 60 Aperture ............6, 55 Audio input ..........18, 68 Auto focus ........... 5, 54 Photo Auto mode ............E-36 Playback .......... - Page 49 Tally lamp .............E-29 Thumbnail ..........35, 79 THUMBNAIL menu OPERATION menu ....... 114 OTHER FUNCTIONS menu ....114 THUMBNAIL menu ........ 114 Tripod receptacle ..........E-9 USER button ..........12, 61 Using scene files ........21, 71 Video compatibility........... 41 VIDEO OUT terminal ......... 52, 89 Viewfinder .............E-31 White balance ..........
- Page 50 Information for Users on Collection and Disposal of Old Equipment and used Batteries These symbols on the products, packaging, and/or accompanying documents mean that used electrical and electronic products and batteries should not be mixed with general household waste. For proper treatment, recovery and recycling of old products and used batteries, please take them to applicable collection points, in accordance with your national legislation and the Directives 2002/96/EC and 2006/66/EC.
- Page 51 Memo E-50...