Samsung DSR 9500A Instructions For Use Manual
Digital satellite receiver
Hide thumbs
Also See for DSR 9500A:
- Instructions for use manual (92 pages) ,
- Instructions for use manual (38 pages)

Related Manuals for Samsung DSR 9500A


Summary of Contents for Samsung DSR 9500A
- Page 1 DSR 9500A FTA, CI, EM VIA, VIA CI Instructions for use “REV 1.0” DIGITAL SATELLITE RECEIVER MF68-00247A...
-
Page 2: Safety Instructions
SAFETY INSTRUCTIONS This STB has been manufactured to satisfy international safety standards. Please read the following recommended safety precautions carefully. MAINS SUPPLY AC 100-240V ~, 50/60Hz OVERLOADING Do not overload wall outlets, extension cords or adapters as this can result in fire or electrical shock. LIQUIDS Keep liquids away from the STB. -
Page 3: Table Of Contents
4000 PROGRAMMABLE CHANNELS Connecting Your DSR 9500A......4 SOFTWARE DOWNLOAD VIA SATELLITE & PC ADVANCED ELECTRONIC PROGRAM GUIDE Description . - Page 4 5. CONNECTING YOUR VCR To connect a VCR or DVD player, the DSR 9500A has been provided with SCART at the rear marked "AV2". Using a SCART connector, the VCR or DVD player can be connected to the receiver.
-
Page 5: Description
Slot for Viaccess smartcard. 9. VIDEO, AUDIO R/L These RCA connectors are used to connect any external (For models DSR 9500A EM VIA, DSR 9500A VIA CI) video and audio. 10. ANT.IN This is used to connect your local RF channels to your TV through Loop. -
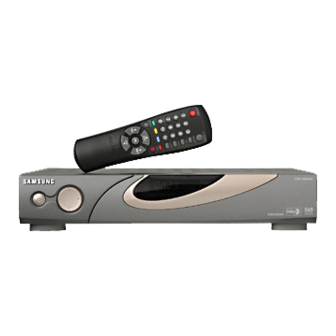
Page 6: Remote Control Unit
DESCRIPTION DESCRIPTION 5. MUTE This key is used to toggle between normal & muted audio. Remote Control Unit 6. FAV Use the key to switch between favorite lists. 7. EPG Electronic Program Guide button displays the TV/Radio Program guide. POWER TV/RADIO 8. -
Page 7: Basic Functions
BASIC FUNCTION BASIC FUNCTIONS 3. Select Soundtrack 1. Display Screen Before you can view the television program, you must perform the installation. Press Yellow ( ) key to see Therefore you will see only menu images at first. the soundtrack list. After the television channels have been programmed, you will see the following Press key to select one. - Page 8 BASIC FUNCTION BASIC FUNCTIONS 5.1 Service Favorites 6. Program Information Press the Green ( ) key on the control unit to select EPG-Electronic Program Guide the Favorites list. The electronic program guide gives you a channel list for the channels. Use the keys to select a favorite group that you want.
-
Page 9: Operating The Receiver
OPERATING THE RECEIVER 8. Teletext OSD Main Menu When the current broadcasting program provides After installing your antenna system and DSR 9500A with appropriate connectors. Teletext OSD, press the Green ( ) key twice to see the current Teletext OSD list. -
Page 10: Lnb Setting
OPERATING THE RECEIVER OPERATING THE RECEIVER 1.1 LNB Setting Select from Menu Mode: "User" mode : Enables control of basic positioner function You can select the satellite and LNB setting conditions recommended for beginners. General user uses “User” mode. to execute channel search and you can alter the settings "Installer"... -
Page 11: User Mode
1.5 Manual Scanning To set the Value of Date and Time, use the keys to change the value. To tune-in new channels and weak signals, the DSR 9500A has been provided with Use the keys to change position. the option "Manual Scanning" where the channel data can be entered by the user. -
Page 12: Channel Organising
OPERATING THE RECEIVER OPERATING THE RECEIVER Select the FEC(Forward Error Correction)of the transponder 2. Channel Organising you want to find. You can select the value of 1/2, 2/3, 3/4, 5/6, 7/8 or Auto. The "Channel Organising" menu has seven Select the polarization of the transponder you want to find. functions: (Horizontal/Vertical/Circular Left/Circular Right) The "Channel Organising"... - Page 13 OPERATING THE RECEIVER OPERATING THE RECEIVER 2.3 Delete Channel 2.7 Move & Edit Channel Select the desired channel you want to delete by pressing Red ( ) key. Select the desired list with keys. Press key for confirmation. Select channel by pressing Red ( ) key.
-
Page 14: Parental Lock
To change the PIN code, select the second option "Change PIN Code". This "Parental Lock" feature sets viewing restrictions and prevents unauthorized access to your DSR 9500A This will take you to the following menu: through the PIN (Personal Identification Number), In this option, you need to enter the current PIN which is a 4 digit number. -
Page 15: System Setup
OPERATING THE RECEIVER OPERATING THE RECEIVER 4. System Setup 4.3 Media Settings You can set the various media settings you want. This option enables you to change the factory Place the cursor on this sub menu and press preset system settings as per your requirements. Select the TV system : PAL, SECAM. - Page 16 6. Embedded Viaccess If you press key, the update starts right away. (Only for DSR 9500A VIA CI, DSR 9500A EM VIA) In case update is impossible, you get this message "You can’t update software!" Or in case you don’t 1.
-
Page 17: Manual Scanning
TROUBLESHOOTING TECHNICAL SPECIFICATIONS 1. User section Problem Possible cause Solution of the problem 4000 programmable channels, 7 segment LED display, software download via satellite & PC, auto and manual scan facility, No display LED on Power cord Power cord plug in correctly advanced Electronic Program Guide, channel organizing (programmable), the front panel;... -
Page 18: Common Interface
MPEG 1 ISO/TEC 11172~3 layer I & II Audio mode: mono, dual, stereo, joint stereo Common Interface Sampling frequency: 32, 44.1, 48 kHz (For models DSR 9500A CI, DSR 9500A VIA CI) Module Type: PCMCIA TYPE II x 2 A/V output Available CAM: VIACCESS, IRDETO, NAGRAVISION, TV SCART: VIDEO (CVBS, RGB), AUDIO R&L...