
Related Manuals for Fosgate Audionics FAP T1

Summary of Contents for Fosgate Audionics FAP T1
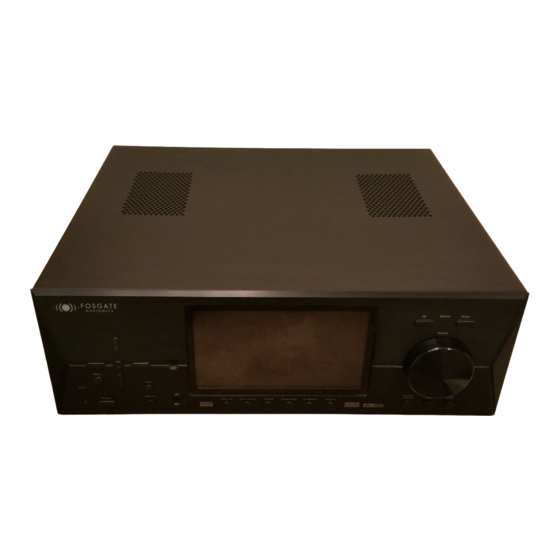
- Page 1 T H E A T E R A U D I O 7 . 1 C H A N N E L P R E A M P / P R O C E S S O R FAP T1...
-
Page 2: Introduction
Fosgate Audionics customer support is second to none—a result of years of experience in designing, building and marketing sophisticated multi-channel audio products. We know home theater and multi-channel sound inside and out. Record your FAP T1's serial number and date of purchase here. The serial number is located on the back panel. Serial Number:... -
Page 3: Table Of Contents
Theater Compensation ........28 Front Panel ............8 Multichannel Source Playback ......29 Remote Control ..........9 Analog Bass Management......29 Rear Panel ............10 Setting the FAP T1 Display Brightness....29 Setting the OSD Time Out ......29 INSTALLATION CONSIDERATIONS ....12 Sleep Timer ..........30 Multi–Zone Operation ........30 INSTALLATION..........12-17 Remote Control Setup and Operation....31... -
Page 4: Safety
NOTICE – IMPORTANT SAFETY INFORMATION – PLEASE READ FIRST Safety • Power-Cord Protection – Power-supply cords should be routed so that they are unlikely to be walked on or pinched by items placed upon or against them, paying particular attention to cords where they enter a plug, or a convenience receptacle, and the point where they exit from the unit. -
Page 5: Safety
Canada, part 1 of the Canadian Electrical Code) provides information is not meant for use with the FAP T1. Should the power cord with respect to proper grounding of the mast and supporting structure,... -
Page 6: Contents Of Carton
• AC Power Cord The FAP T1 is heavy and has many front mounted controls and • FM Antenna rear panel connectors, take care when lifting it so as not to cause •... -
Page 7: Additional Information
Pro Logic II Music mode. In addition, More detailed information about the various surround processing when the Cirrus Extra Surround processing option is engaged for a options contained in the FAP T1 can be found on the following 7.1 channel playback, these options remain engaged. websites: Panorama extends the front stereo image to the surround channels. -
Page 8: Front Panel
Menu mode. STANDBY mode. The STANDBY/MUTE indicator illuminates. – Used to select options while in Menu Mode. (Select) button While in STANDBY mode, the FAP T1 Display is turned off, – (Navigation) buttons Use these buttons to control functions are disabled, and all outputs to the main zone navigate through and change options while in Menu Mode. -
Page 9: Remote Control
When the FAP T1 is in Standby mode, pressing one of these buttons turns the unit on and selects that source as the current input. If the FAP T1 is already on, pressing one of these buttons selects that source as the new input. -
Page 10: Rear Panel
17 TONE button Press this button to select either the Treble or will be activated when the FAP T1 is turned on and should be used Bass for adjustment. Once the desired parameter is selected, for connections to power amplifiers for the main room speakers. - Page 11 The eighth jack of the FAP T1 Display. This can be selected to view on the FAP supplies the output to a powered subwoofer or external sub- T1 Display by using the Monitor button.
-
Page 12: Installation Considerations
When these jacks are not in use the protective cap should be replaced. • Do not plug the power cord into your FAP T1 until all other • When using an optical input or output jack, always use a connections have been made. -
Page 13: Connecting Audio Components
CD player. Later, you will con-figure the FAP T1 to use the device. Later, you will configure the FAP T1 to use the specific specific input that you have chosen. -
Page 14: Connecting Video Components
Composite: Connect the composite video output from the DVD the FAP T1 routes the video portion of the signal through its video player to the DVD video input jack on the rear of the FAP T1 using section. an RCA-type video cable. -
Page 15: Video Display
Composite: Connect the composite video input from the display to Analog Bass Management switch on the FAP T1's rear panel. If the composite video OUT jack on the rear of the FAP T1 using an your system uses all full range speakers, set. the switch in the OFF RCA-type video cable. -
Page 16: Fm Antenna
Connect a 3.5mm mono mini-plug between the DC Trigger MAIN jack on the rear panel of the FAP T1 and the low voltage trigger jack of the device to be controlled to enable remote turn-on of that component. -
Page 17: Installation
Installation Connecting an External Amplifier Connecting to an External Amplifier in a Second Zone (Zone 2) -
Page 18: System Setup
Navigating the Setup Menus IMPORTANT:When viewing static images such as on screen menus Setup of the FAP T1 can be performed from the front panel of the or video game images using a CRT-based projector, unit, or by using the remote control. Information is shown on the plasma display or direct-view CRT monitor or FAP T1 Display, or the On Screen Display (OSD). -
Page 19: Speaker Configuration
DTS, some Dolby Digital EX, and others) contain a special digital "flag" that tells the FAP T1 to switch to that surround 14.Press the button to select RETURN TO MAIN MENU. - Page 20 SPEAKER CONFIGURATION – Setup and Selection Surround left and right speakers You are now ready to configure the FAP T1 for your particular • Place these speakers so that their height is approximately loudspeaker system. Before proceeding please read the following 3 feet (1 meter) higher than that of the listener's ears if feasible.
- Page 21 FRONT speaker. The first step in configuring the FAP T1 to operate with your speaker system is to set the type, number and crossover frequencies The following options are available for each group of speakers: of your particular loudspeakers.
-
Page 22: Channel Calibration
40-46 inches (102-117cm)] with its microphone positioned vertically (pointing at the ceiling). Don't aim the microphone at When you select this function, the FAP T1's Test Tone will the speakers, as this will produce inaccurate results. automatically cycle every few seconds through all the speakers... - Page 23 Setting the speaker delay is crucial to the proper performance of any The PLII Music Parameter menu is used to adjust the Panorama, surround decoder component like the FAP T1. Your home theater Dimension and Center Width processing options when listening to system will not perform properly if this process is not completed.
-
Page 24: Multi-Zone
This menu controls the setting for your second zone (zone 2) and MULTI–ZONE mute function is ON or OFF. the output from the ZONE OUT jacks on the rear of the FAP T1. 9. Press the button to select VOLUME. -
Page 25: Operation
Make sure the unit is plugged in and the as the source input. Main Power switch on the rear panel of the FAP T1 is in the On position, as outlined in the "System Setup" section. To select a source input type: 1. -
Page 26: Changing The Surround Mode
TUNER OPERATION The FAP T1 Tuner can receive AM, FM and FM stereo broadcasts. Use the information on pages 6-7 to learn more about the avail- Up to 32 stations can be preset and accessed from the front panel able surround mode options. -
Page 27: Night Mode
CH/TUNE on the remote You can record from any input source available to the FAP T1 to scan continuously up or down the selected band. The when you have an audio or video recorder properly connected... -
Page 28: Channel Trim
"Channel Calibration" on page 22. Set the levels for the channel(s) Menu. up or down by the amount you normally trim them. The Main Menu appears on the FAP T1 Display and the OSD. The cursor should be pointing to INPUT CONFIG. THEATER COMPENSATION 2. -
Page 29: Multichannel Source Playback
Use this to set how long the On Screen Display (OSD) will remain 80Hz is still summed and sent to the subwoofer visible after a button is pushed or setting is changed on the FAP T1. output. To set the On Screen Display Time Out:... -
Page 30: Sleep Timer
MULTI-ZONE OPERATION of the distance between you and the second zone. The FAP T1 allows you to send a stereo signal to a remote second The Multi-zone volume level is unaffected by the VOL buttons zone. This signal must be amplified by an optional external power on the remote control or FAP T1 volume control. -
Page 31: Remote Control Setup And Operation
More than one setup code number may work with your device. In addition to the FAP T1 itself, the remote control can operate You should test the functions for each of the code numbers that up to seven other audio and video devices in your home work with your device to determine the best one. -
Page 32: Using The Remote Control
• If the FAP T1 is in Standby mode, powers up the unit. NOTE:During programming, the signal for POWER ON and POWER OFF is located on the MUTE button. For devices •... -
Page 33: Macro Buttons
To erase a Macro sequence: 2. On the FAP T1 remote, press the button that is to be taught the new command. 1. Press AUD and MUTE buttons simultaneously. The red LED The orange Status LED will begin to flash continuously. -
Page 34: Operation
Operation To erase a learned command from a button: To erase all the learned commands in one device mode: 1. Press the Source button and SEL buttons simultaneously 1. Press the Source button and SEL buttons simultaneously until the orange Status LED and the Device button turn on until the orange Status LED and the Device button turn on and remain lit. -
Page 35: Care & Maintenance
Change the batteries commands Remote set to different device Press the AUD button to make sure the remote is outputting FAP T1 codes Remote IR sensor is obscured Make certain the FAP T1 Remote Control IR Sensor is visible or connect a... -
Page 36: Setup Codes
Setup Codes The following tables contain the setup codes for most brands of audio and video components. CABLE TV (continued) TV (continued) Manufacturer/Brand Setup Code Number Manufacturer/Brand Setup Code Number Manufacturer/Brand Setup Code Number AMERICAST JCPENNY 004 008 024 030 065 101 TELERENT JERROLD 006 007... - Page 37 Setup Codes CD (continued) VCR (continued) Manufacturer/Brand Setup Code Number Manufacturer/Brand Setup Code Number Manufacturer/Brand Setup Code Number MEMOREX 001 010 014 031 034 040 017 021 DENON 053 072 101 134 139 REALISTIC 005 006 045 046 059 SANSUI MINOLTA 004 020 SHARP...
-
Page 38: Specifications
Specifications Preamplifier Analog Section FM Tuner Section Input Impedance 26kΩ Sensitivity Output Impedance (Main RCA) <600Ω 10dBµ typ. Rated Input 2.0V rms 50dB S/N 13dBµ typ. Maximum Input 3.0V rms S/N Ratio Rated Output (100kΩ load) 1.5V rms Mono 75dB typ. Minimum Load 5kΩ... -
Page 39: Connection Record Chart
Connection Record Chart Use this chart to record the settings and connections made from your system components to the FAP T1. VIDEO 1 VIDEO 2 VIDEO 3 Device Device Device Device Device Surr Mode Surr Mode Surr Mode Surr Mode... -
Page 40: Index
Index AM Antenna 16 FCC Information 5 Analog Bass Management 29 Features 8 Analog Bypass 26 Front Panel 8 Rear Panel 10 Remote Control 9 FM Antenna 16 Battery Installation 31 FM Mode 27 BYPASS 26 FM/AM 26 FRONT DISTANCE 23 C WIDTH (Center Width) 23 CENTER DISTANCE 23 Headphone Jack 8... - Page 41 Index T.MODE 10 P.SCAN 10 TEST 22 PANORAMA 23 Test Tone Function 22 PLII Music Parameter 23 THEATER COMPEN (Theater Compensation) 28 Power Control Connections 16 Trim 28 Power Cord 5 Troubleshooting 35 Power Connection 16 Tune Down 26 Preset Scan 9 Tune Up 26 Programming Remote 31 Tuner Operation 26...
- Page 42 Notes...
-
Page 43: Service Policy & Limited Warranty
Service Policy and Limited Warranty Rockford Corporation (Fosgate Audionics Division) offers a limited warranty on Fosgate Audionics products on the following terms: •Length of Warranty Five (5) years •What is Covered This warranty applies only to products sold to the original owner and is non-transferable. This warranty only applies to units sold in the continental United States. - Page 44 A Division of Rockford Corporation 546 SOUTH ROCKFORD DRIVE TEMPE, ARIZONA 85281 U.S.A. 1-866-777-7282 04/03 BM MAN-4559-B Printed in U.S.A.