
Related Manuals for Integra DTR-8.4


Summary of Contents for Integra DTR-8.4
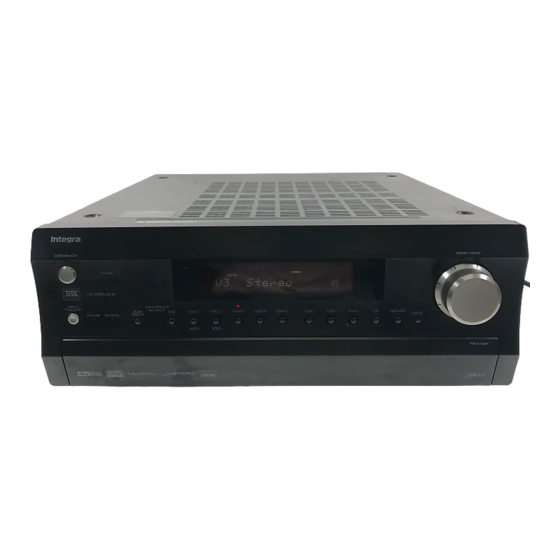
- Page 1 DTR-8.4_En.book Page 1 Thursday, October 16, 2003 11:09 AM AV Receiver DTR-8.4 Instruction Manual...
-
Page 2: Important Safety Instructions
DTR-8.4_En.book Page 2 Thursday, October 16, 2003 11:09 AM WARNING: TO REDUCE THE RISK OF FIRE OR ELECTRIC SHOCK, DO NOT EXPOSE THIS APPARATUS TO RAIN OR MOISTURE. CAUTION: TO REDUCE THE RISK OF ELECTRIC SHOCK, DO NOT REMOVE COVER (OR BACK). NO USER-SERVICEABLE PARTS INSIDE. -
Page 3: Precautions
1. Recording Copyright —Unless it’s for personal use only, recording copyrighted material is illegal with- out permission of the copyright holder. 2. AC Fuse — The AC fuse inside the DTR-8.4 is not user-serviceable. If you cannot turn on the DTR-8.4, contact your Integra/Onkyo dealer. -
Page 4: Table Of Contents
Specifying the TV System (Australian model only)...49 Changing the Input Source Display ...50 Basic Operation Selecting the Source AV Component...51 Muting the DTR-8.4 (remote controller only)...52 Using the Sleep Timer (remote controller only)...52 Setting the Display Brightness ...52 Using Headphones...52 Setting the Input Signal Format...53... - Page 5 Advanced Operation Using the Multichannel Input ... 63 Advanced Features Recording... 65 Net-Tune About Net-Tune... 75 Networking Your DTR-8.4... 76 Using Internet Radio ... 77 Advanced Playing Net-Tune Server Tracks ... 79 Features Music Server Settings... 81 Network Settings ... 82 Zone 2 Connecting Zone 2 ...
-
Page 6: Features
Niles is a registered trademark oh Niles Audio Corporation. Ethernet is a registered trademark of Xerox Corporation. * In catalogs and on packaging, the letter added to the end of the product name indicates the color of the DTR-8.4. Specifications and operation are the same regardless of color. -
Page 7: Supplied Accessories
DTR-8.4_En.book Page 7 Thursday, October 16, 2003 11:09 AM Thank you for purchasing an Integra/Onkyo AV Receiver. Please read this manual thoroughly before making connections and plugging in the unit. Following the instructions in this manual will enable you to obtain optimum performance and listening enjoyment from your new AV Receiver. -
Page 8: Before Using The Dtr-8.4
• You can set the transmission signal format to infrared (IR), or radio frequency (RF) for use with the optional RF Receiver. This is useful when, for example, the DTR-8.4 is installed in a rack or is not in line of sight of the remote controller. -
Page 9: Front & Rear Panels
Zone 2 Stereo For detailed information, refer to the pages in parenthesis. Standby/On button (38) This button is used to set the DTR-8.4 to On or Standby. Standby indicator (38) This indicator lights up when the DTR-8.4 is in Standby mode, and it flashes while a signal is being received from the remote controller. - Page 10 Master Volume control (51) This control is used to set the volume of the DTR-8.4 from 0 to 100. Direct/Pure Audio button (59) This button is used to select the Direct or Pure Audio listening modes.
- Page 11 DTR-8.4_En.book Page 11 Thursday, October 16, 2003 11:09 AM Front & Rear Panels —Continued Display For detailed information, refer to the pages in parenthesis. Audio input format indicators (53) These indicators show the audio input format for the currently selected input source. Listening mode &...
-
Page 12: Rear Panel
PRE OUT—SURR BACK/ZONE 2 (36, 84) These analog audio outputs can be used to feed the L/R surround back inputs on a separate power amp when the DTR-8.4 is used as a preamp, or to feed a power amp in Zone 2. COMPONENT... - Page 13 IR IN/OUT (85) If you want to use the remote controller to control the DTR-8.4 from Zone 2, or if the DTR-8.4 is installed in a cabinet and the line of sight between the DTR-8.4 and the remote controller is obstructed, a commercially available IR receiver can be con- nected to the IR IN.
-
Page 14: Remote Controller
DTR-8.4_En.book Page 14 Thursday, October 16, 2003 11:09 AM Remote Controller The DTR-8.4’s remote controller is a multipurpose device that can be used to control not just the DTR-8.4 but your other AV components as well. This section explains how it’s various operating modes can be used to control the DTR-8.4 and various... - Page 15 This button is used to access the onscreen setup menus (OSD) that appear on the TV. Muting button (52) This button is used to mute the DTR-8.4. This func- tion can be set only with the remote controller. All CH ST button (59) This button is used to select the All Ch Stereo listen- ing mode.
-
Page 16: Dvd Mode
DTR-8.4’s socket allows you to con- trol it with the DTR-8.4’s remote controller. You only need to point the remote controller at the DTR-8.4. See page 36 for connection information. To use the function, you must make an tion and an analog RCA/phono audio connection between the AV component and your DTR-8.4, even if... - Page 17 Setup/Guide button This button is used to access the DVD player’s onscreen setup menus. Muting button This button is used to mute the DTR-8.4. This func- tion can be set only with the remote controller. Play [ ] button This button is used to start DVD playback.
- Page 18 VOL button This button is used to set the volume of the DTR-8.4. Muting button This button is used to mute the DTR-8.4. This func- tion can be set only with the remote controller. Play [ ] button This button is used to start CD playback.
- Page 19 VOL button This button is used to set the volume of the DTR-8.4. Muting button This button is used to mute the DTR-8.4. This func- tion can be set only with the remote controller. . To Play [ ] button This button is used to start MiniDisc playback.
- Page 20 VOL button This button is used to set the volume of the DTR-8.4. Muting button This button is used to mute the DTR-8.4. This func- tion can be set only with the remote controller. Play [ ] button This button is used to start tape playback.
-
Page 21: About Home Theater
About Home Theater Enjoying Home Theater With the DTR-8.4’s superb functionality you can enjoy surround sound with a real sense of movement in your own home—just like being in a movie theater or concert hall. For best results with DVDs that feature THX Surround EX, use a THX-certified THX speaker system. -
Page 22: Connecting The Dtr-8.4
4. Front right speaker 60˚ 5. Surround left speaker Attaching the Speaker Labels Surround back right The DTR-8.4’s positive (+) speaker terminals are color- speaker coded for ease of identification. (The negative (–) speaker terminals are all black.) Speaker terminal Front left... -
Page 23: Connecting Your Speakers
Connecting a Powered Subwoofer Using a suitable cable, connect the DTR-8.4’s PRE OUT SUB output to the powered subwoofer’s input, as shown. If your subwoofer is unpowered and you’re using an external amp, connect the PRE OUT SUB output to the 5/8"... -
Page 24: Connecting Antennas
This chapter explains how to connect the supplied indoor FM antenna and AM loop antenna, and how to connect commercially available outdoor FM and AM antennas. The DTR-8.4 won’t pick up any radio signals without any antenna connected, so you must connect the antenna to use the tuner. - Page 25 DTR-8.4_En.book Page 25 Thursday, October 16, 2003 11:09 AM Connecting the DTR-8.4 —Continued Connecting an Outdoor FM Antenna If you cannot achieve good reception with the supplied indoor FM antenna, try a commercially available out- door FM antenna instead. Notes: •...
-
Page 26: Av Cables & Sockets
• Don’t connect the power cord until you’ve completed all audio and video connections. Optical Digital Inputs The DTR-8.4’s optical digital inputs have shutter-type covers that open when an optical plug is inserted, and close when it’s removed. Push plugs in all the way. -
Page 27: Connecting Your Tv Or Projector
AV components. Use the following section as a guide. Video Connection Formats Video equipment can be connected to the DTR-8.4 using the following video connection formats: composite video, S-Video, or component video, the latter offering the best picture quality. -
Page 28: Av Components
DTR-8.4’s DIGITAL IN COAX 1 to the coaxial out- put on your DVD player, as shown. • Use an optical digital audio cable to connect the DTR-8.4’s DIGITAL IN OPT 1, 2, 3, or 4 to the opti- cal output on your DVD player, as shown. DIGITAL... - Page 29 BACK DVD player Connecting a VCR for Playback You can play a video from a VCR via the DTR-8.4. Video Connections • Use an S-Video cable to connect the DTR-8.4’s S VIDEO VIDEO 1 IN to the S-Video output on your VCR, as shown.
- Page 30 Audio Connections • Use an optical digital audio cable to connect the DTR-8.4’s DIGITAL IN OPT 1, 2, 3, or 4 to the opti- cal output on your D-VHS VCR, as shown. • Use a coaxial digital audio cable to connect the DTR-8.4’s DIGITAL IN COAX 2 or 3 to the coaxial...
-
Page 31: Connecting A Vcr For Recording
S VIDEO VIDEO 1 OUT to an S-Video input on your recording VCR. Use another S-Video cable to connect the DTR-8.4’s S VIDEO VIDEO 3 IN to an S-Video output on your TV or playback VCR, as shown. • Use a composite video cable to connect the DTR-8.4’s VIDEO VIDEO 1 OUT to a composite video input on your recording VCR. -
Page 32: Connecting Other Video Sources
■ Using Coaxial or Optical Connections • Use a coaxial digital audio cable to connect the DTR-8.4’s DIGITAL IN COAX , 2, or 3 to the coaxial output on your video source, as shown. • Use an optical digital audio cable to connect the DTR-8.4’s DIGITAL IN OPT 3 to the optical output... - Page 33 Use an analog audio cable (RCA/phono) to connect the DTR-8.4’s AUDIO VIDEO 3 or 4 IN L/R inputs to the analog audio outputs on your video source, as shown. DIGITAL...
-
Page 34: Audio Components
DTR-8.4’s DIGITAL IN OPT 1 to the optical output on your CD player, as shown. • Use a coaxial digital audio cable to connect the DTR-8.4’s DIGITAL IN COAX 2, or 3 to the coaxial output on your CD player, as shown. DIGITAL... -
Page 35: Connecting A Turntable
■ Using Coaxial or Optical Connections (playback only) • Use a coaxial digital audio cable to connect the DTR-8.4’s DIGITAL IN COAX 2, or 3 to the coaxial output on your recorder, as shown. • Use an optical digital audio cable to connect the DTR-8.4’s DIGITAL IN OPT 2 to the optical output... -
Page 36: Connecting A Power Amp
DTR-8.4_En.book Page 36 Thursday, October 16, 2003 11:09 AM Connecting the DTR-8.4 —Continued Connecting a Power Amp If you want to use the DTR-8.4 as a preamp and connect an external power amp, for example, a multichannel power amp that’s more powerful than the DTR-8.4’s built-in power amp, you can connect it to the PRE OUT outputs. -
Page 37: Connecting The Power Cords Of Other Components
AV components that you intend to use with the DTR-8.4. These compo- nents can then be left turned on so that they turn on and off as and when the DTR-8.4 is turned on and set to Standby. AC OUTLETS... -
Page 38: Turning On The Dtr-8.4
Press the Standby/On button again to enter Standby. Note: Turning on the DTR-8.4 may cause a momentary power surge that might interfere with other electrical equipment on the same circuit. If this is a problem, plug the DTR-8.4 into a different branch circuit. -
Page 39: Basic Setup
This chapter explains the settings that you should make before using the DTR-8.4. About the Onscreen Setup Menus The onscreen setup menus (OSD) are used to configure the DTR-8.4. They appear on the TV connected to the DTR-8.4, and their large size makes them easy to use. -
Page 40: Speaker Settings
6 and 16 ohms. Press the [Setup] button. The setup menu closes. Notes: • This procedure can also be performed by using the DTR-8.4’s [Setup] button, [ tons, and [Enter] button. ] but- ] but- :6 ohms ] but-... - Page 41 DTR-8.4_En.book Page 41 Thursday, October 16, 2003 11:09 AM Basic Setup —Continued Speaker Configuration This section explains how to specify which speakers are connected and their sizes. For speakers with a cone diameter over 6-1/2 inches (16 cm), specify large, and for those with a diameter below this, specify small.
- Page 42 • This procedure can also be performed by using the DTR-8.4’s [Setup] button, [ tons, and [Enter] button. ] but- Crossover...
- Page 43 20 feet (6 meters), corrected values suitable for home theater use will be set automatically. • This procedure can also be performed by using the DTR-8.4’s [Setup] button, [ tons, and [Enter] button. Advanced Menu 1.Speaker Setup 1-2.Speaker Distance...
- Page 44 Notes: • The speakers cannot be calibrated while the output of the DTR-8.4 is muted, while a pair of headphones is connected, or when using the multichannel inputs. • Since the DTR-8.4 supports THX, the test tone is output at the standard level of 0 dB (absolute vol- ume setting 82).
-
Page 45: Input Setup
DTR-8.4_En.book Page 45 Thursday, October 16, 2003 11:09 AM Basic Setup —Continued Input Setup Digital Setup This section explains how to assign digital inputs to input sources. You only need to change these assign- ments if you connect a component to a digital input other than the default assignment listed in the following table. -
Page 46: Video Setup
DTR-8.4_En.book Page 46 Thursday, October 16, 2003 11:09 AM Basic Setup —Continued Video Setup This section explains how to assign the composite video/ S-Video inputs to input sources. You only need to change these settings if you connect a video component to a video input other than the default assignment listed in the following table, or if you want to enjoy audio and video from different sources. -
Page 47: Component Video Setup
DTR-8.4_En.book Page 47 Thursday, October 16, 2003 11:09 AM Basic Setup —Continued Component Video Setup This section explains how to assign the component video inputs to input sources. You only need to change this set- ting if you connect a video component to a component video input other than the default assignment listed in the following table, or if you want to output composite video or S-Video sources from the component video output. -
Page 48: Remote Setup
DTR-8.4’s remote controller interferes with other Inte- gra/Onkyo components located in the same room. Note: If you change the DTR-8.4’s remote control ID, be sure to select the same ID on the remote controller (page 49). The default ID for both the DTR-8.4 and remote control- ler is 1. -
Page 49: Specifying The Tv System (Australian Model Only)
Basic Setup —Continued Changing the Remote Controller’s Control ID This section explains how to change the remote control- ler’s ID. You may need to change this if the DTR-8.4’s remote controller interferes with other Integra/Onkyo components located in the same room. -
Page 50: Changing The Input Source Display
If you connect an Disc recorder to the DTR-8.4’s TAPE IN/OUT sockets, so that functions such as Auto Power On/Off work properly, you must change the input source display. This setting can only be changed on the DTR-8.4. ] but- Standby/On Standby Direct/... -
Page 51: Basic Operation
To adjust the volume, use the MASTER VOLUME control, or the remote controller’s [VOL] button. The volume can be set from 0 to 100. The DTR-8.4 is designed for home theater enjoyment. It has a wide volume range, allowing precise adjustment. -
Page 52: Muting The Dtr-8.4 (Remote Controller Only)
DTR-8.4 is set to Standby. Using the Sleep Timer (remote controller only) With the sleep timer you can set the DTR-8.4 so that it automatically turns off after a specified period. Press the scroll wheel, and then... -
Page 53: Setting The Input Signal Format
Note: • This procedure can also be performed by using the DTR-8.4’s input selector buttons and [Audio Selector] button. Fixing the Digital Input Format With this function you can set the digital inputs to accept only DTS, PCM, or both formats. -
Page 54: Using The Tuner
10 kHz steps for AM (0.05 MHz and 9 kHz respectively on some models). ■ Listening to Stereo FM Radio Stations When the DTR-8.4 is properly tuned to a radio station, the “ TUNED When the DTR-8.4 is properly tuned to a stereo FM radio station, the “FM STEREO”... - Page 55 DTR-8.4_En.book Page 55 Thursday, October 16, 2003 11:09 AM Basic Operation —Continued Selecting Presets You can select previously stored presets as follows. Standby/On Standby Direct/ Zone 2 ( Pure Audio Rec ( Audio Video 1 Video 2 Video 3 Video 4 Video 5 Tape Tuner...
-
Page 56: Listening Modes
Dolby Surround logo or TV programs that feature Dolby Surround. You can also use this mode with stereo movies or TV pro- grams and the DTR-8.4 will create a 5.1 surround mix from the 2-channel stereo. Dolby Pro Logic II Music Use this mode to add 5.1 surround to stereo sources such... - Page 57 DTR-8.4_En.book Page 57 Thursday, October 16, 2003 11:09 AM Basic Operation —Continued DTS Neo:6 This mode provides 6.1 channel playback from 2-chan- nel sources. It offers six full-bandwidth channels with excellent separation. There are two modes of operation: Cinema mode, which is suited to movies, and Music mode, which is for listening to music.
- Page 58 DTR-8.4_En.book Page 58 Thursday, October 16, 2003 11:09 AM Basic Operation —Continued The following table shows which listening modes can be used with which input signal formats. Input signal format Analog, PCM Source CD, TV, LD, VHS, MD, vinyl, radio, cassette, cable, satellite, etc.
- Page 59 If either button is illu- minated, press the illuminated button Remote first. controller Start playback on the selected AV component. On the DTR-8.4, use the [Direct/ Pure Audio], [Stereo], [Sur- DTR-8.4 Stereo Surround round], [THX], or DSP [ buttons to select a listening mode.
-
Page 60: Using The Digital Surround Modes
DTR-8.4_En.book Page 60 Thursday, October 16, 2003 11:09 AM Basic Operation —Continued Using the Digital Surround Modes This section explains functions that can be used when listening to Dolby Digital, and DTS formats. Surround Surround Dolby Digital/Dolby Digital EX If you are using surround back speakers, you can choose whether to use 6.1 channels or 5.1 channels to playback Dolby Digital material. -
Page 61: Display Indicators & Source Info
It works automatically and no user interven- tion is required. It appears on the display just to let you know that it’s working. It’s unaffected by the DTR-8.4’s volume control. Displaying Source Information You can display various DTR-8.4... -
Page 62: Adjusting The Volume Of Individual Speakers
(see page 69). • When the listening mode is THX, the default setting is On. When the DTR-8.4 is set to Standby, it returns to the default setting. • When the listening mode is not THX, the default set- ting is Off. -
Page 63: Advanced Operation Using The Multichannel Input
No: Not assigned to multichannel analog input. Press the [Setup] button. The setup menu closes. Note: • This procedure can also be performed by using the DTR-8.4’s [Setup] button, [ tons, and [Enter] button. ] but- ] but- ] but- ] but-... - Page 64 The volume can be set from 0 to 100. Notes: • This procedure can also be performed by using the DTR-8.4’s input selector buttons and [Audio Selector] button. • You can only use the Direct and Pure Audio listening modes with the multichannel input. If another listen- ing mode is being used when the multichannel input is selected, that listening mode is cancelled.
-
Page 65: Recording
DTR-8.4_En.book Page 65 Thursday, October 16, 2003 11:09 AM Advanced Operation —Continued Recording This section explains how to record the current input source, how to record an input source while listening or watching another input source, and how to record from separate audio and video sources. - Page 66 Prepare your CD player and cam- corder for playback, and your VCR for recording. Press the [Rec Out] button repeatedly until “Rec Sel: DTR-8.4 Rec Out SOURCE” appears on the dis- play. Audio from the CD player and video from the camcorder can now be recorded by the VCR connected to the VIDEO 1 OUT outputs.
-
Page 67: Assigning Listening Modes To Input Sources
DTR-8.4_En.book Page 67 Thursday, October 16, 2003 11:09 AM Advanced Setup Assigning Listening Modes to Input Sources You can assign a listening mode to an each input source so that it’s selected automatically each time you select that input source. This is useful when you regularly use, say, the Dolby Digital listening mode with your DVD player. -
Page 68: Advanced Assigning The A & B 12V Trigger Outputs
• You can select other listening modes during playback (see page 59), however, the listening mode assigned here will be resumed after the DTR-8.4 has been set to Standby. Assigning the A & B 12V Trigger Outputs This section explains how to assign input sources to the 12V TRIGGER OUT A and B outputs. - Page 69 • This function cannot be used with the multichannel input. ■ b. Relative Delay With Integra/Onkyo’s unique Enhanced Spatial Posi- tioning Algorithm you can fine-tune the sound field by delaying the signals to all speakers in 0.5 ms steps from –4.0 ms to +6.0 ms (default is 0 ms).
- Page 70 DTR-8.4_En.book Page 70 Thursday, October 16, 2003 11:09 AM Advanced Setup —Continued 3-5. LFE Level ■ a. Dolby Digital With this setting you can adjust the level of the LFE (Low Frequency Effects) channel for Dolby Digital sources in 1 dB steps from –10 dB to 0 dB (default is 0 dB).
- Page 71 DTR-8.4_En.book Page 71 Thursday, October 16, 2003 11:09 AM Advanced Setup —Continued 3-8. Surround These settings are for the surround sound modes. ■ a. Surr Mode (Analog/PCM) This setting determines the default surround format to be used with analog and PCM input signals. The available options are: Pro Logic II Movie (default), Pro Logic II Music, Neo:6 Cinema, and Neo:6 Music.
-
Page 72: Setting Preferences
■ b. Muting Level This setting determines the volume level while the DTR-8.4 is muted (see page 52). It can be set to – ∞ dB ] but- (default) or between –50 dB and –10 dB in 10 dB steps. -
Page 73: Osd Setup
DTR-8.4_En.book Page 73 Thursday, October 16, 2003 11:09 AM Advanced Setup —Continued 4-3. OSD Setup ■ a. Background Color With this preference you can select a background color for the onscreen setup menus (OSD). The available col- ors are: Blue 1, Blue 2, Green 1, Green 2, Magenta, Red 1, or Red 2. -
Page 74: Using Intellivolume
Press the [Setup] button. The setup menu closes. Note: • This procedure can also be performed by using the DTR-8.4’s input selector buttons, [Setup] button, ] buttons, and [Enter] button. Using IntelliVolume With the IntelliVolume function you can specify an input level for each input source. -
Page 75: About Net-Tune
DTR-8.4_En.book Page 75 Thursday, October 16, 2003 11:09 AM Net-Tune About Net-Tune The DTR-8.4 can be used as a Net-Tune client on a stan- dard Ethernet network, allowing you to play music (MP3, WAV) stored on your network audio server through the DTR-8.4. -
Page 76: Networking Your Dtr-8.4
82. Networking Your DTR-8.4 To connect the DTR-8.4 to your Ethernet network, plug one end of a CAT5 Ethernet cable into the ETHERNET (Net- Tune) port, and plug the other end into a LAN port on your router or switch. -
Page 77: Using Internet Radio
Using Internet Radio This section explains how to use Internet radio. You can select stations by genre, location, or language. To use Internet radio, you must connect the DTR-8.4 to a network with Internet access (see page 75). 3, 4, 6... - Page 78 IRD (Internet Radio). Use the remote controller’s [CH/ Disc] button to select the preset. On the DTR-8.4, use the Preset presets. The station name is displayed for sev- eral seconds, and then the buffering progress is displayed.
-
Page 79: Features Playing Net-Tune Server Tracks
] but- Notes: • When you connect the DTR-8.4 to a network for the very first time, it connects to the first network audio server it finds. If you’re using several servers, use the Select Server setting to select another server (see page 81). - Page 80 • If the message “Disconnected” appears, this means that the DTR-8.4 cannot connect to the network audio server. In this case, check the network audio server, and DTR-8.4 connections. It may be that the DTR-8.4 cannot find the network audio server that it used last...
-
Page 81: Music Server Settings
• This procedure can also be performed by using the DTR-8.4’s input selector buttons, [Setup] button, • The track information display is not affected by the Display Position setting on page 73. -
Page 82: Network Settings
DTR-8.4’s network settings. If your router’s DHCP server is enabled, by default the DTR-8.4 is set use DHCP to configure itself automati- cally (i.e., the DHCP/AUTO IP setting is On), so you don’t need to change any of the settings on the “5. - Page 83 On a Net-Tune network, the network audio server is the server and the DTR-8.4 is the client. ■ a. Client Name You can check the DTR-8.4’s client name. This name is preset at the factory and cannot be changed. ■ b. Wakeup on LAN This setting determines whether or not the DTR-8.4...
-
Page 84: Zone
DTR-8.4’s AUDIO ZONE 2 OUT L/R outputs to ana- log audio inputs on your receiver/integrated amp. • Use a composite video cable to connect the DTR-8.4’s VIDEO ZONE 2 OUT to a composite video input on your Zone 2 TV. -
Page 85: Using The Remote Control In Zone 2
DTR-8.4_En.book Page 85 Thursday, October 16, 2003 11:09 AM Zone 2 —Continued Using the 12V Trigger While Zone 2 is active on the DTR-8.4, the ZONE 2 12V TRIGGER OUT outputs 12 volts (100 milliamperes max). By connecting this to the 12-volt trigger input on,... -
Page 86: Setting The Surr Back/Zone 2 Outputs
(i.e., Dolby Digital EX, DTS-ES, and THX Surround EX) are not avail- able. • This procedure can also be performed by using the DTR-8.4’s [Setup] button, [ tons, and [Enter] button. ] but- ] but-... -
Page 87: Controlling Zone 2
Notes: • If the Sleep function has been set, any Zone 2 compo- nent will turn off along with the DTR-8.4 when the specified sleep time expires. To use the Sleep function with Zone 2 only, set the Sleep function and then set the DTR-8.4 to Standby. -
Page 88: Using The Remote Controller With Other Components
DTR-8.4_En.book Page 88 Thursday, October 16, 2003 11:09 AM Using the Remote Controller with Other Components You can use the DTR-8.4’s remote controller to control your other AV components, including those made by other manufacturers. To do this you can: •... -
Page 89: Remote Control Codes
DVD (DVD player) Manufacturer Control code Aiwa 5010 Apex 5015, 5016 Denon 5017, 5020 5003 Hitachi 5009 Integra 5001, 5002 Integra Research 5001, 5002 5023 Kenwood 5017 Magnavox 5004 Marantz 5025, 5026 Mitsubishi 5005 Onkyo 5001, 5002 Panasonic 5011, 5017, 5020... - Page 90 DTR-8.4_En.book Page 90 Thursday, October 16, 2003 11:09 AM Using the Remote Controller with Other Components —Continued Manufacturer Control code Akai 1002 Amtron 1009 Anam National 1003, 1009 1004, 1005, 1006 Audiovox 1009 Bell & Howell 1010, 1017 Celebrity 1002 Citizen 1004, 1006, 1009, 1017 Colortyme...
-
Page 91: Controlling A Satellite Receiver
[On], [Standby] Standby [CH/Disc] Select satellite channels ] Select menu items [Enter] Confirm selection Number buttons Enter numbers The following buttons control the DTR-8.4. [VOL] Adjust the DTR-8.4 volume [Muting] Mute the DTR-8.4 Controlling a VCR Standby Scroll wheel Mode CH/Disc + –... -
Page 92: Controlling A Tv
*: Buttons marked with an asterisk can always be used to con- trol a TV regardless of the currently selected remote control- ler mode. These buttons do not work with the additional TV modes. The following buttons control the DTR-8.4. [VOL] Adjust the DTR-8.4 volume [Muting] Mute the DTR-8.4... -
Page 93: Learning Commands From Another Remote Controller
[Light], [Custom], [Macro], [Mode], [Input], [Zone 2], and the scroll wheel button. • The DTR-8.4’s remote controller can learn a total of 150 commands. However, the commands of some remote controllers may use a lot of memory, in which case, this total will be reduced. -
Page 94: Using Macros
DTR-8.4: 1. Press the scroll wheel, (to select AMP mode). 2. Press the [On] button (to turn on the DTR-8.4). 3. Roll the scroll wheel to select CD (to select the CD remote controller mode and the CD input source). - Page 95 DTR-8.4_En.book Page 95 Thursday, October 16, 2003 11:09 AM Using the Remote Controller with Other Components —Continued Running Macros Programmed macros can be run as follows. Press the [Macro] button. Roll the scroll wheel to select the macro’s number, and then press the scroll wheel.
-
Page 96: Editing Remote Controller Modes
DTR-8.4_En.book Page 96 Thursday, October 16, 2003 11:09 AM Using the Remote Controller with Other Components —Continued Editing Remote Controller Modes Adding New Remote Controller Modes You can add additional modes (DVD, TV, VCR, CBL, SAT) to the remote controller. This is useful if, for exam- ple, you have several DVD players or TVs. -
Page 97: Deleting Remote Controller Modes
DTR-8.4_En.book Page 97 Thursday, October 16, 2003 11:09 AM Using the Remote Controller with Other Components —Continued Deleting Remote Controller Modes You can delete remote controller modes that you don’t need, such as modes for components that you don’t have. The AMP mode cannot be deleted. -
Page 98: Changing The Remote Controller's Transmission Signal Format (Ir/Rf)
RF receiver to pick up commands from the remote controller, which are then fed to the DTR-8.4 via its IR IN socket. For this to work, you must assign the same ID and channel to the remote controller and RF receiver. -
Page 99: Others Troubleshooting
DTR-8.4_En.book Page 99 Thursday, October 16, 2003 11:09 AM Troubleshooting If you have any trouble using your DTR-8.4, look for a solution in this section. If you can’t resolve the issue yourself, contact your Integra/Onkyo dealer. Power Can’t turn on the DTR-8.4? •... - Page 100 • With some CD and LD players, you won’t be able to playback DTS material properly even though your player is connected to a digital input on the DTR-8.4. This is usually because the DTS bitstream has been processed (e.g., output level, sampling rate, or fre- quency response changed) and the DTR-8.4 doesn’t...
- Page 101 • Make sure that the DTR-8.4 is not subjected to direct sunshine or inverter-type fluorescent lights. Relocate if necessary. • If the DTR-8.4 is installed in a rack or cabinet with colored-glass doors, the remote controller may not work reliably when the doors are closed.
- Page 102 five seconds, and then plug it back in again. To reset the DTR-8.4 to its factory defaults, turn it on and, while holding down the [Video 1] button, press the [Standby/On] button. When the reset is complete, “CLEAR”...
-
Page 103: Specifications
DTR-8.4_En.book Page 103 Thursday, October 16, 2003 11:09 AM Specifications Amplifier Section 110 W (8 Ω , 20 Hz–20 kHz, FTC) Power output: All channels: (American Model) 150 W (6 Ω , 1 kHz, DIN) (Australian model) 2 x 280 W (3 Ω , front) Dynamic power: 2 x 220 W (4 Ω... - Page 104 DTR-8.4_En.book Page 104 Thursday, October 16, 2003 11:09 AM Integra Division of ONKYO U.S.A. CORPORATION 18 park Way, Upper Saddle River, N.J. 07458, U.S.A. Tel: 201-785-2600 Fax: 201-785-2650 http://www.integrahometheater.com Integra Division of ONKYO CORPORATION Sales & Product Planning Div.: 2-1, Nisshin-cho, Neyagawa-shi, OSAKA 572-8540, JAPAN...
-
Page 105: Quick Guide
DTR-8.4 • This guide shows you how to connect your speakers and DVD player and enjoy 7.1 surround sound. • For full details on using the DTR-8.4, refer to the main instruction manual. Center speaker This speaker enhances the front left... -
Page 106: Connecting The Speaker Cables
Quick Guide.fm Page 2 Thursday, October 16, 2003 9:30 AM Attaching the Speaker Labels The DTR-8.4’s positive (+) speaker terminals are color- coded for ease of identification. (The negative (–) speaker terminals are all black.) Speaker terminal Color Front left... -
Page 107: Connecting A Tv
DVD player, as shown. Use an optical digital audio cable to connect the DTR-8.4’s DIGITAL IN OPT 1, 2, 3, or 4 to the optical output on your DVD player, as shown. Initially, the COAX1 digital input is assigned to the DVD input source. -
Page 108: Playing A Dvd
Quick Guide.fm Page 4 Thursday, October 16, 2003 9:30 AM Turn on your DVD player and TV. Select the appropriate input on your TV. Select the input to which the DTR-8.4 is connected. Select the DVD input source. Roll the scroll wheel to select the DVD input source. - Page 109 • This guide explains how to get started quickly with Net-Tune. • The DTR-8.4/7.4 can be used as a Net-Tune client on a standard Ethernet network, allowing you to play the music (MP3, WAV) stored on your network audio server through the DTR-8.4/7.4. If your network is connected to the Internet, you can also tune into Internet radio stations.