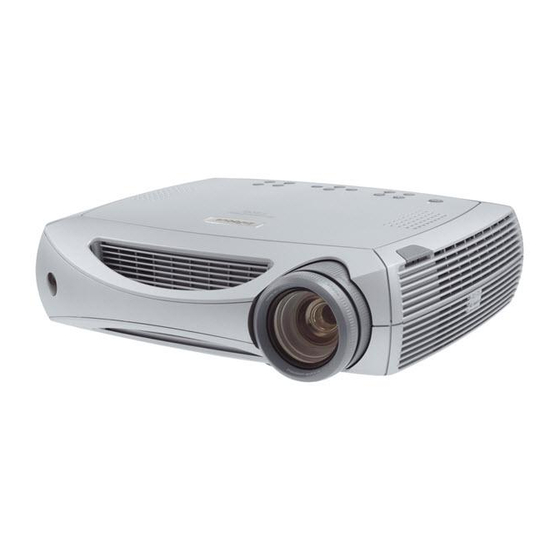
InFocus ScreenPlay 7205 User Manual
Infocus user's guide projector screenplay 7205
Hide thumbs
Also See for ScreenPlay 7205:
- Service manual (73 pages) ,
- User manual (41 pages) ,
- Benutzerhandbuch (41 pages)

Related Manuals for InFocus ScreenPlay 7205


Summary of Contents for InFocus ScreenPlay 7205
- Page 1 ScreenPlay 7205 User’s Guide [ English • Français • Deutsch • Español • Italiano • Norsk ]...
- Page 2 Cet appareil numérique de la classe B est conforme à la norme NMB-003 du Canada. Agency Approvals UL, CUL, NOM, IRAM, GOST, C-tick Other specific Country Approvals may apply. Please see product certification label. InFocus reserves the right to alter product offerings and specifications at any time without notice.
-
Page 3: Table Of Contents
Source compatibility Projector dimensions for ceiling mount installations RS-232 terminal specifications For complete details on connecting and operating the projector, refer to this User’s Guide. Electronic versions of this User’s Guide in multiple languages are available on our website at www.infocushome.com/service. - Page 4 Do not place objects in the areas along the side and in the front of the projector 2 ft (.6m) 2 ft (.6m) Do not place objects or people in the 2 foot (.6m) area along the front of the projector. For ceiling mount applications, this area should be 5 feet (1.5m). 2 ft (.6m)
-
Page 5: Introduction
InFocus is specifically designed for home cinema applications. The ScreenPlay 7205 sets the standard for high-definition digital perfection, fea- turing true High Definition 1280x720 resolution using the latest DLP™ tech- nology and new DCDi video processing from Faroudja™. Calibrated to D65 color mastering standards, the ScreenPlay 7205 reproduces colors and details the way the director intended. - Page 6 For example, if you connect your projection screen to Trigger 1, when you turn on the projector the screen will move down; when you turn the projector off, the screen will return to the storage position.
-
Page 7: Positioning The Projector
If you install the projector on the ceiling, refer to the installation guide that comes with the Ceiling Mount Kit for more information. To turn the image upside down, see page 29. InFocus recommends use of an authorized InFocus ceiling mount. The Ceiling Mount Kit is sold sepa- rately. -
Page 8: Video Connections
VCRs, digital video recorders, and satellite TV boxes. Basically, any device that can change channels is considered a tuner.) Audio must be provided by your own speakers, as the projector has no separate audio controls. If there is more than one output, select the highest quality one. -
Page 9: Connecting A Video Device
VESA connector on the projector. Connecting the power cable Connect the power cable to the connector on the back of the projector and to your electrical outlet. The Power LED on the keypad turns solid green. NOTE: Always use the power cable that shipped with the projector. -
Page 10: Displaying A Video Image
Remove the lens cap. Press the Power button on the top of the projector. The projector chimes if the chime feature is enabled (page 30). The LED flashes green and the fans start to run. When the lamp comes on, the startup screen displays and the LED is steady green. - Page 11 Adjust the zoom or focus rings by rotating them until the desired image size adjust zoom and focus and sharpness are produced. zoom focus If the image is not square, adjust the keystone using the buttons on the key- adjust keystone pad.
-
Page 12: Connecting A Computer
Connect the power cable to the connector on the back of the projector and to your electrical outlet. The Power LED on the projector’s keypad turns solid green. -
Page 13: Shutting Down The Projector
Turning off the projector To turn off the projector, press the Power button. The lamp turns off and the LED blinks green for about one minute while the fans continue to run to cool the lamp. When the lamp has cooled, the LED lights green and the fans stop. - Page 14 Problem No startup screen Image not centered on screen Solution Plug power cable in and remove lens cap press Power button Move projector, adjust zoom, adjust height zoom Adjust horizontal or vertical position in Picture>Keystone menu Result Correct image Correct image...
- Page 15 Image not square Image does not fit 16:9 screen Edges of image distorted Adjust keystone on keypad or Keystone menu Change aspect ratio to 16:9 in Picture>Aspect ratio menu Turn Overscan on in the Picture>Overscan menu Square image Correct image Correct image...
- Page 16 1. Projected colors don’t match source 2. Colors are washed out or too deep 3. Image from component source appears greenish COLOR Image upside down Image reversed left to right 1. Adjust color, tint, color temperature, brightness, or contrast in the menus. 2.
- Page 17 Lamp won’t turn on, LED blinking red (page 12) blinks Change Video Standard in Picture>Advanced menu Make sure vents aren’t blocked; allow projector to cool for one minute Correct image Unplug projector; wait one minute; plug in projector and turn it on: lamp lights...
- Page 18 Computer-specific troubleshooting Only startup screen appears No computer image, just the words “Signal out of range” Press the Source button Activate laptop’s external port or restart laptop Adjust computer refresh rate in Control Panel>Display>Settings>Advanced> Adapter (location varies by operating system) Computer image projected Computer image projected...
- Page 19 Image fuzzy or cropped The video embedded in my PowerPoint presentation does not play on the screen Set your computer’s display resolution to the native resolution of the projector (Start>Settings>Control Panel>Display>Settings tab, select 1280x720) For a laptop, disable laptop monitor...
- Page 20 This product is backed by a limited warranty. An extended warranty plan may be purchased from your dealer. When sending the projector in for repair, we recommend shipping the unit in its original packing material, or having a professional packaging company pack the unit.
-
Page 21: Using The Keypad Buttons
Most buttons are described in detail in other sections, but here is an over- view of their functions: Power–turns the projector on (page 9) and off (page 9). Menu–opens the on-screen menus (page 23). Select–confirms choices made in the menus (page 23). -
Page 22: Using The Remote Control
+ and - ends of the batteries, sliding them into place, and then replacing the cover. To operate, point the remote at the projection screen or at the projector (not at the video device or computer). The range of optimum operation is up to 30 feet (9.14m). -
Page 23: Optimizing Video Images
Make sure your DVD player is set for a 16:9 television. See your DVD player’s user’s guide for instructions. Customizing the projector You can customize the projector for your specific setup and needs. See page 29 to page 31 for details on these features. •... -
Page 24: Using The Menus
• The About menu provides a read-only display of information about the projector and source. Certain menu items may be hidden until a particular source is connected. For example, Tint is only available for NTSC video sources and will be hid- den when other sources are active. -
Page 25: Picture Menu
Picture menu To adjust the following five settings, highlight the setting, press Select, use the up and down arrows to adjust the values, then press select to confirm the changes. All menu defaults are listed in a table starting on page 38. Keystone: adjusts the image vertically and horizontally to make a squarer Keystone image. - Page 26 16:9: the default is 16:9, which preserves the 16:9 aspect ratio and is designed to be used with content that is Enhanced for Widescreen TVs. 4:3: resizes the image from its original version to fit a standard 4:3 aspect ratio screen. If you have a 4:3 source on a 16:9 screen, the image is placed in a 16:9 space, so black bars appear at the sides of the image.
- Page 27 Presets: This allows you to customize settings and save the settings to be restored later. To restore the factory default settings, choose Factory Reset in Save User Presets Presets the Settings>Service menu. To set a preset for the current source, adjust the image, select Save Settings in the Presets menu, then choose Save User 1, 2, or 3.
- Page 28 Horizontal/Vertical Position: adjusts the position of the source. Sync Threshold Adjust: If a hardware device, such as a DVD player, is not syncing properly with the projector, select this option to help it to sync when connected to the projector.
- Page 29 (the amount of black in the color) of the red, green, and blue colors. Video Standard: When it is set to Auto, the projector attempts to pick the video standard automatically based on the input signal it receives. (The video standard options may vary depending on your region of the world.) If...
-
Page 30: Settings Menu
If no source is found, a blank screen displays. When Autosource is checked, the projector checks the last-used source first at power up. If no signal is present, the projector checks the sources in order until a source is found or until power down. - Page 31 Power Save: when On, the lamp is automatically turned off after no signals are detected for 20 minutes. After 10 additional minutes with no signal, the projector powers down. If an active signal is received before the projector powers down, the image will be displayed.
-
Page 32: Maintenance
Abrasive cleaners, solvents or other harsh chemicals might scratch the lens. Lightly wipe the cleaning cloth over the lens in a circular motion. If you don’t intend to use the projector immediately, replace the lens cap. Service menu clean the lens... -
Page 33: Replacing The Projection Lamp
Turn off the projector and unplug the power cable. Wait 60 minutes to allow the projector to cool thoroughly. Turn the projector upside down and remove the lamp door by removing the two screws and sliding the lamp door tabs out of the three tab bays. - Page 34 WARNINGS: • To avoid burns, allow the projector to cool for at least 60 minutes before you replace the lamp. • Do not drop the lamp module. The glass may shatter and cause injury. • Do not touch the glass lamp screen. Fingerprints can obscure projection sharpness.
-
Page 35: Appendix
Appendix Red LED behavior and projector errors If the projector is not functioning properly and the red LED is blinking, con- sult Table 2 to determine a possible cause. There are two second pauses between the blinking cycles. Visit www.infocushome.com/support for more details on the red LED error codes. -
Page 36: Source Compatibility
PAL: B, H, I, M, N) Computer Digital and analog PC, Macintosh, 1280x1024 resolution Communi- USB and RS-232 cation Table 6: Projector Inputs and Outputs 2-Component HDTV, EDTV, and Standard TV component (Gold RCA) 1-Component HDTV, EDTV, Standard TV, RGB SCART with adapter (D5) -
Page 37: Projector Dimensions For Ceiling Mount Installations
Projector dimensions for ceiling mount installations 11.3” 288.1mm dimensions of optional cable cover: 12.4 x 3.9 x 3.2” (315 x 100 x 82mm) total length with optional cable cover: 16.2” 411.5mm) 2.1” 53.7mm 2.3” 57.8mm 2.6” 64.9mm 12.3” 312.7mm 8.7”... -
Page 38: Rs-232 Terminal Specifications
RS-232 terminal specifications Communication configuration To control the projector from an LCD control panel, connect an RS-232 cable to the serial control connector on the projector and set your computer’s serial port settings to match this communication configuration: Setting Bits per second... - Page 39 Supported commands Function Command Aspect Ratio Auto Chime Enable Auto Power Auto Source Blank Blank Screen Blue Color Offset Blue Gain Brightness Ceiling Chroma Detail Color Color Space Color Temp Range Default Contrast 0 = Native 1 = 16:9 2 = 4:3 Display Messages 3 = Letterbox Factory Reset (Write only)
- Page 40 Language NTSC 2:2 Pulldown Enable Noise Reduction Enable Noise Reduction Level Overscan Phase Power Power Save Presets Rear Project 0-11 Red Color Offset 0 = English Red Gain 1 = French Skintone Bypass Enable 2 = German 3 = Spanish Source 4 = Chinese Tradi- tional...
- Page 41 8 computer, connecting 11 connecting computer 11 power cable 8 video device 8 connector panel 5 contacting InFocus 19 Contrast 24 customer service contact information 19 D65 colors 10 dimensions of projector 36 Display Messages 29 DVI connector 8...
- Page 42 6 image reversed 15 image size matrix 34 image sizes 6 image torn 16 image upside down 15 InFocus website 2 inputs 35 IR repeater 5 keystone 10, 24 lamp replacement 32 lamp timer, resetting 33 lamp won’t turn on 16...
- Page 43 33 Serial connection 11 serial connection 5, 37 Service Code 31 Service menu 31 Settings menu 29 shutting down the projector 12 Sleep Timer 30 solid green 12 solid red 12 source compatibility 35 Source troubleshooting 13, 17...
- Page 44 Product found to be defective within the Limited Warranty period and to repair or replace defective parts with new parts or, at the option of InFocus, serviceable used parts that are equivalent or superior to new parts performance. Limited Warranty periods are as follows: •...
- Page 45 To Be Eligible For Limited Warranty Coverage Any person exercising a claim under this Limited Warranty must establish to the satisfaction of InFocus both the date of purchase and that the Product was purchased new. The sales receipt or invoice, showing the date of pur- chase of the Product is the proof of the date of purchase.