Table of Contents
Advertisement
Instruction booklet
EN
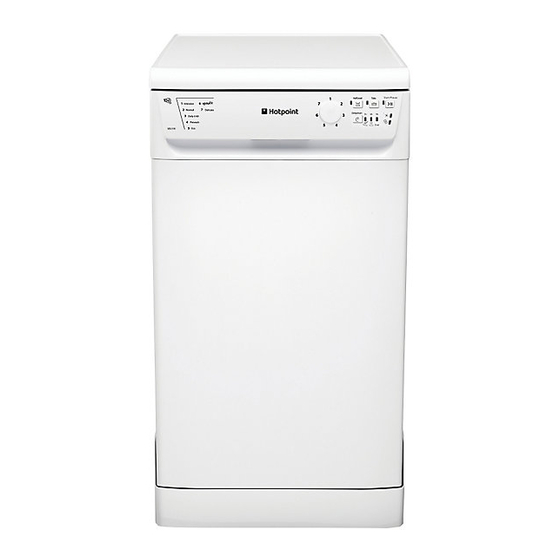
SDL 510
Contents
Installation, 2-5
Connecting the water supply
Start-up and use, 8-9
Loading the detergent
Washing options
Wash cycles, 10
Loading the rinse aid
Loading the refined salt
Shutting off the water and electricity supplies
Cleaning the dishwasher
Preventing unpleasant odours
Cleaning the sprayer arms
Cleaning the water inlet filter
Troubleshooting, 14
After Sales Service
Hotpoint Guarantee, 16
DISHWASHER
Advertisement
Table of Contents

Related Manuals for Hotpoint SDL 510


Summary of Contents for Hotpoint SDL 510
-
Page 1: Table Of Contents
Loading the racks, 7 Lower rack Cutlery basket Upper rack Start-up and use, 8-9 Starting the dishwasher SDL 510 Loading the detergent Washing options Wash cycles, 10 Wash cycle table Rinse aid and refined salt, 11 Loading the rinse aid... -
Page 2: Installation
Installation Advice regarding the first wash cycle see chapter entitled Rinse aid and refined salt see chapter entitled Rinse aid and refined salt Technical data width 45 cm Dimensions height 85 cm depth 60 cm Capacity 10 standard place-settings Positioning and levelling Water supply 0,05 ÷... -
Page 3: Electrical Connection
Green/Yellow - Earth Blue Neutral Brown Live Electrical Connection EARTH ‘E’ NEUTRAL ‘N’ LIVE ‘L’ see Description of the appliance see After Sales Service (See After Sales Service) -
Page 4: Installation
Connecting the water supplies Sink Waste System see After Sales Service see Installation... - Page 5 New Acqua Stop Only available in selected models.
-
Page 6: Description Of The Appliance
Description of the appliance Overall view Upper rack Upper sprayer arm Tip-up compartments Rack height adjuster Lower rack Lower sprayer arm Cutlery basket Washing filter Salt dispenser Detergent and rinse aid dispensers Data plate Control panel Control panel Multi-functional tablets button and indicator light Half load button and... -
Page 7: Loading The Racks
Loading the racks Before loading the racks, remove all food residues from the crockery and empty liquids from glasses and cups. Arrange the crockery so that it is held in place firmly and does not tip over. After loading the appliance, check that the sprayer arms can rotate freely. -
Page 8: Start-Up And Use
Start-up and use Starting the dishwasher Measuring out the detergent A good wash result also depends on the correct amount of detergent being used; exceeding the stated amount does not result in a more effective wash and increases environmental pollution. see below see Loading the racks see adjacent information... -
Page 9: Wash Options
Wash options* The OPTIONS may only be set, modified or reset after the wash cycle has been selected and before the Start/Pause button has been pressed. Remember to halve the amount of detergent. (see Table of wash It is better to use powder detergent in this case. cycles) This option is incompatible with the following wash cycle: Speed wash. -
Page 10: Wash Cycles
Wash cycles Detergent Wash Wash cycle (A) = compartment A cycles duration Wash cycle selection Wash cycle Options (B) = compartment B which (tolerance instructions include ±10%) Powder Liquid Tablets drying Hrs. Min. Heavily soiled dishes and pans (not to be used for delicate 1. -
Page 11: Measuring Out Rinse Aid
Rinse aid and refined salt lights will flash. It is now possible to select the water hardness level. There is a water hardness level for every wash cycle: E.g.: wash cycle 1, water hardness level 1 wash cycle 2, water hardness level 2, etc. etc., up to a maximum of five levels. -
Page 12: Care And Maintenance
Care and maintenance Cleaning the filters NEVER REMOVE (fig. 4) Leaving the machine unused for extended periods Only available in selected models. -
Page 13: Precautions And Advice
• Keep detergents and rinse aids away from children. • Keep children away from the open door of a dishwasher, As part of Hotpoint's continued commitment to helping the there could still be some detergent left inside. environment, Hotpoint reserves the right to use quality... -
Page 14: Troubleshooting
Troubleshooting Whenever the appliance fails to work, check for a solution from the following list before calling for Assistance (see Assistance). Problem: Possible causes / Solutions: The dishwasher does not start or • Switch off the appliance by pressing the ON/OFF button, switch it back on after cannot be controlled approximately one minute and reset the program. -
Page 15: After Sales Service
After Sales Service Appliance Registration After Sales Service We want to give you additional benefits of Hotpoint ownership. To activate your free 5 year parts guarantee you must register your appliance with us. Essential Contact Information We are the largest service team in the country Indesit Company UK Ltd. - Page 16 5 Year Parts Guarantee Hotpoint also offers you a free 5 year parts guarantee. This additional guarantee is conditional on you registering your appliance with us and the parts being fitted by one of our authorised engineers. There will be a charge for our engineer’s time.