Panasonic RX-D55 Operating Instructions Manual
Portable stereo cd system
Hide thumbs
Also See for RX-D55:
- Operating instructions manual (28 pages) ,
- Operating instructions manual (14 pages)
Table of Contents
Advertisement
Dear Customer
Thank you for purchasing this product.
For optimum performance and safety, please read these instructions
thoroughly before connecting, operating or adjusting this product.
Please keep this manual for future reference.
Unless otherwise indicated, illustrations in these operating instructions are of
RX-D55.
Supplied accessories
Please check and identify the supplied accessories.
1 x AC mains lead
1 x
RX-D55
For Saudi Arabia and Kuwait
RX-D55 RX-D50
For others
Operations in these instructions are described mainly using the remote control, but you can perform the operations on the main unit if the controls
are the same.
Your unit may not look exactly the same as illustrated.
Panasonic Corporation
Web Site: http://panasonic.net
RX-D55
1 x Remote control
1 x
RX-D55
(N2QAYA000008)
(N2QAYA000009)
RX-D50
Operating Instructions
Portable Stereo CD System
En
CD
RX-D55
Model No.
RX-D50
Cn
Ar
GC GS
RQTX1036-1G
L0410LL1040
Advertisement
Table of Contents

Related Manuals for Panasonic RX-D55


Summary of Contents for Panasonic RX-D55
-
Page 1: Operating Instructions
RX-D55 (N2QAYA000009) RX-D50 For Saudi Arabia and Kuwait RX-D55 RX-D50 For others Operations in these instructions are described mainly using the remote control, but you can perform the operations on the main unit if the controls are the same. Your unit may not look exactly the same as illustrated. -
Page 2: Note On Ac Mains Lead
To completely disconnect this apparatus from the AC Mains, disconnect the power supply cord plug from AC receptacle. Note on AC mains lead only) RX-D55 (For Saudi Arabia and Kuwait only) Before use This product may receive radio interference caused by mobile telephones during use. -
Page 3: Table Of Contents
Table of contents Power sources Note on AC mains lead ( only) ......2 RX-D55 Using the household mains socket Using the household mains socket Safety precautions ............3 Use of batteries .............. 3 Set the voltage before connection. Connect the AC mains lead fi rmly to the unit and the household mains socket. -
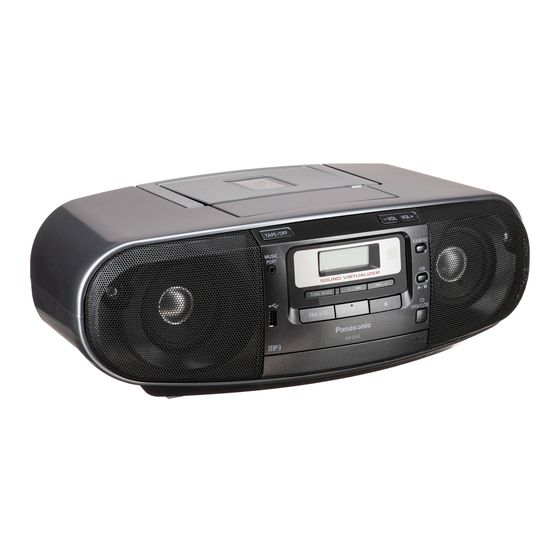
Page 4: Overview Of Controls
Overview of controls Buttons with the labelled numbers for the main unit and remote control meant that they activate the same function. RX-D55 RX-D55 Headphone jack (PHONES) Battery installation for remote control Plug type: Ø 3.5 mm stereo (not included) Insert the batteries (not included) •... -
Page 5: Discs
You can repeat program play or other selected play mode. disc with the label facing up. To activate Press [x, CD OPEN/CLOSE] again to close. Press [REPEAT]. Press [4/9, CD] to start play. RX-D55 RX-D50 “ON REPEAT” and “ ” are displayed. “ ” is displayed. -
Page 6: Using The Fm/Am Radio
Press [FM/AM] to select “FM” or “AM”. After a few seconds the display changes to a fl ashing display of the current Press [TUNE MODE] to select “MANUAL”. RX-D55 minimum frequency. RX-D50 If “PGM” is displayed, press [TUNE MODE] to clear it. -
Page 7: Cassette Tape - Play And Record
Recording • Prepare the music source you want to listen to; disc, radio, USB ( only) RX-D55 or music port source, and set the volume. Use normal position tapes. High position and metal position tapes can be used, but the unit will not be able Press [CLOCK/TIMER] repeatedly to select the play timer. -
Page 8: Using Sound Effects
Press [PRESET EQ] (main unit: [SOUND EQ]) repeatedly to select your No response when remote control buttons are pressed. desired setting. • Check that the batteries are installed correctly. RX-D55 RX-D50 • Replace the batteries if they are worn. Adds punch to rock The unit cannot be turned on from the remote control. -
Page 9: Specifi Cations
CASSETTE DECK SECTION CASSETTE DECK SECTION Output power 10 W x 2 (RMS MAX / DC) Track system 4 track, 2 channel, stereo RX-D55 Monitor system Variable sound monitor 4 W x 2 (RMS MAX / DC) RX-D50 Recording system... - Page 10 RX-D55 • • FM/AM • RX-D55 • • • • – – • RX-D55 • • • • • • – • • • • • • • •...
- Page 11 RX-D55 RX-D55 (PHONES) Ø 3.5 • + – • PHONES R6/LR6, AA RX-D55 RX-D50 [2/3] [5/6] (FM/AM) [–/2] [6/+] TREBLE [OK] [OK] [R/T] EQ OFF RX-D50 [Y/U] [2/3] [5/6] RE-MASTER RX-D55 Preset EQ RX-D50 BASS RX-D55 RX-D50 MONO RX-D55 “ON A.OFF”...
- Page 12 RANDOM 1-ALBUM RANDOM [2/3] [5/6] ( [–/2] [6/+] • ✒ • • [R/T ALBUM] “ ” [R/T, ALBUM] [PLAY MODE] 1-TRACK RX-D55 RX-D50 1-ALBUM RX-D55 RX-D50 1ALBUM ALBUM [R/T ALBUM] • RANDOM RX-D55 RX-D50 • • 1-ALBUM RANDOM RX-D55 RX-D50...
- Page 13 FM/AM [FM/AM] “FM” “AM” [TUNE MODE] “MANUAL” RX-D55 “PGM” [TUNE MODE] RX-D50 [REPEAT] [2/3] [5/6] [– /2] [6/+] RX-D55 RX-D50 “ON REPEAT” “ ” “ ” [2/3] [5/6] [REPEAT] • RX-D55 RX-D50 • [2/3] [5/6] “OFF REPEAT” “ ” “...
- Page 14 [FM/AM] [TAPE/OFF] [FM/AM] • • “ ” [8/x, STOP/EJECT] [4, PLAY] RX-D55 [8/x, STOP/EJECT] [9, PAUSE] [3, REW/REV] [5, FF/CUE] [3, REW/REV] [5, FF/CUE] ✒ ✒ [0, STOP/EJECT] RX-D55 [4/9, USB] [4/9, CD] “RESUME” [4/9, USB] [4/9, USB] [PLAY MODE]...
- Page 15 [CLOCK/TIMER] [PRESET EQ] [SOUND EQ] # PLAY ON CLOCK RX-D55 RX-D50 [2/3] [5/6] [CLOCK/TIMER] [CLOCK/TIMER] ✒ • BASS TREBLE • [BASS] [TREBLE] [2/3] [5/6] ✒ ✒ • • • “EQ OFF” BASS TREBLE • RX-D55 RE-MASTER [CLOCK/TIMER] [2/3] [5/6] [RE-MASTER] “ON RE-MASTER”...
- Page 16 ■ RX-D55 RX-D50 PMPO RX-D55 RX-D50 • • FM/AM FM/AM • 3, 4 (FM) 87.50 ~ 108.00 (AM) • 4, 7 ~ 1629 ~ 1630 • • “UO1” • “F76” • CD-DA (2) CD-R/RW CD-DA, MP3 ■ (3) MP3 MPEG-1 Layer 3, MPEG-2 Layer 3 “ERROR”...
- Page 17 ﺍﻻﻋﻄﺎﻝ ﺍﻟﻌﺎﻣﺔ ■ ﻃﺎﻗﺔ ﺍﳋﺮﺝ ( ﺣﺪ ﺃﻗﺼﻰ / ﺗﻴﺎﺭ ﻣﺒﺎﺷﺮRMS) 2 x 01 ﻭﺍﻁ RX-D55 .ﻻ ﺃﺟﺪ ﺍﺳﺘﺠﺎﺑﺔ ﻋﻨﺪﻣﺎ ﺃﻗﻮﻡ ﺑﺎﻟﻀﻐﻂ ﻋﻠﻰ ﺍﻷﺯﺭﺍﺭ ﻭﺣﺪﺓ ﺍﻟﺘﺤﻜﻢ ﻋﻦ ﺑﻌﺪ ( ﺣﺪ ﺃﻗﺼﻰ / ﺗﻴﺎﺭ ﻣﺒﺎﺷﺮRMS) 2 x 4 ﻭﺍﻁ RX-D50 .ﺗﺄﻛﺪ ﻣﻦ ﺻﺤﺔ ﺇﺩﺧﺎﻝ ﺍﻟﺒﻄﺎﺭﻳﺎﺕ...
- Page 18 ([SOUND EQ] :[ )ﻭﻳﻘﺎﺑﻠﻪ ﻋﻠﻰ ﺍﻟﻮﺣﺪﺓ ﺍﻟﺮﺋﻴﺴﻴﺔ ﺯﺭPRESET EQ] ﺍﺿﻐﻂ ﺑﺸﻜﻞ ﻣﺘﻜﺮﺭ ﻋﻠﻰ ﺍﻟﺰﺭ :ﻛﻞ ﻣﺮﺓ ﺗﻀﻐﻂ ﻓﻴﻬﺎ ﺍﻟﺰﺭ .ﻻﺧﺘﻴﺎﺭ ﺍﻹﻋﺪﺍﺩ ﺍﳌﻄﻠﻮﺏ CLOCK PLAY ON RX-D50 RX-D55 ﺍﻟﻌﺮﺽ ﺍﻻﺻﻠﻲ ﺧﻼﻝ 5 ﺛﻮﺍﻥ ﺍﻭ ﻣﺎ ﻳﻌﺎﺩﻟﻬﺎ ﻳﻀﻴﻒ ﻗﻮﺓ ﺇﻟﻰ ﻣﻮﺳﻴﻘﻰ ﺍﻟﺮﻭﻙ .[ ﻟﻀﺒﻂ ﺍﻟﻮﻗﺖ ] [ ﺍﻭ...
- Page 19 ، STOP EJECT] ﺍﺿﻐﻂ ﺍﻟﺰﺭ ﺃﺩﺧﻞ ﺷﺮﻳﻂ ﺍﻟﻜﺎﺳﻴﺖ ﺑﺤﻴﺚ ﻳﻜﻮﻥ ﺍﳉﺎﻧﺐ ﺍﳌﺮﺍﺩ ﺗﺸﻐﻴﻠﻪ ﻷﻋﻠﻰ ﻭﺑﺤﻴﺚ ﻳﻜﻮﻥ ﺍﻟﺸﺮﻳﻂ ﺍﳌﻜﺸﻮﻑ USB ﻳﻮ ﺇﺱ ﺑﻲ .ﻧﺤﻮﻙ. ﺃﻏﻠﻖ ﺣﺎﻣﻞ ﺍﻟﺸﺮﻳﻂ ﺑﻴﺪﻙ (ﻓﻘﻂ RX-D55 .[ ﻟﺒﺪﺀ ﺍﻟﺘﺸﻐﻴﻞ ، PLAY] ﺍﺿﻐﻂ ﺍﻟﺰﺭ ﻻﻳﻘﺎﻑ ﺗﺸﻐﻴﻞ ، STOP/EJECT ﺍﺿﻐﻂ...
- Page 20 .“AM” “ ﺍﻭFM” [ ﻻﺧﺘﻴﺎﺭFM/AM] ﺍﺿﻐﻂ ﺍﻟﺰﺭ .ﺘﺎﺭ ﺍﻵﺧﺮﳝﻜﻨﻚ ﺗﻜﺮﺍﺭ ﺗﺸﻐﻴﻞ ﺍﻟﺒﺮﻧﺎﻣﺞ ﺃﻭ ﻭﺿﻊ ﺍﻟﺘﺸﻐﻴﻞ ﺍ .“MANUAL” [ ﻻﺧﺘﻴﺎﺭ ﺍﳌﻌﺎﺩﻝ ﺍﻟﻴﺪﻭﻱTUNE MODE] ﺍﺿﻐﻂ ﺍﻟﺰﺭ RX-D55 ﻟﻠﺘﻨﺸﻴﻂ .[ ﻹﻟﻐﺎﺋﻬﺎ ﻣﻦ ﺍﻟﺸﺎﺷﺔTUNE MODE] “ ﻣﻌﺮﻭﺿﺔ ﻋﻠﻰ ﺍﻟﺸﺎﺷﺔ، ﺍﺿﻐﻂPGM” ﺍﺫﺍ ﻛﺎﻧﺖ ﺍﻻﺷﺎﺭﺓ .[REPEAT] ﺍﺿﻐﻂ ﺍﻟﺰﺭ...
- Page 21 .[ ﻻﺧﺘﻴﺎﺭ ﺍﻟﻮﺿﻊ ﺍﳌﻄﻠﻮﺏPLAY MODE] ﺍﺿﻐﻂ ﺍﻟﺰﺭ 1-TRACK .ﻳﺸﻐﻞ ﻣﺴﺎﺭﺍ ﻭﺍﺣﺪﺍ ﻣﺨﺘﺎﺭﺍ ﻋﻠﻰ ﺍﻻﺳﻄﻮﺍﻧﺔ ﺍﺿﻐﻂ ﻓﻲ ﺍﲡﺎﻩ ﺣﲔ ﺗﻘﻮﻡ .ﺍﺿﻐﻂ ﺍﺯﺭﺍﺭ ﺍﻻﺭﻗﺎﻡ ﻻﺧﺘﻴﺎﺭ ﺍﳌﺴﺎﺭ RX-D50 RX-D55 .(ﺑﺈﺩﺭﺍﺝ ﺍﻟﺒﻄﺎﺭﻳﺔ )ﺍﳌﺪﺧﺮﺓ 1-ALBUM ﺍﻟﺼﻒ ﺍﻟﺪﺍﺧﻠﻲ .ﻳﺸﻐﻞ ﺃﻟﺒﻮﻣﺎ ﻭﺍﺣﺪﺍ ﻣﺨﺘﺎﺭﺍ ﻋﻠﻰ ﺍﻻﺳﻄﻮﺍﻧﺔ ﺍﻟﺼﻒ ﺍﳋﺎﺭﺟﻲ...
- Page 22 ﺃﺳﻤﺎﺀ ﺃﺯﺭﺍﺭ ﺍﻟﺘﺤﻜﻢ .ﺇﻥ ﺍﻷﺯﺭﺍﺭ ﺍﻟﺘﻲ ﲢﻤﻞ ﺃﺭﻗﺎﻣﺎ ﻣﻦ ﺃﺟﻞ ﺍﻟﻮﺣﺪﺓ ﺍﻟﺮﺋﻴﺴﻴﺔ ﻭﺟﻬﺎﺯ ﺍﻟﺘﺤﻜﻢ ﻋﻦ ﺑﻌﺪ )ﺍﻟﺮﳝﻮﺕ ﻛﻨﺘﺮﻭﻝ( ﺗﻌﻨﻲ ﺃﻧﻬﺎ ﺗﻨﺸﻂ ﻧﻔﺲ ﺍﻟﻮﻇﻴﻔﺔ RX-D55 RX-D55 (PHONES) ﻣﻘﺒﺲ ﺳﻤﺎﻋﺎﺕ ﺍﻟﺮﺃﺱ (ﺗﺮﻛﻴﺐ ﺑﻄﺎﺭﻳﺔ ﺟﻬﺎﺯ ﻟﻠﺘﺤﻜﻢ ﻋﻦ ﺑﻌﺪ )ﺍﻟﺮﳝﻮﺕ ﻛﻨﺘﺮﻭﻝ (5.3 ﱈ ﺳﺘﻴﺮﻳﻮ )ﻻ ﻳﺄﺗﻲ ﻣﻊ ﺍﳉﻬﺎﺯ...
- Page 23 ﺇﺳﺘﺨﺪﺍﻡ ﺃﺩﻭﺍﺕ ﺍﻟﺘﺤﻜﻢ ﺃﻭ ﺍﻟﻀﺒﻂ ﺃﻭ ﺍﻷﺩﺍﺀ ﻏﻴﺮ ﻣﺎ ﻫﻮ ﻣﺤﺪﺩ ﻓﻲ ﻫﺬﻩ ﺍﻟﻮﺛﻴﻘﺔ ﻗﺪ ﻳﺆﺩﻱ ﺇﻟﻰ .... ﺍﻟﺮﺋﻴﺴﻲAC ﺗﻨﺒﻴﻪ ﺣﻮﻝ ﺳﻠﻚ ﺍﻟﺘﻴﺎﺭ ﺍﳌﺘﺮﺩﺩ (ﻓﻘﻂ RX-D55 .ﺍﻟﺘﻌﺮﺽ ﺍﳋﻄﻴﺮ ﺇﻟﻰ ﺍﻷﺷﻌﺔ ...................ﺍﺣﺘﻴﺎﻃﺎﺕ ﺍﻟﺴﻼﻣﺔ .ﻻ ﺗﻔﺘﺢ ﺍﻷﻏﻄﻴﺔ ﻭﻻ ﲢﺎﻭﻝ ﺇﺻﻼﺡ ﺍﳋﻠﻞ ﺑﻨﻔﺴﻚ. ﺭﺍﺟﻊ ﺍﻟﻔﻨﻴﲔ ﺍﳌﺆﻫﻠﲔ ﻷﺩﺍﺀ ﺃﻋﻤﺎﻝ ﺍﻟﺼﻴﺎﻧﺔ...
- Page 24 ﻟﻠﺤﺼﻮﻝ ﻋﻠﻰ ﺃﻓﻀﻞ ﺃﺩﺍﺀ ﻭﺃﻣﺎﻥ ﻳﺮﺟﻰ ﻗﺮﺍﺀﺓ ﺟﻤﻴﻊ ﺍﻹﺭﺷﺎﺩﺍﺕ ﺟﻴﺪﺍ ﻗﺒﻞ ﺗﻮﺻﻴﻞ ﻫﺬﺍ ﺍﳌﻨﺘﺞ ﺃﻭ ﺗﺸﻐﻴﻠﻪ .ﺃﻭ ﺿﺒﻄﻪ .ﻳﺮﺟﻰ ﺍﻻﺣﺘﻔﺎﻅ ﺑﻬﺬﺍ ﺍﻟﻜﺘﻴﺐ ﻟﻴﻜﻮﻥ ﻟﻚ ﻣﺮﺟﻌﺎ ﻭﻗﺖ ﺍﳊﺎﺟﺔ .RX-D55 ﻣﺎ ﻟﻢ ﺗﺘﻢ ﺍﻹﺷﺎﺭﺓ ﺇﻟﻰ ﺧﻼﻑ ﺫﻟﻚ ﻓﺈﻥ ﺍﻟﺮﺳﻮﻡ ﺍﻟﺘﻮﺿﻴﺤﻴﺔ ﻓﻲ ﻫﺬﻩ ﺍﻟﺘﻌﻠﻴﻤﺎﺕ ﺗﺨﺺ ﺍﻟﻄﺮﺍﺯ ﺍﳌﻠﺤﻘﺎﺕ ﺍﻟﺘﻲ ﺗﺄﺗﻲ ﻣﻊ ﺍﳉﻬﺎﺯ .ﻳﺮﺟﻰ ﻓﺤﺺ ﻭﲤﻴﻴﺰ ﺍﳌﻠﺤﻘﺎﺕ ﺍﳌﺮﻓﻘﺔ...