Jacuzzi J - 415 Owner's Manual
Jacuzzi j-400 collection
Hide thumbs
Also See for J - 415:
- Owner's manual (122 pages) ,
- Instructions for preinstallation (28 pages) ,
- Installation manual and use & maintenance (120 pages)

Related Manuals for Jacuzzi J - 415


Summary of Contents for Jacuzzi J - 415
- Page 1 OWNER’S MANUAL J - 4 0 0 ™ C o l l e c t i o n J - 415 J - 425 J - 465 J - 470 J - 480 J - 495 2530-442Z Rev. A...
- Page 2 Attention New Spa Owner! Congratulations on the purchase of your new Jacuzzi® spa! The following is a list of automated functions performed by your spa. These functions are listed below in an attempt to suppress any operational concerns you may have during...
-
Page 3: Table Of Contents
J-400 Table of Contents Important Spa Owner Information ............1 FCC Notice ....................1 Industry Canada (IC) Information .............. 1 Important Safety Instructions for all Spa Owners ........ 2 Entrapment Risk ..................6 Hyperthermia ..................... 7 Important CSA safety instructions (Canada only) ........8 Choosing a Location ................ - Page 4 J-400 11.0 Operating Instructions ................56 11.1 J-1000™ Control Panel ................56 11.2 Activate Jets Pump .................. 56 11.3 Activate Lights ..................57 11.4 Adjusting Individual Jet Flow ..............59 11.5 Adjusting PowerPro™ MX2 Jets ............. 59 11.6 Adjusting RX Jets ..................59 11.7 WaterColour™...
- Page 5 Typical Spa Wiring Diagrams ..............94 19.1 Wiring diagram for North American 60 Hz Models Only ......94 20.0 Optional Jacuzzi J-1000™ Audio System Stereo ........ 95 20.1 Optional J-1000 Wireless Remote ............96 20.2 J-1000 Wireless Remote Battery Replacement........102 20.3...
- Page 6 J-400...
-
Page 7: Important Spa Owner Information
Jacuzzi insulating cover in place at all times when the spa is not in use. Read and carefully follow the requirements for your spa’s support base found in the Section 4.0 titled, “Choosing a Location”... -
Page 8: Important Safety Instructions For All Spa Owners
J-400 Important Safety Instructions for all Spa Owners READ AND FOLLOW ALL INSTRUCTIONS CAREFULLY! This spa was manufactured to meet the standards and specifications outlined in the “Virginia Graeme Baker Pool and Spa Safety Act” (VGB Safety Act). When installing and using this spa, basic safety precautions should always be followed, including: DANGER: RISK OF SEVERE INJURY OR DROWNING! - Page 9 J-400 to the wire connector on the grounding lug, inside the equipment compartment on the equipment box. • A grounding wire connector is provided on this unit to connect a minimum No. 8 AWG (8.4 mm²) solid copper conductor between this unit and any metal equipment, metal enclosures of electrical equipment, metal water pipe, or conduit within 5 feet (1.5m) of the unit.
- Page 10 J-400 WARNING: RISK OF SEVERE INJURY OR DEATH! • Since excessive water temperatures have a high potential for causing fetal damage during the early months of pregnancy, if pregnant or possibly pregnant, consult your physician before using a spa. • Pregnant or possibly pregnant women should limit spa water temperatures to 100°F (38°C).
- Page 11 J-400 WARNING: In addition to maintenance of filters and water chemistry, proper ventilation is recommended to reduce the risk of contracting a waterborne illness (e.g. an infection, bacteria or virus) and/or respiratory ailments that could be present in the air or water. Consult a licensed architect or building contractor to determine your specific needs if installing your hot tub indoors.
-
Page 12: Entrapment Risk
J-400 Entrapment Risk The Consumer Products Safety Commission/USA has reported that users of pools and spas have become entrapped (stuck) to drain and/or suction fittings causing death, drowning, or serious injury (see diagram below). This spa was manufactured to meet the standards and specifica- tions outlined in the “Virginia Graeme Baker Pool and Spa Safety Act”... -
Page 13: Hyperthermia
A Warning Sign is provided in your warranty packet. Please install at a location near your spa, where it is visible to users of the spa. For additional or replacement Warning Signs please contact your local Jacuzzi dealer and reference item number #6530-082. Page 7... -
Page 14: Important Csa Safety Instructions (Canada Only)
J-400 Important CSA safety instructions (Canada only) When using this electrical equipment, basic safety precautions should always be followed, including the following: 1. READ AND FOLLOW ALL INSTRUCTIONS. 2. A green colored terminal or a terminal marked G, Gr, Ground, Grounding or the symbol* is located inside the supply terminal box or compartment. -
Page 15: Outdoor Location
J-400 The spa must be installed in such a manner as to provide drainage away from it. Placing the spa in a depression without provisions for proper drainage could allow rain, overflow and other casual water to flood the equipment and create a wet condition in which it would sit in. For spas which will be recessed into a floor or deck, install so as to permit access to the equipment, either from above or below, for servicing. -
Page 16: Indoor Location
J-400 Indoor Location For indoor installations many factors need to be considered before installing a spa indoors. WARNING: In addition to maintenance of filters and water chemistry, proper ventilation is recommended to reduce the risk of contracting a waterborne illness (e.g. an infection, bac- teria or virus) and/or respiratory ailments that could be pres- ent in the air or water. -
Page 17: General Electrical Safety Instructions
Please contact your local Jacuzzi dealer or local building department should you have any questions regarding your installation. Proper grounding is extremely important. Jacuzzi spas are equipped with a current collector system. A pressure wire connector is provided on the... - Page 18 J-400 4. The electrical supply for this product must include a suitably rated switch or circuit breaker to open all ungrounded supply conductors to comply with Section 422-20 of the National Electrical Code/USA, ANSI/NFPA 70. The disconnecting means must be readily accessible to the spa’s occupant but installed at least 5 feet (1.5m) from spa water.
- Page 19 J-400 Figure B 60 Hz Terminal Block Connection 1. Main Terminal Block 2. Bonding Lug/Grounding Terminal 3. Power wires Entrance (Electrical fitting and conduit must be installed) Figure C Terminal Connection (North American 240 VAC Connection Shown) Main Terminal Block Main Terminal Block Lift white lever by hand to pry...
- Page 20 J-400 Figure D 50Hz Terminal Block Connection 1. Main Terminal Block 2. Heater Terminal Block 3. Bonding Lug/Grounding Terminal 4. Power wires Entrance (Electrical fitting and conduit must be installed) Figure E Terminal Connection (Export 230 VAC 50 Hz Connection Shown) Heater Main Heater Terminal Block...
- Page 21 J-400 Figure F 1. Remove the access door on the controller. 2. Locate the gray Terminal, towards the top of the controller, Figure 1. Figure 1 3. Grab one of the white levers. Push the lever upward to the open position, Figure 2.
-
Page 22: Power Requirements
J-400 Power Requirements Jacuzzi ® spas are designed to provide optimum performance and flexibility of use when connected to their maximum electrical service. They are configured at the factory. The most common electrical connections are listed below: • All North American 60 Hz Models only: These models come set for 50A logic. - Page 23 J-400 North American J-415 Models (60 Hz) Voltage: 240 VAC 240 VAC Max. Current Draw: Frequency: 60 Hz 60 Hz Number of Wires: Circuit Breaker (2-Pole): 30A* 50A** In 30A configuration, the heater will not operate while the jets pump is running.
-
Page 24: Spa Fill Up Procedure
Clear all debris from the spa. (Although the spa shell has been polished at the factory, you may want to treat it with a specially formulated spa cleaner.) Consult your authorized Jacuzzi dealer for additional information prior to filling spa. - Page 25 (see Section 11.2, page 56 to activate jets). 5. Add Start-Up Chemicals Add the spa water chemicals as recommended by your authorized Jacuzzi spa dealer. See Section titled “Water Quality Maintenance” (page 82) for general guidance. WARNING: RISK OF POISONING OR DEATH.
- Page 26 J-400 Important Heater Details: • The maximum temperature for which the spa can be set is 104°F (40°C) and the minimum is 80°F (27°C). • For North American spas: With a 50 amp service, turn off one of the jet pumps to operate heater. With a 30 amp service, turn off both jet pumps to operate heater.
- Page 27 J-400 Water Fill Volume by Model Average Sodium Model Fill Volume* Dichlor J-415........280 Gal (1,060 L) ......... 7.0 oz J-425........292 Gal (1,105 L) ......... 7.5 oz J-465........380 Gal (1,438 L) ......... 9.5 oz J-470........415 Gal (1,571 L) ........ 10.5 oz J-480........480 Gal (1,817 L) ........
- Page 28 J-400 5. Consult your authorized Jacuzzi dealer for chemical recommendations, then add chemicals to hot tub water to achieve a constant sanitizer reading within the levels recommended on the inside cover of this manual. 6. Turn on jet pumps when adding chemicals to ensure proper mixing and leave your hot tub cover open until the sanitizer level becomes stable to protect pillows and plastic knobs from chemical attack.
-
Page 29: Spa Features
J-400 Spa Features J-495 Spa Features 1. J-1000™ Control Panel 11. NX2 Jets (8 ea.) 12. RX Back Jets (6 ea.) 2. Lighted Mass Aspiration Jet Flow 13. Underwater Light Control Valve 14. Footwell Filter Suction Covers (6 ea.) 3. Air Control Valves (5 ea.) Introduce Air 15. -
Page 30: Massage/Waterfall Selector Diagram
J-400 J-495 Massage/Waterfall Selector Diagram Massage Selector (1) • Massage selector 1 diverts jets pump Nº 2 output between jets groups 1a-1b. • Massage selector 2 diverts jets pump Nº 1 output between jets groups 2a-2b. Mass Aspiration Jet Flow Control Valve (3) • Valve (3) controls output to footwell IX Jet when jets pump Nº 3 is running. Jets Without Massage Selector Controls (4) • Jets (4) are always on when jets pump Nº 3 is running. Waterfall Selector (5) • Waterfall selector (5) controls circulation pump output to waterfall. Spa operation subject to change without notice Page 24... -
Page 31: Air Controls Diagram
J-400 J-495 Air Controls Diagram Air Controls Operation • Rotate air controls 1-5 to add air to designated jet groups. • Center footwell IX Jet (6) draws air at all times when jets pump Nº 3 is running. This jet has no air control. Spa operation subject to change without notice Page 25... -
Page 32: Spa Features
J-400 J-480 Spa Features 4:05 PM T emp. 1. J-1000™ Control Panel 12. FX2 Jets (6 ea.) 2. Waterfall Control Valve 13. NX2 Jets (4 ea.) 3. Air Control Valves (4 ea.) Introduce Air 14. RX Back Jets (6 ea.) to Specified Jet Groups 15. -
Page 33: Massage/Waterfall Selector Diagram
J-400 J-480 Massage/Waterfall Selector Diagram 4:05 PM T emp. Massage Selectors (1-2) • Massage selector 1 diverts jets pump Nº 1 output between jet groups 1a-1b. • Massage selector 2 diverts output jets pump Nº 2 between jet groups 2a-2b. Waterfall Selector (3) • Waterfall selector 3 controls circulation pump output to waterfalls. Mass Aspiration Jet Flow Control Valve (4) • Valve (4) controls output to footwell IX Jet when jets pump Nº 2 is running. Jets Without Massage Selector Controls (5) • Jets (5) are always on when jets pump Nº 1 is running. -
Page 34: Air Controls Diagram
J-400 J-480 Air Controls Diagram 4:05 PM T emp. Air Controls Operation • Rotate air controls 1-4 to add air to designated jet groups. • Center footwell IX Jet (5) draws air at all times when jets pump is running. This jet has no air control. Spa operation subject to change without notice Page 28... -
Page 35: Spa Features
J-400 J-470 Spa Features 4:05 PM T emp. 1. J-1000 Control Panel 12. FX2 Jets (5 ea.) 2. Waterfall Control Valve 13. NX2 Jets (4 ea.) 3. Air Control Valves (4 ea.) Introduce Air 14. FX Jets (20 ea.) to Specified Jet Groups 15. -
Page 36: Massage/Waterfall Selector Diagram
J-400 J-470 Massage/Waterfall Selector Diagram 4:05 PM T emp. Massage Selectors (1-2) • Massage selector 1 diverts jets pump Nº 1 output between jet groups 1a-1b. • Massage selector 2 diverts jets pump Nº 2 output between jet groups 2a-2b. Waterfall Selector (3) • Waterfall selector 3 controls circulation pump output to waterfalls. Mass Aspiration Jet Flow Control Valve (4) • Valve (4) controls output to footwell IX Jet when jets pump Nº 2 is running. Jets Without Massage Selector Controls (5) • Jets (5) are always on when jets pump Nº 1 is running. -
Page 37: Air Controls Diagram
J-400 J-470 Air Controls Diagram 4:05 PM T emp. Air Controls Operation • Rotate air controls 1-4 to add air to designated jet groups. • Center footwell IX Jet (5) draws air at all times when jets pump is running. This jet has no air control. Spa operation subject to change without notice Page 31... -
Page 38: Spa Features
J-400 9.10 J-465 Spa Features 1. J-1000 Control Panel 12. NX Jets (4 ea.) 2. Waterfall Control Valve 13. FX2 Jets (7 ea.) 3. Air Control Valves (3 ea.) Introduce Air 14. PX Jets (4 ea.) to Specified Jet Groups 15. -
Page 39: Massage/Waterfall Selector Diagram
J-400 9.11 J-465 Massage/Waterfall Selector Diagram Massage Selectors (1-2) • Massage selector 1 diverts jets pump Nº 1 output between jet groups 1a-1b. • Massage selector 2 diverts jets pump Nº 2 output between jet groups 2a-2b. Waterfall Selector (3) • Waterfall selector 3 controls circulation pump output to waterfalls. Mass Aspiration Jet Flow Control Valve (4) • Valve (4) controls output to footwell IX Jet when jets pump Nº 1 is running. Jets Without Massage Selector Controls (5) • Jets (5) are always on when jets pump Nº 2 is running. Spa operation subject to change without notice Page 33... -
Page 40: Air Controls Diagram
J-400 9.12 J-465 Air Controls Diagram Air Controls Operation • Rotate air controls 1-3 to add air to designated jet groups. • Center footwell IX Jet (4) draws air at all times when jets pump is running. This jet has no air control. Spa operation subject to change without notice Page 34... -
Page 41: Spa Features
J-400 9.13 J-425 Spa Features 1. J-1000 Control Panel 12. FX2 Jets (5 ea.) 2. Waterfall Control Valve 13. Filter/Skimmer Grill 3. Optional Audio System Speakers 14. Underwater Light (4 ea.) 15. Footwell Filter Suction Covers (4 ea.) 4. Adjustable Pillows (4 ea.) 16. -
Page 42: Massage/Waterfall Selector Diagram
J-400 9.14 J-425 Massage/Waterfall Selector Diagram Massage Selector (1) • Massage selector 1 diverts jets pump Nº 1 output between jet groups 1a-1b. Mass Aspiration Jet Flow Control Valve (2) • Valve (2) controls output to footwell IX Jet when jets pump Nº 1 is running. Waterfall Selector (3) • Waterfall selector (3) controls circulation pump output to waterfall. Jets Without Massage Selector Controls (4) • Jets (4) are always on when jets pump Nº 2 is running. Spa operation subject to change without notice Page 36... -
Page 43: Air Controls Diagram
J-400 9.15 J-425 Air Controls Diagram Air Controls Operation • Rotate air controls 1-4 to add air to designated jet groups. • Center footwell IX Jet (5) draws air at all times when jets pump is running. This jet has no air control. Spa operation subject to change without notice Page 37... -
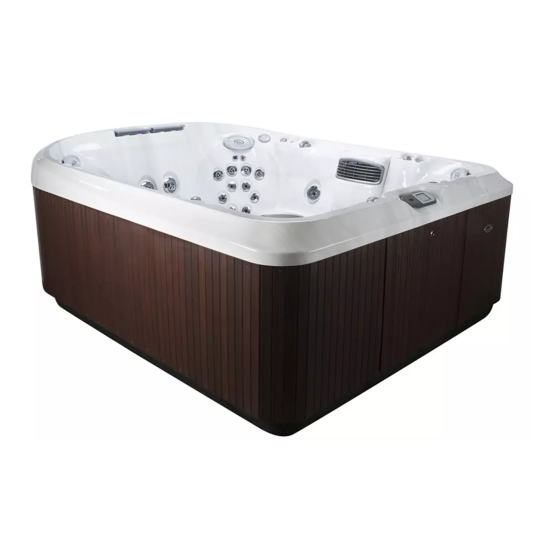
Page 44: Spa Features
J-400 9.16 J-415 Spa Features 1. J-1000 Control Panel 10. Waterfall Control Valve 2. FX Jets (13 ea.) 11. Waterfall 3. Air Control Valves (2 ea.) Introduce Air 12. Filter/Skimmer Grill to Specified Jet Groups 13. Footwell Filter Suction Covers (2 ea.) 4. -
Page 45: Massage/Waterfall Selector Diagram
J-400 9.17 J-415 Massage/Waterfall Selector Diagram Massage Selector (1) • Massage selector 1 diverts output between jet groups 1a-1b. Waterfall Selector (2) • Waterfall selector 2 controls circulation pump output to waterfall. Spa operation subject to change without notice Page 39... -
Page 46: Air Controls Diagram
J-400 9.18 J-415 Air Controls Diagram Air Controls Operation • Rotate air controls 1-2 to add air to designated jet groups. Spa operation subject to change without notice Page 40... -
Page 47: Control Panel Main Menu
10.1 Control Panel Your Jacuzzi Spa is equipped with a state-of-the-art control panel. You will be able to access sets of multi-level menus. Familiarize yourself with the following information, so you can gain the full benefits of your spa. By learning the key features of the control panel, you will navigate through the menus and programming with ease. -
Page 48: Main Menu Features
J-400 10.2 Main Menu Features From the Main Menu you can access the main component menus to operate your Jacuzzi Spa. Listed below is a list of the Main Menu icons. A. Menu Control Buttons 4:05 PM Temp. Dec 22, 2012 = Temperature Control: Indicates that by using the Quad Temp. - Page 49 J-400 = Button D: Press this button to access the corresponding menu located to the left side of it. = Entertainment Menu Icon: Press button A to access the menu to operate the J-1000 Audio System (page 45). = Jets Menu Icon: Press button B to access the menu to operate the jets pump (page 56).
-
Page 50: Menu Flowchart
J-400 10.3 Menu Flowchart The flowchart below is included to help you understand the spa’s navigational screens. By pressing the buttons located next to each corner icon, you will enter additional menus and submenus. Each menu is covered in detail in the sections to follow. Note: If your spa is not equipped with an audio system. -
Page 51: Entertainment Menu Display
J-400 10.4 Entertainment Menu Display Jacuzzi models equipped with the optional J-1000 Audio System offer an enhanced spa experience. These models include an integrated Bluetooth, FM Radio, iPod®, Universal Serial Bus, Auxiliary device receiver, four high fidelity spa engineered speakers for unsurpassed sound quality and long-life, and an integrated subwoofer for a superb acoustical sound. -
Page 52: Bluetooth Submenu
J-400 10.5 Bluetooth Submenu While in the Entertainment menu (only when a Bluetooth device is connect) press button A to access the Bluetooth submenu (Figure B). You can scroll through the tracks, control the volume, and pause/play the device. Note: In order to use your Bluetooth device it must be paired to the J1000 audio system. -
Page 53: Aux Submenu
J-400 = Previous Icon: Press button D to return to the Choose Media Device Menu. = Splash Button: Press this button once to pause the track. Press again to play. 10.6 AUX Submenu When you press button B (while still in the Entertainment Menu) you can access the AUX/USB submenu. -
Page 54: Usb Submenu
J-400 10.7 USB Submenu When you press button B (from the Auxiliary Menu) you can access the USB submenu. The USB submenu lets you connect to a USB device (page 95). You can control the folder selection, track selection, vol- ume, and pause/play the device. - Page 55 J-400 B. Accessing a folder USB FOLDER Displays Audio Information Press Open Folder “Displays = Folder Icon: Allows you to select the folder from the USB Audio Information” drive. The arrows on either side indicate that the Quad Keypad can be used to scroll through the folders. •...
-
Page 56: Fm Radio Submenu
J-400 10.8 FM Radio Submenu The FM radio submenu (Figure E) gives you access to your local FM radio stations and preset stations. A. Listening to local FM radio stations FM RADIO 106.7 Vol. Press Set Preset Figure E 106.7 = Station Number: Indicates the station that is currently playing. - Page 57 J-400 B. Using the scan feature FM RADIO From the FM Radio Menu (Figure E) Press press button A to access the scan remain on station 106.7 feature. The radio will scan and stop at Vol. frequencies with a strong signal for about 5 seconds then continue scanning.
- Page 58 J-400 D. Setting preset stations FM RADIO Use the Quad Keypad to set stations into memory (Figure I). 106.7 1. Use the Left and Right buttons to Vol. locate a station you would like to set or use the scan and seek features. Press Set Preset 2.
-
Page 59: Adjust Audio Settings Submenu
J-400 10.9 Adjust Audio Settings Submenu The J1000 audio system offers you the flexibility to adjust a series of audio settings. From the Choose Media Device Menu, press the Splash button to enter the Adjust Audio Settings submenus (Figure L). Bass Press next Audio Settings... - Page 60 J-400 A. Adjusting the Bass Audio Setting Bass Use the Quad Keypad to adjust the range from -5 to 5 (Figure M). 1. Press the Left button to lower the bass to a minimum of -5. 2. Press the Right button to raise the Press next Audio Settings bass up to a maximum of 5.
- Page 61 J-400 E. Rock Audio Setting Rock From the Audio Settings Menu, press button A to activate the rock audio settings (Figure Q). 1. Programmed audio settings are Bass (+3) and Treble (+1). Bass 3 Treble 1 2. If this audio setting is selected do not Figure Q press any button and in 15 seconds the display will return to the Choose Media Device Menu.
-
Page 62: Operating Instructions
(pages 23-40). These controls let you operate many of the special functions of your Jacuzzi spa. When you press button B from the Main Menu, you will enter the Jets Pump Submenu (Figure A). -
Page 63: Activate Lights
J-400 6. Press button C to turn pump #2 off. 7. Press again to activate pump #2. The pumps will move from an “ON” ( ) state into an “OFF” state. Auto Turn Off — Anytime a pump has been manually turned on, it will automatically turn off after approximately 20 minutes. If at this time you desire more jet operation you may simply turn the pump(s) back on. 11.3 Activate Lights From the Main Menu (page 42), press button C to enter the Light’s submenus. - Page 64 J-400 A. To Access the Interior Solid Color Mode: 1. Press button A to activate the solid color mode. Note: The default color and intensity will always be the last color and intensity used. 2. Press again to turn off. 3.
-
Page 65: Adjusting Individual Jet Flow
J-400 3. To increase or decrease light intensity, use the Quad Keypad as follows: • Press the Up button to increase the intensity in 25% increments. • Press the Down button to decrease the intensity in 25% increments. Note: The intensity range is from 25% to 100%, in increments of 25%.As the intensity is increased the bulb will darken to reflect the effect (Figure D, page 58). -
Page 66: Selecting The Desired Massage Action
J-400 11.9 Selecting the Desired Massage Action Your Jacuzzi spa is equipped to allow you to customize the massage action you desire. Each model incorporates a massage selector that allow you to customize the massage and performance by diverting water between various jet systems. -
Page 67: Programming Instructions For Settings 1 Menus
J-400 12.0 Programming Instructions for Settings 1 Menus Your Jacuzzi spa is equipped with three settings menus that allow you to program and activate different components of the spa. In the “Settings 1” menu you can program the Heating, the CLEARRAY® Water Purification System (UV), and the check/clean filter reminder. -
Page 68: Programming The Eco-Mode Heating Mode
J-400 12.1 Programming the Eco-Mode Heating Mode Eco-Mode is an energy saving heating program. By heating the spa in the non-peak hours, you conserve electricity. While in Eco-Mode the spa is programmed to heat during the hours of 5:00 PM to 7:00 AM on a daily basis. -
Page 69: Programmable Heating Mode
J-400 3. To exit the submenu, press button D to return to the Settings 1 Menu. SETTINGS 1 4. If you have programmed the Auto- Heating cycle you will see the Heating Thermometer with wavy lines icon UV Light 0 Days next to word Heating on the display Filter (Figure F). - Page 70 J-400 4. Press the Splash button to save settings. Then the display will revert to the Program A menu (Figure I). 5. Press the Down button on the Quad PROGRAM A keypad to select “Start Time” (Figure K). Press the Left or Right button on Day Settings the Quad Keypad to select the time Start Time...
- Page 71 J-400 3. When you enter the submenu PROGRAM B (Figure O), you can choose the Monday day(s) you would like “Program B” to Tuesday run for a heating cycle. Press the Up Wednesday Select Thursday or Down button (on the Quad Friday Saturday Keypad) to scroll through and change...
-
Page 72: Clean-Up "Blow-Out" Cycle
J-400 12.4 Clean-Up “Blow-Out” Cycle The clean-up cycle occurs once per day in all Heating modes at 12:00 (noon) for two minutes. This is not user programmable. Each jets pump activates for one minute to circulate any water in the plumbing unless a pump has just finished a 20 minute time out, it will not automatically activate for the clean-up cycle. -
Page 73: Programming Instructions For Settings 2 Menus
J-400 3. Press the Splash button to confirm and save your selection. 4. When the set time period expires, the “Please check filter!” message will appear on the Main Menu display (page 91). The reminder must be reset when the time allotted expires. Note: The time range is from 10 to 365 days in increments of 10 days or you can elect to turn the feature “OFF.”... -
Page 74: Programming The Primary Filter Cycle
J-400 = Settings 3 Menu Icon: Press button B to access the “Settings 3” Submenus. = Previous Icon: Press button D to go to the previous menu. 13.1 Programming the Primary Filter Cycle 1. To program the Primary Filter cycle PRIMARY press button A. -
Page 75: Programming The Secondary Filter Cycle
J-400 13.2 Programming the Secondary Filter Cycle 1. To program the Secondary Filter SETTINGS 2 cycle, press button C (Figure B, pg. Primary 67). This cycle will activate the Secondary main jet pump to run for additional filtration when programmed (Figure E). -
Page 76: Programming Instructions For Settings 3 Menus
J-400 6. Now you will need to adjust the filter SECONDARY cycle “Duration” (Figure I). The Day Settings duration range is from 0 (OFF) to 120 Start Time minutes. Press the Left or Right Select button on the Quad Keypad to make Duration Duration your adjustments in increments of 15... -
Page 77: Choosing The Language
J-400 = Date Icon: Press button C to access the Date and Time submenus. Note: The Date and Time submenus will default to the last submenu accessed. = Lock/Unlock Icon: Press button B to lock and unlock the control panel. = Previous Icon: Press button D to go to the previous menu. -
Page 78: Setting The Time
J-400 3. With the “Set Day” selected DATE (Figure F), press the Left or Right Year 2011 button on the Quad Keypad to scroll Month through selection. Once the correct Select Set Day day is displayed, press the Splash button to save your changes. The Press to Save display will change to the Time... -
Page 79: Locking And Unlocking The Topside
J-400 14.4 Locking and Unlocking the Topside 1. From the “Settings 3” Menu (Figure J), press button B to access the Lock feature. The Lock Menu opens up to a padlock (Figure K). This feature accepts a three digit code to lock and unlock the panel from unauthorized use. -
Page 80: Spa Maintenance
J-400 15.0 Spa Maintenance Proper and regular maintenance of your spa will help it retain its beauty and performance. Your authorized Jacuzzi dealer can supply you with all the information, supplies, and accessory products you will need to accomplish this. - Page 81 J-400 during a programmed filter cycle. These pumps draw water from footwell suction fitting and through a secondary water polishing bag filter and additional filter. The exclusive footwell “sweeper” suction fitting enhances filtration in the footwell area by creating a “swirling” water motion to maximize particle agitation and pickup.
- Page 82 J-400 Cartridge 1 Remove the filter pins If used, remove the Lift unthreaded filter in order to separate chemical feeder as cartridge from skimmer the ProClarity filter and instructed prior to rinsing well. the filter cartridge. Rinse canister. debris from filter pleats using a garden hose and high-pressure nozzle.
- Page 83 J-400 Trapped Bubbles Debris Submerge both filter Place each cartridge Install clean debris bag cartridges in spa. Tilt back into skimmer back onto the filter cover threaded end upward well, then rotated clips as shown (you can to remove trapped air each cartridge handle flip the filter skimmer bubbles, then keep...
-
Page 84: Draining And Refilling
J-400 15.2 Draining and Refilling About every 3 to 6 months, you will want to replace the spa’s water. The frequency depends on a number of variables including the amount of use, number of users, attention paid to water quality maintenance, etc. You will know it is time for a change when you cannot control sudsing and/or you can no longer get the normal feel or sparkle to the water even though the key water balance measurements are all within the proper... -
Page 85: Cleaning The Spa Interior
If you are not certain as to the suitability of a particular cleanser, consult your authorized Jacuzzi dealer. Regardless of the cleanser used, use extreme care to assure that no soap residue is left on the surface. -
Page 86: Cleaning The Control Panel
15.7 Vinyl Cover Care and Maintenance Your Jacuzzi cover has a vinyl encasement. This vinyl encasement is attractive and durable. Monthly cleaning and conditioning is strongly recommended to maintain and increase the longevity of your cover. -
Page 87: Winterizing
J-400 15.8 Winterizing Your Jacuzzi spa is designed to automatically protect itself against freezing when operating properly. During periods of severe freezing temperatures, you should check periodically to be certain that the electrical supply to the spa has not been interrupted. Constantly check the indicator light to make sure is it white, page 60. -
Page 88: Restarting Your Spa In Cold Weather
10. Re-install cabinet side panels and cover spa so that no casual moisture can enter into it. Consult your Jacuzzi dealer if you have any questions regarding winter use or winterizing. 15.9... -
Page 89: Ph Control
Your authorized Jacuzzi dealer can advise you on the use of these additives. When adding spa shock (chlorine or non-chlorine) or pH balancing chemicals activate the jet pump(s) and leave the spa cover open for a minimum of 20 minutes. -
Page 90: Clearray® (Ultraviolet) Water Purification System
J-400 16.4 CLEARRAY® (Ultraviolet) Water Purification System CLEARRAY Water Purification System is exclusive technology utilizing natural ultraviolet technology to WARNING! DO NOT LOOK AT LIT BULB eliminate waterborne bacteria, viruses, and algae in SEVERE EYE DAMAGE OR BLINDNESS CAN OCCUR portable spas. - Page 91 J-400 DANGER: TURN THE SPA BREAKER TO THE OFF POSITION! WARNING DRAIN THE SPA IF YOU ARE REPLACING OR CLEANING THE QUARTZ TUBE! WARNING: ALLOW BULB TO COOL DOWN PRIOR TO REMOVING FROM QUARTZ TUBE. DANGER: NEVER LOOK AT THE LIT BULB. THIS CAN CAUSE SEVERE EYE DAMAGE OR BLINDNESS.
- Page 92 J-400 7. Now you are ready to clean or replace the quartz tube (2). For the cleaning of the quartz tube (2), follow steps 8 and 9 then proceed to step 10. For replacing of the quartz tube (2), skip steps 8 and 9 and proceed to step 10.
- Page 93 J-400 WARNING: DO NOT TOUCH THE NEW UV BULB WITH YOUR BARE HAND. Oil on your skin will cause hot spot on the UV bulb and shorten the life of your UV bulb. Use the pro- vided latex glove to handle the UV bulb. 17.
-
Page 94: Error/Display Messages
17.0 Error/Display Messages There are a number of unique functions designed into your Jacuzzi spa to protect it from damage and/or to aid in troubleshooting. When an error occurs the spa will notify you by showing the screen below and an error code next to it. Also... - Page 95 J-400 3. Communication error: Communication between the control panel and circuit board is faulty. If condition persists, contact your authorized dealer or service organization. 4. Pump does not operate: Proper flow of water is inhibited or a flow switch has malfunctioned. Check for proper water level and for clogged filter (page 74).
- Page 96 J-400 10. Shorted sensor: The hi-limit temperature sensor is not functional. Heater is disabled. This must be repaired only by a qualified authorized service organization or service technician. 11. Start-up malfunction: Flow switch is non-functional. Closed or shorted flow switch on system start-up (system disabled). This must be repaired only by an authorized dealer or qualified service organization.
- Page 97 J-400 17. Please Check Filter! 6:45 PM This message will appear when the filter reminder time has expired (Figure B). T emp. Please remove the ProClarity/Proclear filters and filter/debris bag for cleaning or Please check filter! replacement. Figure B 18. Feature not installed: This message will appear when a user tries to activate a feature that is not installed.
-
Page 98: Troubleshooting Procedures
J-400 18.0 Troubleshooting Procedures In the unlikely event your spa is not working the way you believe it should, please first review all the installation and operating instructions in this manual and check the message on the panel display; second, if you are still not satisfied it is working properly, please follow the appropriate troubleshooting instructions. - Page 99 Your input as a Jacuzzi spa owner is a cherished part of this process. If you have any comments or suggestions, or if you wish to be informed on any new products for your spa, please write to us.
-
Page 100: Typical Spa Wiring Diagrams
J-400 19.0 Typical Spa Wiring Diagrams 19.1 Wiring diagram for North American 60 Hz Models Only 2-Pole Circuit Breaker with 2-Wire Grounded Load Connection (3 Wires to Hot Tub, 2-Hot (L1-L2), 1-Ground) 240 VAC Ground/Bonding Lug** White (N) Black (L1) 2-Pole GFCI Red (L2) -
Page 101: Optional Jacuzzi J-1000™ Audio System Stereo
J-400 20.0 Optional Jacuzzi J-1000™ Audio System Stereo USB plug 30 pin 3.5 mm Cable Connector 1. Media Locker Handle Slide the handle to lock and unlock the protective door. 2. Power Button Press power button once to turn “ON” stereo system. Press a second time to place the stereo in standby mode and the red light will remain illuminated. -
Page 102: Optional J-1000 Wireless Remote
J-400 WARNING: RISK OF ELECTRICAL SHOCK HAZARD EXISTS AND EQUIPMENT DAMAGE! Never install or remove electrical devices while hands are wet or while sitting partially immersed or fully immersed in spa! CAUTION: Never leave electrical devices in the Docking Station when spa is not is use to prevent damage from out- door elements! Never spray Docking Station with a pressur- ized water hose for any reason! Damage to the device or spa stereo system caused by water intrusion is not covered under... - Page 103 J-400 = Filter Boost Icon: Allows you to active the Filter Boost feature. Jets pumps will activate for 20 minutes. = Time Icon: Allows you to view the time, either in a 12-Hour or 24-Hour period. = Temperature Icon: Allows you to set and control the temperature.
- Page 104 J-400 = AUX Icon: Allows you to access files on an auxiliary device. Devices must be connected in order for the remote to operate some functions. = Bluetooth Icon: Allows you to access files on a Bluetooth device. This icon will only appear if a Bluetooth device is connected.
-
Page 105: Main Menu
J-400 2. Main Menu When any key is pressed and the remote awakes it will display the icons that are selectable. You can use the Navigational Keypad (up, down, left or right) to navigate through the screens and make selections. By moving through the icons, they will blink to let you know that if you hit the Select button you will activate that component or aspects of it. - Page 106 J-400 6. Turning on the Interior Light Rotation Mode When the Show 1 icon is selected, all other icons on the display screen will disappear. The only two items shown are the temperature and the Show 1 icon. Using the Navigational Keypad you can: •...
- Page 107 J-400 3. USB Folder Operation You can scan through the folders (Figure C), track num- bers and adjust the volume with the remote. Using the Navigational Keypad you can: • Increase the volume by pressing the Up button. Figure C •...
-
Page 108: J-1000 Wireless Remote Battery Replacement
J-400 20.2 J-1000 Wireless Remote Battery Replacement Figure A 1. Turn the remote unit over and locate the battery door (Figure A). 2. Remove the six screws securing the door. Figure B 3. Remove the battery door. You could use a small screwdriver to pry the door upward. -
Page 109: J-1000 Audio System Stereo Specifications
J-400 20.3 J-1000 Audio System Stereo Specifications Power supply ........10.7-14.4V DC Tuner FM radio sensitivity. - Page 110 J-400 Page 104...