
Related Manuals for AMX RS-232/422/485 Interface Card AXC-232++


Summary of Contents for AMX RS-232/422/485 Interface Card AXC-232++
- Page 1 instruction manual AXC-232++ RS-232/422/485 Interface Card A x c e s s C o n t r o l C a r d s...
-
Page 3: Table Of Contents
Table of Contents Introduction ...1 Specifications ... 1 Installation and Wiring ...3 Setting the Internal Jumpers ... 3 Setting jumper JP1 to terminate RS-422 input with 100 ohms... 3 Setting jumper JP2 to set the RS-422 port for RS-485 use ... 3 Setting the RS-232/422 DIP Switch ... - Page 4 Table of Contents AXC-232++ RS-232/422/485 Interface Card...
-
Page 5: Introduction
Introduction Many audiovisual and computer-based devices can be remotely controlled using RS-232, RS-422, or RS-485 commands. The AXC-232++ RS-232/422/485 Interface Card can generate virtually unlimited numbers of product/function commands as they are programmed into the AXC-EM Master Card. As needs and technology change, existing cards can be reprogrammed or new cards added, one for each device. - Page 6 Introduction Specifications (Cont.) LEDs: RX/TX: DIP Switch Asynchronous data standards Connectors: • RS-232 • RS-422 • +12VDC • RS-232 • AXlink Buffer Internal jumpers Processor Memory Red LED indicators for data transmission Red LED blinks to indicate that the AXC-232++ is receiving RS-232, RS-422, or RS-485 data.
-
Page 7: Installation And Wiring
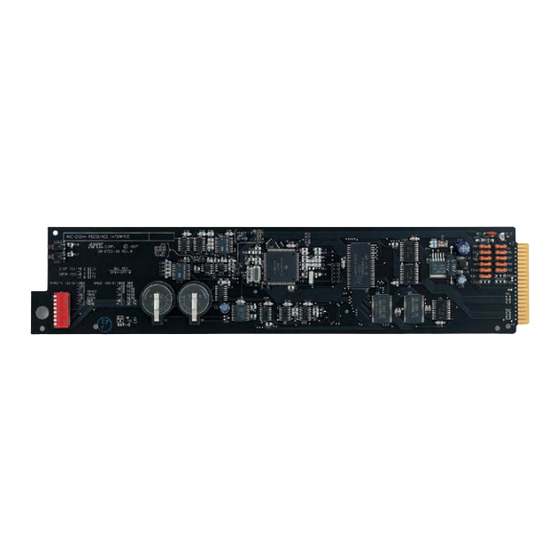
Installation and Wiring Setting the Internal Jumpers The AXC-232++ can be used as an independent RS-232/422/485-controlled interface by setting the internal jumpers (JP1 and JP2). FIG. 1 indicates the location of the jumpers on the card. Static electricity can damage electronic components. Before opening the device, discharge any accumulated static electricity from your body by touching a grounded metal object. -
Page 8: Setting The Rs-232/422 Dip Switch
Installation and Wiring Setting the RS-232/422 DIP Switch Set the stop bits, data bits, parity, and baud rate on the RS-232/422 DIP switch (see FIG. 1). The AXC-232++ supports the following asynchronous data standards: Stop bits 1 and 2 Data bits 7, 8, and 9 Parity None, Odd, Even, Mark, and Space Baud rates 300, 600, 1,200, 2,400, 4,800, 9,600, 19,200 and 38,400. -
Page 9: Wiring Devices To The Axc-232
Wiring Devices to the AXC-232++ Card Edge Pinouts The table below lists the card edge pinouts and the function of each. Card Edge Pinouts Signal +12V RX - RX + TX - TX + 12 - 16 Factory Use Preparing captive wires To secure wires in a captive-wire connector: 1. -
Page 10: Using Rs-422
Installation and Wiring Using RS-422 When communicating via RS-422, connect the wiring as shown in FIG. 3. +12V RX - RX + AXC- AXB- 232++ TX - 232++ TX + FIG. 3 RS-422 wiring Using RS-485 When communicating via RS-485, connect the wiring as shown in FIG. 4. +12V RX - RX +... -
Page 11: Replacing The Lithium Batteries
Replacing the Lithium Batteries The AXC-232++’s lithium batteries have a life of approximately 5 years to protect its memory. When DC power is on, the batteries are not used. When you install the AXC-232++, record the date the batteries should be replaced. There is a danger of explosion if you replace the batteries incorrectly. - Page 12 Installation and Wiring AXC-232++ RS-232/422/485 Interface Card...
-
Page 13: Programming
Programming Send_Commands The AXC-232++ supports the same command set as the AXC-232. Figure 20 lists the AXC-232++ Send_Commands. AXC-232++ Send_Commands B9MOFF Sets data bit mode to normal with DIP switch settings (default). B9MON Enables a special mode to override DIP switch settings. BAUDHIGH Enables 115,200 baud rate when the DIP switch is set to... - Page 14 Programming AXC-232++ Send_Commands (Cont.) CHARD Sets delay between all trans- mitted characters to incre- ment specified. CTSPSH Enables PUSHes and RELEASEs. CTSPSHF Disables the 'CTSPSH' command. EOFF Disables the 'EON ' command (default). Forces the AXC-232++ to ignore the transmitted char- acters on its receiver.
-
Page 15: Axcess Program Characteristics
AXC-232++ Send_Commands (Cont.) RXOFF AXC-232++ does not pass on received characters to the AXC-EM (default). RXON Enables AXC-232++ to send incoming characters received to the AXC-EM. TXCLR Clears and stops any charac- ters waiting in the Transmit buffer. XOFF Disables software handshaking (default). -
Page 16: Send_String Escape Sequences
Programming Send_String Escape Sequences The AXC-232++ does not regard certain three-character combinations within a Send_String program as literal characters, but as commands. The following table lists those combinations. Send_String Escape Sequences 27,17,<time> Sends a break character of the specified length of time. 27,18,1 Sets the ninth data bit to 1 for all of the following characters... -
Page 17: Axc-232++ Statements
AXC-232++ statements The Axcess program of the AXC-232++ communicates with the AXC-EM as Device 0. Its device communicates with the RS232/422 Input/Output (I/O) of the AXC-232++ as Device 1. The following table lists AXC-232++ statements. AXC-232++ Program Statements Statement CREATE_BUFFER 0,buffer CREATE_BUFFER 1,buffer... -
Page 18: Xmodem Timing Commands
Programming Xmodem Timing Commands The following table lists the AXC-232++ Xmodem timing commands. Xmodem timeouts exist to accommodate potential Ethernet delays and for consistency among and within products. Any Xmodem timing command will change timing and retries for Axcess code download as well as SOFTROM transfer. -
Page 19: Reserved Channels
Reserved Channels The following table lists the channels reserved on Device 0. Reserved Channels Channel Channel 254 Channel 255 Axcess Master Mode When an Axcess device is placed in "Master Mode", the Central Controller’s moved to the Axcess device’s RS-232 port. Press the escape key, then type either MC or MD: <esc>MC - connects the device in Master Mode <esc>MD - disconnects the device... - Page 20 ATLANTA • BOSTON • CHICAGO • CLEVELAND • DALLAS • DENVER • INDIANAPOLIS • LOS ANGELES • MINNEAPOLIS • PHILADELPHIA • PHOENIX • PORTLAND • SPOKANE • TAMPA 3000 RESEARCH DRIVE, RICHARDSON, TX 75082 USA • 800.222.0193 • 469.624.8000 • 469-624-7153 fax • 800.932.6993 technical support • www.amx.com...