Advertisement
Available languages
Available languages
Table of Contents
- 1 Table of Contents
- 2 Warnings
- 3 Description of the Appliance
- 4 Personalisation
- 5 How to Run a Wash Cycle
- 6 Standby Mode
- 7 Washing Guide
- 8 International Symbols
- 9 Programmes Table
- 10 Consumption
- 11 Care and Cleaning
- 12 Operating Problems
- 13 Technical Specifications
- 14 Installation
- 15 Environment
- Download this manual
Advertisement
Table of Contents

Related Manuals for Electrolux EWT 11420 W


Summary of Contents for Electrolux EWT 11420 W
- Page 1 User manual Инструкцияѝпоѝэксплуатации Washing machine Стиральнаяѝмашина EWT 11420 W - EWT 10420 W...
- Page 2 We were thinking of you when we made this product...
- Page 3 Thank you for choosing a first class product from Electrolux, which hopefully will provide you with lots of pleasure in the future. The Electrolux ambition is to offer a wide variety of quality products that make your life more comfortable.
-
Page 4: Table Of Contents
4 contents Contents Warnings ........... 5 Description of the appliance ....7 Personalisation ........8 How to run a wash cycle ? ....9 Washing guide ........ 14 Programmes table ......16 Consumption ........17 Care and cleaning ......18 Operating problems ...... -
Page 5: Warnings
warnings 5 Warnings Installation • Unpack or ask for the appliance to be unpacked immediately upon arri- val. Check the outside of the appliance is not damaged in any way. These warnings are for the safety of Put any complaints you may have in you and others around you. - Page 6 6 warnings Precautions to be taken against these items into the drum. frost • Your appliance has been designed If your appliance is exposed to tempera- for use by adults. Ensure children do tures below 0°C, the following precau- not touch the appliance or use it as a tions must be taken : toy.
-
Page 7: Description Of The Appliance
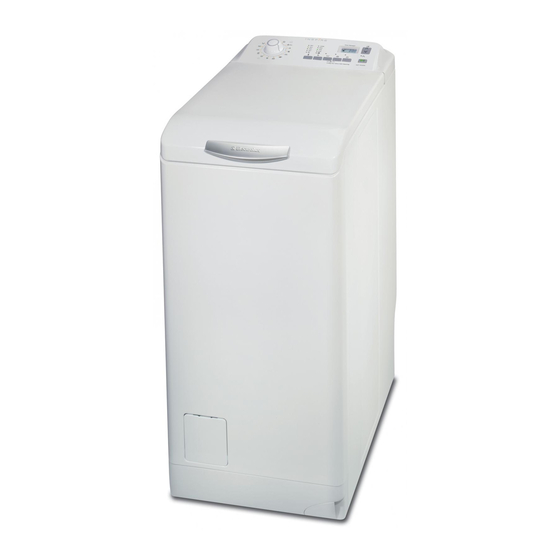
description of the appliance / personalisation 7 Description of the appliance The control panel Lid handle Filter access cover Lever for moving the appliance Adjustable levelling feet Dispenser box Prewash Wash Softener (do not fill above the MAX symbol The control panel Programme selector “Start/Pause”... -
Page 8: Personalisation
8 description of the appliance / personalisation The symbols Time manager Cycle running Temperature Length of cycle or Timer delay Child safety countdown 8.88 Personalisation Child safety To deactivate child safety, repeat the This option provides two types of process. locking : - if the option is activated after the cycle Audible signal... -
Page 9: How To Run A Wash Cycle
how to run a wash cycle 9 How to run a wash cycle? Proportioning of detergents Your washing machine has been desi- Using for the first time gned to reduce your water and deter- gent consumption. You can therefore reduce the amounts recommended by detergent manufacturers. - Page 10 10 how to run a wash cycle progress, the appliance will ignore the a “Spin” or “Drain” programme to finish new selected programme. “Err” flashes the cycle. “Start/Pause” pushbutton flashes red for a few seconds then the “Night silence plus” current cycle display reappears.
- Page 11 how to run a wash cycle 11 • Temporary : the “Start/Pause” pushbutton, by pres- sing the “Delay start” pushbutton again (0’ indicates immediate start). If you have already pressed the “Start/ Pause” pushbutton and you want to change or cancel the delayed start, pro- Press the “Rinse plus”...
- Page 12 12 how to run a wash cycle Very lightly soiled laundry or half Interrupting a programme load Adding washing The availability of these different levels When the “Add washing” light is on, varies depending on the selected pro- you can add washing by proceeding as gramme type.
-
Page 13: Standby Mode
how to run a wash cycle 13 Turn the programme selector to the “Stop” position. Remove washing Unplug and close water inlet tap. We recommend leaving the lid and drum open after use to ventilate the water tank. Standby mode If the appliance is on but no commands are selected for 10 min before or after a cycle, it goes into standby mode. -
Page 14: Washing Guide
14 washing guide Washing guide Wash loads depending on type of materials The amount of washing placed in the drum must not exceed the maximum capacity of the washing machine. This Sorting and preparing the washing capacity can vary depending on the type •... -
Page 15: International Symbols
washing guide 15 You can obtain information on the hard- case, the wash cycle must be started ness level of water in your area by con- immediately. tacting your water company or other Detergent tablets or doses must be pla- competent source. -
Page 16: Programmes Table
16 programmes table / consumption Programmes table Programme / Type of washing Load Possible options Cotton : White or colour, e.g., normally soiled work clo- 5,5 kg thes, bed linen, table linen, body linen, towels. Night silence plus Prewash Synthetics : Synthetic fabrics, body linen, coloured fa- 2,5 kg Rinse plus brics, non-iron shirts, blouses. -
Page 17: Consumption
programmes table / consumption 17 Consumption Programme Tempera- Average Washing type tures consumption** °C Litres Time Cotton cold - 90 2,10 Synthetics cold - 60 0,80 Delicates cold - 40 0,50 Easy iron cold - 60 0,55 Jeans cold - 60 0,90 Spin 0,015... -
Page 18: Care And Cleaning
18 care and cleaning Care and cleaning Drainage filter Clean the filter located at the base of the appliance regularly : Unplug the appliance before cleaning. Descaling the appliance To descale the appliance, use an appro- priate non-corrosive product designed for washing machines. -
Page 19: Operating Problems
operating problems 19 Operating problems Numerous checks were carried out on your appliance before it left the factory. However, should you notice a malfunction, please refer to the sections below before contacting the after-sales service. Problems Causes washing machine • the appliance isn’t plugged in correctly, the doesn’t start or doesn’t fill : electrical installation isn’t working, •... - Page 20 20 operating problems Problems Causes Wash is unsatisfactory : • the detergent is unsuitable for machine washing, • there is too much washing in the drum, • the wash cycle is unsuitable, • there isn’t enough detergent. The appliance vibrates, is •...
- Page 21 operating problems 21 Problems Causes The E20 error code ap- • the drainage filter is obstructed, pears in the display** and • the drain hose is blocked or bent, the Start/Pause pushbut- • the drain hose is fixed too high (see “Installa- ton flashes red*** : tion”...
-
Page 22: Technical Specifications
22 technical specifications / installation Technical specifications DIMENSIONS Height 850 mm Width 400 mm Depth 600 mm LINE VOLTAGE / FREQUENCY 230 V / 50 Hz POWER CONSUMPTION 2300 W WATER PRESSURE Minimum 0,05 MPa (0,5 bar) Maximum 0,8 MPa (8 bar) Connection to water supply Type 20x27 This appliance conforms to the CEE 89-336 directive concerning the limi-... - Page 23 technical specifications / installation 23 Untying To install your washing machine at the same level as surrounding furniture, pro- ceed as follows : Water supply Install the supplied water inlet hose at the rear of your washing machine by proceeding as follows (Do not reuse an old hose) : Open the water inlet tap.
- Page 24 24 technical specifications / installation Drainage Positioning - The connector at Position the appliance on a flat and hard the end of the flexi- surface in a ventilated location. Ensure ble hose can be at- the appliance does not come into con- tached tact with the wall or other furniture.
-
Page 25: Environment
environment 25 Environment Protecting the environment Disposing of the appliance To save water and energy and therefore help protect the environment, we re- All materials carrying the symbol are commend the following : recyclable. Dispose of them at a waste •... - Page 26 26 оглавление Оглавление Мерыѝпредосторожностиѝ ...27 Описаниеѝприбораѝ .....29 Дополнительныеѝнастройкиѝ ..30 Какѝстиратьѝ?ѝ ......32 Руководствоѝпоѝстиркеѝ....38 Таблицаѝпрограммѝ Потреблениеѝводыѝиѝэнергииѝ..43 Уходѝиѝчисткаѝ ......44 Вѝслучаеѝнеисправностиѝ ....46 Техническиеѝданныеѝ ....50 Установкаѝ........50 Защитаѝокружающейѝсредыѝ ..54 Вѝ данномѝ руководстве используютсяѝ следующие обозначенияѝ: Важнаяѝ информацияѝ по личнойѝ безопасностиѝ и сведенияѝ по предотвращению поврежденийѝприбора Общиеѝсведения Сведенияѝпоѝзащитеѝ...
- Page 27 Мерыѝпредосторожности 27 Мерыѝ например,ѝ носки,ѝ ремниѝ иѝ т.п.ѝ в полотняныйѝ мешочекѝ илиѝ в предосторожности наволочку. • Поѝ окончанииѝ пользованием приборомѝ отключитеѝ подачу напряженияѝ наѝ розеткуѝ и Описанныеѝ здесьѝ меры закройтеѝкранѝподачиѝводы. предосторожностиѝ направлены • Передѝ выполнениемѝ уборкиѝ или наѝ обеспечениеѝ вашейѝ личной техобслуживанияѝ...
- Page 28 28 Мерыѝпредосторожности доме,ѝ необходимоѝ обратитьсяѝ к положениеѝ“Выкл”. квалифицированномуѝэлектрику. • Отсоединитеѝ приборѝ от • Послеѝ установкиѝ прибора электрическойѝсети. необходимоѝ удостоверитьсяѝ в • Прикрутитеѝ сноваѝ шлангѝ подачи том,ѝчтоѝонѝнеѝопираетсяѝнаѝсвой водыѝ иѝ установитеѝ наѝ место кабельѝпитания. сливнойѝшланг. • Приѝ установкеѝ машиныѝ наѝ полѝ с Такимѝобразом,ѝводаѝбудетѝудалена...
- Page 29 описаниеѝприбораѝ/ѝдополнительныеѝнастройки 29 Описаниеѝприбора Панельѝуправления Ручкаѝдляѝоткрыванияѝкрышки Крышкаѝотделенияѝфильтра Рычагѝдляѝперемещенияѝприбора Регулируемыеѝпоѝвысотеѝножки Отделениеѝдляѝмоющихѝсредств ѝПредварительнаяѝстирка ѝСтиркаѝ ѝ Кондиционерѝ дляѝ тканиѝ (не превышатьѝотметкуѝMAXѝ Панельѝуправления Переключательѝпрограмм Кнопкаѝ“Старт/Пауза” Кнопкиѝ сѝ указаниемѝ их Кнопкиѝ“TimeѝManager” назначения Дисплей...
- Page 30 30 описаниеѝприбораѝ/ѝдополнительныеѝнастройки Символы Ходѝвыполненияѝцикла Timeѝmanager Продолжительностьѝциклаѝили Температура обратныйѝотсчетѝвремени Безопасностьѝдетей задержки 8.88 Дополнительныеѝнастройки Безопасностьѝдетей Этаѝфункцияѝпредусматриваетѝдва видаѝблокировкиѝ: -ѝеслиѝонаѝвключаетсяѝпослеѝпуска цикла,ѝ изменениеѝ программыѝ или дополнительныхѝ функций становитсяѝневозможным. Режимѝ выполненияѝ цикла становитсяѝ фиксированным;ѝ для выполненияѝ новогоѝ цикла Выборѝ функцииѝ будетѝ занесенѝ в необходимоѝ отключитьѝ данную память.ѝ...
- Page 31 описаниеѝприбораѝ/ѝдополнительныеѝнастройки 31 случаеѝаварийнойѝситуации. Дляѝ повторногоѝ включения функцииѝподачиѝсигналаѝповторите туѝжеѝпроцедуру.
- Page 32 32 какѝстирать Какѝстиратьѝ? машины,ѝ убедитесьѝ вѝ том,ѝ что барабанѝзакрытѝправильноѝ: Первоеѝпользованиеѝ • створкиѝзацепленыѝдругѝзаѝдруга, • запирающаяѝ кнопкаѝ А прибором освобождена. Дозировкаѝмоющихѝсредств Стиральнаяѝ машина • Проверьте,ѝ чтобыѝ все сконструированаѝ такимѝ образом, подключенияѝ кѝ электросетиѝ иѝ к чтобыѝ сделатьѝ возможным сетиѝ водоснабжения снижениеѝ потребленияѝ водыѝ и соответствовалиѝ...
- Page 33 какѝстирать 33 Индикаторѝ кнопкиѝ “Старт/Пауза” Выборѝскоростиѝотжима начинаетѝмигатьѝзеленымѝцветом. Нажимайте Наѝ дисплейѝ выводятсяѝ символы, последовательноѝ кнопку соответствующиеѝ разнымѝ стадиям “Отжим”ѝ ѝ ,ѝ чтобы выполненияѝ циклаѝ ( ѝ Стирка,ѝ повыситьѝ илиѝ понизить Полоскание,ѝ ѝСлив,ѝ ѝОтжим). скоростьѝ отжимаѝ в случае,ѝеслиѝнеобходимо выполнитьѝ отжимѝ белья наѝскорости,ѝотличнойѝот Приѝ...
- Page 34 34 какѝстирать “Ночнойѝрежимѝплюс”ѝ иѝ синтетикиѝ иѝ сливомѝ вѝ случае Сливѝ водыѝ послеѝ последнего программѝ стиркиѝ деликатных полосканияѝнеѝпроизводится,ѝтаким тканей. образом,ѝ бельеѝ неѝ сминается. Посколькуѝвсеѝстадииѝотжимаѝбудут Функцияѝ“Полосканиеѝплюс”ѝ отменены,ѝциклѝстиркиѝбудетѝпочти Вѝ процессеѝ выполненияѝ цикла бесшумным,ѝиѝегоѝможноѝвыбирать будетѝ добавленоѝ одноѝ или дляѝ стиркиѝ ночью.ѝ Вѝ программах несколькоѝполосканий. Хлопокѝ...
- Page 35 какѝстирать 35 “Задержкаѝпуска”ѝ 30’ Вѝ течениеѝ периодаѝ задержки крышкаѝбудетѝблокирована.ѝЕслиѝее необходимоѝ открыть,ѝ следует перевестиѝ стиральнуюѝ машинуѝ в режимѝпаузы,ѝнажавѝкнопкуѝ“Старт/ Пауза”.ѝ Закрывѝ крышку,ѝ нажмите кнопкуѝ“Старт/Пауза”. Выбравѝ этуѝ функцию,ѝ можно TimeѝManager отложитьѝ пускѝ программыѝ стирки наѝ30,ѝ60,ѝ90ѝминут,ѝ2ѝчасаѝиѝвплоть доѝ20ѝчасов. Выбранноеѝ времяѝ задержки выводитсяѝ наѝ дисплееѝ вѝ течение несколькихѝсекунд...
- Page 36 36 какѝстирать Пауза”;ѝ соответствующий Вмешательствоѝвѝходѝ выполненияѝпрограммы индикаторѝ загоритсяѝ зеленым Добавлениеѝбелья цветом. Приѝ включенииѝ индикатора 2.00 “Добавлениеѝ белья”ѝ можно добавитьѝ вѝ машинуѝ белье, выполнивѝ описанныеѝ ниже действия. Нажмитеѝ кнопкуѝ “Старт/Пауза:ѝ во Считаетсяѝ нормальнымѝ явлением времяѝ паузыѝ соответствующий тотѝ факт,ѝ чтоѝ переключатель индикаторѝмигаетѝзеленымѝцветом.
- Page 37 какѝстирать 37 Конецѝпрограммы Стиральнаяѝ машина останавливаетсяѝ автоматически; кнопкаѝ “Старт/Пауза”ѝ гаснет,ѝ аѝ на дисплееѝмигаетѝсимволѝ“0”.ѝКрышка можетѝ бытьѝ открытаѝ ѝ толькоѝ по прошествииѝ примерноѝ 2ѝ минут послеѝ остановкиѝ стиральной машины. Установитеѝ ручкуѝ переключателя программѝвѝположениеѝ“Выкл”ѝ Выньтеѝбелье. Отключитеѝ подачуѝ напряженияѝ на розеткуѝ иѝ закройтеѝ кранѝ подачи воды.
- Page 38 38 руководствоѝпоѝстирке Руководствоѝпоѝстирке аноракиѝ иѝ т.п.),ѝ цветные трикотажныеѝ изделия,ѝ аѝ также изделияѝ изѝ шерстиѝ иѝ тканейѝ с декоративнымиѝвставками. • Мелкиеѝ непрочныеѝ изделия Сортировкаѝиѝподготовкаѝбелья (носки,ѝколготки,ѝбюстгальтерыѝи • Рассортируйтеѝ бельеѝ поѝ типуѝ и т.п.)ѝ следуетѝ стиратьѝ вѝ мешке- символуѝ обработкиѝ (см.ѝ ниже сеткеѝдляѝбелья. разделѝ...
- Page 39 руководствоѝпоѝстирке 39 Моющиеѝсредстваѝиѝдобавки получить,ѝ обратившисьѝ вѝ службу Пользуйтесьѝтолькоѝтемиѝмоющими водоснабженияѝ илиѝ вѝ другую средствамиѝ иѝ добавками,ѝ которые компетентнуюѝорганизацию. Cтиральныеѝ порошкиѝ могут предназначеныѝ дляѝ стиральных машин.ѝ Следуйтеѝ инструкциям использоватьсяѝбезѝограничений. Вѝ случаеѝ выбораѝ предварительной производителяѝ сѝ учетомѝ указаний, содержащихсяѝ вѝ разделах стиркиѝнельзяѝиспользоватьѝжидкие моющиеѝ средства.ѝ Приѝ остальных “Отделениеѝдляѝмоющихѝсредств”ѝи...
- Page 40 40 руководствоѝпоѝстирке Международныеѝсимволы ОБЫЧНАЯ СТИРКА Стиркаѝприѝ Стиркаѝприѝ Стиркаѝприѝ Стиркаѝприѝ 95°C 60°C 40°C 30°C Щадящаяѝ Неѝстирать ручнаяѝстирка ЩАДЯЩАЯ СТИРКА ОБРАБОТКАѝ Разрешеноѝотбеливаниеѝхлоромѝ(жавелем),ѝ Запрещеноѝотбеливаниеѝхлоромѝ(жавелем) ЖАВЕЛЕМ толькоѝвѝхолоднойѝводеѝиѝразбавленнымѝ раствором ГЛАЖЕНЬЕ Высокиеѝтемпературыѝ Средниеѝтемпературыѝ Низкиеѝтемпературыѝ Неѝгладить (макс.ѝ200°C) (макс.ѝ150°C) (макс.ѝ100°C) ХИМИЧЕСКА Химическаяѝчисткаѝ Химическаяѝчисткаѝ Химическаяѝчисткаѝ Химическаяѝчисткаѝ ЯѝЧИСТКА (всеѝобычныеѝ (всеѝобычныеѝ (толькоѝ...
- Page 41 таблицаѝпрограммѝ/ѝпотреблениеѝводыѝиѝэнергии 41 Таблицаѝпрограмм Программа/Типѝбелья Загру Возможныеѝ зка дополнительныеѝ функции Хлопокѝ (Cotton)ѝ :ѝ белоеѝ илиѝ цветноеѝ белье, 5,5ѝкг например,ѝ рабочаяѝ одеждаѝ обычнойѝ степени загрязнения,ѝпостельноеѝбелье,ѝстоловоеѝбелье, Ночнойѝрежимѝплюс нательноеѝбелье,ѝсалфетки. Предварительнаяѝ стирка Синтетикаѝ(Synthetics)ѝ:ѝсинтетическиеѝткани, 2,5ѝкг Полосканиеѝплюс нательноеѝ белье,ѝ цветныеѝ ткани,ѝ рубашки,ѝ не Задержкаѝпуска требующиеѝглаженья,ѝблузки. Timeѝmanager Деликатныеѝтканиѝ(Delicates)ѝ:ѝдляѝнепрочных 2,5ѝкг...
- Page 42 42 таблицаѝпрограммѝ/ѝпотреблениеѝводыѝиѝэнергии Программа/Типѝбелья Загру Возможныеѝ зка дополнительныеѝ функции Тонкоеѝ нижнееѝ бельеѝ (Lingerie)ѝ :ѝ очень 1,0ѝкг нежное,ѝтонкоеѝбелье,ѝнапример,ѝнижнееѝбелье. Шёлкѝ (Silk)ѝ :ѝ ткани,ѝ допускающиеѝ машинную 1,0ѝкг стиркуѝприѝ30°C. ѝРучнаяѝстиркаѝ(Handwash)ѝ:ѝтонкоеѝбелье, 1,0ѝкг Ночнойѝрежимѝплюс требующееѝ бережнойѝ стирки,ѝ сѝ указаниемѝ на Задержкаѝпуска этикеткеѝ“ручнаяѝстирка”. ѝ Шерстьѝ (Wool)ѝ :ѝ Шерсть,ѝ допускающая 1,0ѝкг...
- Page 43 таблицаѝпрограммѝ/ѝпотреблениеѝводыѝиѝэнергии 43 Потреблениеѝводыѝиѝэнергии Программа Температура Примерныеѝпоказатели Типѝбелья потребления** °C литры кВт длит-сть Хлопок холоднаяѝ-ѝ90 2,10 Синтетика холоднаяѝ-ѝ60 0,80 Деликатныеѝткани холоднаяѝ-ѝ40 0,50 Легкоеѝглаженье холоднаяѝ-ѝ60 0,55 Джинсы холоднаяѝ-ѝ60 0,90 Отжим 0,015 Слив 0,002 Полоскание 0,05 Тонкоеѝнижнееѝбелье холоднаяѝ-ѝ40 0,50 Шёлк холоднаяѝ-ѝ30 0,30 Ручнаяѝстирка холоднаяѝ-ѝ40 0,45 Шерсть...
- Page 44 44 уходѝиѝчистка Уходѝиѝчистка Передѝ чисткойѝ всегдаѝ отключайте приборѝотѝэлектросети. Удалениеѝизвестковыхѝ отложенийѝвѝприборе Сливнойѝфильтр Дляѝ удаленияѝ известковых Регулярноѝ прочищайтеѝ фильтр, отложенийѝ используйте расположенныйѝ вѝ нижнейѝ части специальные,ѝ неѝ вызывающие прибораѝ: коррозииѝ средства, предназначенныеѝ дляѝ стиральных машин.ѝ Соблюдайтеѝ приведенные наѝупаковкеѝуказанияѝпоѝдозировке иѝчастотеѝпользования. Корпус Чиститеѝ корпусѝ стиральной...
- Page 45 уходѝиѝчистка 45 Фильтрыѝнаѝлинииѝподачиѝводы Дляѝ чисткиѝ этихѝ фильтров выполнитеѝ действия,ѝ показанные нижеѝ:...
- Page 46 46 вѝслучаеѝнеисправности Вѝслучаеѝнеисправности Приѝ изготовленииѝ приборѝ прошелѝ множествоѝ проверок.ѝ Еслиѝ всеѝ же имеетѝ местоѝ сбой/неисправность,ѝ ознакомьтесьѝ сѝ изложеннымиѝ ниже сведениямиѝпрежде,ѝчемѝобращатьсяѝвѝсервисныйѝцентр.ѝ Неисправность Причины Стиральнаяѝ машинаѝ не • приборѝ подключенѝ неправильноѝ к включаетсяѝ илиѝ не электросети;ѝ ѝ неѝ работает заполняетсяѝводойѝ: электрооборудованиеѝвѝдоме, • плохоѝ закрытаѝ...
- Page 47 вѝслучаеѝнеисправности 47 Неисправность Причины Следыѝ водыѝ около • переливѝ пеныѝ из-заѝ избыточного машиныѝ: количестваѝмоющегоѝсредства, • используемоеѝ моющееѝ средствоѝ не подходитѝ дляѝ стиркиѝ вѝ стиральной машине, • неправильноѝ подвешенѝ загнутыйѝ конец слива, • неѝустановленѝнаѝместоѝсливнойѝфильтр, • шлангѝ подачиѝ водыѝ закреплен негерметично. Неудовлетворительные •...
- Page 48 48 вѝслучаеѝнеисправности Неисправность Причины Слишком • засореныѝфильтрыѝвѝлинииѝѝподачиѝводы, продолжительныйѝ цикл • сбойѝподачиѝводы, стиркиѝ: • сработалаѝ системаѝ термозащиты двигателя, • температураѝ подаваемойѝ водыѝ ниже обычной, • сработалаѝ защитнаяѝ система обнаруженияѝ пеныѝ (слишкомѝ много моющегоѝсредства),ѝиѝстиральнаяѝмашина выполняетѝудалениеѝпены, • сработалоѝ устройствоѝ предотвращения дисбаланса:ѝ добавленаѝ дополнительная стадияѝ...
- Page 49 вѝслучаеѝнеисправности 49 Неисправность Причины Наѝ дисплееѝ выводится • засоренѝсливнойѝфильтр, кодѝ ошибкиѝ E20**,ѝ и • закупоренѝилиѝперегнутѝсливнойѝшланг, кнопкаѝ “Старт/Пауза” • слишкомѝ высокоѝ установленѝ сливной мигаетѝ красным шлангѝ(см.ѝразделѝ“Установка”), цветом***ѝ: • засоренѝсливнойѝнасос, • засоренѝсифон. Наѝ дисплееѝ выводится • закрытѝкранѝподачиѝводы, кодѝ ошибкиѝ E10**,ѝ и • сбойѝподачиѝводыѝвѝсетиѝводоснабжения. кнопкаѝ...
- Page 50 50 техническиеѝданныеѝ/ѝустановка Техническиеѝданные ГАБАРИТЫѝ Высота 850ѝмм Ширина 400ѝмм Глубина 600ѝмм НАПРЯЖЕНИЕ/ЧАСТОТА 230ѝВѝ/ѝ50ѝГц ОБЩАЯѝМОЩНОСТЬ 2300ѝВт ДАВЛЕНИЕѝВОДЫ Минимум 0,05ѝМПаѝ(0,5ѝбар) Максимум 0,8ѝМПаѝ(8ѝбар) Подсоединениеѝ кѝ сети Типѝ20x27 водоснабжения Данныйѝ приборѝсоответствуетѝ требованиямѝ директивыѝ CEEѝ 89- 336,ѝ касающимсяѝ ограниченийѝ радиопомех,ѝ иѝ директивыѝ 2006/ 95/CE,ѝкасающимсяѝэлектробезопасности. Установка Обязательноѝудалитеѝпередѝпервым включениемѝприбораѝвсеѝзащитные...
- Page 51 техническиеѝданныеѝ/ѝустановка 51 Подготовкаѝмашиныѝкѝработе Еслиѝ нужноѝ сохранить выравниваниеѝ машины относительноѝ стоящейѝ рядом мебели,ѝ выполнитеѝ показанные нижеѝдействияѝ: Подачаѝводы Закрепитеѝ шлангѝ подачиѝ воды, поставляемыйѝ вѝ комплектеѝ с прибором,ѝ наѝ заднейѝ панели стиральнойѝ машины,ѝ выполнив описанныеѝ нижеѝ действияѝ (Не используйтеѝ повторноѝ старый шланг)ѝ:...
- Page 52 52 техническиеѝданныеѝ/ѝустановка Откройтеѝкранѝподачиѝводы. Подключениеѝ кѝ электрической Проверьтеѝнаѝотсутствиеѝутечек. сети Шлангѝ подачиѝ водыѝ неѝ можетѝ быть Даннаяѝ стиральнаяѝ машинаѝ может удлинен.ѝ Еслиѝ егоѝ длинаѝ всеѝ же подключатьсяѝтолькоѝкѝоднофазной недостаточна,ѝ обратитесьѝ в сетиѝ230ѝВ. сервисныйѝцентр. Проверьтеѝ характеристики линейногоѝ предохранителя:ѝ 10ѝ A Слив приѝ230ѝВ. -ѝ Наконечникѝ на Нельзяѝ...
- Page 53 техническиеѝданныеѝ/ѝустановка 53 Точноеѝ выставлениеѝ прибораѝ по уровнюѝ позволяетѝ предотвратить вибрации,ѝ шумѝ иѝ смещение прибораѝвоѝвремяѝработы.
- Page 54 54 защитаѝокружающейѝсреды Защитаѝокружающейѝ Защитаѝокружающейѝсреды среды Удалениеѝвѝотходы Дляѝ экономногоѝ расходаѝ водыѝ и энергии,ѝ аѝ такжеѝ дляѝ защиты окружающейѝсредыѝрекомендуется Всеѝ материалы,ѝ имеющиеѝ символ соблюдатьѝ приведенныеѝ ниже ,ѝ допускаютѝ реутилизацию. правилаѝ: Доставьтеѝ этиѝ материалыѝ вѝ место • Пользуйтесьѝ приборомѝ при сбораѝ утиляѝ (оѝ местонахождении максимальной,ѝ...
- Page 55 108 3597 01 - 02/09...