Table of Contents
Advertisement
Quick Links
DUAL BAND
HEAVY DUTY SUBMERSIBLE TRANSCEIVER
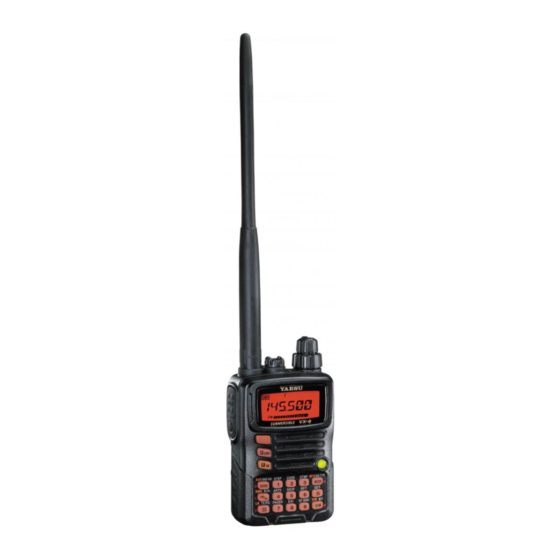
VX-6R/E
O
M
PERATING
ANUAL
VERTEX STANDARD CO., LTD.
4-8-8 Nakameguro, Meguro-Ku, Tokyo 153-8644, Japan
VERTEX STANDARD U.S.A. Inc.
6125 Phyllis Drive, Cypress, California 90630, U.S.A.
YAESU UK LTD.
Unit 12, Sun Valley Business Park, Winnall Close
Winchester, Hampshire, SO23 0LB, U.K.
VERTEX STANDARD HK LTD.
Unit 1306-1308, 13F., Millennium City 2, 378 Kwun Tong Road,
Kwun Tong, Kowloon, Hong Kong
VERTEX STANDARD AUSTRALIA PTY., LTD.
Tally Ho Business Park, 10 Wesley Court, East Burwood, VIC, 3151
Advertisement
Table of Contents

Related Manuals for Yaesu VX-6E


Summary of Contents for Yaesu VX-6E
- Page 1 VERTEX STANDARD CO., LTD. 4-8-8 Nakameguro, Meguro-Ku, Tokyo 153-8644, Japan VERTEX STANDARD U.S.A. Inc. 6125 Phyllis Drive, Cypress, California 90630, U.S.A. YAESU UK LTD. Unit 12, Sun Valley Business Park, Winnall Close Winchester, Hampshire, SO23 0LB, U.K. VERTEX STANDARD HK LTD.
-
Page 2: Table Of Contents
General Description ............ 1 Scanning ..............46 VFO Scanning ................47 Accessories & Options ..........2 Setting the Squelch Level during activate Scanning Opertion 48 Controls & Connections ..........3 Top & Front Panel ................3 How to Skip (Omit) a Frequency during VFO Scan ..... 48 LCD .................... -
Page 3: General Description
Vertex Standard’s WIRES™ (Wide-coverage Internet Repeater Enhancement System), a transmit Time-Out Timer (TOT), Automatic Power-Off (APO), Automatic Repeater Shift (ARS), Yaesu’s exclusive ARTS™ (Auto-Range Transponder System) which “beeps” the user when you move out of communica- tions range with another ARTS™ equipped station, plus provision for reduction of the TX deviation in areas of high channel congestion. -
Page 4: Accessories & Options
Consult your Yaesu dealer for details regarding these and any newly-available options. -
Page 5: Controls & Connections
& C ONNECTIONS T & F ONTROL RONT ANEL Antenna Jack Connect the supplied rubber flex antenna (or another antenna presenting a 50-Ohm impedance) here. MIC/SP Jack This four-conductor miniature jack provides connec- tion points for microphone audio, earphone audio, PTT, and ground. - Page 6 & C ONNECTIONS LCD ONTROL Memory Channel Number Skip Memory Channel or Repeater Shift Direction Preferential Memory Channel CTCSS/DSC Operation DMR Channel Recall Internet Connection Priority Channel Feature Active Operating Frequency Automatic Power-Off Active Battery Saver Active Key Lock Active Low TX Power Selected Bell Alarm Active Dual Watch Active...
-
Page 7: Side & Bottom Panel
& C ONNECTIONS S & B ONTROL OTTOM ANEL PTT (Push To Talk) Switch Press this switch to transmit, and release it (to receive) after your transmission is completed. MONI/T-CALL Switch USA/EXP Versions: Pressing this switch disables the noise squelching action, allowing you to hear very weak signals near the background noise level tempo- rarily. - Page 8 & C ONNECTIONS K ONTROL EYPAD Moves operation to the Primary Function Frequency entry digit Frequency entry digit next-highest frequency “1” “2” RESS band Moves operation to the Selects the synthesizer Selects the CTCSS Secondary Function next-lowest frequency steps to be used during tone or DCS code [ F/W ] + K RESS...
- Page 9 & C ONNECTIONS K ONTROL EYPAD Selects the Receive Frequency entry digit Primary Function Activates the “User mode among AM, FM, “3” Programmed” mode RESS and Wide FM Selects the DTMF Activates CTCSS or Secondary Function No Action [ F/W ] + K mode DCS Operation RESS...
-
Page 10: Installation Of Accessories
NSTALLATION OF CCESSORIES NTENNA NSTALLATION The supplied antenna provides good results over the entire frequency range of the transceiver. However, for enhanced re- ception on certain non-Amateur frequencies, you may wish to connect an antenna designed specifically for that frequency range, as the supplied antenna is necessarily a compromise out- side the Amateur bands, and cannot be expected to provide high performance at all frequencies. -
Page 11: Installation Of Fnb-80Li Battery Pack
NSTALLATION OF CCESSORIES FNB-80LI B NSTALLATION OF ATTERY The FNB-80LI is a high-performance Lithium-Ion battery providing high capacity in a very compact package. Under normal use, the FNB-80LI may be used for approximately 300 charge cycles, after which operating time may be expected to decrease. If you have an old battery pack which is displaying capacity which has become diminished, you should re- place the pack with a new one. -
Page 12: Installation Of Fba-23 Battery Case
NSTALLATION OF CCESSORIES FBA-23 A NSTALLATION OF LKALINE ATTERY PTION The optional FBA-23 Battery Case allows receive monitoring using two “AA” size Alka- line batteries. Alkaline batteries can also be used for transmission in an emergency, but power output will only be selectable 300 mW and 50 mW, and battery life will be shortened dramatically. -
Page 13: Interface Of Packet Tncs
The VX-6R/E may be used for Packet operation, using the optional CT-91 microphone adapter (available from your Yaesu dealer) for easy interconnection to commonly-avail- able connectors wired to your TNC. You may also build your own cable, using a four- conductor miniature phone plug, per the diagram below. -
Page 14: Operation
PERATION Hi! I’m R. F. Radio, and I’ll be helping you along as you learn the many features of the VX-6R/E. I know you’re anxious to get on the air, but I encour- age you to read the “Operation” section of this manual as thoroughly as possible, so you’ll get the most out of this fantastic new transceiver. -
Page 15: Squelch Adjustment
This provides a “Short-cut” to Set Mode Item 59: On the VX-6E, press the [ F/W ] key, then press the [ 0 ( SET )] key. Rotate the DIAL , then press the [ 0 ( SET )] key. -
Page 16: Selecting The Operating Band
PERATION ELECTING THE PERATING The VX-6R/E covers an incredibly wide frequency range, over which a number of different operating modes are used. There- REQUENCY ANGE USA V EXP/EU V UMBER ERSION ERSION fore, the VX-6R/E’s frequency [ 1 ] BC Band 0.5 - 1.8 MHz 0.504 - 1.8 MHz coverage has been divided into [ 2 ]... - Page 17 PERATION REQUENCY AVIGATION 2 ) Direct Keypad Frequency Entry The desired operating frequency may be entered directly from the keypad. To enter a frequency from the keypad, just press the numbered digits on the keypad in the proper sequence. There is no “Decimal point” key on the VX-6R/E, so if the frequency is below 100 MHz (e.g.
-
Page 18: Transmission
PERATION RANSMISSION Once you have set up an appropriate frequency inside one of the 144 MHz, 222 MHz , or 430 MHz Amateur bands on which the VX-6R/E can transmit, you’re ready to go on the air! These are the most basic steps; more advanced aspects of transmitter operation will be discussed later (222 MHz: USA version only). -
Page 19: Changing The Transmitter Power Level
PERATION RANSMISSION Changing the Transmitter Power Level You can select between a total of four transmitter power levels on your VX-6R/E. The exact power output will vary somewhat, depending on the voltage supplied to the transceiver. With the standard FNB-80LI Battery Pack and external DC source, the power output levels available are: To change the power level: 1. -
Page 20: Changing The Microphone Gain Level
PERATION RANSMISSION Changing the Microphone Gain Level Different operators speak at different voice levels, and speak at varying distances from the radio’s microphone. So as to compensate for these differences, the VX-6R/E includes a Microphone Gain control, that allows you to set the Microphone Gain to the best level according to your operating preferences. -
Page 21: Am Aircraft Reception
PERATION AM A IRCRAFT ECEPTION Reception of AM signals in the aeronautical band (108-137 MHz) is similar to that described in the previous section. 1. Press the [ BAND ( SCN ) BND DN ] key (or press the [ F/W ] key, followed by the [ BAND ( SCN ) BND DN ] key) (repetitively, if necessary), until you see a frequency in the aeronautical band. -
Page 22: Advanced Operation
DVANCED PERATION Now that you’re mastered the basics of VX-6R/E operation, let’s learn more about some of the really neat features. EYBOARD OCKING In order to prevent accidental frequency change or inadvertent transmission, various as- pects of the VX-6R/E’s DIAL and keypad may be locked out. The possible lockout combi- nations are: : Just the front panel keypad is locked out DIAL... -
Page 23: Adjusting The Keypad Beeper Volume Level
DVANCED PERATION DJUSTING THE EYPAD EEPER OLUME EVEL A keypad beeper provides useful audible feed back whenever a keypad is pressed. The keypad beeper level changes according to the VOL konb setting. However, you may adjust the volume balance between the receiving audio and keypad beeper via the Set mode. 1. -
Page 24: Changing The Channel Steps
DVANCED PERATION HANGING THE HANNEL TEPS The VX-6R/E’s synthesizer provides the option of utilizing channel steps of 5/10/12.5/15/ 20/25/50/100 kHz per step, as well as an automatic step selection based on the current operating frequency (“AUTO”), any number of which may be important to your operating requirements. -
Page 25: Rf Squelch
DVANCED PERATION RF S QUELCH A special RF Squelch feature is provided on this radio. This feature allows you to set the squelch so that only signals exceeding a certain S-meter level will open the squelch. To set up the RF squelch circuit for operation, use the following procedure: 1. -
Page 26: Repeater Operation
EPEATER PERATION Repeater stations, usually located on mountaintops or other high locations, provide a dramatic extension of the communication range for low-powered hand-held or mobile trans- ceivers. The VX-6R/E includes a number of features which make repeater operation simple and enjoyable. EPEATER HIFTS Your VX-6R/E has been configured, at the factory, for the repeater shifts customary in your... -
Page 27: Manual Repeater Shift Activation
EPEATER PERATION ANUAL EPEATER HIFT CTIVATION If the ARS feature has been disabled, or if you need to set a repeater shift direction other than that established by the ARS, you may set the direction of the repeater shift manually. To do this: 1. -
Page 28: Tone Calling (1750 Hz)
1750 H ALLING If your transceiver is VX-6E (European version), press and hold in the MONI/T.CALL switch (just below the PTT switch) to generates a 1750-Hz burst tone to access the Euro- pean repeater. The transmitter will automatically be activated, and a 1750-Hz audio tone will be superimposed on the carrier. -
Page 29: Ctcss/Dcs Operation
CTCSS/DCS O PERATION CTCSS O PERATION Many repeater systems require that a very-low-frequency audio tone be superimposed on your FM carrier in order to activate the repeater. This helps prevent false activation of the repeater by radar or spurious signals from other transmitters. This tone system, called “CTCSS”... -
Page 30: Dcs Operation
CTCSS/DCS O PERATION CTCSS O PERATION 7. When you have made your selection, press the [ 2 ( CODE )] key momentarily to save the new settings and exit to normal operation. This is different than the usual method of restoring normal operation, and it ap- plies only to the configuration of the CTCSS/DCS frequencies. -
Page 31: Dcs Code Inversion
CTCSS/DCS O PERATION DCS O PERATION Remember that the DCS is an Encode/Decode system, so your receiver will remain muted until a matching DCS code is received on an incoming trans- mission. Switch the DCS off when you’re just tuning around the band! DCS C NVERSION The DCS system was first introduced in the commercial LMR (Land Mobile Radio) service,... -
Page 32: Ctcss/Dcs Bell Operation
CTCSS/DCS O PERATION CTCSS/DCS B PERATION During CTCSS Decode or DCS operation, you may set up the VX-6R/E such that a ringing “bell” sound alerts you to the fact that a call is coming in. Here is the procedure for activating the CTCSS/DCS Bell: 1. -
Page 33: Tone Search Scanning
CTCSS/DCS O PERATION EARCH CANNING In operating situations where you don’t know the CTCSS or DCS tone being used by another station or stations, you can command the radio to listen to the incoming signal and scan in search of the tone being used. Two things must be remembered in this regard: You must be sure that your repeater uses the same tone type (CTCSS vs. -
Page 34: Split Tone Operation
CTCSS/DCS O PERATION PLIT PERATION The VX-6R/E can be operated in a Split Tone configuration via the Set mode. 1. Press the [ F/W ] key, then press the [ 0 ( SET )] key to enter the Set mode. 2. -
Page 35: Memory Mode
EMORY The VX-6R/E provides a wide variety of memory system resources. These include: Regular Memory Channels, which made up of: 900 “Standard” memory channels, numbered “ ” through “ .” 99 “Frequency Skip Memory” channels, numbered “ ” through “ .”... -
Page 36: Memory Storage
EMORY ODE R EGULAR EMORY HANNEL EMORY TORAGE 1. Select the desired frequency, while operating in the VFO mode. Be sure to set up any desired CTCSS or DCS tones, as well as any desired repeater offset. The power level may also be set at this time, if you wish to store it. -
Page 37: Memory Recall
EMORY ODE R EGULAR EMORY HANNEL EMORY TORAGE Storing Independent Transmit Frequencies (“Odd Splits”) All memories can store an independent transmit frequency, for operation on repeaters with non-standard shift. To do this: 1. Store the receive frequency (downlink) using the method already described under MEMORY STORAGE (it doesn’t matter if a repeater offset is active). - Page 38 EMORY ODE R EGULAR EMORY HANNEL ABELING EMORIES You may wish to append an alpha-numeric “Tag” (label) to a memory or memories, to aid in recollection of the channel’s use (such as a club name, etc.). This is easily accomplished using the Set Mode.
-
Page 39: Memory Offset Tuning
EMORY ODE R EGULAR EMORY HANNEL ABELING EMORIES 1) While programming multiple memories with alpha-numeric “Tags” with repetitive information, you may press the [F/W] key to copy a previous entry of letters and numbers, and then paste these characters into another “NM SET”... -
Page 40: Moving Memory Data To The Vfo
EMORY ODE R EGULAR EMORY HANNEL OVING EMORY ATA TO THE Data stored on memory channels can easily be moved to the VFO, if you like. 1. Select the memory channel containing the frequency data to be moved to the VFO. 2. -
Page 41: Home Channel Memory
EMORY ODE R EGULAR EMORY HANNEL HOME C HANNEL EMORY A special one-touch “HOME” channel is available for each of operating bands, to allow quick recall of a favorite operating frequency on each band. Home Channel storage is simple to accomplish: 1. -
Page 42: Memory Bank Operation
EMORY ODE R EGULAR EMORY HANNEL EMORY PERATION The large number of memories available in the VX-6R/E could be difficult to utilize without some means of organizing them. Fortunately, the VX-6R/E includes provision for dividing the memories into as many as 24 Memory Banks, so you can categorize the memories in a manner convenient to you. - Page 43 EMORY ODE R EGULAR EMORY HANNEL EMORY PERATION then press the [ BAND ( SCN ) BND DN ] key momentarily. 6. To exit from Memory Bank operation, just press the [ BAND ( SCN ) BND DN ] key . MEMORY “...
-
Page 44: Direct Memory Recall Channel
EMORY ODE R EGULAR EMORY HANNELS IRECT EMORY ECALL HANNEL The Direct Memory Recall Channel (DMR) feature allows you to recall up to ten favorite frequencies directly via the numeric ([ 0 ] through [ 9 ]) keys. DMR channels may be selected from the VFO, an already-programmed memory, or a Home channel. -
Page 45: Short-Wave Broadcast Station Memory Channels
EMORY ODE S PECIAL EMORY HANNELS HORT ROADCAST TATION EMORY HANNELS A large number of Short-Wave Broadcast Station Memory Channels have also been pre- programmed at the factory, for convenient selection of broadcast stations. 1. Press the [ F/W ] key, then press the [ 9 ( SP BNK )] key, to recall the Special Memory Channel Bank. -
Page 46: Weather Broadcast Channels
EMORY ODE S PECIAL EMORY HANNELS U. S. V EATHER ROADCAST HANNELS ERSION The VHF Weather Broadcast Station Memory Channel Bank has been pre-programmed at the factory, for quick selection of NOAA weather information stations. 1. Press the [ F/W ] key, then press the [ 9 ( SP BNK )] key, to recall the Special Memory Channel Bank. -
Page 47: Vhf-Marine Channels
EMORY ODE S PECIAL EMORY HANNELS VHF M ARINE HANNELS Another special Memory Bank contains VHF Marine Channels, pre-programmed at the factory, for quick selection. 1. Press the [ F/W ] key, then press the [ 9 ( SP BNK )] key, to recall the Special Memory Channel Bank. -
Page 48: Scanning
CANNING The VX-6R/E allows you to scan just the memory channels, the entire operating band, or a portion of that band. It will halt on signals encountered, so you can talk to the station(s) on that frequency, if you like. Scanning operation is basically the same in each of the above modes. -
Page 49: Vfo Scanning
CANNING VFO S CANNING 1. Select the VFO mode by pressing the [ V/M ( DW ) MT ] key, if necessary. 2. Press and hold in the [ BAND ( SCN ) BND DN ] key for one second, then rotate the DIAL knob while holding the [ BAND ( SCN ) BND DN ] key to select the bandwidth for the VFO scanner. -
Page 50: Setting The Squelch Level During Activate Scanning Opertion
CANNING VFO S CANNING Setting the Squelch Level during active Scanning Operation The VX-6R/E allows adjustment of the Squelch level “on the fly” while you are scanning. 1. While the scanner is engaged, press the [ F/W ] key, then press the MONI key (the current squelch level (e.g. -
Page 51: Memory Scanning
CANNING EMORY CANNING Memory scanning is similarly easy to initiate: 1. Set the radio to the Memory mode by pressing the [ V/M ( DW ) MT ] key, if necessary. 2. Press and hold in the [ BAND ( SCN ) BND DN ] key for one second, and rotate the DIAL knob while holding in the [ BAND ( SCN ) BND DN ] key to select the desired Memory Scan mode. -
Page 52: Preferential Memory Scan
CANNING EMORY CANNING 3. Rotate the DIAL knob to select Set Mode Item 57: SKIP 4. Press the [ 0 ( SET )] key momentarily to enable adjustment of this Set Mode Item. SKIP 5. Rotate the DIAL knob so as to select “ .”... -
Page 53: Memory Bank Scan
CANNING EMORY CANNING ALL CH The scanner sweeps all Preferential Memory channels. TAG1 : The scanner sweeps only those Preferential Memory channels with same “first” digit of the alpha/numeric tag as the first channel on which scanning started. TAG2 The scanner sweeps only those Preferential Memory channels with same “first”... -
Page 54: Programmable (Band Limit) Memory Scan (Pms)
CANNING ROGRAMMABLE IMIT EMORY This feature allows you to set sub-band limits for either scanning or manual VFO operation. For example, you might wish to set up a limit (in North America) of 144.300 MHz to 148.000 MHz so as to prevent encroachment into the SSB/CW “Weak Signal” portion of the band below 144.300 MHz. -
Page 55: Priority Channel" Scanning (Dual Watch)
CANNING “P ” S RIORITY HANNEL CANNING ATCH The VX-6R/E’s scanning features include a two-channel scanning capability which allows you to operate on a VFO or Memory channel, while periodically checking a user-defined Memory Channel for activity. If a station is received on the Memory Channel which is strong enough to open the Squelch, the scanner will pause on that station in accordance RESUME with the Scan-Resume mode set via Set Mode Item 49:... -
Page 56: Automatic Lamp Illumination On Scan Stop
CANNING UTOMATIC LLUMINATION ON The VX-6R/E will automatically illuminate the LCD/Keypad Lamp whenever the scanner stops on a signal; this allows you to see the frequency of the incoming signal better at night. Note that this will, of course, increase the battery consumption, so be sure to switch it off during the day (the default condition for this feature is “ON”). -
Page 57: Weather Alert Scan
CANNING U. S. V EATHER LERT ERSION This feature allows you to check the Weather Broadcast Memory Channels for the pres- ence of the NOAA Alert Tone while operating using VFO scan or Memory channel scan. When the Weather Alert Scan feature is engaged, the VX-6R will check the Weather Broadcast Memory Channels for activity every five seconds while scanning. -
Page 58: Smart Search Operation
MART EARCH PERATION The Smart Search feature allows you to load frequencies automatically according to where activity is encountered by your radio. When Smart Search is engaged, the transceiver will search above and below your current frequency, storing active frequencies as it goes (without stopping on them even momentarily);... - Page 59 MART EARCH PERATION frequencies stored by Smart Search. 7. To return to normal operation, press the [ MODE ( SP S ) SQ TYP ] key. Smart Search is a great tool when visiting a city for the first time. You don’t need to spend hours looking up repeater frequencies from a reference guide- book.
-
Page 60: Channel Counter Operation
HANNEL OUNTER PERATION The Channel Counter allows measuring of the frequency of a nearby transmitter, without knowing that frequency in advance. The frequency can be measured by bringing the VX- 6R/E close to the transceiver which is transmitting. The VX-6R/E performs a high-speed search within a ±5 MHz range from the frequency displayed on the LCD. - Page 61 HANNEL OUNTER PERATION Setting the Channel Counter Sweep Width You may change the bandwidth of the Channel Counter. Available selections are ±5, ±10, ±50, and ±100 MHz (default: ±5 MHz). Here is the procedure for setting the Channel Counter Bandwidth: 1.
-
Page 62: Epcs (Enhanced Paging & Code Squelch)
EPCS E & C NHANCED AGING QUELCH The VX-6R/E includes an Enhanced CTCSS tone encoder/decoder and a dedicated micro- processor providing paging and selective calling feature. This allows you to place a call to a specific station (Paging), and to receive calls of your choice directed only to you (Code Squelch). -
Page 63: Activating The Enhanced Paging & Code Squelch System
EPCS E & C NHANCED AGING QUELCH Activating the Enhanced Paging & Code Squelch System 1. Press the [ F/W ] key, then press the [ 0 ( SET )] key to enter the Set mode. 2. Rotate the DIAL knob to select Set Mode Item 43: PAGER 3. -
Page 64: Emergency Feature
MERGENCY EATURE MERGENCY HANNEL PERATION The VX-6R/E includes an “Emergency” feature which may be useful if you have someone monitoring on the same frequency as your transceiver’s UHF “Home” channel. See page 39 for details on setting the Home channel. The “Emergency”... -
Page 65: Selecting The Eai Mode And Its Transmit Time
MERGENCY EATURE ID EAI F MERGENCY UTOMATIC EATURE timer expiration at the power level stored in that memory channel; it is NOT necessary for the incapacitated person to press the PTT switch. In the Continuous mode, when the VX-6R/E receives the CTCSS tone pair which is stored PAG.CDR in the Receiving Pager Code Memory (configured via Set Mode Item 45: ) on... -
Page 66: To Locate An Unresponsive Operator Using The Eai Feature
MERGENCY EATURE ID EAI F MERGENCY UTOMATIC EATURE 6. To disable the EAI feature, just repeat above procedure, rotating the DIAL knob to select “ ” in step “4” above. 1) Do not activate the EAI feature by pressing the [F/W] key, followed by the [8(EAI)] key. -
Page 67: Arts (Automatic Range Transponder System)
ARTS™ UTOMATIC ANGE RANSPONDER YSTEM The ARTS™ feature uses DCS signaling to inform both parties when you and another ARTS™-equipped station are within communications range. This may be particularly use- ful during Search-and Rescue situations, where is important to stay in contact with other members of your group. - Page 68 ARTS™ UTOMATIC ANGE RANSPONDER YSTEM ARTS™ constitutes a form of “remote control” operation that may be re- stricted to certain frequencies. U.S. users should confirm the current status of §97.201(b) of the FCC’s rules governing the Amateur service before utilizing this feature on the 144 MHz band.
-
Page 69: Cw Identifier Setup
ARTS™ UTOMATIC ANGE RANSPONDER YSTEM CW Identifier Setup The ARTS™ feature includes a CW identifier, as discussed previously. Every ten minutes during ARTS™ operation, the radio can be instructed to send “DE (your callsign) K” if this feature is enabled. The callsign field may contain up to 6 characters. Here’s how to program the CW Identifier: 1. -
Page 70: Sensor Mode
ENSOR The VX-6R/E can display the radio’s inside-the-case temperature, measured by internal sensors. Also, when the optional Barometric Pressure unit (SU-1) is installed, you get the unique capability of providing readout of the current barometric pressure. This information is then used for calculation of your current altitude. The Barometric Pressure unit requires calibration of the “offset”... -
Page 71: Selecting And Correcting The Atmospheric Pressure Meter
ENSOR Selecting and Correcting the Atmospheric Pressure Meter 1. Press the [ F/W ] key, then press the [ 0 ( SET )] key to enter the Set mode. 2. Rotate the DIAL knob to select Set Mode Item 63: SU1.BRM 3. -
Page 72: Internet Connection Feature
NTERNET ONNECTION EATURE The VX-6R/E can be used to access a “node” (repeater or base station) which is tied into the Vertex Standard WIRES™ (Wide-Coverage Internet Repeater Enhancement System) network. Details may be found at the WIRES-II Web site: http://www.vxstd.com/en/ wiresinfo-en/. -
Page 73: Frg ("Friendly Radio Group") Mode
NTERNET ONNECTION EATURE FRG “F ” RIENDLY ADIO ROUP MODE You may access other Internet Link Systems (including WIRES™ in the “FRG” mode) that use a DTMF string for access. Programming the FRG code 1. Load the DTMF tones which you wish to use for Internet-link access into a Internet Memory register. - Page 74 NTERNET ONNECTION EATURE FRG “F ” RIENDLY ADIO ROUP MODE Operation (Accessing an FRG Node) 1. Press the [ F/W ] key, then press the [ 0 ( SET )] key to enter the Set mode. 2. Rotate the DIAL knob to select Set Mode Item 30: INT MD 3.
-
Page 75: Dtmf Operation
DTMF O PERATION The VX-6R/E’s 16-button keypad allows easy DTMF dialing for Autopatch, repeater con- trol, or Internet-link access purposes. Besides numerical digits [ 0 ] through [ 9 ] , the keypad includes the [ ] and [ # ] digits, plus the [ A ] , [ B ] , [ C ] , and [ D ] tones often used for repeater control. - Page 76 DTMF O PERATION 12. If you store other numbers, repeat steps 3- 11 above, using a different DTMF memory register. 13. When all required DTMF memories are filled to your satisfaction, press the PTT switch to save the settings and exit to normal operation You may check your work by monitoring the entered DTMF string.
-
Page 77: Cw Training Feature
CW T RAINING EATURE The VX-6R/E provides a CW Training feature, which sends random Morse Code via the sidetone (heard in the speaker), so you can inprove your CW proficiency. 1. Press the [ F/W ] key, then press the [ 0 ( SET )] key to enter the Set mode. 2. -
Page 78: Miscellaneous Settings
ISCELLANEOUS ETTINGS ASSWORD The VX-6R/E provides a password feature which can minimize the chance that your trans- ceiver could be used by an unauthorized party. When the password feature is activated, the radio will ask for the four digit password to be entered when the radio is first turned on. -
Page 79: Programming The "P" Key
ISCELLANEOUS ETTINGS “P” K ROGRAMMING THE The VX-6R/E can assigne, using the Set Mode, a user-selected Menu Item to the “pri- mary” function of the [ P ( DMR )] key. To assign a preferred Set Mode Item to the [ P ( DMR )] key: 1. -
Page 80: Wakeup Feature Setup
ISCELLANEOUS ETTINGS AKEUP EATURE ETUP The Wakeup feature is similarly to the Receive Battery Saver. However, it is a newer, more advanced feature which conserves battery life by providing a longer “sleep” time than the regular Receive battery Saver. The Wakeup feature, once engaged, operates while the WAKEUP transceiver is turned off (“... -
Page 81: Tx Battery Saver
ISCELLANEOUS ETTINGS TX B ATTERY AVER The VX-6R/E also includes a useful Transmit Battery Saver, which will automatically lower the power output level when the last signal received was very strong. For example, when you are in the immediate vicinity of a repeater station, there generally is no reason to use the High Power output selection in order to achieve full-quieting access to the repeater. -
Page 82: Disabling The Tx/Busy Indicator
ISCELLANEOUS ETTINGS TX/BUSY I ISABLING THE NDICATOR Further battery conservation may be accomplished by disabling the BUSY indicator which appears while the VX-6R/E is receiving a signal. Use the following procedure: 1. Press the [ F/W ] key, then press the [ 0 ( SET )] key to enter the Set mode. BSY.LED 2. -
Page 83: Automatic Power-On Feature
ISCELLANEOUS ETTINGS UTOMATIC OWER EATURE The VX-6R/E also includes the capability to turn itself on after a programmed time interval. 1. Press the [ F/W ] key, then press the [ 0 ( SET )] key to enter the Set mode. 2. -
Page 84: Busy Channel Lock-Out (Bclo)
ISCELLANEOUS ETTINGS BCLO HANNEL The BCLO feature prevents the radio’s transmitter from being activated if a signal strong enough to break through the “noise” squelch is present. On a frequency where stations using different CTCSS or DCS codes may be active, BCLO prevents you from disrupting their communications accidentally (because your radio may be muted by its own Tone Decoder). -
Page 85: Transmitter Time-Out Timer (Tot)
ISCELLANEOUS ETTINGS RANSMITTER IMER The TOT feature provides a safety switch which limits transmission time to a pre-pro- grammed value. This will promote battery conservation by not allowing you to make exces- sively-long transmissions, and in the event of a stuck PTT switch (perhaps if the radio or a Speaker/Mic is wedged between car seats) it can prevent interference to other users as well as battery depletion. - Page 86 ISCELLANEOUS ETTINGS VX-6R/E O PERATING ANUAL...
-
Page 87: Reset Procedures
ESET ROCEDURES In the event of erratic operation of the transceiver, it is possible that data on the micropro- cessor may have become corrupted. While this is a highly unusual situation, the only path to recovery may involve resetting of the microprocessor. Here’s how to do this: ICROPROCESSOR ESETTING To clear all memories and all other settings to factory defaults:... -
Page 88: Cloning
LONING The VX-6R/E includes a convenient “Clone” feature, which allows the memory and con- figuration data from one transceiver to be transferred to another VX-6R/E. This can be particularly useful when configuring a number of transceivers for a public service opera- tion. -
Page 89: Set (Menu) Mode
The VX-6R/E Set Mode, already described in parts of many previous chapters, is easy to activate and set. It may be used for configuration of a wide variety of transceiver param- eters, some of which have not been detailed previously. Use the following procedure to activate the Set Mode: 1. - Page 90 VAILABLE ALUES UNCTION EFAULT TALIC 1 [ APO ] Setting of the Automatic Power-Off feature. OFF / 30MIN / 1HOUR / 3HOUR / 5HOUR / 8HOUR 2 [ AR BEP ] Selects the Beep option during ARTS operation. IN RNG / ALWAYS / OFF 3 [ AR INT ] Selects the Polling Interval during ARTS operation.
- Page 91 VAILABLE ALUES UNCTION EFAULT TALIC 41 [ ON TMR ] Set the ON Timer time. OFF / 00H10M (00:10) - 24H00M (24:00) (10 minutes multiples) 42 [ OPN.MSG ] Selects the Opening Message that appears when the radio is pow- DC / MSG / OFF ered on.
- Page 92 EPEATER ETTING VAILABLE ALUES EFAULT Enables/Disables the Automatic Repeater Shift function. 4 [ARS] ON / OFF Sets the Repeater Shift Direction. 51 [RPT] SIMP / –RPT / +RPT Sets the magnitude of the repeater Shift. 56 [SHIFT] 0.00 - 149.95 MHz CTCSS/DCS S ETTING VAILABLE...
- Page 93 WITCH ETTING VAILABLE ALUES EFAULT Enables/Disables the keypad beeper. 7 [BEEP] ON / OFF Adjust the Beep volume level. 9 [BP LVL] LVL 1 - LVL 9 (LVL 5) Enables/Disables the BUSY LED while the Squelch is open. 11 [BSY.LED] ON / OFF Selects the Primary function of the [HM/RV(EMG)R/H] key.
- Page 94 Set Mode Item 1 APO Function: Setting of the Automatic Power-Off feature. Available Values: OFF/30MIN/1HOUR/3HOUR/5HOUR/8HOUR Default: OFF Set Mode Item 2 AR BEP Function: Selects the Beep option during ARTS operation. Available Values: INRANG/ALWAYS/OFF Default: INRANG INRANG: Beeps sound only when the radio first detects that you are within range. ALWAYS: Beeps sound every time a polling transmission is received from the other sta- tion (every 15 or 25 seconds when in range).
- Page 95 Set Mode Item 9 BP LVL Function: Adjust the Beep volume level. Available Values: LVL 1 - LVL 9 Default: LVL 5 Set Mode Item 10 BNK NM Function: Stores Alpha-Numeric “Tags” for the Memory Group. See page 41 for details. Set Mode Item 11 BSY.LED Function: Enables/Disables the BUSY LED while the Squelch is open.
- Page 96 Set Mode Item 17 DCS CD DCS CODE 023 025 026 031 032 036 043 047 051 053 Function: Setting of the DCS code. 054 065 071 072 073 074 114 115 116 122 Available Values: 104 standard DCS codes 125 131 132 134 143 145 152 155 156 162 Default: 023 165 172 174 205 212 223 225 226 243 244...
- Page 97 Set Mode Item 25 EDG.BEP Function: Enables/Disables the Band-edge Beeper while selecting the frequency via the DIAL knob. Available Values: OFF/ON Default: OFF Set Mode Item 26 EMG S Function: Selects the alarm(s) utilized when the Emergency function is engaged. Available Values: BP+STR/BEAM/BP+BEM/CW/BP+CW/BEEP/STROBE Default: BP+STR BP+STR: Loud “Alarm”...
- Page 98 Set Mode Item 30 INT MD Function: Selects the Internet Link Connection mode. Available Values: SRG/FRG Default: SRG (Single DTMF Digit is appended at the beginning of each transmission) Set Mode Item 31 INT.A/M Function: Enables/Disables the DTMF Autodialer feature while operating using the Internet Connection feature.
- Page 99 Set Mode Item 37 MCGAIN Function: Adjust the microphone gain level. Available Values: LVL 1 - LVL 9 Default: LVL 5 Set Mode Item 38 MW MD Function: Selects the method of selection of channels for Memory Storage. Available Values: NEXT/LOWER Default: NEXT NEXT: Stores the data into the memory channel which is next-highest from the last-...
- Page 100 Set Mode Item 42 OPN.MSG Function: Selects the Opening Message that appears when the radio is powered on. Available Values: DC/MSG/OFF Default: DC DC supply voltage MSG: Set by user. See below. OFF: No Opening Message Here’s how to program the Opening Message: 1.
- Page 101 Set Mode Item 47 PSWD Function: Programs and activates the Password feature. See page 76 for details. Set Mode Item 48 PTT.DLY Function: Select the time delay between when the PTT switch is pressed and the carrier is transmitted. Available Values: OFF/20MS/50MS/100MS/200MS Default: OFF Set Mode Item 49 RESUME Function: Selects the Scan Resume mode.
- Page 102 Set Mode Item 54 S SRCH Function: Selects the Smart Search Sweep mode. Available Values: SINGLE/CONT Default: SINGLE SINGLE: The transceiver sweeps the current band once in each direction, starting on the current frequency. All channels where activity is present (up to 15 in each direc- tion) are loaded into the Smart Search memories.
- Page 103 Set Mode Item 59 SQL Function: Sets the Squelch threshold level. Available Values: LVL 0 - LVL 15 (Narrow FM), LVL 0 - LVL 8 (Wide FM) Default: LVL 1 (Narrow FM), LVL 2 (Wide FM) Set Mode Item 60 SQL.TYP Function: Selects the Tone Encoder and/or Decoder mode.
- Page 104 Set Mode Item 65 TEMP Function: Indicates indicate the current temperature inside the transceiver’s case and se- lects the measurement units (“°F” or “°C”) for the temperature sensor. Set Mode Item 66 TN FRQ Function: Setting of the CTCSS Tone Fre- CTCSS TONE FREQUENCY ( Hz ) quency.
- Page 105 Set Mode Item 72 WAKEUP Function: Available Values: OFF/5S/10S/20S/30S/EAI Default: OFF Set Mode Item 73 WX ALT Function: Enables/Disables the Weather Alert Scan feature. Available Values: OFF/ON Default: OFF VX-6R/E O PERATING ANUAL...
-
Page 106: Specifications
PECIFICATIONS General RX 0.5 - 1.8 MHz (BC Band), Frequency Ranges: (USA version) 1.8 - 30 MHz (SW Band), 30 - 76 (59) MHz (50 MHz HAM Band), 76 (59) - 108 MHz (FM Band), 108 - 137 MHz (Air Band), 137 - 174 MHz (144 MHz HAM Band), 174 - 222 MHz (VHF TV Band), 222 - 420 MHz (222 MHz HAM Band),... - Page 107 PECIFICATIONS Transmitter High Low 3 Low 2 Low 1 RF Power Output: 144 MHz/430 MHz 5.0 W 2.5 W 1.0 W 0.3 W 222 MHz (USA Only) 1.5 W 1.0 W 0.5 W 0.2 W Variable Reactance F2D, F3E Modulation Type: Maximum Deviation: ±5.0 kHz (F2D, F3E) At least 60 dB down (@ High power)
-
Page 108: Auto" Mode Preset Operating Parameters
“AUTO” M RESET PERATING ARAMETERS USA Version EXP/EU Version ( MH ( MH REQENCY ANGE REQENCY ANGE 0.500 - 1.800 10 kHz 0.500 - 1.800 9 kHz 1.800 - 30.000 5 kHz 1.800 - 30.000 5 kHz 30.000 - 50.500 5 kHz 30.000 - 76.000 5 kHz... -
Page 109: Installation Of The Su-1 (Option)
SU-1 O NSTALLATION OF THE PTION 1. Make sure that the transceiver is off. Remove the hard or soft case, if used. 2. Remove the battery pack. 3. Locate the connector for the SU-1 under the caution seal in the battery compartment on the back of the radio, just peel off the caution seal. -
Page 110: Fcc Notice
FCC N OTICE 1. Changes or modifications to this device not expressly approved by VERTEX STANDARD could void the user’s authorization to operate this device. 2. This device complies with part 15 of the FCC Rules. Operation is subject to the following two conditions;... -
Page 111: Declaration Of Conformity
Declaration of Conformity We, Yaesu UK Ltd. declare under our sole responsibility that the following equipment com- plies with the essential requirements of the Directive 1999/5/EC and 2004/104/EC. Type of Equipment: Dual Band Transceiver Brand Name: YAESU Model Number: VX-6E Manufacturer: Vertex Standard Co., Ltd. - Page 112 Copyright 2011 Printed in Japan VERTEX STANDARD CO., LTD. All rights reserved. No portion of this manual may be reproduced without the permission of VERTEX STANDARD CO., LTD.