Table of Contents
Advertisement
Advertisement
Table of Contents

Related Manuals for Astell & Kern AK240


Summary of Contents for Astell & Kern AK240
- Page 1 AK240 INSTRUCTION BOOK User Guide...
-
Page 2: Table Of Contents
CONTENTS Start Components AK240 at a Glance Power Management Connections Firmware Upgrade Using the Device Basic Functions Home Screen Notification Bar Store MQS Streaming Music Player Playlist Management USB DAC Functionality Bluetooth Settings Wi-Fi Equalizer Miscellaneous Safety Precautions Troubleshooting Copyright... - Page 3 User Guide Package Contents may be changed without prior notice to improve the performance or quality of the product. Contents AK240 Leather Case Quick Start Guide (with warranty) & Warranty Card & Protective Film Micro-USB cable microSD Card Slot Cover Leather Case &...
-
Page 4: Start
User Guide AK20 at a The appearance of the product, printed and engraved information may vary depending on the model. Glance Earphones / Optical Port Micro-USB port Power Balanced audio pin map R- R+ L+ L- Balanced audio port Previous/ Rewind Volume Play/Pause... -
Page 5: Power Management
User Guide Play/Pause : Play or Pause a song. Next/Fast Forward : Skip to the next song. Long press - Fast Forward. microSD card slot : Insert a microSD card and access its files. Volume : Control the volume by turning the wheel. LCD Touchscreen : Display with gesture control. -
Page 6: Reset Function
User Guide Reset Function 1. In cases of unexpected device failure or freeze, press the [ ] button for 12 seconds to force a shutdown. The device can be restarted normally after a shutdown. Resetting the device will not affect the stored data or time setting. -
Page 7: Connections
User Guide Connections Earphones/Headphones 1. Connect earphones or headphones to the earphones port. Balanced Earphones/Headphones 1. Connect supported earphones or headphones to the Balanced port. Balanced Audio Device 1. Connect to an external audio device by using both the Earphones port and Balanced port in conjunction. Earphones port Balanced port (LR) (Ground) -
Page 8: Connecting To A Computer
User Guide Optical Out 1. Music can be played back on an SPDIF-capable external audio device by using an optical cable. DSD format is not supported while using Optical Out. Connecting to a Computer 1. Turn on the device and the PC. 2. -
Page 9: Disconnecting From The Computer
User Guide Disconnecting from the Computer 1. Verify that all operations have completed before attempting to disconnect the device from the computer. Disconnecting the device from the computer during an operation (i.e. file transfer) may corrupt data on the device. Copy Files/Folders to the Device 1. - Page 10 User Guide Delete Files/Folders on the Device 1. Select the file/folder to delete, right click, and select [Delete]. 2. Select [Yes] in the [Confirm File/Folder Deletion] window to delete the selected files/folders. Insert/Remove a microSD Card 1. Refer to the diagram and gently insert a microSD card into the microSD card slot.
- Page 11 User Guide Recommended microSD Cards Brand : SanDisk, Transcend Notes on inserting a microSD card. - Do not force the microSD card into the slot. Doing so may cause damage to the device and/or the microSD card. - Do not repeatedly insert/remove the microSD card. - If the microSD card is improperly inserted, it may become immovable or cause damage to the device.
-
Page 12: Firmware Upgrade
User Guide Firmware Wi-Fi Update / OTA (Over-the-Air) Upgrade 1. Connect to a wireless network. 2. When a new firmware version is found, a Firmware Update Guide window will display on screen. 3. Select [Update] and choose the items for update. 4. -
Page 13: Using The Device
User Guide Basic LCD Touchscreen Functions 1. This device features an LCD Touchscreen. Interact with the device by touching the screen to access a variety of features. Do not use a sharp object or excessive force to prevent damage to the screen. Moving up/down in the list 1. -
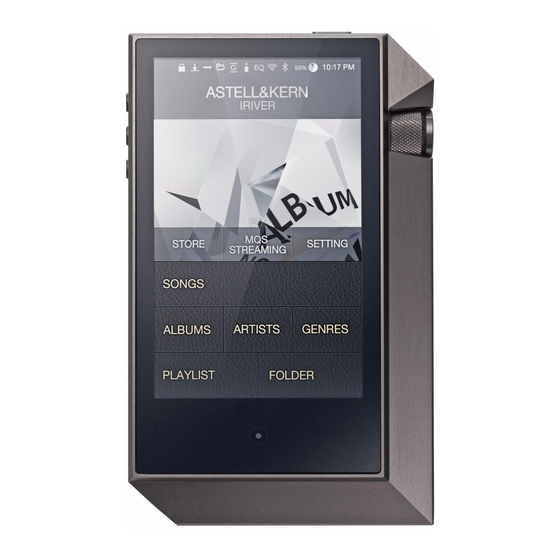
Page 14: Home Screen
User Guide Home Screen Notification Bar Pull down on the Notification Bar to view its contents. (See pp. 14-16) Current Song Currently playing artist/song information. Menu items Select a menu button to move to the corresponding screen. Search options View the list of songs by different search options. -
Page 15: Notification Bar
User Guide Notification Using the Device... - Page 16 User Guide Notification Press the Notification Bar to close. Wi-Fi Press [ ] to turn Wi-Fi on or off. Equalizer Press [ ] to turn the EQ on or off. The most recent EQ settings are used by default. Bluetooth Press [ ] to turn Bluetooth on or off.
- Page 17 User Guide Brightness Use the adjustment bar to control the display brightness. Screen Lock Press [ ] to turn the Screen Lock on or off. The volume wheel will not function when the screen is locked. Play Mode Press [ ] to cycle through different Play Modes.
-
Page 18: Store
User Guide Store Conveniently purchase music from the Store when connected to a wireless network. Purchase Music 1 Connect to a wireless network. 2. Select [Store] from the Home Screen. 3. Select the desired Store category. 4. Check the User Guides within each Store for detailed information. -
Page 19: Mqs Streaming
User Guide The AK240 can access music files stored on a computer on the same network. Streaming MQS Streaming Server Installation 1. Visit the Astell&Kern website and download the server installer that corresponds to your operating system. [http://www.astellnkern.com > Support > Download] 2. - Page 20 User Guide 3. The MQS Streaming Server is displayed in the list. 4. Selecting the server will connect automatically and direct the user to the server Home Screen. 5. Select a search option at the bottom of the server Home Screen to display a list of music.
- Page 21 Server response may be slow when the server computer is under a load. Depending on network conditions and server status, the AK240's performance may be affected when streaming and downloading simultaneously. Terminating MQS Streaming or pressing the item being downloaded within the Notification Bar will stop downloads.
-
Page 22: Music Player
User Guide Music Selecting Music Player 1. Select a search option from the Home Screen to display a list of music. 2. Select a song from the list to begin playback. Select [Folder] to search by folder. Continuous Playback: Approximately 10 hours (Basis: FLAC, 16 bit, 44 kHz, Unbalanced output, Volume 40, EQ Off, LCD Off) Supported file formats: FLAC, WAV (8-192 kHz, 8/16/24... - Page 23 User Guide - Press the [Home] button on the device to go to the Home Screen. - Press [ ] to display the current Playlist. - Long press a song on the Playlist for Playlist options. + [Add to Playlist/Remove/Add to end of Playlist/Add after current song] are available from the Playlist.
- Page 24 User Guide Playlist Screen Current Indicates the current location. Press to location move return to the previous screen. Playlist Displays the playlist for the current location. Long press a song to add to or remove from the playlist. List sorting Select a method for sorting the playlist.
- Page 25 User Guide Playlist Option Add to Playlist Add the selected song to a Playlist. Remove from Remove the selected song from Playlist the Playlist. Add to End Add the selected song to of Playlist the end of the Playlist. Add After Add the selected song after Current Song the song currently playing.
- Page 26 User Guide Music Player Screen Using the Device...
- Page 27 User Guide Previous Screen Return to the previous screen. Album Cover Displays album covers. Press the album cover to show lyrics, add the current song to a playlist, or view song information. Indicates the elapsed time. Song Progress Song title information. Song Title File name is displayed when ID3 metadata is unavailable.
- Page 28 User Guide Add to Playlist Add current song to a playlist. Lyrics Lyrics for the current song. Details Detailed song information. Using the Device...
-
Page 29: Playlist Management
User Guide Playlist Create a Playlist Manage- 1. Press [Playlists] from the Home screen to display ment a list of playlists. 2. Press [All Playlists], then press [+ Add]. 3. Enter a name for the playlist and press [Create] to create a new playlist. - Page 30 User Guide Remove a Song from a Playlist 1. Press [All Playlists] to display a list of playlists. 2. Selected the desired playlist and press [- Remove]. 3. Check the box next to desired song and press [Remove] to remove the song from the selected playlist.
-
Page 31: Usb Dac Functionality
User Guide USB DAC The USB DAC functionality allowed the AK240 to be registered as a sound card on the computer. Functionality Music from the computer is played through the device for an enhanced listening experience. USB DAC Specifications - USB DAC Supported OS + Windows XP (32 bit) / Windows 7(32 &... - Page 32 User Guide USB DAC Installation 1. Set [DAC Input] from [Settings - Connect USB]. 2. Connect the device to the PC using the supplied Micro-USB cable. 3. Run 'Setup.exe' from Drivers. 4. Press [Next] when the below screen is displayed. - When the below screen is displayed, verify that [DAC Input] is selected under [Settings - Connect USB].
- Page 33 User Guide 5. Click [Browse] to select the driver destination folder and click [Install]. 6. When the below screen is displayed, click [Finish] to complete the installation. < Before driver installation > < After driver installation > Using the Device...
- Page 34 > Audio tab > Change the default audio device under 'Sound playback' to [AK240 USB DAC] - Win 7/8: Control Panel > Hardware and Sound > Manage Audio Devices > Right click [AK240 USB DAC] and select [Set as default device] < Windows XP >...
- Page 35 Hi-Fi audio playback on Windows 7/8: Control Panel > Hardware and Sound > Manage Audio Devices > Double click [AK240 USB DAC] > Advanced tab > Default format > Select [24 bit, 192000 Hz] (Recommended) - Mac OS X: System Preferences > Sound >...
-
Page 36: Bluetooth
[Settings - Bluetooth]. Bluetooth Pairing 1. Select the appropriate Bluetooth device from the list of available devices. A Bluetooth device must be paired with the AK240 prior to use. Refer to the Bluetooth device's instruction manual for details. Terminate Bluetooth Connection 1. - Page 37 Pairing methods may be different for each individual Bluetooth device. Always refer to the respective instruction manual for details. Maintain a distance of 20 cm (8 in) between the AK240 and the paired Bluetooth device. Audio quality will degrade with longer distances, and the pairing may disconnect at a distance of 2 m (6.5 ft).
-
Page 38: Settings
User Guide Settings Set up the device according to the user's needs. The settings menu may vary depending on the Firmware version. Setup 1. Select [Settings] from the Home Screen. 2. Select the desired item. Wi-Fi Change wireless network settings and turn Wi-Fi on or off. - Page 39 User Guide Equalizer is not supported during DSD playback. Using the equalizer may affect device performance. Refer to pages 43-45 of the manual for more information on using the Equalizer. Gapless Playback Play the next song without any interruptions/silence. - Gapless playback is only supported between two files with identical bitrate, sampling rate, and channels.
- Page 40 User Guide Left-Right Balance Adjust the Left-Right Balance for earphones/ headphones. Screen Brightness Adjust screen brightness settings. Theme Change the Theme. Date & Time Set the current Date, Time, and Region. Language Select the displayed Language. - English, Korean, Japanese, Chinese (Simplified / Traditional) Power Automatic Shutdown: The device will turn off after a...
-
Page 41: System Information
User Guide Connect USB Media Device (USB Drive): Connect to a computer to transfer media files. DAC Input: Listen to music from a PC on the device. Download Select a folder for downloaded files. Select a default folder for downloading music during MQS Streaming. - Page 42 User Guide System Restore Default Settings: Revert all user settings back to their original settings. Factory Reset: Delete all user data and restore the device to its original factory settings. Using the Device...
-
Page 43: Wi-Fi
User Guide Wi-Fi Connect to a Wireless Network 1. Long press [ ] from the Notification Bar or select [Settings - Wi-Fi] to display a list of Access Points (AP). 2. Select an appropriate AP to connect to the wireless network. - Additional information (encryption key, index, etc.) may be required depending... -
Page 44: Equalizer
User Guide Equalizer Equalizer Setup 1. Long press [EQ] from the Notification Bar or turn on the feature from [Settings - Equalizer]. 2. Press [Pro] from the drop-down list and select [Add New]. 3. Enter a name for the custom EQ settings and select [Add]. - Page 45 User Guide 4. Adjust the frequencies according to the user's preferences. Reset Equalizer 1. Select the desired EQ setting and select [Reset] to revert the EQ to its default settings. Using the Device...
- Page 46 User Guide Delete Equalizer 1. Select [Delete] and choose the desired EQ setting for deletion. 2. Press [Confirm] to complete process. Rename Equalizer 1. Select [Rename] and enter a new name for the EQ setting. 2. Press [Rename] to complete the process.
-
Page 47: Miscellaneous
Customer Support Center. (Water-damaged devices will be repaired for a fee regardless of warranty status, but the device may not be repairable.) Avoid places with excess moisture, dust, or smoke. -
Page 48: Troubleshooting
User Guide Miscellaneous Do not use earphones/headphones or operate the product while operating any type of vehicle. Not only is it dangerous, it may be illegal in certain regions. Do not use the product during any physical activity (driving, walking, hiking, etc.). Always use in a safe environment to avoid the risk of an accident. - Page 49 User Guide 3. The computer won't recognize the device or an error occurs when connected. Use a USB port on the back of the computer. Check the USB cable connections. For Windows XP, verify that Service Pack 2 (or higher) and Windows Media Player 10 is installed.
-
Page 50: Copyright
Companies, organizations, products, people, and events used in the examples are not based on actual data. It is not the intention of iriver Limited to correlate any companies, organizations, products, people, and events with this manual. It is the responsibility of the user to comply with applicable copyright laws. -
Page 51: Specifications
User Guide Specifi- General Specifications Model AK240 cations Body Color Gun Metal Body Material Aircraft Grade Duralumin Display 3.31 inch WVGA (480x800) AMOLED Touch Screen Supported Audio WAV, FLAC, WMA, MP3, OGG, APE (Normal, High, Fast), Formats AAC, ALAC, AIFF, DFF, DSF... -
Page 52: Trademarks
The information in this user manual was written based on current product specifications. The manufacturer, iriver Limited, is currently adding new complementary features and will continue to apply new technologies in the future. All standards are subject to change without prior notice.