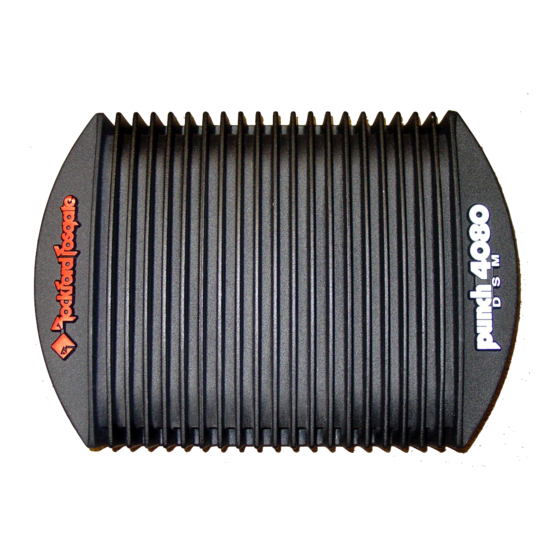
Rockford Fosgate Punch Owner's Manual
4-channel amplifier
Hide thumbs
Also See for Punch:
- Installation & operation manual (12 pages) ,
- Installation & operation manual (52 pages) ,
- Installation reference sheet (4 pages)
Table of Contents
Advertisement
Advertisement
Table of Contents

Related Manuals for Rockford Fosgate Punch


Summary of Contents for Rockford Fosgate Punch
- Page 1 4-CHANNEL AMPLIFIER OWNER’S MANUAL...
-
Page 2: Practice Safe Sound
(RTTI). Please read your warranty and retain your receipt and original carton for possible future use To add the finishing touch to your new Rockford Fosgate image, order your Rockford accessories, which include everything from T-shirts and jackets to hats and sunglasses. -
Page 3: Table Of Contents
TABLE OF CONTENTS Specifications ..................Punch 4-Channel Accessory Pack ........... Introduction ..................Features and Benefits ..............Controls and Features..............Top View of Amplifier and End Caps........... Power/REM/LED Side ..............Input/Output Terminal Side ............Installation Considerations ............... Tools Needed ................ -
Page 6: Punch 4-Channel Accessory Pack
PUNCH 4-CHANNEL ACCESSORY PACK (366cm) 17’ (518cm) Blue‘ Remote Red Power Turn-on Wire Wire 1.5’ (46cm) Black Grounding Wire Remote Turn-on Wire Power Ring Connector Plug Terminals Allen Head Set Screws and Mounting Screws Fuse Holder 4080 Fuse Holder 4040... -
Page 7: Introduction
12 volt power source is available. “Discrete Surface Mount” (DSM) technology is utilized in the crafting of all of our Punch amplifiers. This process provides greater ruggedness and consistency of both components and layout. Already used heavily in aero-... -
Page 8: Controls And Features
To get a better understanding of the Punch let’s take a closer look. CONTROLS AND FEATURES This section describes the various controlsand features of the Punch 4040 DSM and 4080 DSM amplifiers. -
Page 9: Power/Rem/Led Side
Rear Speaker Output Terminals Connector Output Terminals The Punch 4-Channel is turned on by connecting the blue Connector remote turn-on wire to the source unit’s “Accessory” or “Auto Antenna” lead, either of which will go to +12 volts when the source unit is turned on. -
Page 10: Input/Output Terminal Side
Input/Output Terminal Side Front Treble Front Input Front Bass Rear Treble Rear Input Rear Bass Adjustment Gain Adjustment Adjustment Gain Adjustment Control Control Control Control Control Control Front Input Front+Rear Rear Input 0/180° Rear Front/Rear Phase Selector lnput Switch Connectors Summed Pass-Thru Connectors Connectors... -
Page 11: Installation Considerations
INSTALLATION CONSIDERATIONS This section focuses on some of the vehicle consider- ations for installing your new Punch 4-Channel amplifier. Checking your battery and current sound system, as well as pre-planning your system layout and best wiring routes will save installation time. -
Page 12: Tools Needed
Electric Hand Drill with assorted bits Wire Crimpers BATTERY AND CHARGING Punch amplifiers will naturally put an extra load on your battery and charging system. We recommend you check your alternator capacity to ensure ample charging capa- bility to handle the additional load of your new Punch equipment. -
Page 13: Mounting And Location
Mounting F (80° C) during the summer months. Since the thermal shutoff point for the Punch 4-Channel is 195° F (90° C), it is easy to see that the amp must be mounted for maximum cooling capability. Mounting the amplifier on the floor or under the rear parcel tray prevents sufficient convectional airflow cooling. - Page 14 For the Punch 4040, place the protective boot onto the wire. Inset-t the wire into one end of the fuse holder so that the insulation is just inside the crimp area as shown in the diagram. Crimp the wire in place with the notched portion of a crimping tool.
-
Page 15: Wiring The Ring And Spade Connectors
If using a larger gauge wire than that supplied with your Using Larger Gauge Wire new Punch 4-Channel, cut the wire casing on the diago- nal as shown in the following diagram. Insert the wire into the connector. Twist the wire around so that the long end of the insulation faces up. -
Page 16: Ground
Antenna goes down during tape operation), we recom- mend a switch in the car with one terminal connected to +12 volts and the other to the Punch 4-Channel REM lead. This will allow you to engage the amplifier manually. The amplifier’s signal input RCA jacks should be con- Input nected to the source unit’s signal outputs with high-... -
Page 17: Speakers
2Q stereo or 4R bridged/mono. Be sure to observe proper speaker terminal polarity throughout the system. It is critical for the Punch 4- Channel to use the correct negative terminals for right and left channels, since the RIGHT NEGATIVE (-) terminal is the “hot”... - Page 18 Authorized Rockford Fosgate Dealer.
-
Page 20: Active Crossover Mode Selection
Active Punch 4-Channel amplifiers feature selectable elec- Crossover tronic crossovers. Selection is made by positioning of a Mode removable module card. These modules control the Selection output channels and can be configured in a High Pass, Low Pass or Full Range (factory default) position. The 4-... -
Page 28: Troubleshooting
- i.e., simple home box type, bookshelf, raw speaker, etc.). If the amp plays, check for shorts or blown voice coils in the vehicle’s speaker system. If you are still having problems, have theamplifierchecked out by an Authorized Rockford Fosgate Dealer. - Page 29 (Perfect Interface DT-1) to the amplifier. (See your Perfect Interface DT-1 Authorized Rockford Fosgate Dealer for more infor- mation.) 2. If the noise persists, disconnect the turn-on wire from the head unit and use a different +12 volt power source to turn on the amplifier (i.e., battery direct).
- Page 30 Problem Engine Noise (Whine) Solution 1. Disconnect the speakers from the amplifier. Connect a test speaker to the amplifier output terminals. If the noise goes away, check your speaker leads, speakers and crossovers. 2. If the noise persists, use a “shorting plug” to mute the input signal at the amplifier.
-
Page 31: Dynamic Power Measurements
Real World operation of an amplifier. Many manufacturers, including Rockford Fosgate, at times will measure amplifier power into a fixed resistor (4 ohm, 2 ohm). While this method is useful in some types of... - Page 32 Audio Graph -The PowerCube MODEL BEING TESTED MANUFACTURERS VOLTAGE FROM BATTERY RATED OUTPUT X4=STEREO MONO=BRIDGED MONO Amplifier: PUNCH 4040 14 4V x Rated Power: 2OW at 4 0hms Serial No B1AB13A000016 Owner : ROCKFORD CORPORATION - 3 0 ” 20 W 20 W 6 0 ’...
- Page 33 The laws of physics generally prevent it. A great amplifier is about the best As you can see by the PowerCube and as you will experience by listening, your Punch amplifier is a GREAT AMPLIFIER!
-
Page 34: Warranty Information
(3) years. We will cover parts and labor provided the product was purchased from an Authorized Rockford Fosgate Dealer. This warranty does not apply to any product on which the seals and/or serial number have been broken, removed, tampered with, defaced or altered in any manner. - Page 35 Rockford Fosgate A Division of Rockford Corporation 546 South Rockford Drive Tempe, Arizona 85281 U.S.A. In U.S.A., (602) 967-3565 In Canada, call Korbon (416) 567-1929 In Europe, Fax (49) 4207-801250 REV. B 4/93 4/93 M A N - 0 2 8 8...