Table of Contents
Advertisement
Advertisement
Table of Contents

Related Manuals for Kyocera FS-1040


Summary of Contents for Kyocera FS-1040
- Page 1 FS-1040/FS-1041 FS-1060DN/FS-1061DN...
- Page 2 This Operation Guide is for models FS-1040, FS-1041, FS-1060DN and FS-1061DN. This Operation Guide is intended to help you operate the machine correctly, perform routine maintenance and take a simple troubleshooting action as necessary, so that you can always use the machine in good condition.
-
Page 3: Table Of Contents
Connecting and Printing ..........................2-1 Connections ..............................2-2 Altitude Setting ............................. 2-3 Installing the Printer Driver .......................... 2-4 Printing ................................2-7 KYOCERA Client Tool ..........................2-10 Configuration .............................. 2-12 Uninstalling Software (Windows PC) ......................2-14 Loading Paper ............................... 3-1 General Guidelines ............................3-2 Selecting the Right Paper .......................... -
Page 5: Legal And Safety Information
All rights are reserved. Copying or other reproduction of all or part of this guide, or any copyrightable subject matter without the prior written consent of KYOCERA Document Solutions Inc. is prohibited. Any copies made of all or part of this guide, or any copyrightable subject must contain the same copyright notice as the material from which the copying is done. - Page 6 License Agreements Compliance and Conformity This equipment has been tested and found to comply with the limits for a Class B digital device, pursuant to Part 15 of the FCC Rules. These limits are designed to provide reasonable protection against harmful interference in a residential installation.
-
Page 7: Energy Saving Control Function
Safety Instructions Regarding the Disconnection of Power Caution: The power plug is the main isolation device! Other switches on the equipment are only functional switches and are not suitable for isolating the equipment from the power source. VORSICHT: Der Netzstecker ist die Hauptisoliervorrichtung! Die anderen Schalter auf dem Gerät sind nur Funktionsschalter und können nicht verwendet werden, um den Stromfluß... - Page 8 Environmental benefits of "Power Management" To reduce power consumption when idle, this machine is equipped with a power management function that automatically activates energy-saving mode when the machine is idle for a certain period of time. Although it takes the machine a slight amount of time to return to READY mode when in energy-saving mode, a significant reduction in energy consumption is possible.
-
Page 9: Safety Conventions In This Guide
Safety Conventions in This Guide The sections of this guide and parts of the machine marked with symbols are safety warnings meant to protect the user, other individuals and surrounding objects, and ensure correct and safe usage of the machine. The symbols and their meanings are indicated below. -
Page 10: Other Precautions
Environment The service environmental conditions are as follows: • Temperature: 50 to 90.5 °F (10 to 32.5 °C) • Humidity: 15 to 80 % However, adverse environmental conditions may affect the image quality. Avoid the following locations when selecting a site for the machine. - Page 11 About the Operation Guide This Operation Guide contains the following chapters: Parts Machine This chapter lists the names of different machine parts. 2 Connecting and Printing This chapter explains how to start up the printer, print from your PC, and use the application software included in the Product Library disc.
-
Page 13: Machine Parts
Machine Parts This chapter identifies machine parts, indicators, and operation panel keys. Front Printer Components ............................ 1-2 Rear Printer Components............................1-2 Operation Panel..............................1-3... -
Page 14: Front Printer Components
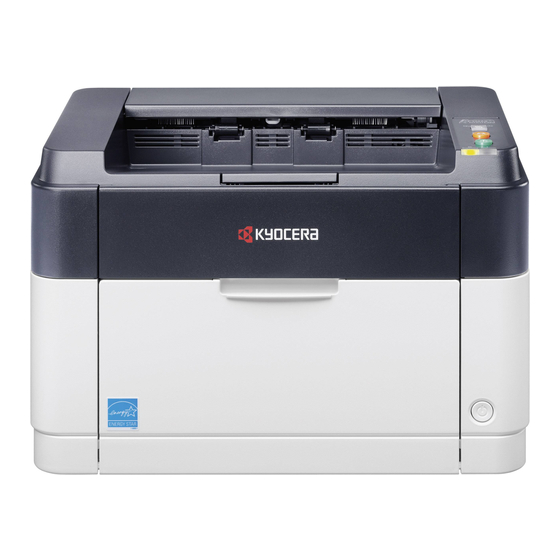
Machine Parts Front Printer Components Top Tray Paper Stopper Front Cover Manual Feed Tray (FS-1060DN/FS-1061DN) Cassette Cover Cassette Operation Panel Main Power Switch (For Korean models) Power Switch Rear Printer Components 10 Top Cover 11 Rear Cover 12 Power Cord Connector 13 Network Interface Connector (FS-1060DN/FS-1061DN) 14 USB Interface Connector The illustration shows the FS-1060DN/FS-1061DN. -
Page 15: Operation Panel
The printer status is normal. Or, the power is off. Note For other combinations of the two indicators, call for service. KYOCERA Client Tool (software bundled with the GX Driver) will provide more detailed information about the printer status. (Refer to KYOCERA Client Tool on page 2-10.) - Page 16 Machine Parts...
-
Page 17: Connecting And Printing
This chapter explains how to start up the printer, print from your PC, and use the application software included in the Product Library disc. Connections ................................2-2 Altitude Setting............................... 2-3 Installing the Printer Driver ........................... 2-4 Printing..................................2-7 KYOCERA Client Tool............................2-10 Configuration................................ 2-12 Uninstalling Software (Windows PC) ......................... 2-14... -
Page 18: Connections
Connecting and Printing Connections This section explains how to start up the printer. Connecting the USB Cable Follow the steps as below for connecting the USB cable. Connect the USB cable to the printer's USB interface connector. Note Use a USB cable with a rectangular Type A plug and a square Type B plug. -
Page 19: Altitude Setting
If you are using the machine at an altitude of 1500 meters (480 feet) or higher and print quality has deteriorated, the Altitude setting can be used to restore print quality. For more information, refer to KYOCERA Client Tool User Guide. -
Page 20: Installing The Printer Driver
Connecting and Printing Installing the Printer Driver Ensure the printer is plugged in and connected to the PC before installing the printer driver from the Product Library disc. Note Install the printer driver when the printer status is online (the Processing indicator is lit). Installing the Software in Windows If you are connecting this printer to a Windows PC, follow the next steps to install the printer driver. -
Page 21: Installation On A Macintosh
This section explains how to install the printer driver in Mac OS. Turn on the printer and the Macintosh. Insert the included Product Library disc into the disc drive. Double-click the Product Library disc icon. Double-click OS X 10.5 or higher. Double-click Kyocera OS X 10.5+ xxxxx. - Page 22 Connecting and Printing The printer driver installation program starts up. Install the printer driver as directed by the instructions in the installation software. IMPORTANT In the Authentication screen, enter the name and password used to log in to the operating system. This completes the printer driver installation.
-
Page 23: Printing
Connecting and Printing Printing This section explains the printing procedure from an application software. You can specify the printing settings from each tab on GX Driver. GX Driver is stored in the Product Library disc. For more information, refer to the Printer Driver User Guide in the Product Library disc. - Page 24 Manual Duplex (FS-1040/FS-1041 only) To print on both sides of the paper using a FS-1040/FS-1041, use Manual Duplex. The even pages are printed first and then reloaded to print the odd pages. An instruction sheet is available to assist with loading the sheets in the correct orientation and order.
- Page 25 Connecting and Printing Remove all the even pages (including the instruction sheet) from the output tray, fan through the sheets to separate them prior to loading. If the paper is curled at an edge, straighten it prior to reloading. Load the even pages printed into the cassette with the instruction sheet facing down and the arrows pointing toward the printer.
-
Page 26: Kyocera Client Tool
Note For the detailed functions of the KYOCERA Client Tool, refer to the KYOCERA Client Tool User Guide. Accessing the KYOCERA Client Tool To open the KYOCERA Client Tool, click Start > All Programs > Kyocera > Client Tool > KYOCERA Client Tool. KYOCERA Client Tool Settings... - Page 27 Status Monitor Icon When the KYOCERA Client Tool is installed, you can check the printer status in the Status Monitor icon. The Status Monitor icon displays printer status messages in the lower right corner of the screen.
-
Page 28: Configuration
Device Defaults Tab* The Device Defaults tab is used to select energy, units, error, timeout, and paper options. Note Power off when does not appear on the FS-1040 for Europe, Russia, Africa and Middle East, and FS- 1041 for Europe. - Page 29 Connecting and Printing Description Closes the Configuration. Clicking OK exits the Configuration after applying the modified printer settings. Clicking Cancel exits the Configuration without applying the modified printer settings. Clicking Apply applies the modified printer settings without exiting the Configuration. The items that can be configured will be different depending on the model.
-
Page 30: Uninstalling Software (Windows Pc)
Following the procedure used to install the printer driver, click Uninstall tab. Select the software package to remove. Click Uninstall. Note When KYOCERA Net Viewer is installed, separate uninstallers are launched for this application. Proceed with the uninstallation steps for this application as directed by the on- screen instructions. -
Page 31: Loading Paper
Loading Paper This chapter explains paper specifications for this printer and how to load paper into the cassette or Manual Feed tray. General Guidelines ..............................3-2 Selecting the Right Paper............................3-4 Paper Type ................................3-9 Preparing the Paper ............................. 3-10 Loading Paper into Cassette.......................... -
Page 32: General Guidelines
Loading Paper General Guidelines The machine is designed to print on standard copier paper, but it can also accept a variety of other types of paper within the limits specified below. Note The manufacturer assumes no liability for problems that occur when paper not satisfying these requirements is used. -
Page 33: Minimum And Maximum Paper Sizes
Loading Paper Minimum and Maximum Paper Sizes The minimum and maximum paper sizes are as follows. Cassette Manual Feed tray Minimum Minimum Paper Size Paper Size 70 mm 70 mm (2-3/4 inches) (2-3/4 inches) Maximum Maximum Paper Size Paper Size 216 mm (8-1/2 inches) 216 mm (8-1/2 inches) -
Page 34: Selecting The Right Paper
Loading Paper Selecting the Right Paper This section describes the guidelines for selecting paper. Condition Avoid using paper that is bent at the edges, curled, dirty, torn, embossed, or contaminated with lint, clay, or paper shreds. Use of paper in these conditions can lead to illegible printing and paper jams, and can shorten the life of the machine. In particular, avoid using paper with a surface coating or other surface treatment. -
Page 35: Basis Weight
Loading Paper Basis weight Basis weight is the weight of paper expressed in grams per square meter (g/m²). Paper that is too heavy or too light may cause feed errors or paper jams as well as premature wear of the product. Uneven weight of paper, namely uneven paper thickness may cause multiple-sheet feeding or print quality problems such as blurring because of poor toner fusing. -
Page 36: Special Paper
Loading Paper Curl: Most paper naturally tends to curl one way if left unpacked. When paper passes through the fixing unit, it curls upward a little. To produce flat printouts, load the paper so that the upward pressure from the machine can correct their curling. - Page 37 Loading Paper Label paper has a structure comprising of three layers, as shown in the diagram. The top sheet is printed on. The adhesive layer consists of pressure-sensitive adhesives. The carrier sheet (also called the linear or Top sheet (white backing sheet) holds the labels until used.
- Page 38 Loading Paper Thick Paper If an excessive amount of thick paper is loaded in the cassette, it may not be fed. In that case, reduce the number of sheets to be loaded. Fan the stack of paper and align the edges before loading them in the paper source.
-
Page 39: Paper Type
Not only can preset paper types be selected, but it is also possible for you to define and select customized paper types. Paper type can be changed using the printer driver and KYOCERA Client Tool. The following types of paper can be used. -
Page 40: Preparing The Paper
Loading Paper Preparing the Paper After removing paper from the packaging, fan through the sheets to separate them prior to loading. If using paper that has been folded or is curled, straighten it prior to loading. Failure to do so may result in a paper jam. IMPORTANT Ensure paper is not stapled and clips are removed. - Page 41 Loading Paper Adjust the position of the width guides located on the left and right sides of the cassette. Note Paper sizes are marked on the cassette. Adjust the paper length guide to the paper size required. Note When using paper larger than A4/Letter, pull out the paper length guide.
- Page 42 Note When storing the cassette, or when using paper larger than A4/Letter, remove the cassette cover. Specify the paper size and type for the cassette using KYOCERA Client Tool. For more information, refer to Configuration on page 2- Note Set the same paper size to the paper size that is set on the printing system.
-
Page 43: Loading Paper Into Manual Feed Tray (Fs-1060Dn/Fs-1061Dn Only)
Load envelope with the print side facing up. Specify the paper size and type for Manual Feed tray using KYOCERA Client Tool. For more information, refer to Configuration on page 2-12. Note Set the same paper size to the paper size that is set on the printing system. - Page 44 Loading Paper 3-14...
-
Page 45: Maintenance
Maintenance This chapter explains how to replace the toner container and clean the printer. General Information ............................... 4-2 Toner Container Replacement ..........................4-2 Maintenance Kit Replacement ..........................4-4 Cleaning the Printer ............................... 4-5 Maintenance Menu ..............................4-6 Prolonged Non-Use and Moving of the Printer ....................4-7... -
Page 46: General Information
Toner Kits For best results, we recommend that you only use genuine Kyocera Parts and Supplies. Should any damage be caused by the application of a toner other than the original toner, then this damage is excluded from the guarantee. -
Page 47: Replacing The Toner Container
Kyocera toner containers. For optimum performance, it is also recommended to use only the Kyocera toner containers which are specifically intended for use in your country or region. If the toner container for another destinations is installed, the printer will stop printing. -
Page 48: Maintenance Kit Replacement
Maintenance Install the new toner container in the printer. Push in firmly until you hear a "click" sound. Close the front cover. Toner is replenished for about 4 seconds. Note If the front cover does not close, check that the new toner container is installed correctly (in step 4). -
Page 49: Cleaning The Printer
Maintenance Cleaning the Printer To avoid print quality problems, the interior of the printer must be cleaned with every toner container replacement. Open the rear cover. Use a clean, lint-free cloth to wipe dust and dirt off the metal and rubber rollers, conveying unit, and paper feed unit. -
Page 50: Maintenance Menu
Maintenance Maintenance Menu The Maintenance Menu that the user can adjust from the KYOCERA Client Tool is described below. In addition, also refer to KYOCERA Client Tool User Guide. Maintenance Menu Description Adjust print Drum charge When print quality has deteriorated, the output of the main charger can be... -
Page 51: Prolonged Non-Use And Moving Of The Printer
Maintenance Prolonged Non-Use and Moving of the Printer Prolonged Non-use If you ever leave the printer unused for a long period of time, remove the power cord from the wall outlet. We recommend you consult with your dealer about the additional actions you should take to avoid possible damage that may occur when the printer is used next time. - Page 52 Maintenance...
-
Page 53: Troubleshooting
Troubleshooting This chapter explains how to handle printer problems, understand indicator combinations, and clear paper jams Solving Malfunctions ............................. 5-2 Error Messages ..............................5-6 Clearing Paper Jams.............................. 5-8... -
Page 54: Solving Malfunctions
Troubleshooting Solving Malfunctions The table below provides general guidelines for problem solving. If a problem occurs with your printer, look into the checkpoints and perform procedures indicated on the following pages. If the problem persists, contact your service technician. Reference Symptom Checkpoints Corrective Actions... - Page 55 Troubleshooting Reference Symptom Checkpoints Corrective Actions Page Vapor is emitted near the Check if the temperature is low near Depending on the operating — top tray. the location of the printer, or if the environment of the printer and the paper that is being used has been condition of the paper, heat generated exposed to humidity.
- Page 56 Check the Print density setting in Increase the adjustment value for the — KYOCERA Client Tool. Print density in the KYOCERA Client Tool. For more information, refer to KYOCERA Client Tool User Guide. Check the Drum charge setting in the Decrease the adjustment value for the Maintenance Menu.
- Page 57 Check the Print density setting in Decrease the adjustment value for the — KYOCERA Client Tool. Print density in the KYOCERA Client Tool. For more information, refer to KYOCERA Client Tool User Guide. Dirt on the top edge or Check the Drum charge setting in the Increase the adjustment value for the back of the paper.
-
Page 58: Error Messages
Error Messages If a problem has occurred in the printer, the indicators on the operation panel, the KYOCERA Client Tool, and the Status Monitor will show the status of the printer. Problems that can be resolved by the user are described below. - Page 59 Troubleshooting Message Displayed in KYOCERA Meaning Remedy Client Tool and Status Monitor* Non-genuine Toner is installed This message is displayed if the The manufacturer assumes no installed toner container is non- responsibility for damage caused by a genuine. non-genuine toner.
-
Page 60: Clearing Paper Jams
If paper jams in the paper transport system, or no paper sheets are fed at all, the printer automatically goes offline, and the Attention indicator will flash. KYOCERA Client Tool can indicate the location of the paper jam (the component where the paper jam has occurred). -
Page 61: Rear Cover
Troubleshooting Rear Cover Follow the steps below to clear paper jams inside the rear cover. Note When the front cover is opened or closed, the paper inside the machine may be discharged. Drum Transfer Roller IMPORTANT Take care not to touch the drum and transfer roller (black). - Page 62 Troubleshooting 5-10 CAUTION The fuser unit inside the printer is hot. Do not touch it, as it may result in burn injury. Close the rear cover to clear the error. The printer warms up and resumes printing. Note Close the top cover first and then close Note When printing by manual feeding, press the rear cover.
- Page 63 Troubleshooting Cassette Follow the steps below to clear paper jams in the cassette. IMPORTANT Do not try to remove paper that has already been partially fed. Refer to Rear Cover on page 5-9. Note Do not open or close the front cover or rear cover before removing the jammed paper. Remove any partially fed paper.
- Page 64 Troubleshooting If paper feed failure occurs Check on and reduction of number of paper sheets loaded If an excessive amount of thick paper is loaded in the cassette, it may not be fed. In that case, reduce the number of sheets to be loaded. Edge fanning and curl straightening Remove all the even pages (including the instruction sheet) from the output tray, fan through the sheets to separate them prior to loading.
- Page 65 Troubleshooting Manual Feed Tray (FS-1060DN/FS-1061DN only) Follow the steps below to clear paper jams in the Manual Feed tray. IMPORTANT Do not try to remove paper that has already been partially fed. Refer to Rear Cover on page 5-9. Note Do not open or close the front cover or rear cover before removing the jammed paper. Remove the paper jammed at the Manual Feed tray.
- Page 66 Troubleshooting 5-14...
-
Page 67: Appendix
Appendix This section lists the following information of this printer. Specifications................................. 6-2... -
Page 68: Specifications
Appendix Specifications Note These specifications are subject to change without notice. Description Item FS-1040/FS-1041 FS-1060DN/FS-1061DN Type Desktop Printing Method Electrophotography by semiconductor laser Paper Weight Cassette 60 to 220 g/m² Manual Feed Tray* – 60 to 220 g/m² Paper Type... - Page 69 Appendix Description Item FS-1040/FS-1041 FS-1060DN/FS-1061DN Printing Speed A5/B5/A6 Light (63 g/m² or less): 12 Light (63 g/m² or less): 15 (images/min) (Quiet Mode) Normal 1 (64 to 69 g/m²): 12 Normal 1 (64 to 69 g/m²): 15 Normal 2 (3) (70 to 105 g/m²): 12 Normal 2 (3) (70 to 105 g/m²): 15...
- Page 70 Appendix Description Item FS-1040/FS-1041 FS-1060DN/FS-1061DN Warm-up Time Power on 14 seconds or less 16 seconds or less (22°C/71.6°F, Sleep 12 seconds or less 14 seconds or less 60%RH) Paper Capacity Cassette 250 sheets (80 g/m²) Manual Feed Tray* – 1 sheet Top Tray Capacity Standard paper 150 sheets (80 g/m²) (The printer pauses after 150 sheets are printed.)
- Page 71 .............. 1-3 Cassette Keys basis weight ............. 3-5 Quiet Mode, Cancel, GO ......... 1-3 clearing paper jams ..........5-11 KYOCERA Client Tool ........... 2-10 components ............. 1-2 loading paper ............3-10 minimum and maximum page sizes ......3-3 paper sizes ..............
- Page 72 minimum and maximum sizes ........3-3 Paper guides ..............3-13 Paper length guide ............3-11 USB cable Paper stopper ..............3-10 connection ............... 2-2 components ............. 1-2 USB interface connector Paper weight ..............3-5 components ............. 1-2 Paper width guide ............
- Page 74 Phone: +33-1-69852600 Fax: +27-11-466-3050 Fax: +33-1-69853409 KYOCERA Document Solutions Russia LLC KYOCERA Document Solutions Espana, S.A. Botanichesky pereulok 5, Moscow, 129090, Edificio Kyocera, Avda. de Manacor No.2, Russia 28290 Las Matas (Madrid), Spain Phone: +7(495)741-0004 Phone: +34-91-6318392 Fax: +7(495)741-0018 Fax: +34-91-6318219...
- Page 75 Rev.1 2012.09 2M3KDEN001...