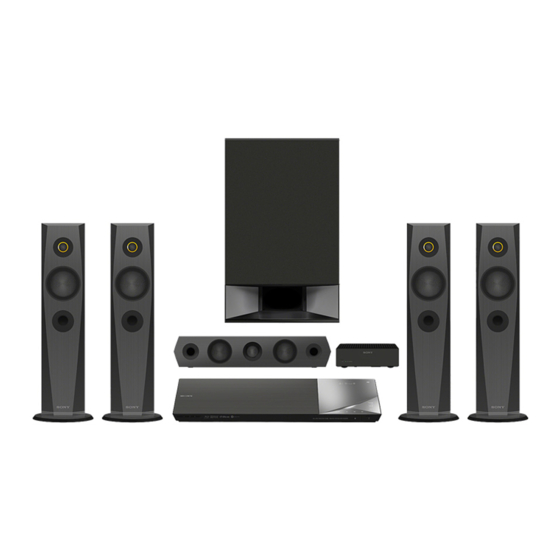
Sony BDV-N9200W Operating Instructions Manual
Blu-ray disc/ dvd home theatre system
Hide thumbs
Also See for BDV-N9200W:
- Reference manual (100 pages) ,
- Operating instructions manual (82 pages) ,
- Quick start manual (21 pages)

Related Manuals for Sony BDV-N9200W


Summary of Contents for Sony BDV-N9200W
- Page 1 4-485-800-13(1) Blu-ray Disc™/ DVD Home Theatre System Operating Instructions BDV-N9200W/BDV-N9200WL BDV-N7200W/BDV-N7200WL/BDV-N5200W...
- Page 2 CAUTION WARNING The use of optical instruments with this product will increase eye hazard. Do not install the appliance in a As the laser beam used in this Blu-ray confined space, such as a bookcase or Disc/DVD Home Theatre System is built-in cabinet.
- Page 3 (applicable EU directives. in the European Union This product has been manufactured by and other European or on behalf of Sony Corporation, 1-7-1 countries with separate Konan Minato-ku Tokyo, 108-0075 collection systems) Japan. Inquiries related to product This symbol on the product, the battery...
- Page 4 (such as eye strain, fatigue, unauthorized copy is detected, a or nausea) while watching 3D video message will be displayed and images. Sony recommends that all playback or copying will be viewers take regular breaks while interrupted. watching 3D video images. The length...
- Page 5 • Google Play™ is a trademark of Google • , “XMB”, and “xross media bar” are Inc. trademarks of Sony Corporation and • “Xperia” is a trademark of Sony Mobile Sony Computer Entertainment Inc. Communications AB. • “PlayStation” is a registered trademark of Sony Computer Entertainment Inc.
- Page 6 PlayReady Bluetooth SIG, Inc. and any use of such to access their content. If you decline marks by Sony Corporation is under an upgrade, you will not be able to license. Other trademarks and trade...
- Page 7 personal non-commercial use only. You functioning of Gracenote Software or agree not to assign, copy, transfer or Gracenote Servers will be transmit the Gracenote Software or any uninterrupted. Gracenote is not Gracenote Data to any third party. YOU obligated to provide you with new AGREE NOT TO USE OR EXPLOIT enhanced or additional data types or GRACENOTE DATA, THE GRACENOTE...
-
Page 8: About These Operating Instructions
BDs, DVDs, Super Audio CDs, or CDs unless otherwise specified by the text or illustrations. • The instructions in this manual are for BDV-N9200W, BDV-N9200WL, BDV-N7200W, BDV-N7200WL and BDV-N5200W. BDV-N9200WL is the model used for illustration purposes. -
Page 9: Table Of Contents
Table of Contents Playback About These Operating Instructions ......8 Playing a Disc ......31 Unpacking ........11 Playing from a USB Device ..33 Guide to Parts and Controls ..14 Enjoying Music from a BLUETOOTH Device ....33 Getting Started Using Screen mirroring .....35 Step 1: Installing the Connecting to a Remote Speakers ...... - Page 10 Other Operations Additional Information Using the Control for HDMI Precautions ......64 Function for “BRAVIA” Notes about Discs ....66 Sync ........45 Troubleshooting ....... 67 Calibrating the Appropriate Playable Discs ......73 Speaker Settings Playable Types of Files ..... 74 Automatically .....46 Supported Audio Formats ..
-
Page 11: Unpacking
• Speaker Installation Guide • Reference Guide (Europe models only) • Remote control (1) • R03 (size AAA) batteries (2) • FM wire antenna (aerial) (1) • Calibration mic (1) (BDV-N9200W/ BDV-N9200WL/BDV-N7200W/ (BDV-N9200WL only) BDV-N7200WL only) • High Speed HDMI cable (1) (Africa,... - Page 12 BDV-N7200W/BDV-N7200WL only • Front speakers (2), Surround speakers (BDV-N7200W only) • Speaker cords – (5, red/white/gray/blue/green) (BDV-N9200W only) – (1, green) (BDV-N9200WL only) (BDV-N7200WL only) • Bases (4) • Center speaker (1) • Lower parts of the front and surround speakers (4) •...
- Page 13 • Speaker cords BDV-N5200W only – (5, red/white/gray/blue/green) • Front speakers (2) (BDV-N7200W only) – (1, green) (BDV-N7200WL only) • Surround speakers (2) • Stands (for front and surround speakers) (4) • Screws (8) • Center speaker (1) • Subwoofer (1)
-
Page 14: Guide To Parts And Controls
Guide to Parts and Controls For more information, refer to the pages indicated in parentheses. Main unit Top and front panel Slot A "/1 (on/standby) E LED indicator Turns on the main unit, or sets it to White: Lights up when the main unit standby mode. - Page 15 F Soft-touch buttons/indicators (remote control sensor) I Z (open/close) N* (play) x* (stop) ./> (previous/next) About soft-touch buttons/ indicators VOL +/– The soft-touch button indicators flash FUNCTION (page 28) each time you turn on the main unit, Selects the playback source. wait until the indicators stop flashing.
- Page 16 B TV (DIGITAL IN OPTICAL) jack F HDMI (OUT) jack (page 22) (pages 22, 23) G HDMI (IN 1/IN 2) jacks (page 23) C A.CAL MIC jack (BDV-N9200W/ H LAN (100) terminal (page 25) BDV-N9200WL/BDV-N7200W/ I SPEAKERS jacks (page 21)
-
Page 17: Remote Control
Turns on the TV or sets it to standby mode. BDV-N9200WL/ "/1 (on/standby) (page 28) BDV-N7200WL Turns on the system or sets it to standby mode. BDV-N9200W/ B SPEAKER ILLUMINATION BDV-N7200W/ BDV-N5200W (page 50) Selects the illumination pattern on the speakers. - Page 18 Enters or exits the system’s home During Blu-ray 3D Disc playback, slow- menu. motion reverse play and single-frame reverse play are not available. Accesses the “Sony Entertainment ./> (previous/next) Network™” online service. Selects the previous/next chapter, FUNCTION (page 28) track, or file.
- Page 19 Note When you replace the batteries of the remote control, the code number may reset to the default (SONY) setting. Set the remote control again. Hold down TV ?/1. Press the corresponding button for your TV (see table below), then press...
-
Page 20: Getting Started
Note • Be sure to select the speakers layout Getting Started setting (page 47) according to your speakers placement. Step 1: Installing the • Use caution when placing the speakers and/or speaker stands attached to the Speakers speakers on a specially treated (waxed, oiled, polished, etc.) floor, as staining or discoloration may result. -
Page 21: Connecting The Speakers
To connect the SPEAKER Connecting the speakers ILLUMINATION terminal (BDV-N9200WL/ Connect the speaker cords to match the BDV-N7200WL only) color of the SPEAKERS jacks of the main Connect the speaker illumination unit and surround amplifier. Be sure to connector (attached with the speaker insert the speaker connector until it cord) to the main unit and surround clicks. -
Page 22: Connecting The Tv
Connecting the TV Select one of the following connection methods according to the input jacks on your Video connection HDMI cable (supplied with Africa, India, Middle East, Singapore, China, Thailand, and Taiwan models only) High Speed HDMI cable The Audio Return Channel (ARC) function enables the TV to output sound through the system with an HDMI connection, without performing the B or C connection below. -
Page 23: Connecting The Other Equipment
Note To enjoy TV sound, select “TV” function for connection B or “AUDIO” function for connection C. Connecting the other equipment Connect the system, TV and other equipment as follows. You cannot enjoy the audio and video of the connected equipment on the TV through this system when the system is off or in standby mode. - Page 24 High quality HDMI cable* (not supplied) HDMI OUT * High Speed HDMI cable Optical digital cord (not supplied) DIGITAL OUT OPTICAL Audio cable (not supplied) AUDIO OUTPUT Standard quality When you make connection This connection can transmit both video and audio signals. Note •...
-
Page 25: Connecting The Antenna (Aerial)
Connecting the antenna Step 3: Preparing for (aerial) Network Connection Rear of the main unit To connect the system to your network, perform [Easy Network Settings]. For details, see “Step 5: Performing the Easy Setup” (page 27). Select the method based on your LAN (Local Area Network) environment. -
Page 26: Step 4: Setting Up The Wireless System
– visit the following website: x WPA-PSK (AES), WPA2-PSK (AES) For customers in Europe and Russia: AES is a security technology that uses an http://support.sony-europe.com/ advanced security method distinct from WEP and TKIP. AES assures a higher For customers in other countries/ security level than WEP or TKIP. -
Page 27: Step 5: Performing The Easy Setup
About the standby mode Press "/1 to turn on the system. The surround amplifier enters standby mode automatically when the main unit "/1 is in standby mode or wireless transmission is deactivated. The surround amplifier turns on automatically when the main unit is turned on and wireless transmission is Connect the AC power cord (mains activated. -
Page 28: Step 6: Selecting The Playback Source
For details about [Auto Calibration], “SCR M” t “BT” t “AUDIO” see “Calibrating the Appropriate “BD/DVD” Speaker Settings Automatically” Disc or network device to be played by the (page 46). (BDV-N9200W/ system BDV-N9200WL/BDV-N7200W/ “USB” BDV-N7200WL only) USB device that is connected to the... -
Page 29: Step 7: Enjoying Surround Sound
• Some functions may be changed via the [Digital Music] TV screen by pressing FUNCTION, V/v, This is a technology developed by Sony to enhance the sound quality of compressed • You can also press BLUETOOTH and audio files by restoring high frequency range MIRRORING on the remote control to sound after compression process. - Page 30 Arena : On]. Press MUSIC EQ repeatedly during You can enjoy Live Music Concert filled playback. with great excitement created by Sony You can select the sound to suit your unique Audio DSP technology. (Digital preference. Music Arena) Each time you press the button, the setting changes cyclically as follows.
-
Page 31: Playing A Disc
To select the football mode Playback Press FOOTBALL repeatedly while watching a football match broadcast. You can experience a feeling of Playing a Disc presence in the stadium when watching the football match broadcast. For playable discs, see “Playable Discs” •... - Page 32 Prepare for BD-LIVE (BD-LIVE Displaying the playback only). information • Connect the system to a network (page 25). You can check the playback • Set [BD Internet Connection] to information, etc., by pressing DISPLAY. [Allow] (page 59). The displayed information differs depending on the disc type and system Insert a BD-ROM with status.
-
Page 33: Playing From A Usb Device
Playing from a USB Enjoying Music from a Device BLUETOOTH Device You can play video/music/photo files About the BLUETOOTH on a connected USB device. For playable types of files, see “Playable wireless technology Types of Files” (page 74). BLUETOOTH wireless technology is a Connect the USB device to the short-range wireless technology that (USB) port. -
Page 34: Connecting To Bluetooth Device From System
You can connect to a BLUETOOTH Select your system’s name (for device from this main unit. example, “BDV-N9200W”) on the Check the following before playing device’s display. music: – The BLUETOOTH function of the Perform this step within 5 minutes, BLUETOOTH device is turned on. -
Page 35: Using Screen Mirroring
Adjust the volume. Using Screen mirroring Adjust the volume of the BLUETOOTH device first, if the “Screen mirroring” is a function to volume level is still too low, adjust display the screen of a mobile device on the volume level on the main unit. the TV by Miracast technology. -
Page 36: Connecting To A Remote Device By One-Touch Function (Nfc)
Connecting to a remote Connecting to a Remote device by One-touch Device by One-touch listening function (NFC) Function (NFC) By holding an NFC-compatible remote device near to the N-Mark on the main What is “NFC”? unit, the main unit and remote device NFC (Near Field Communication) is a proceed to complete pairing and the technology enabling short-range... - Page 37 Note The application may not be available If the volume level is low, adjust the in some countries/regions. volume of the remote device first. If the volume level is still too low, adjust the Start the “NFC Easy Connect” volume level on the main unit. application on the remote device.
-
Page 38: Using "Songpal
Entertainment Network (SEN) You can select your preference sound field during mirroring. Press the sound field buttons (page 17). Sony Entertainment Network serves as a gateway delivering selected Internet content and a variety of on-demand entertainment straight to your main unit. - Page 39 • Some Internet content may not be Playing files on a Home available in some countries/regions. Network (DLNA) Prepare for Sony Entertainment Network. You can play video/music/photo files on other DLNA-certified equipment by Connect the system to a network connecting them to your home network.
- Page 40 To play remote files by operating Press B/b to select [Video] or the system (Renderer) via a DLNA [Music]. controller Press V/v to select [Video You can operate the system with a Search] or [Music Search]. DLNA-certified controller (a mobile phone, etc), when playing files stored The content information (such as on a DLNA server.
-
Page 41: Available Options
[Video] only Available Options [A/V SYNC] Adjusts the time gap between picture and Various settings and playback sound (page 42). operations are available by pressing [3D Output Setting] OPTIONS. The available items differ Sets whether or not to output 3D video depending on the situation. -
Page 42: Adjusting The Delay Between The Picture And Sound
[IP Content NR Pro] Adjusting the delay between Adjusts the video quality for Internet content. the picture and sound [Video Search] Displays information on the BD-ROM/ DVD-ROM based on Gracenote technology. (A/V SYNC) [Number Entry] When the sound does not match the Inputs numbers. -
Page 43: Sound Adjustment
Note Stereo (Audio1)] and [ Stereo (Audio2)] Sound Adjustment do not appear if only one audio stream is recorded on the disc. Selecting the Audio x CD Format, Multilingual • [ Stereo]: The standard stereo sound. Tracks, or Channel • [ 1/L]: The sound of the left channel (monaural). -
Page 44: Tuner
Presetting radio stations Tuner You can preset up to 20 stations. Before tuning, make sure to turn down the Listening to the Radio volume to minimum. Press FUNCTION repeatedly until Press FUNCTION repeatedly until “FM” appears in the top panel “FM”... -
Page 45: Receiving Radio Data System (Rds)
“BRAVIA” Sync [DTS Neo:6 Music] (page 59). This function is available on TVs with the “BRAVIA” Sync function. By connecting Sony equipment that is Receiving Radio Data compatible with the Control for HDMI System (RDS) function via an HDMI cable, operation is simplified. -
Page 46: Calibrating The Appropriate Speaker Settings Automatically
• When the system is turned on, the sound of the TV or other equipment [Auto Calibration] can be output from the speakers of the (BDV-N9200W/BDV-N9200WL/ system. BDV-N7200W/BDV-N7200WL • When sound from the TV or other only) -
Page 47: Setting The Speakers
Press V/v to select setting Press V/v to select [OK] or according to your speakers [Cancel], then press placement, then press x The measurement is OK. • [Standard]: The surround Disconnect the calibration mic, then speakers are installed in the rear select [OK]. - Page 48 [Subwoofer] 0.0 dB: Set the subwoofer Press B/b to select [OK] or level. [Cancel], then press Press V/v to select the item, then x [Relocation] (BDV-N9200W/ press BDV-N9200WL/BDV-N7200W/ BDV-N7200WL only) Press V/v to adjust the parameter. You can correct the speaker position...
-
Page 49: Using The Sleep Timer
Press RETURN. Deactivating the Buttons The system returns to the previous display. on the Main Unit Press V/v to select [Test Tone], then press (Child Lock) Press V/v to select [Off], then press You can deactivate the buttons on the main unit (except for "/1) for preventing misoperation, such as child mischief. -
Page 50: Enjoying The Visualization On The Tv Screen
Note Press VISUALIZER repeatedly. The illumination LED light is bright, be sure (BDV-N9200W/BDV-N7200W/ to avoid looking directly at the LED light. If BDV-N5200W only) the illumination is glaring, you can turn off Press COLOUR PATTERN repeatedly. -
Page 51: Saving Power In Standby Mode
“REAR IMMERSIVE OFF” Browsing Websites [Immersive Colour (Rear Off)] The illumination of the surround speakers are turned off. The illumination pattern of the front speakers is same as [Immersive Colour] Prepare for Internet browsing. setting. Connect the system to a network “REAR AMBIENT OFF”... - Page 52 Internet Browser display Available options You can check website information by Various settings and operations are pressing DISPLAY. The display available by pressing OPTIONS. information differs depending on the The available items differ depending on website and page status. the situation. [Browser Setup] Displays the Internet Browser settings.
-
Page 53: Further Settings For The Wireless System
[Break] Select [Wireless Sound Moves the cursor to the next line in the text Connection] in [System Settings] input field. (page 53). [Delete] Erases one character on the left side of the Press V/v to select [Secure Link], cursor during text input. then press Press V/v to select [On], then press... - Page 54 Selecting the frequency If wireless transmission is bandwidth unstable [RF Band] [RF Channel] (Europe, Oceania, Africa, India, If you use multiple wireless systems, Middle East, Thailand, and Russia such as a wireless LAN (Local Area Network), the wireless signals may be models only) unstable.
-
Page 55: Settings And Adjustments
For information about update functions, [Parental Control Settings] visit the following website: (page 60) Makes detailed settings for For customers in Europe and Russia: the Parental Control http://support.sony-europe.com/ function. For customers in other countries/regions: [Music Settings] (page 60) http://www.sony-asia.com/section/ Makes detailed settings for support... -
Page 56: [Screen Settings]
x [Update via Internet] x [Screen Format] Updates the system’s software using [Full]: Select this when connecting to a available network. Make sure network is TV with a wide-mode function. Displays connected to the Internet. For details, a 4:3 screen picture in 16:9 aspect ratio see “Step 3: Preparing for Network even on a wide-screen TV. - Page 57 TV via an HDMI connection and the [Output Video Resolution] is set Note to [Auto] or [1080p]. If your Sony equipment is not detected [On]: Select this when your TV is when [Auto1] is selected, the setting will compatible with 1080/24p video have the same effect as [Auto2] setting.
-
Page 58: [Audio Settings]
x [SBM] (Super Bit Mapping) x [Audio DRC] [On]: Smooths the gradation of video You can compress the dynamic range of signals output from the HDMI (OUT) the sound track. jack. [Auto]: Performs playback at the [Off]: Select this when outputting dynamic range specified by the disc distorted video signals or unnatural (BD-ROM only). -
Page 59: [Bd/Dvd Viewing Settings]
Speakers” (page 47). “Language Code List” (page 79). x [Auto Calibration] x [BD Hybrid Disc Playback Layer] (BDV-N9200W/BDV-N9200WL/ [BD]: Plays BD layer. BDV-N7200W/BDV-N7200WL only) [DVD/CD]: Plays DVD or CD layer. You can calibrate the appropriate settings automatically. -
Page 60: [Parental Control Settings]
[Parental Control [Music Settings] Settings] x [Super Audio CD Playback Layer] [Super Audio CD]: Plays the Super Audio x [Password] CD layer. Set or change the password for the [CD]: Plays the CD layer. Parental Control function. A password allows you to set a restriction on x [Super Audio CD Playback BD-ROM, DVD VIDEO, or Internet video Channels]... - Page 61 [Audio Return Channel] x [Auto Standby] This function is available when you [On]: Turns on the [Auto Standby] connect the system to a TV’s HDMI IN jack that is compatible with the Audio function. When you do not operate the system for about 20 minutes, the Return Channel function and [Control system enters standby mode...
-
Page 62: [External Input Settings]
You can enable and disable AAC audio. [On]: AAC audio if the BLUETOOTH For further details, visit the following device supports AAC. website and check the FAQ: [Off]: SBC audio. For customers in Europe and Russia: http://support.sony-europe.com/ For customers in other countries/regions: http://www.sony-asia.com/section/ support... -
Page 63: [Easy Network Settings]
x [Network Connection Status] [Resetting] Displays the current network connection status. x [Reset to Factory Default Settings] x [Network Connection Diagnostics] You can reset the system settings to the You can run the network diagnostic to factory default by selecting the group of check if the network connection has settings. -
Page 64: Additional Information
• Keep the system and discs away from components with strong magnets, Additional Information such as microwave ovens, or large loudspeakers. • Do not place heavy objects on the Precautions system. • Do not place metal objects in front of On safety the front panel. - Page 65 On cleaning discs, disc/lens On BLUETOOTH communication cleaners • BLUETOOTH devices should be used within approximately 10 meters Do not use cleaning discs or disc/lens (unobstructed distance) of each other. cleaners (including wet or spray The effective communication range types). These may cause the may become shorter under the apparatus to malfunction.
-
Page 66: Notes About Discs
• Do not stick paper or tape on the disc. always be careful when performing communication using BLUETOOTH technology. • Sony cannot be held liable in any way for damages or other loss resulting from information leaks during • Do not expose the disc to direct... -
Page 67: Troubleshooting
Set the child lock function to off (page 49). “D. LOCK” appears in the top panel display. t Contact your nearest Sony dealer or local authorized Sony service facility. - Page 68 3D images from the HDMI (IN 1) or top panel display. HDMI (IN 2) jack do not appear on the t Contact your nearest Sony dealer or TV screen. local authorized Sony service facility t Depending on the TV or video and give the error code.
- Page 69 The sound loses stereo effect when Sound you play a CD. t Select stereo sound by pressing There is no sound. AUDIO (page 43). t The speaker cords are not connected securely. The sound outputs from the center t Check the speaker settings speaker only.
- Page 70 The disc does not play. above items, consult your t The region code on the BD/DVD nearest Sony dealer. does not match the system. • Flashes green or orange slowly or t Moisture has condensed inside the turns red.
-
Page 71: Usb Device
Picture/sound quality may be subtitle or angles cannot be changed. improved by changing the t Try using the BD’s or DVD’s menu. connection speed. Sony t Multilingual tracks/subtitles or recommends a connection speed of multi-angles are not recorded on at least 2.5 Mbps for standard-... -
Page 72: Network Connection
t Check the following and refer to the t Depending on the usage operating instructions supplied with environment, including the wall the equipment. material, radio wave reception • The connected equipment is conditions, or obstacles between compatible with the [Control for the system and the wireless LAN HDMI] function. -
Page 73: Playable Discs
Connecting cannot be done. t The pairing registration information Playable Discs has been erased. Perform the pairing operation again (page 34). Blu-ray Disc BD-ROM There is no sound. BD-R/BD-RE t Make sure this main unit is not too 3)4) far from the BLUETOOTH device, or DVD-ROM DVD-R/DVD-RW this system is not receiving... -
Page 74: Playable Types Of Files
Notes on discs Playable Types of Files This product is designed to play back discs that conform to the Compact Disc (CD) standard. Video DualDiscs and some music discs encoded with copyright protection Codec Container Extension technologies do not conform to the MPEG-1 Video .mpg, Compact Disc (CD) standard. - Page 75 Codec Extension Note .dsf • Some files may not play depending on *6*13 the file format, the file encoding, the DSDIFF .dff recording condition, or DLNA server AIFF .aiff, .aif condition. ALAC .m4a • Some files edited on a PC may not play. •...
-
Page 76: Supported Audio Formats
Supported Audio Specifications Formats Amplifier Section POWER OUTPUT (rated) Audio formats supported by this system Front L/Front R: are as follows. 125 W + 125 W (at 6 ohms, 1 kHz, 1% THD) Function POWER OUTPUT (reference) Front L/Front R: Format “BD/DVD”... - Page 77 BLUETOOTH Section Speakers Communication system Front (SS-TSB133)/Surround BLUETOOTH Specification version 3.0 (SS-TSB138) for BDV-N9200W Output BLUETOOTH Specification Power Front (SS-TSB134)/Surround Class 2 (SS-TSB139) for BDV-N9200WL Maximum communication range Dimensions (w/h/d) (approx.) Line of sight approx. 10 m 102 mm × 705 mm × 71 mm...
- Page 78 Center (SS-CTB125) for BDV-N9200W/ Surround amplifier (TA-SA500WR) for BDV-N7200W BDV-N9200W/BDV-N7200W Center (SS-CTB126) for Surround amplifier (TA-SA600WR) for BDV-N9200WL/BDV-N7200WL BDV-N9200WL/BDV-N7200WL Dimensions (w/h/d) (approx.) Surround amplifier (TA-SA700WR) for 365 mm × 73 mm × 77 mm BDV-N5200W Mass (approx.) Amplifier Section 1.1 kg...
-
Page 79: Language Code List
Code Language Code Language Language Code List 1157 Persian 1516 Swedish 1428 Polish 1532 Tagalog 1436 Portuguese 1527 Tajik The language spellings conform to the 1417 Punjabi 1521 Tamil ISO 639: 1988 (E/F) standard. 1463 Quechua 1540 Tatar 1481 Rhaeto- 1525 Telugu Code Language... - Page 80 Parental Control/Area Code List Code Area Code Area 2044 Argentina 2333 Luxembourg 2047 Australia 2363 Malaysia 2046 Austria 2362 Mexico 2057 Belgium 2376 Netherlands 2070 Brazil 2390 New Zealand 2090 Chile 2379 Norway 2092 China 2427 Pakistan 2093 Colombia 2424 Philippines 2115 Denmark...
-
Page 81: Index
Index Numerics 3D 32 CD 73 3D Output Setting 56 Child Lock 49 Cinema Conversion Mode 56 Connection Server Settings 63 Control for HDMI 45, 60 A/V SYNC 42 Attenuation settings - AUDIO 58 Audio DRC 58 Audio Language 59 D.C.A.C. - Page 82 Initialise Personal Information 63 RDS 45 Input Skip Setting 62 Rear panel 16 Internet content 38 Region code 74 Internet Settings 62 Registered Remote Devices 63 Internet Video Parental Control 60 Remote control 17 Internet Video Unrated 60 Remote Start 63 Renderer Access Control 63 Reset to Factory Default Settings 63 Resetting 63...
- Page 83 Update 55 USB 33 Visualizer 50 WEP 26 Wireless Sound Connection 60 WPA2-PSK (AES) 26 WPA2-PSK (TKIP) 26 WPA-PSK (AES) 26 WPA-PSK (TKIP) 26...
- Page 84 The software of this system may be updated in the future. To find out details on any available updates, please visit the following URL. For customers in Europe and Russia: http://support.sony-europe.com/ For customers in other countries/regions: http://www.sony-asia.com/section/support ©2014 Sony Corporation Printed in Malaysia...