Rinnai RHFE-263FA Owner's Operation And Installation Manual
Energysaver gas direct vent wall furnace
Hide thumbs
Also See for RHFE-263FA:
- Conversion manual (12 pages) ,
- Service manual (112 pages) ,
- Owner's operation and installation manual (44 pages)
Table of Contents
Advertisement
THIS MANUAL MUST BE READ IN ITS
ENTIRETY BEFORE OPERATING HEATER
GAS DIRECT VENT WALL FURNACE
Owner
WARNING: IF THE INFORMATION IN THIS MANUAL IS NOT FOLLOWED
EXACTLY, A FIRE OR EXPLOSION MAY RESULT CAUSING PROPERTY
DAMAGE, PERSONAL INJURY OR LOSS OF LIFE.
DO NOT STORE OR USE GASOLINE OR OTHER FLAMMABLE VAPORS
AND LIQUIDS IN THE VICINITY OF THIS OR ANY OTHER APPLIANCE.
•
DO NOT TRY TO LIGHT ANY APPLIANCE.
•
DO NOT TOUCH ANY ELECTRICAL SWITCH; DO NOT USE ANY PHONE
IN YOUR BUILDING.
•
IMMEDIATELY CALL YOUR GAS SUPPLIER FROM A NEIGHBOR'S
PHONE. FOLLOW THE GAS SUPPLIER'S INSTRUCTIONS.
•
IF YOU CANNOT REACH YOUR GAS SUPPLIER, CALL THE FIRE
DEPARTMENT.
INSTALLATION AND SERVICE MUST BE PERFORMED BY A QUALIFIED
INSTALLER, SERVICE AGENCY OR THE GAS SUPPLIER.
This appliance may be installed in an aftermarket, permanently located, manufactured
home (USA only) or mobile home, where not prohibited by local codes.
This appliance is only for use with the type of gas indicated on the Rating Plate. This
appliance is not convertible for use with other gases, unless a certified kit is used.
INSTALLER: MUST LEAVE MANUAL WITH UNIT AFTER INSTALLATION.
OWNER: RETAIN THIS MANUAL SAFELY FOR FUTURE REFERENCE.
HOME OWNER / INSTALLER
FOR YOUR SAFETY
RHFE-263FA
ENERGYSAVER
s Operation and Installation Manual
'
WHAT TO DO IF YOU SMELL GAS
Advertisement
Table of Contents

Related Manuals for Rinnai RHFE-263FA


Summary of Contents for Rinnai RHFE-263FA
- Page 1 HOME OWNER / INSTALLER FOR YOUR SAFETY THIS MANUAL MUST BE READ IN ITS ENTIRETY BEFORE OPERATING HEATER RHFE-263FA ENERGYSAVER GAS DIRECT VENT WALL FURNACE Owner s Operation and Installation Manual ’ WARNING: IF THE INFORMATION IN THIS MANUAL IS NOT FOLLOWED EXACTLY, A FIRE OR EXPLOSION MAY RESULT CAUSING PROPERTY DAMAGE, PERSONAL INJURY OR LOSS OF LIFE.
-
Page 2: Table Of Contents
SAFETY DEVICES ....................1 IMPORTANT POINTS / USAGE AND INSTALLATION MUSTS ......3 DIMENSIONS ......................5 SPECIFICATIONS ....................6 SAFETY POINTS ....................8 GETTING TO KNOW YOUR NEW RHFE-263FA ..........10 CONTROL PANEL ....................11 CUT-AWAY DIAGRAM ...................12 NOTICE BEFORE INSTALLATION ...............13 INSTALLATION INSTRUCTIONS ................14 GAS CONNECTION ....................15 CANADIAN VENT REGULATIONS ...............16... -
Page 3: Features Of The Rhfe-263Fa Units
FEATURES OF THE RHFE-263FA UNITS Clean Heating Forced Flue Type Easy Operation One-Touch Ignition Sensible Temperature Control Feature Comfortable Room Temperature Control and Display Warm Air Outlet at Floor Level (Keeps Your Feet Warm) Child Safety Lock Room Temperature Setting Memory... - Page 4 THE RESPONSIBILITY OF THE PERSON AND COMPANY MARKING THE CHANGE. Thank you for purchasing a Rinnai gas forced flue heater. Before using this product, please read this manual carefully to insure proper use of the product. Please read the attached warranty thoroughly and keep it in a safe place.
-
Page 5: Important Points / Usage And Installation Musts
8. This appliance is only for use with the type of gas indicated on the rating plate. This appliance is not convertible for use with other gases, unless a certified kit is used. If a conversion of the unit is needed, conversions must be performed at Rinnai America or authorized agent at owner's expense. - Page 6 When provisions are being made to convert this unit, a certified conversion kit must be used. You must also readjust manifold gas pressure to specifications indicated in the conversion manual. If in doubt, contact Rinnai America for assistance.
-
Page 7: Dimensions
DIMENSIONS FLUE MANIFOLD POSITION IMPORTANT Before drilling the flue hole, check for water and gas pipes as well as electric cables. Use a 3 1/8" (80mm) drill for hole through the wall. Center of hole must be located exactly at specified point. See diagram. -
Page 8: Specifications
HI:128.5 11,000 8,800 SPECIFICATIONS Type of Appliance Fan forced flued gas furnace Model RHFE-263FA ENERGYSAVER Width 16 3/4" (425mm) Dimensions Depth 9 13/16" with back spacer (250mm with back spacer) Height 26 5/8" (676.5mm) Weight Approx. 37 lbs. Electrical AC 120V 60Hz 47 watts Connections Gas 1/2"... - Page 9 Flame failure – Flame rod Over heat – Bi-metal switch, thermal fuse, thermistor Power failure – PCB Safety Devices Power surge – 3 Amp. fuse Fan delay – Micro computer timer Pre-purge – Combustion fan, pre-purge timer, spark sensor Room over heat – Automatic cut off at 104°F after 10 minutes Noise Level Range HI LOW 38 31dB Combustion Method...
-
Page 10: Safety Points
SAFETY POINTS Do not restrict the warm air discharge by This appliance must not be used for any placing articles in front of the heater. purpose other than heating. Do not spray aerosols while the heater is Do not install the heater in an unusually operating. - Page 11 SAFETY POINTS Keep flammable materials, trees, shrubs, Do not allow anyone to poke articles etc., away from the flue terminal. through the louvers. Gasoline LPGAS Filter should be cleaned at regular intervals. Young children should be supervised at all See page 29. times.
-
Page 12: Getting To Know Your New Rhfe-263Fa
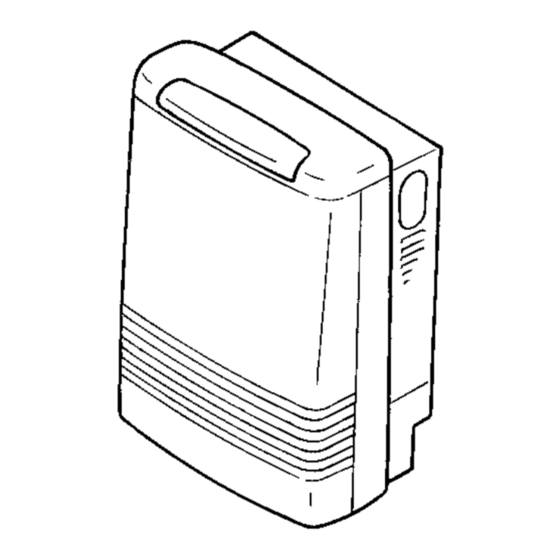
GETTING TO KNOW YOUR NEW RHFE-263FA CONTROL PANEL OPERATION/ TEMPERATURE CONTROL DISPLAY FILTER LAMP OPERATION LAMP WARM AIR OUTLET RATING PLATE MODEL NUMBER, HUMIDIFIER TRAY SERIAL NUMBER, OPEN THE DOOR GAS TYPE, ETC. AND POUR WATER INTO THE TRAY. AIR FILTER GAS CONNECTION 1/2"... -
Page 13: Control Panel
CONTROL PANEL ALL BUTTONS BEEP WHEN OPERATED. – 11 –... -
Page 14: Cut-Away Diagram
CUT-AWAY DIAGRAM – 12 –... -
Page 15: Notice Before Installation
TRAFFIC AND AWAY FROM FURNITURE AND plug. DRAPERIES. CHILDREN AND ADULTS SHOULD BE ALERTED Rinnai recommends a dedicated electrical circuit. TO THE HAZARDS OF HIGH SURFACE This gas appliance must not be connected to a TEMPERATURES AND SHOULD STAY AWAY TO chimney flue serving a separate solid-fuel burning AVOID BURNS OR CLOTHING IGNITION. -
Page 16: Installation Instructions
Refer to local gas authority for confirmation of gas type if in doubt. Refer to data plate located inside of the front panel. Check for damage. If the unit is damaged, contact your supplier or Rinnai. Do not install a damaged unit before checking with your supplier. -
Page 17: Gas Connection
GAS CONNECTION 1. The gas supply line shall be gas-tight, sized and so installed as to provide a supply of gas sufficient to meet the maximum demand of the heater without loss of pressure. 2. A shut off valve (and appliance connector valve) should be installed in the upstream of the gas line to permit servicing. -
Page 18: Canadian Vent Regulations
CANADIAN VENT REGULATIONS CAN/CGA–B149.1–M91 A vent shall not terminate: (a) Directly above a paved sidewalk or paved driveway which is located between two single family dwellings and serves both dwellings; (b) less than 7 ft. (2.13m) above a paved sidewalk or a paved driveway located on public property;... -
Page 19: Location / Clearances
Do not flue into natural draught flues or fireplaces. This unit can only be used with one of the five types of Rinnai flue kits. Do not flue unit into other rooms. Flue terminal must be outside. The flue is not designed to be positioned under floors, or below the level of the heater. - Page 20 SNOW AREAS Snow In areas subject to heavy snowfall, keep snow clear of flue terminal at all times. STANDARD INSTALLATION OF FLUE MANIFOLD. Diagram below shows minimum clearances and distances from obstructions. Also check local regulations. Flammable Flammable Wall (250mm) (500mm) (600mm) Opposite...
-
Page 21: Sleeve And Manifold Installation
SLEEVE AND MANIFOLD INSTALLATION METHOD FOR STANDARD WALLS 1. Disassemble Manifold from Sleeve. Flanges The flue consists of 3 parts, sleeve, inside connectors and tube, outside terminal; (disassembly by pulling hard on outside terminal and inner connections, then pull sleeve off outer terminal.) NOTE: Clearance to combustibles for terminal Sleeve Terminal... - Page 22 5. Check rubber seal is in place on terminal. *For weather board walls, add spare rubber seal Terminal seal (Add "weather board" provided to compensate for weather board angle. seal here) 6. Installation of Terminal "TOP" mark "A" From outside, insert terminal into sleeve with the “A” Label mark at the top.
-
Page 23: Fitting Unit
FITTING UNIT Pipe stopper Hook Manifold Pipe stopper Elbow Fit the Pipe stopper over the connection between the flue elbow and the manifold. Engage the hook and rotate it until it snaps against the body of the clamp. Attach the Air Inlet Hose to the flue manifold on either inlet position a or b. - Page 24 Top spacer the customer. Fault-Failure Procedure If unable to get the heater to operate correctly, contact Rinnai directly or your Agent or Gas Utility. Spacer bracket Do not use electrical extension cords to connect unit SECURE HEATER TO WALL to power supply. Keep the power cord away from Top spacer the flue.
-
Page 25: Operating Instruction Label
OPERATING INSTRUCTION LABEL ENERGYSAVER RHFE-263FA FOR YOUR SAFETY READ BEFORE OPERATING WARNING: If you do not follow these instructions exactly, a fire or explosion may result causing property damage, personal injury or loss of life. This appliance does not have a pilot. It is equipped •... -
Page 26: Additional Customer Operating Information
ADDITIONAL CUSTOMER OPERATING INFORMATION IGNITION Make certain the heater is connected into both the gas Filter and the electric power. Depress the ignition ON/OFF button slowly and firmly. ON/OFF TEMPERATURE LEVEL When you release the ignition ON/OFF button, the ‘LED Display will illuminate, the spark will ignite the main burner and the Combustion fan will begin to run. - Page 27 ROOM TEMPERATURE DISPLAY Temperature is indicated by the L.E.D. display on the control panel. The first time when the appliance is turned on, the preset temperature 72 F degrees’(from the factory) will be shown on the L.E.D.dispIay. Every time the Set Temp has been changed Set Temp that set temperature will be the latest data appearing on the RoomTemp...
- Page 28 OPERATING PRECAUTIONS Please read this section carefully before using your Forced flue heater. Gas Type, Power Source, and Manufactured Date Type of gas, power source and manufactured date are displayed on the nameplate placed on the right side of the unit. Do not use gas other than the type of gas (gas group) indicated on the nameplate.
- Page 29 In case of an emergency (e.g., abnormal overheating of the unit, loud noise), always stay calm, turn the unit off by pushing the ON/OFF button, close the gas valve and contact your dealer or the Rinnai office or store near you.
- Page 30 Make sure there is no combustible or flammable material near the main unit or the air supply/exhaust. CAUTION: If you find a problem with the air supply/exhaust, do not use the unit. Contact your dealer or the nearest Rinnai office. Function Lock: The Function lock feature prevents accidents due to tampering by small children. LOCKED Press the “Function Lock”...
- Page 31 Refit the bottom trim panel after filling the tray. The RHFE-263FA is a very high efficiency appliance. During operation a small amount of condensation is produced in the flue system. This drains into the enamelled humidifier tray.
-
Page 32: Testing
Purge air from gas line. If unable to get the unit to operate correctly, contact Refer to pipe sizing chart if in doubt about the size of Rinnai Agent, or Gas Utility. Please read the fault the gas line. finding charts before reporting faults. -
Page 33: Pre-Service Check
Heater will not re-ignite after overheating. Even after unit has cooled down, the heater does not ignite again. Repair is necessary. Contact your local agent or Rinnai for a Service call. When the unit is turned off. Convection fan continues to run after This is to remove the residual heat from the heat exchanger. -
Page 34: Trouble Shooting
TROUBLE SHOOTING Your RHFE-263FA requires very little maintenance. Simply clean the rear fan filter as needed and wipe the outer case and louver section with a damp cloth. Problem Remedy Cause Not Plugged In Plug In Re-ignite manually after Power Cut... -
Page 35: Error Messages
In all cases, you may be able to clear the Error Message simply by turning the heater OFF, then ON again. If the Error Message still remains or returns on the next operation, contact Rinnai or your nearest service agent and arrange for a service call. -
Page 36: Maintenance / Service
MAINTENANCE / SERVICE MAINTENANCE SUGGESTIONS VISUAL CHECK SATISFACTORY This heater has been designed and constructed for a long performance life when installed and operated FRONT VIEW properly under normal conditions. Regular inspections, as outlined in this section, are strongly recommended as means of keeping your heater operating efficiently throughout the season. -
Page 37: Wiring Diagram
– 35 –... -
Page 38: Warranty Information
WARRANTY INFORMATION Please record below: Purchased from: Address: Phone: Date of Purchase: Model No.: Serial No.: Installed by: Installer s license No.: Address: Phone: Date of installation: The installer is responsible for your heater's correct installation. Keep in a safe place for your records. CONSUMER'S NOTICE: Consumer Product Safety Commission suggest all heating systems should be checked annually to be certain venting system is free of foreign matter, and that safety and electrical components be checked... - Page 39 In order to obtain the name and location of the qualified Rinnal servicing agent closest to you, please write Rinnai at the address shown on the back side of the warranty card or call Rinnai at 1-800-621-9419 in U.S.A.
-
Page 40: Schematic Diagram
SCHEMATIC DIAGRAM – 38 –... - Page 41 – 39 –...
- Page 42 – 40 –...
- Page 43 – 41 –...
- Page 44 – 42 –...
-
Page 45: Parts List
PARTS LIST ’ – 43 –... - Page 46 ’ – 44 –...
- Page 47 ’ – 45 –...
- Page 48 Vent sizes: 5 Vent lengths are available. inch (mm) Vent suits walls 3" 4 1/2" (75 115) Vent suits walls 4 1/2" 9 1/2" (115 240) Vent suits walls 9 1/2" 15 3/4" (240 400) Vent suits walls 15 3/4" 23 5/8" (400 600) Vent suits walls 23 5/8"...
-
Page 49: Rhfe-263Fa Flow Diagram
RHFE-263FA FLOW DIAGRAM VENT ASS'Y MAIN P.C.B COMBUSTI- CONVECTION FAN ON FAN SUB HEAT EXCHANGER OVERHEAT SWITCH No.1 ROOM THERMISTOR FLAME OVERHEAT THERMISTOR HEAT EXCHANGER PRESSURE SENSOR MODULATING VALVE SOLENOID VALVE No.1 GAS FILTER WARM AIR ELECTRODE THERMAL FUSE GAS INLET SOLENOID VALVE No.2... -
Page 50: Extended Flue Pipe Kit
EXTENSION SET PARTS AND INSTALLATION GUIDE FOT 155 20"(0.5m)EXTENSION SET FOT 156 40"(1m) EXTENSION SET FOT 157 80"(2m) EXTENSION SET FOT 158 BENT ELBOW SET FOT 190 LONG BENT ELBOW SET • This extension set is to be used for installations requiring extra distance. MAXIMUM VENT LENGTH 13' WITH 2 ELBOWS NAMES AND NUMBERS OF PARTS A FOT-155(11.4-20.3 inch) -
Page 51: How To Install
TYPES COMPATIBLE WITH EXTENSION SET RHFE-263FA INSTALLING AN EXTENSION KIT Installing an extension kit requires construction of an air line and the exhaust line. The air line is connected between the Air Supply Elbow at the rear of the heater and the air inlet port on the Flue pipe. - Page 52 1. How to connect exhaust pipes Exhaust pipe Exhaust pipe Fit inside Male end Male end Female end Female end Pipe stopper B Pipe stopper B Pipe stopper A To connect the exhaust pipes, fit the male end into the female end and clamp with pipe stopper A to prevent slipping.
- Page 53 CAUTIONS 1. Maximum extendable length 2. To prevent water condensation FOR BEST ROOM AIR HUMIDITY, KEEP WATER Condensed water IN THE HUMIDIFIER TRAY. may accumulate here, and cause a blockage preventing combustion. CAUTION 13 feet, 2 bends Never allow the exhaust pipe to sag, as condensed The bend where the hose and pipes leave the body is water may accumulate and cause incomplete not counted.
-
Page 54: Technical Data
GAS SUPPLY PRESSURE NATURAL PROPANE MINIMUM 3.5"W.C. 8.0"W.C. MAXIMUM 10.5"W.C. 13.0"W.C. The minimum inlet gas supply pressures are for the purpose of input adjustment. Heaters may be converted from one gas to another using Rinnai conversion kits. – 52 –... - Page 55 – 53 –...
- Page 56 EXTENDED WARRANTIES ARE AVAILABLE,CONTACT RINNAI FOR DETAILS. 308F-2060 04(00) Printed in Japan 2003.8...