Table of Contents
Advertisement
Available languages
Available languages
Advertisement
Table of Contents

Related Manuals for Keurig Select B77


Summary of Contents for Keurig Select B77
- Page 1 USING YOUR BREWER OWNER’S MANUAL: Getting the most from your new Select B77 Keurig Brewer ® COMMENT UTILISER VOTRE CAFETIÈRE MANUEL D’UTILISATION : Tirez le meilleur de votre nouvelle cafetière Select B77 de Keurig ®...
-
Page 2: Important Safeguards
Contact Do not, under any circumstances, cut or before it is used. Keurig Customer Service to report any remove the third (ground) prong from The use of accessory attachments not recom- malfunction of or damage to the Brewer. -
Page 3: Table Of Contents
TABLE OF CONTENTS KEURIG GOURMET SINGLE CUP HOME BREWING SYSTEM ® Select B77 — Using Your Brewer CAUTION: There are two sharp needles that puncture the K-Cup portion pack, ® one above the K-Cup Holder and the other in the bottom of the K-Cup Holder. To avoid risk of injury, do not put your fingers in the K-Cup Assembly Housing. -
Page 4: Helpful Hints
5. Brewing into a travel mug. page 3 of this guide. The serial number can be hot cocoa, Keurig recommends using bottled To brew into a travel mug, simply remove the found on the bottom of the Brewer box or on the or filtered water. -
Page 5: Features
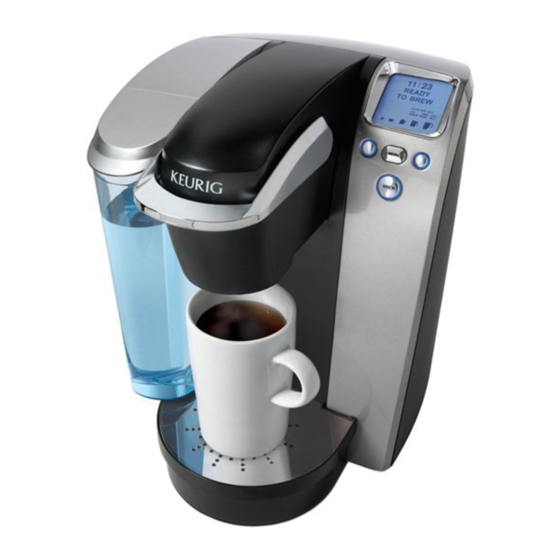
Features Select — Model B77 Brewer READY TO BREW MENU MENU BREW Controls and Indicators Select B77 Brewer Water Reservoir Lid K-Cup Portion Pack Housing Power Cord LCD Control Center ® Holder (E and F are the Water Reservoir Drip Tray Plate... -
Page 6: Setting Up Your Brewer
SECTION 1 Set-Up & First Brew You cannot use your Keurig Brewer until ® Place Water Reservoir base into Lock Tab IMPORTanT: fig. the left side of the Brewer and be it has been set up for its first use as set forth below. -
Page 7: Ready To Brew Your First Cup
Press the BREW Button to start a cleansing Place a K-Cup portion pack fig. brew without a K-Cup. Pour the hot water into in the K-Cup Holder (fig. 6). the sink. CAUTION: There are two sharp needles that NOTE: A K-Cup should not be used for this puncture the K-Cup, one above the K-Cup Holder READY fig. - Page 8 Set-Up & First Brew SECTION 1 Brewing Your First Cup (Continued) Enjoy your first cup of Keurig Brewed ® gourmet coffee, tea or hot cocoa! glass filled with ice on the Drip Tray Plate. Use Your Brewer may display “NOT READY” as...
-
Page 9: Purging The Brewer
Purging the Brewer The Water Reservoir can be filled in two ways. fig. Lift off the Water Reservoir Lid and pour If your Brewer has not been used for more than one week, you should purge water directly into the Water Reservoir the water from the inner tank. -
Page 10: Programming On/Off Features
SECTION 2 Controls & Indicators (LCD Control Center) Setting the clock The correct time should now be displayed in the LCD Control Center. NOTE: If power is interrupted to the Brewer by unplugging it, or if power Setting the clock is optional. When the clock is set, the time will appear in is lost, follow the procedure above to reset the time as the clock will not be the LCD Control Center. - Page 11 b. Press or hold the Left Button under the c. Press or hold the Right Button under the fig. fig. blinking “H” to advance 1 hour at a time, up “M” to scroll through the minutes to your to 9 hours. desired “ON TIME”...
-
Page 12: Programming Your Brew Size
SECTION 2 Controls & Indicators (LCD Control Center) Programming Your Brew Size simply press the Power Button and you can fig. brew as soon as the water is heated and the “READY TO BREW” indicator is displayed on The Brewer is preset with the Small Mug (7.25 oz.) as the default brew size. the LCD Control Center. -
Page 13: Cleaning External Parts
SECTION 3 Cleaning & Maintenance cleaning External Parts The Funnel can be 2. Cleaning the Funnel — fig. removed from the K-Cup Holder by pulling ® on it until it pops off (fig. 18). The Funnel is Regular cleaning of the Brewer’s external components is recommended. dishwasher safe. -
Page 14: De-Scaling
SECTION 3 Cleaning & Maintenance (continued) De-Scaling Your Brewer You should promptly de-scale if “DE-SCALE” is displayed on the LCD Control Center. Properly follow the de-scaling procedure described. Mineral content in water varies from place to place. Depending on the mineral NOTE: The Brewer will continue to function even when “DE-SCALE”... -
Page 15: Storage
Storage Step 3: Repeat the brew process 3 times. Step 4: Now let the Brewer stand for at least 4 hours while still on. Empty the Water Reservoir before storing, and take care to ensure that you C. RINSE store your Brewer in a safe and environment. -
Page 16: Section 4 — Troubleshooting
SECTION 4 Troubleshooting Situation Solution Brewing a partial cup The Exit Needle may be clogged (refer to page 13). • Situation Solution Clean the K-Cup Holder if necessary and rinse • under faucet (refer to page 13). Brewer does not Plug Brewer into an independent outlet. -
Page 17: Section 5 — Warranty
Brewer so that your purchase information will be stored in our SPECIFICALLY DISCLAIMS ALL OTHER WARRANTIES WITH RESPECT TO system. Keurig will, at its option, repair or replace the Brewer without charge YOUR B77 BREWER, INCLUDING ANY IMPLIED WARRANTY OF MERCHANT upon its receipt of proof of the date of purchase. - Page 18 été endommagé. Communiquer avec le 21. Consulter un électricien qualifié si les instruc- avant de l’utiliser. Service à la clientèle de Keurig pour signaler tout tions sur la mise à la terre ne sont pas parfaite- 4. L’utilisation d’accessoires non recommandés par mauvais fonctionnement de la cafetière ou tout...
- Page 19 ® ATTENTION : L’eau se trouvant dans le support à K-Cup durant l’infusion est Select B77 — Comment utiliser votre cafetière extrêmement chaude. Pour éviter tout risque de blessure, ne pas soulever la poignée ni ouvrir le boîtier du support à K-Cup durant l’infusion.
- Page 20 (3,25 oz), petite tasse de 155 ml (5,25 oz), tasse moyenne de 214 ml (7,25 oz), et grande tasse de 274 ml (9,25 oz), votre cafetière Keurig vous ® offre d’infinies possibilités de formats,...
- Page 21 Caractéristiques Cafetière Select — Modèle B77 READY TO BREW MENU MENU BREW Commandes et voyants Cafetière Select B77 Couvercle du Entonnoir Boîtier Évent Afficheur ACL réservoir d’eau Support à godet K- Plateau à tasse Cordon Bouton de gauche Réservoir d’eau (E et F forment ®...
- Page 22 SECTION 1 Préparation et première infusion IMPORTanT : N’utilisez pas votre cafetière Keurig avant de Replacez la base du réservoir d’eau sur le ® Languette fig. de verrouillage côté gauche de la cafetière et assurez-vous l’avoir préparée pour une première utilisation, tel qu’indiqué...
- Page 23 REMARQUE : Durant le cycle de préparation Placez un godet K-Cup dans le support à fig. et lors des périodes de chauffage subséquen- K-Cup (fig. 6). ATTENTION : Le godet K-Cup est tes, il est possible qu’une petite quantité d’eau perforé...
- Page 24 (96 ml/3,25 oz) (214 ml/7,25 oz) K-Cup préféré, sélectionnez le format Bois- chocolat chaud Keurig Brewed ® ® son glacée et appuyez sur le bouton d’infusion Si votre cafetière indique ensuite « NOT (BREW).
- Page 25 ajout d’eau REMARQUE : Après avoir infusé un godet K-Cup de chocolat chaud, nous vous fig. recommandons d’effectuer un cycle d’infusion sans K-Cup. L’afficheur ACL de votre cafetière vous indiquera vidange de la cafetière que le niveau d’eau dans le réservoir est bas ou READY que le réservoir a été...
- Page 26 SECTION 2 Commandes et voyants (Afficheur ACL) Réglage de l’horloge sera pas visible tant que l’heure ne sera pas réglée. Le réglage de format de tasse sera conservé et rétabli automatiquement. Tous les autres réglages seront Le réglage de l’horloge est facultatif. Quand l’horloge est réglée, l’heure rétablis automatiquement après le réglage de l’horloge.
- Page 27 b. Appuyez sur le bouton de gauche sous le « H » c. Appuyez sur le bouton de droite, sous le « M », pour fig. fig. clignotant pour avancer le délai d’une heure à régler les minutes de l’heure de mise en marche la fois, jusqu’à...
- Page 28 SECTION 2 Commandes et voyants (Afficheur ACL) 5. Programmation du format de tasse Pour infuser une tasse après cette période, fig. appuyez simplement sur le bouton de mise en marche. Vous pourrez procéder dès que l’eau La cafetière est préréglée pour infuser une tasse de format moyen sera chaude et que le message «...
- Page 29 SECTION 3 Nettoyage et entretien nettoyage des pièces externes L’entonnoir peut 2. Nettoyage de l’entonnoir — fig. être enlevé du support à K-Cup en tirant ® Il est recommandé de nettoyer régulièrement les éléments externes dessus jusqu’à ce qu’il se déclenche (fig. 18) de la cafetière.
- Page 30 SECTION 3 Nettoyage et entretien (suite) nettoyage du réservoir d’eau et de son couvercle Cette cafetière détecte si l’accumulation fig. de tartre nuit au bon fonctionnement de la cafetière. Dans ce cas, le message Le réservoir et son couvercle ne doivent pas être mis au lave-vaisselle. Ils «...
- Page 31 Procédure de détartrage Réparation À l’exception des procédures de nettoyage et d’entretien recommandées, A. PRÉPARATION étape : Assurez-vous d’avoir au moins 1,4 litre (48 oz) de vinaigre cette cafetière ne peut pas être réparée par l’utilisateur. Pour faire réparer blanc non dilué. Vous aurez également besoin d’un évier vide l’appareil, veuillez vous reporter à...
- Page 32 Situation Solution SECTION 4 Dépannage L’aiguille de sortie est peut-être obstruée (voir la La cafetière n’infuse • page 29). pas une tasse com- Situation Solution Nettoyez le support à K-Cup si nécessaire et rincez-le • plète sous le robinet (voir la page 29). Le réservoir d’eau a peut-être été...
- Page 33 à la garantie, il vous suffit d’appeler au Service à la INDIRECTS, TELS QUE LES DOMMAGES MATÉRIELS, ET NE COUVRE PAS clientèle de Keurig en composant le numéro sans frais 1 866 901-2739. Avant LES FRAIS ET LES COÛTS ENGENDRÉS PAR UNE VIOLATION DE LA de retourner votre cafetière pour la faire réparer, vous devez d’abord...
- Page 36 55 Walkers Brook Drive Reading, MA 01867 Keurig, Incorporated is a wholly-owned subsidiary of Keurig, Incorporated est une filiale à 100 % de Green Mountain Coffee Roasters, Inc. Green Mountain Coffee Roasters, Inc. cLIcK, caLL OR SHOP I www.keurig.com I...