Table of Contents
Advertisement
2004 Owner's Manual
USA and Canada
Duplication without written consent is strictly prohibited.
This Owner's Manual is for spas manufactured after January 1, 2004
Due to continuous improvement program, all models, operation, and/or specifications are subject to change without prior notice.
LTR17000174
Advertisement
Chapters
Table of Contents

Related Manuals for Cal Spas Pneumatic Series


Summary of Contents for Cal Spas Pneumatic Series
- Page 1 2004 Owner’s Manual USA and Canada Duplication without written consent is strictly prohibited. This Owner’s Manual is for spas manufactured after January 1, 2004 Due to continuous improvement program, all models, operation, and/or specifications are subject to change without prior notice. LTR17000174...
- Page 2 2004 Owner’s Manual USA and Canada Pneumatic Series 1100 Electronic Series 2300 Electronic Series 5000 Electronic Series 7000 Electronic Series 9000 Electronic Series Duplication without written consent is strictly prohibited. This Owner’s Manual is for spas manufactured after January 1, 2004 Due to continuous improvement program, all models, operation, and/or specifications are subject to change without prior notice.
-
Page 3: Table Of Contents
Table of Contents Safety Instructions ....................2 Basic Spa Information ..................4 Quick Reference Information ................5 Set-Up and Delivery Instructions ................7 110 Volt Installation Information ................8 220 Volt Installation Information ................9 Starting Up Your Portable Spa ................11 Starting Up Your Inground or Olympian Spa............12 Filter Maintenance Portable Spas ................13 Filter Maintenance Inground, Champion, and Olympian Spas ......14 General Operation Instructions ................15... -
Page 4: Safety Instructions
Owner’s Manual Important Safety Instructions IMPORTANT SAFETY INSTRUCTIONS When installing and using this electrical equipment, basic safety precautions should always be followed, including the following: READ AND FOLLOW ALL INSTRUCTIONS WARNING: To reduce the risk of injury, do not permit children to use this product unless they are supervised at all times. -
Page 5: Important Safety Instructions
Important Safety Instructions Owner’s Manual IMPORTANT SAFETY INSTRUCTIONS (Continued) WARNING RISK OF INJURY: Before entering a spa, the user should measure the water temperature with an accurate thermometer, since the tolerance of water temperature-regulating devices varies. The spa water should never exceed 104°F (40°C). Water temperatures between 100°F (38°C) and 104°F (40°C) are considered safe for a healthy adult. -
Page 6: Basic Spa Information
We recommend that your spa water be changed every 4 to 6 months. You may find the need to change your spa water more often with heavy use. When empty, your spa should be cleaned with a non-abrasive cleaner, such as “Cal Spas All Surface Cleaner,” then rinsed thoroughly. -
Page 7: Quick Reference Information
Quick Reference Information Owner’s Manual QUICK REFERENCE INFORMATION Set Up and Delivery Electrical 1. 110-volt spas will require a 20 amp dedicated receptacle. 2. 220-volt spas will require a 50 amp dedicated GFCI breaker. 3. See Pages 7 through 10 for more information. Surface and Pad Requirements for Spas and Gazebos 1. - Page 8 Before the use of any chemicals, C.A.I. recommends all spa users to consult with their physician for mportant Chemical Notice: possible allergic reactions to the corresponding chemicals. C.A.I. also recommends consulting with your local Cal Spas Dealer for a chemical program that is best suited for your local water condition, climate and usage habits. Page 6...
-
Page 9: Set-Up And Delivery Instructions
Set-Up and Delivery Instructions Owner’s Manual SET-UP AND DELIVERY INSTRUCTIONS Getting Ready for Delivery and Set-up of Your New Cal Spa Planning For Delivery of Your Portable Spa 1. Your 110-Volt spa will require a 20 amp dedicated receptacle. 2. Your 220-volt spa will require a 50 amp dedicated GFCI circuit breaker. 3. -
Page 10: Volt Installation Information
Owner’s Manual 110V Installation Information 110 VOLT INSTALLATION INFORMATION Always Follow Applicable Local, State, Federal Codes and Guidelines. 1. Use only a dedicated electrical line with a 20-amp breaker. 2. Do not use an extension cord. 3. Always use a weatherproof/covered receptacle. 4. -
Page 11: Volt Installation Information
Owner’s Manual 220V Installation Information 220 VOLT INSTALLATION INFORMATION All 220-volt spas are required to have a GFCI breaker and should only be wired by a licensed electrician. To ensure prop- er wiring of your GFCI, please follow the wiring diagrams on pages 9 and 10. 1. -
Page 13: Starting Up Your Portable Spa
Owner’s Manual Starting Up Your Portable Spa STARTING UP YOUR PORTABLE SPA Filling and Powering-up Your Cal Spa: 1. Once spa is placed on an approved surface and is connected to the correct electrical service, inspect all plumbing connections in the equipment area of your spa. These connections may have loosened in shipment. 2. - Page 14 Starting Your Inground, Champion, or Olympian Spa Owner’s Manual STARTING UP YOUR INGROUND, CHAMPION, OR OLYMPIAN Filling and Powering-up Your Cal Spa 1. Once your spa is installed inground or placed on an approved surface and connected to the correct electrical service, you can proceed with these instructions.
-
Page 15: Filter Maintenance Portable Spas
Spray the filter cartridges with a pressure nozzle, starting from the top and spraying down each pleat. c. Turn filter cartridge over and repeat step 4.b. d. Reinstall the filter cartridge in reverse order of removal. 5. Deep clean filter cartridge(s) every month. Use only a Cal Spas approved filter-cleaning chemical. - Page 16 Turn the filter cartridge over and repeat Step 7b. d. Re-install the filter cartridge in reverse order of removal. 8. Deep clean the filter cartridge every month. Use a Cal Spas approved filter-cleaning chemical only. Figure 5. Outdoor Spa Equipment...
- Page 17 Owner’s Manual General Operating Instructions GENERAL OPERATING INSTRUCTIONS Your new Cal Spa is very versatile, you can direct the flow of water and air through various locations throughout your spa. The following list of features are available on most spas: Air Venturies Air Venturies are the smaller knobs located around the top of your spa.
- Page 18 General Operating Instructions Owner’s Manual GENERAL OPERATING INSTRUCTIONS (Continued) Diverter Knobs Diverter knobs are the larger knobs located around the top of your spa. They allow you to divert water through jets from one side of the spa to the other. Or in most cases from “Floor Jets” to” Wall Jets”. This is accomplished by simply rotating the diverter knob to the left (Counter clockwise) decreasing the amount of water flow through a section of jets.
-
Page 19: Pure Water System
Owner’s Manual General Operating Instructions GENERAL OPERATING INSTRUCTIONS (Continued) Pure Water System (Optional) The Pure Water System is designed to remove the chemical and ozone vapors from the area between the water level and spa cover. Normally, this area is the harshest environment of the spa causing the deterioration of fixtures, pillows, and the spa cover. - Page 20 General Operating Instructions Owner’s Manual This button allows the user to cycle Up from one though seven massage modes one at a time. Each mode offers a different pulsating massage. Some modes are faster than others, so just cycle through them to find the massage you like best.
-
Page 21: Fitness Series Instructions
Owner’s Manual Fitness Series Instructions FITNESS SERIES INSTRUCTIONS The fitness series spas put the fun back into fitness. This comes with everything you need for a high powered, low impact, result-getting workout in total comfort and privacy. Plus you get a spa loaded with incredible therapeutic seating, variable jet massage and generous control options, and the most gorgeous cabinetry on the planet. - Page 22 Fitness Series Exercise Program Owner’s Manual FITNESS SERIES EXERCISE PROGRAM Many people have never performed resistance training and/or may not fully understand the benefits of this extremely important form of exercise for the goal of improving your health, appearance and overall confidence. Resistance training is necessary when trying to loose body fat, maintain and improve lean muscle structure and increase energy levels while improving flexibility.
-
Page 23: Pneumatic Operation
Filtration of the spa water is accomplished any time the pump is running. To set filtration time, simply press the white tabs towards the center of the time clock. Each white tab equals (15) fifteen minutes of filtration and heating time. Cal Spas recommends a filter setting of two (2) to four (4) hours twice a day. Revised 01/01/04... - Page 24 Pneumatic Operation Owner’s Manual PNEUMATIC OPERATION (Continued) Hi Limit Your spa is equipped with a High Limit Safety Switch that will automatically shut down the spa in the unlikely event of an overheating situation. To reset the Hi-Limit, simply push the Hi-Limit Reset Button in until it stops, and the spa will restart itself.
-
Page 25: Electronic Operation
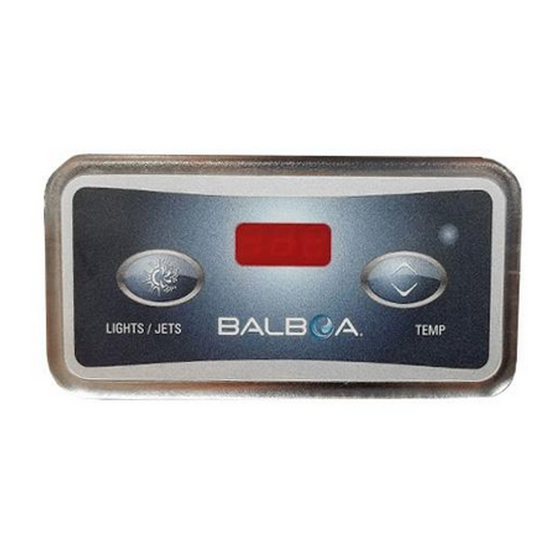
Owner’s Manual 1100 Electronic Operation 1100 ELECTRONIC OPERATION Figure 14. 1100 Electronic Control Panel Temperature Adjustment (Range 80°F to 104°F) The display screen will always display the actual water temperature. Example: The actual water temperature is 100°F, the topside display will read 100. To display the set temperature, simply depress the Temp pad and the temperature setting will flash on and off on the display panel. - Page 26 1100 Electronic Operation Owner’s Manual 1100 ELECTRONIC OPERATION (Continued) Setting Filtration Cycles Your spa will automatically filter itself twice a day. Set to the filtration time, turn off the power to the spa and turn it back on at the time of day you would like the filtration cycles to start at the GFCI Breaker. Example: If you power-up your spa at 12 Noon, your filtration cycles will start at 12 noon and 12 Midnight.
- Page 27 Owner’s Manual Self Diagnostics Self-Diagnostics Display Messages for the 1100 Series Spas Message Meaning Action Required DO NOT ENTER THE SPA WATER. “Overheat” The spa has Remove the spa cover and let the water shut down. Either the spa has cool.
-
Page 28: Electronic Operation
2300 Electronic Operation Owner’s Manual 2300 ELECTRONIC OPERATION Figure 15. 2300 Electronic Control Panel Initial Start up When first powered up, the system will perform a self-diagnostic check, then it will automatically heat and maintain 100˚F until you change the set temperature as listed in the Temperature Adjustment section. Temperature Adjustment (Range 80°F to 104°F) The display screen will always display the actual water temperature. - Page 29 Owner’s Manual 2300 Electronic Operation 2300 ELECTRONIC OPERATION (continued) Jet 1 Controls One Speed Pumps: Depress the Jets 1 pad once to activate the high-speed pump. Depress the Jets 1 pad again to turn off the high-speed pump. Two Speed Pump Option: Depress the Jets1 pad once to activate low speed.
- Page 30 2300 Electronic Operation Owner’s Manual 2300 ELECTRONIC OPERATION (continued) Setting the Temperature lock This feature allows you to lock-in a temperature into the system. When engaged the set temperature will blink on and off when either the Up or Down pad is depress. However, the user will not be able to change the set temperature.
-
Page 31: Electronic Operation
Owner’s Manual 5000 Electronic Operation 5000 ELECTRONIC OPERATION Initial Start up When first powered up, the system will perform a self-diagnostic check and then it will automatically heat to, and maintain a temperature of 100°F until you change the set temperature as listed in the “Temperature Adjustment”... - Page 32 5000 Electronic Operation Owner’s Manual 5000 ELECTRONIC OPERATION (cont.) Jet Controls One pump equipment: Depress the Jets pad once to activate the low speed pump. Depress the jets pad again to activate the high-speed pump. Depress the jets pad a third time to turn off the high-speed. One pump equipment with circulation pump Depress the Jets pad once to activate the circulation pump.
- Page 33 Owner’s Manual 5000 Electronic Operation 5000 ELECTRONIC OPERATION (cont.) Automatic Time outs The low-speed or optional circulation pump will automatically turn itself off after 4 hours if it is not turned off manually. The high-speed pump will automatically turn itself off after 15 minutes if it is not turned off manually.
- Page 34 Self-Diagnostics Display Messages for 5000 Electronic Spas This message does not indicate the need for “Economy Heating Mode” When service. For more information, see the flashing alternately with the water Standard and Economy temperature, your spa is in the Modes Section on page 29. Economy Heating Mode.
-
Page 35: Electronic Operation
Owner’s Manual 7000 and 9000 Electronic Operation 7000 AND 9000 ELECTRONIC OPERATION These instructions will describe features and options that your particular spa may not be equipped with. Initial Start-up: When your spa is first powered up, it will display some configuration codes and then go into Priming Mode (Pr will appear on the display panel) This mode will last up to 4 minutes and then the spa will began to heat to its pre -programmed temperature of 100°F. - Page 36 7000 and 9000 Electronic Operation Owner’s Manual Jets 2: (Optional on 7000) Press the “Jets 2” button once to Circ Pump (optional) If your system is equipped with a circ turn pump 2 on or off, and to shift between low and high pump, it may be configured to work in one of two different speeds if it is a two-speed pump.
-
Page 37: Diagnostic Messages
Owner’s Manual 7000 and 9000 Electronic Operation Diagnostic Messages Message Meaning Action Required o message on display. Power has been cut off The control panel will be disabled until power returns. Spa settings and time of to the spa. day will be preserved for 30 days with a battery back-up; settings only are preserved until the next power-up on 7000 systems. - Page 38 7000 and 9000 Electronic Operation Owner’s Manual Periodic Reminder Messages (Press the “Mode” button to reset a displayed reminder) Message Frequency Action Require Every 7 days Test and adjust chemical levels per manufacturer’s instructions. Every 7 days Test and adjust chemical levels per manufacturer’s instructions.
- Page 39 Owner’s Manual Champion Spa Information CHAMPION SPA INFORMATION The Champion spa allows the operator to swim or relax in one spa. This spa is controlled by the 2300 electronic control system which gives you complete control of this unique spa. Please see the 2300 operating instructions to properly control the various functions of this spa.
- Page 40 Olympian Spa Information Owner’s Manual OLYMPIAN SPA INFORMATION The Olympian spa is the best of both worlds. Swimming and exercising in the swim area and relaxing in the spa area. This spa is controlled by two completely separate control systems, which gives you the ability to have cooler temperatures for swimming and warmer temperatures for relaxing in the spa.
- Page 41 Owner’s Manual Cal Spa Entertainment System CAL SPAS ENTERTAINMENT SYSTEM 88.7 This system can be used to listen to AM or FM Stereo signals, CD’s and also audio from the optional DVD and TV Tuner on our Entertainment Spas. Each spa that is equipped with the Splash Stereo system is delivered with the manufacturers operating instructions.
- Page 42 Cal Spa Entertainment System Owner’s Manual Cal Spas Automatic Pop-up Operation (Optional) Raising and Lowering the System Let’s start our entertainment experience by raising the TV monitor and optional pop-up speakers. The large single CEC button located on the top right side of the spa, controls the monitor and speaker raising and lowering.
- Page 43 Owner’s Manual Cal Spa Entertainment System 15” TV Monitor Operation (Optional) Once the TV has been raised (either by manual or automatic operation) you will be able to operate the TV with the silver TV remote control. NOTE: This remote control is not waterproof. Do Not operate with wet hands or from inside the spa. Operation: 1.
- Page 44 Cal Spa Entertainment System Owner’s Manual Cal Spas Entertainment System Operation DVD Player and Surround Sound Processor (Optional) This system contains the DVD player and DVD remote controller. Although incased in a plastic housing with weather seals, this system and remote control are not NOTE: waterproof.
- Page 45 Owner’s Manual Cal Spa Entertainment System Operating the DVD System In TV Mode The DVD system is used to feed the audio signal form the TV Tuner to the stereo. You will need to switch the audio and Video modes with DVD remote to properly receive picture and sound. NOTE: The Stereo must be tuned to 88.7FM to receive audio signals from either the DVD or TV Tuner.
- Page 46 Chemical Directions: • All directions in this program are calculated for Cal Spas chemicals only. Other chemicals may have similar names and/or usage descriptions. However, all chemicals are manufactured differently, increasing the likeli- hood of under or over dosing spa chemicals.
- Page 47 Yet this same pump seal will fail in numerous spas because the owners were not following a chemical plan. Chemical damage is not covered by Cal Spas limited warranty. So, in addition to wasted expenses on excess chemicals, you will find yourself with a huge expense of replacing chemically damaged parts.
- Page 48 A chemical maintenance plan for your spa is not much different. Follow the Cal Spas’ Clear Water Plan, or replace your spa every two years. We know you don’t want to become a chemists. You just to enjoy your new spa. That is why the Cal Spas’ Clear Water plan is so effective.
- Page 49 The Cal Spas Exclusive Bio-Clean filter is the only antibacterial filter cartridge on the market today. What does this mean to you? Having a filter cartridge that prevents bacteria growth is simply added protection for those times you forget to clean the filter. We recom- mend that you only replace your spas filter cartridge with a Bio-Clean filter cartridge for ensured protection and peace of mind.
-
Page 50: Cloudy Water
Always rinse thoroughly when transferring between a swimming pool and a spa. Clean the spas filter(s) regularly as described in the Cal Spas Clear Water Plan. Spa Brite: (Water Clarifier) Spa Brite: This chemical is used to help clear up cloudy water. - Page 51 Enzyme Oil Gone: (Oil Remover) Enzyme Oil Gone: This chemical will help break-down excessive amounts of body and other oils in the spa water. Body oil, perspiration, lotions and tanning oil will quickly accumulate in your spa if your not careful. The best solution is prevention.
- Page 52 Vinegar: You would need to use 100 times the amount of vinegar to equal 1/2 oz. of Cal Spas “pH / Alkalinity Down”. Vinegar will also add a large amount of organic waste in the spa water requiring the need for more sanitizers.
- Page 53 5. Use “Stain and Scale Defense” weekly as described in the Clear Water Plan. 6. Applying Cal Spas “Fast Sheen” to the spas acrylic surface when you drain and clean your spa will greatly help your spas finish pro- tect itself from scale build-up.
- Page 54 (Mineral Control at Start-up) Your Cal Spas’ Clear Water Plan recommends draining and refilling of your spa every three (3) to four (4) months. Upon doing so, you will want to add 3 oz. of Metal Protector to the center of the spa. Make sure all of the jets are on high speed.
- Page 55 Due to the constant punishment your spa cover and pillows receive, you should protect them by applying Vinyl & Leather Cleaner as a part of monthly maintenance. Cal Spas’ Vinyl & Leather Cleaner is specifically designed to protect spa covers and pillows from chemical and ultraviolet damage.
- Page 56 7. Allow Fast Sheen to dry until white and powdery. 8. Buff clean with a soft cloth, rotating frequently. Important: Cal Spas Fast Sheen should not be used on spas full of water. Only apply to a clean, cool, dry surfaces. Incorrect product usage may cause water clarity issues.
- Page 57 Sanitizers: (Bromine and Chlorine) How Sanitizers Work: Sanitizers such and Bromine and Chlorine, basically kill bacteria and other organic waste by breaking them down to unharmful levels, thus eliminating them from the water. You will need to know how each sanitizer performs this task to maximize their efficiency. Bromine: Bromine is generally in tablet form, and requires a small plastic floater to dissolve slowly into the spa water.
- Page 58 Test Levels Without Quest 2000 Ozonator: 1 to 3 Parts Per Million (ppm) 2. Add 1 to 2 tablespoons of Cal Spas’ Granular Chlorine to the spa water weekly. Chlorine dissipation rate will be faster at higher water temperatures and slower at lower temperatures.
- Page 59 5. Pour in 3 oz. of Cal Spas Metal Protector to the center of the spa. 6. Sprinkle 2 oz. of Cal Spas Oxidizer Shock in the center of the spa and leave spa uncovered and turn on the jets for 30 minutes prior to recovering.
- Page 60 Cal Spas Clear Water Plan (Chlorine) This plan and its chemical dosages are intended for Cal Spas’ Chemicals only. Most chemical manufacturers use different chemical formulas and strengths. Only Cal Spas’ chemicals are specially formulated to provide proper chemical balance at lower dosages.
- Page 61 Q: When is the best time to use Oxidizer Shock? A: Every week, as described in Cal Spas’ Clear Water Plan, and after heavy bather loads. You may use Cal Spas’ Oxidizer Shock as often as you like, as long as you allow you spa to run for 30 minutes with the spa cover at least half off.
- Page 62 Special Extra Strength spa components and effecting oils, suntan lotion, and other contami- formula for spas and hot tubs. performance. nates found in spas and hot tubs. TO ORDER CAL SPAS’ CHEMICALS, PLEASE CALL 1-800-CALSPAS Page 48 Owner’s Manual...
- Page 63 This Limited Warranty is effective for spas manufactured after January 1, 2004 Spa Shell / Structural Warranty: T E N Majestic, Fiesta, Special, Genesis and System Spas: Equipment Warranty: C.A.I. warranties against the loss of water through the spa shell due F I V E to defects in materials and workmanship for a period of ten years Genesis and System Spas: C.A.I.
-
Page 64: Warranty Information
Warranty Information Owner’s Manual 2004 WARRANTY INFORMATION C.A.I. warranties the 2004 model year Majestic, Fiesta, and promotional spas equipment for one year from the date of purchase. Three years on 2004 Champion and Olympian spas, and five years on 2004 System spas. See your selling dealer for a copy of the applicable warranty, details, and any questions you may have regarding the warranty coverage on your spa. - Page 65 Owner’s Manual Warranty Information Winterizing In many areas of the country the temperature drops below 32˚F. C.A.I. recommends that you always have your spa full of water and running at normal spa temperatures (80˚F to 100˚F). This will help reduce the risk of freezing in your spa and your spas equipment.
- Page 66 How To Remove A Pillow Owner’s Manual HOW TO REMOVE PILLOW TO REMOVE PILLOWS: USE A FLAT SCREWDRIVER PLACE THE FLAT SCREWDRIVER INTO THE PILLOW PEGS AND TAKE OUT PILLOW AS SHOWN. INCORRECT WAY DO NOT PULL OUT PILLOW WITH THE HANDS. Page 64 Revised 01/01/04...
- Page 67 Owner’s Manual How To Remove A Pillow HOW TO REMOVE PILLOW cont. Remove pillow by grabbing from these points of the pillow Remove pillow by grabbing from these points of the pillow Revised 01/01/04 Page 65...
- Page 68 2004 Owner’s Manual USA and Canada Victory Series 1500 Electronic Duplication without written consent is strictly prohibited. This Owner’s Manual is for spas manufactured after January 1, 2004 Due to continuous improvement program, all models, operation, and/or specifications are subject to change without prior notice. LTR17000174...
-
Page 69: Winterizing And Draining Your Cal Spa
Table of Contents Safety Instructions ....................2 Basic Spa Information ..................4 Quick Reference Information ................5 Set-Up and Delivery Instructions ................7 110 Volt Installation Information ................8 220 Volt Installation Information ................9 Starting Up Your Portable Spa ................11 Filter Maintenance Portable Spas ................12 General Operation Instructions ................13 1500 Electronic Spa Control Operation ..............15 1500 Self- Diagnostics ..................17... - Page 70 IMPORTANT SAFETY INSTRUCTIONS When installing and using this electrical equipment, basic safety precautions should always be followed, including the following: READ AND FOLLOW ALL INSTRUCTIONS WARNING: To reduce the risk of injury, do not permit children to use this product unless they are supervised at all times.
-
Page 71: Save These Instructions
Important Safety Instructions (Continued) WARNING RISK OF INJURY: Before entering a spa, the user should measure the water temperature with an accurate thermometer, since the tolerance of water temperature-regulating devices varies. The spa water should never exceed 104 ° F (40 ° C). Water temperatures between 100 ° F (38 ° C) and 104 ° F (40 °... - Page 72 We recommend that your spa water be changed every 4 to 6 months. You may find the need to change your spa water more often with heavy use. When empty, your spa should be cleaned with a non-abrasive cleaner, such as “Cal Spas All Surface Cleaner,”...
- Page 73 Quick Reference Information Set Up and Delivery: Electrical: 1. 110-volt spas will require a 20 amp dedicated receptacle. 2. 220-volt spas will require a 50 amp dedicated GFCI breaker. 3. See Pages 8 through 10 for more information. Surface and Pad Requirements for Spas and Gazebos: 1.
- Page 74 Before the use of any chemicals, C.A.I. recommends all spa users to consult with their physician for possible allergic reactions to the corresponding chemicals. C.A.I. also recommends consulting with your local Cal Spas Dealer for a chemical program that is best suited for your local water condition,...
- Page 75 Set-Up and Delivery Instructions Getting Ready for Delivery and Set-up of Your New Cal Spa Planning For Delivery of Your Portable Spa: a. Your 110-Volt spa will require a 20 amp dedicated receptacle. b. Your 220-volt spa will require a 50 amp dedicated GFCI circuit breaker. c.
- Page 76 110 Volt Installation Information Always Follow Applicable Local, State, Federal Codes and Guidelines. 1. Use only a dedicated electrical line with a 20-amp breaker. 2. Do not use an extension cord. 3. Always use a weatherproof/covered receptacle. 4. Never have your spa with in 10 feet to the receptacle. 5.
-
Page 77: 220 Volt Installation Information
220 Volt Installation Information All 220-volt spas are required to have a GFCI breaker and should only be wired by a licensed electrician. To ensure proper wiring of your GFCI, please follow the wiring diagrams on pages 9 and 10. 1. -
Page 79: Starting Up Your Portable Spa
Starting Up Your Portable Spa Filling and Powering-up Your Cal Spa: 1. Once spa is placed on an approved surface and is connected to the correct electrical service, inspect all plumbing connections in the equipment area of your spa. These connections may have loosened in shipment. 2. -
Page 80: Filter Maintenance
Spray the filter cartridges with a pressure nozzle, starting from the top and spraying down each pleat. c. Turn filter cartridge over and repeat step 4.b. d. Reinstall the filter cartridge in reverse order of removal. 5. Deep clean filter cartridge(s) every month. Use only a Cal Spas approved filter-cleaning chemical. -
Page 81: General Operation Instructions
General Operating Instructions Your new Cal Spa is very versatile, you can direct the flow of water and air through various locations throughout your spa. The following list of features are available on most spas: Air Venturies Air Venturies are the smaller knobs located around the top of your spa. Each one will let you add a mixture of air in with the jet pressure. - Page 82 General Operating Instructions (Continued) Cal Zone Quest 1000 Ozonator (Available on V-300, though V-800 spas) Your new Cal Zone Quest 1000 Ozonator is a state-of-the-art bacteria killing machine. This unit will assist you in maintaining clean and clear spa water, while saving you time and expense with spa chemicals. Operation Your Cal Zone Quest 1000 Ozonator will automatically operate during the filter cycles and any other time the spa is running on low speed.
- Page 83 1500 Electronic Operation Temperature Adjustment (Range 80°F to 104°F) The display screen will always display the actual water temperature. Example: The actual water temperature is 100°F, the topside display will read 100. To display the set temperature, simply depress the Temp pad and the temperature setting will flash on and off on the display panel. While the display is flashing, each time you depress the Temp pad the set temperature will increase one degree.
- Page 84 The first cycle will start after the spa is powered up. The second filtration cycle will begin twelve hours later. The filter cycle duration is preset for 2 hours. If spa usage is heavy, your Cal Spas authorized service technician can reconfigure your system to run two five hour fil- ter cycle.
- Page 85 Self-Diagnostics Display Messages for the 1500 Series Spas Message Meaning Action Required DO NOT ENTER THE SPA WATER. “Overheat” The spa has Remove the spa cover and let the water shut down. Either the spa cool. At 110˚F, the spa should has reached a temperature of automatically reset.
- Page 86 Chemical Directions: • All directions in this program are calculated for Cal Spas chemicals only. Other chemicals may have similar names and/or usage descriptions. However, all chemicals are manufactured differently, increasing the likeli- hood of under or over dosing spa chemicals.
- Page 87 Yet this same pump seal will fail in numerous spas because the owners were not following a chemical plan. Chemical damage is not covered by Cal Spas limited warranty. So, in addition to wasted expenses on excess chemicals, you will find yourself with a huge expense of replacing chemically damaged parts.
- Page 88 A chemical maintenance plan for your spa is not much different. Follow the Cal Spas’ Clear Water Plan, or replace your spa every two years. We know you don’t want to become a chemists. You just to enjoy your new spa. That is why the Cal Spas’ Clear Water plan is so effective.
- Page 89 The Cal Spas Exclusive Bio-Clean filter is the only antibacterial filter cartridge on the market today. What does this mean to you? Having a filter cartridge that prevents bacteria growth is simply added protection for those times you forget to clean the filter. We recom- mend that you only replace your spas filter cartridge with a Bio-Clean filter cartridge for ensured protection and peace of mind.
- Page 90 Always rinse thoroughly when transferring between a swimming pool and a spa. Clean the spas filter(s) regularly as described in the Cal Spas Clear Water Plan. Spa Brite: (Water Clarifier) Spa Brite: This chemical is used to help clear up cloudy water.
- Page 91 Enzyme Oil Gone: (Oil Remover) Enzyme Oil Gone: This chemical will help break-down excessive amounts of body and other oils in the spa water. Body oil, perspiration, lotions and tanning oil will quickly accumulate in your spa if your not careful. The best solution is prevention.
- Page 92 Vinegar: You would need to use 100 times the amount of vinegar to equal 1/2 oz. of Cal Spas “pH / Alkalinity Down”. Vinegar will also add a large amount of organic waste in the spa water requiring the need for more sanitizers.
- Page 93 5. Use “Stain and Scale Defense” weekly as described in the Clear Water Plan. 6. Applying Cal Spas “Fast Sheen” to the spas acrylic surface when you drain and clean your spa will greatly help your spas finish pro- tect itself from scale build-up.
- Page 94 (Mineral Control at Start-up) Your Cal Spas’ Clear Water Plan recommends draining and refilling of your spa every three (3) to four (4) months. Upon doing so, you will want to add 3 oz. of Metal Protector to the center of the spa. Make sure all of the jets are on high speed.
- Page 95 Due to the constant punishment your spa cover and pillows receive, you should protect them by applying Vinyl & Leather Cleaner as a part of monthly maintenance. Cal Spas’ Vinyl & Leather Cleaner is specifically designed to protect spa covers and pillows from chemical and ultraviolet damage.
- Page 96 7. Allow Fast Sheen to dry until white and powdery. 8. Buff clean with a soft cloth, rotating frequently. Important: Cal Spas Fast Sheen should not be used on spas full of water. Only apply to a clean, cool, dry surfaces. Incorrect product usage may cause water clarity issues.
- Page 97 Sanitizers: (Bromine and Chlorine) How Sanitizers Work: Sanitizers such and Bromine and Chlorine, basically kill bacteria and other organic waste by breaking them down to unharmful levels, thus eliminating them from the water. You will need to know how each sanitizer performs this task to maximize their efficiency. Bromine: Bromine is generally in tablet form, and requires a small plastic floater to dissolve slowly into the spa water.
- Page 98 Test Levels Without Quest 2000 Ozonator: 1 to 3 Parts Per Million (ppm) 2. Add 1 to 2 tablespoons of Cal Spas’ Granular Chlorine to the spa water weekly. Chlorine dissipation rate will be faster at higher water temperatures and slower at lower temperatures.
- Page 99 5. Pour in 3 oz. of Cal Spas Metal Protector to the center of the spa. 6. Sprinkle 2 oz. of Cal Spas Oxidizer Shock in the center of the spa and leave spa uncovered and turn on the jets for 30 minutes prior to recovering.
- Page 100 Cal Spas Clear Water Plan (Chlorine) This plan and its chemical dosages are intended for Cal Spas’ Chemicals only. Most chemical manufacturers use different chemical formulas and strengths. Only Cal Spas’ chemicals are specially formulated to provide proper chemical balance at lower dosages.
-
Page 101: Frequently Asked Chemical Questions
Q: When is the best time to use Oxidizer Shock? A: Every week, as described in Cal Spas’ Clear Water Plan, and after heavy bather loads. You may use Cal Spas’ Oxidizer Shock as often as you like, as long as you allow you spa to run for 30 minutes with the spa cover at least half off. - Page 102 Special Extra Strength spa components and effecting oils, suntan lotion, and other contami- formula for spas and hot tubs. performance. nates found in spas and hot tubs. TO ORDER CAL SPAS’ CHEMICALS, PLEASE CALL 1-800-CALSPAS Page 48 Owner’s Manual...
- Page 103 WARRANTY This Limited Warranty is effective for Victory Series spas manufactured after January 1, 2004 Equipment Warranty: Spa Shell / Structural Warranty: T E N F I V E Victory Series Spas: C.A.I. warranties the spas electrical and elec- Victory Spas: C.A.I. warranties against the loss of water through tronic component-specifically, the control system, pumps, and air the spa shell due to defects in materials and workmanship for a blowers against malfunction due to defects in materials and work-...
- Page 104 2003 Warranty Information: See your selling dealer for a copy of the applicable warranty, details, and any questions you may have regarding the warranty coverage on your spa. Warranty Limitations: The 2004 Limited Warranty is void if the spa has been subject to negligence, alteration, misuse, abuse, repairs by non- C.A.I.
- Page 105 Winterizing In many areas of the country the temperature drops below 32˚F. C.A.I. recommends that you always have your spa full of water and running at normal spa temperatures (80˚F to 100˚F). This will help reduce the risk of freezing in your spa and your spa's equipment.
-
Page 106: Replacement Parts Reference Card
Replacement Part Reference Card: SHELL: 1. Granite Repair Kit Galaxy Green: ACR03400020 2. Spa Cover: V-100:ACC01000590 V-200/300:ACC1001250 V400/500/700/800:ACC01000910 V600:ACC01000200 CABINET: 1. Equipment Acces Panel: V-100:WOO27500484 V-200/300:WOO27513051 2. Front Panel: V-100: N/A V-200/300:WOO27513049 3. Side Panel: V-100:WOO27500402 V-200/300:WOO27513052 3. Corner Panel: V-100: N/A V-200/300:WOO27504382 4. - Page 107 2004 Owner’s Manual US and Canada JOURNEY SERIES 5000 - 5300 ELECTRONIC CONTROL Duplication without written consent is strictly prohibited. This Owner’s Manual is for spas manufactured after January 1, 2004 Due to continuous improvement programs, all models, operation, and/or specifications are subject to change without prior notice. LTR17000175...
- Page 108 Starting Your Portable Spa ....................13 Filter Maintenance ......................14 Operating Instructions ......................15 5000 Electric Operation ....................18 Multi-Colored Spa Light Operation..................21 Cal Spas Clear Water Plan ....................22 Filters and Filtration......................25 Cleaning and Maintenance....................26 Water and Your Spa ......................29 Frequently Asked Questions ....................36 Warranty ..........................37...
-
Page 109: Benefits Of Owning A Cal Spa
The size and shape of the hot tub, of course, will determine the specific types of exercises you can do in it. Cal Spas would like to share some tips on the benefits of warm water therapy. -
Page 110: Safety Instructions
Safety Instructions Owner’s Manual SAFETY INSTRUCTIONS When installing and using this electrical equipment, basic safety precautions should always be followed. READ AND FOLLOW ALL INSTRUCTIONS WARNING: To reduce the risk of injury, do not allow children to use the spa unless they are supervised at all times. -
Page 111: Contact Information
Owner’s Manual Contact Information Hyperthermia Danger Prolonged exposure to hot air/water can induce hyperthermia. Hyperthermia occurs when the internal temperature of the body reaches a level 3˚ to 6˚ above the normal body temperature of 37˚C (98.6˚F). While hyperthermia has many health benefits, it is important not to allow your body’s core temperature to rise above 103˚F. -
Page 112: Basic Spa Information
When empty, your spa should be cleaned with a non-abrasive cleaner, such as Cal Spas All Surface Cleaner, then rinsed thoroughly. When draining your spa, turn off all power to the spa and attach a garden hose to the hose-bib fixture located on the floor of the equipment area. -
Page 113: Delivery And Set-Up
Owner’s Manual Delivery and Set-Up DELIVERY AND SET-UP Please make a record of the following. It will be valuable if service is required. Cal Spa Model: Cal Spa Serial Number: Date Purchased: Date Installed: Cal Spa Dealer’s Phone Number: Cal Spa Dealer’s Address: Most cities and counties require permits for exterior construction and electrical circuits. -
Page 114: Electrical Setup Before Delivery Of Your Spa
Delivery and Set-Up Owner’s Manual Provide A View With Your Spa Think about the direction you will be facing when sitting in your spa. Do you have a special landscaped area in your yard that you find enjoyable? Perhaps there is an area that catches a soothing breeze during the day and lovely sunset in the evening. -
Page 115: Preparing A Good Foundation
Owner’s Manual Set-Up and Delivery PREPARING A GOOD FOUNDATION Your spa needs a solid and level foundation. The area that it sits on must be able to support the weight of the spa and the occupants who use it. If the foundation is inadequate, it may shift or settle after the spa is in place, causing stress that could DAMAGE YOUR SPA SHELL AND FINISH. -
Page 116: Electrical Installation
Electrical Installation Owner’s Manual ELECTRICAL INSTALLATION 110-Volt Installation Always follow applicable local, state and federal code and guidelines. Use only a dedicated electrical line with a 20-amp breaker. Do not use an extensions cord. Always use a weatherproof-covered receptacle. Never have your spa within 10’ of the receptacle. Do not bury the power cord. - Page 117 Owner’s Manual Electrical Installation 220V Installation All 220V spas are required to have a dedicated 50-Amp GFCI breaker and should only be wired by a licensed electrician. To ensure proper wiring of your GFCI, follow these diagrams (Figure 2 and Figure 3). Always follow applicable local, state, and federal codes and guidelines.
-
Page 119: Starting Your Portable Spa
Owner’s Manual Starting Your Portable Spa STARTING YOUR PORTABLE SPA Be careful not to over-tighten the plumbing fittings. NOTE: Never run the spa with the gate valves closed or without water circulating for long periods of time. NOTE: NOTE: Never fill your spa with soft water. Soft water makes it impossible to maintain the proper water chemistry and may cause the water to foam, which will ultimately harm the finish of the spa and void your warranty. -
Page 120: Filter Maintenance
Filter Maintenance Owner’s Manual FILTER MAINTENANCE Portable Spas: Filtration starts on electronically-controlled spas as soon as the pumps are primed and water flow is steady. As the flow of water goes through the filter, dirt and debris is removed and accumulated in the filter cartridge. As the filter cartridge accumulates dirt and debris, water flow is restricted and jet production is reduced. -
Page 121: Operating Instructions
Owner’s Manual Operating Instructions OPERATING INSTRUCTIONS Your new Cal Spa is very versatile. You can direct the flow of water and air through various locations throughout your spa. The following list of features are available on most spas. Adjustable Jets (Figure 5) Almost all of the jets in your spa are adjustable. - Page 122 Owner’s Manual Operating Instructions Cal Zone Quest 2000 Ozonator (Figure 6) Your new Cal Zone Quest 2000 Ozonator is a state-of-the-art bacteria killing machine. This unit will assist you in maintaining clean and clear spa water, while saving you time and money with spa chemicals. Operation Your Cal Zone Quest 2000 Ozonator will automatically operate during the filter cycles.
- Page 123 Owner’s Manual Operating Instructions Air Venturies (Figure 7) Air venturies are the smaller knobs located around the top of your spa. Each one will let you add a mixture of air with the jet pressure. This is accomplished by simply rotating the air venturi knob to the left (counter-clock- wise) to increase the amount of airflow through the jets.
-
Page 124: 5000 Electric Operation
5000 Electronic Operation Owner’s Manual 5000 ELECTRONIC OPERATION When first powered-up, the 5000 Electronic System (Figure 8) will perform a self-diagnostic check and then it will automatically heat to, and maintain, a temperature of 100˚F until you change the set temperature as listed in the ‘Temperature Adjustment’... - Page 125 Owner’s Manual 5000 Electronic Operation Pump Equipment One Pump Equipment Depress the ‘Jets’ (Figure 10) button once to activate the low-speed pump. Depress the ‘Jets’ button again to activate the high-speed pump. Depress the ‘Jets’ button a third time to turn off the high-speed. Figure 10.
- Page 126 5000 Electronic Operation Owner’s Manual Figure 12. 5000 Electronic System Temp and Light Pads. Setting Filtration Cycles Your spa will automatically filter itself twice a day. To set the filtration time, turn off the power to the spa at the GFCI breaker.
-
Page 127: Multi-Colored Spa Light Operation
Owner’s Manual Multi-Color Spa Light Operation MULTI-COLORED SPA LIGHT OPERATION This section will discuss the operation of the Multi-Colored Spa Light that comes in the J-505, J-506, J-507 and J-508 spas. The J-505 and J-506 spa models come with one light-emitting-diode (LED) waterfall and one LED Multi-Colored Spa Lighting harness. -
Page 128: Cal Spas Clear Water Plan
Chemical Directions: • All directions in this program are calculated for Cal Spas chemicals only. Other chemicals may have similar names and/or usage descriptions. However, all chemicals are manufactured differently, increasing the likeli- hood of under or over dosing spa chemicals. - Page 129 Yet this same pump seal will fail in numerous spas because the owners were not following a chemical plan. Chemical damage is not covered by Cal Spas limited warranty. So, in addition to wasted expenses on excess chemicals, you will find yourself with a huge expense of replacing chemically damaged parts.
- Page 130 A chemical maintenance plan for your spa is not much different. Follow the Cal Spas’ Clear Water Plan, or replace your spa every two years. We know you don’t want to become a chemists. You just to enjoy your new spa. That is why the Cal Spas’ Clear Water plan is so effective.
-
Page 131: Filters And Filtration
The Cal Spas Exclusive Bio-Clean filter is the only antibacterial filter cartridge on the market today. What does this mean to you? Having a filter cartridge that prevents bacteria growth is simply added protection for those times you forget to clean the filter. We recom- mend that you only replace your spas filter cartridge with a Bio-Clean filter cartridge for ensured protection and peace of mind. - Page 132 Always rinse thoroughly when transferring between a swimming pool and a spa. Clean the spas filter(s) regularly as described in the Cal Spas Clear Water Plan. Spa Brite: (Water Clarifier) Spa Brite: This chemical is used to help clear up cloudy water.
- Page 133 Enzyme Oil Gone: (Oil Remover) Enzyme Oil Gone: This chemical will help break-down excessive amounts of body and other oils in the spa water. Body oil, perspiration, lotions and tanning oil will quickly accumulate in your spa if your not careful. The best solution is prevention.
- Page 134 Vinegar: You would need to use 100 times the amount of vinegar to equal 1/2 oz. of Cal Spas “pH / Alkalinity Down”. Vinegar will also add a large amount of organic waste in the spa water requiring the need for more sanitizers.
- Page 135 5. Use “Stain and Scale Defense” weekly as described in the Clear Water Plan. 6. Applying Cal Spas “Fast Sheen” to the spas acrylic surface when you drain and clean your spa will greatly help your spas finish pro- tect itself from scale build-up.
- Page 136 (Mineral Control at Start-up) Your Cal Spas’ Clear Water Plan recommends draining and refilling of your spa every three (3) to four (4) months. Upon doing so, you will want to add 3 oz. of Metal Protector to the center of the spa. Make sure all of the jets are on high speed.
- Page 137 Due to the constant punishment your spa cover and pillows receive, you should protect them by applying Vinyl & Leather Cleaner as a part of monthly maintenance. Cal Spas’ Vinyl & Leather Cleaner is specifically designed to protect spa covers and pillows from chemical and ultraviolet damage.
- Page 138 7. Allow Fast Sheen to dry until white and powdery. 8. Buff clean with a soft cloth, rotating frequently. Important: Cal Spas Fast Sheen should not be used on spas full of water. Only apply to a clean, cool, dry surfaces. Incorrect product usage may cause water clarity issues.
- Page 139 Sanitizers: (Bromine and Chlorine) How Sanitizers Work: Sanitizers such and Bromine and Chlorine, basically kill bacteria and other organic waste by breaking them down to unharmful levels, thus eliminating them from the water. You will need to know how each sanitizer performs this task to maximize their efficiency. Bromine: Bromine is generally in tablet form, and requires a small plastic floater to dissolve slowly into the spa water.
- Page 140 Test Levels Without Quest 2000 Ozonator: 1 to 3 Parts Per Million (ppm) 2. Add 1 to 2 tablespoons of Cal Spas’ Granular Chlorine to the spa water weekly. Chlorine dissipation rate will be faster at higher water temperatures and slower at lower temperatures.
- Page 141 5. Pour in 3 oz. of Cal Spas Metal Protector to the center of the spa. 6. Sprinkle 2 oz. of Cal Spas Oxidizer Shock in the center of the spa and leave spa uncovered and turn on the jets for 30 minutes prior to recovering.
- Page 142 Cal Spas Clear Water Plan (Chlorine) This plan and its chemical dosages are intended for Cal Spas’ Chemicals only. Most chemical manufacturers use different chemical formulas and strengths. Only Cal Spas’ chemicals are specially formulated to provide proper chemical balance at lower dosages.
-
Page 143: Frequently Asked Questions
Q: When is the best time to use Oxidizer Shock? A: Every week, as described in Cal Spas’ Clear Water Plan, and after heavy bather loads. You may use Cal Spas’ Oxidizer Shock as often as you like, as long as you allow you spa to run for 30 minutes with the spa cover at least half off. -
Page 144: Cal Spas Chemicals
Special Extra Strength spa components and effecting oils, suntan lotion, and other contami- formula for spas and hot tubs. performance. nates found in spas and hot tubs. TO ORDER CAL SPAS’ CHEMICALS, PLEASE CALL 1-800-CALSPAS Page 48 Owner’s Manual... - Page 145 WARRANTY LIMITED This limited warranty is effective for Journey Series spas manufactured after January 1, 2004 Spa Shell / Structural Warranty Equipment Warranty Journey Spas: C.A.I. warranties against the loose of Journey Series Spas: C.A.I. warranties the water through the spa shell due to defects in mate- spas electrical and electronic component- rials and workmanship for a period of 10 years from specific, the control system, pumps and air...
-
Page 146: Parts List
Parts List Owner’s Manual PARTS LIST Description Part Number Plumbing Accu Therapy Jet (940123MG) PLU21702702 Micro Flow Jet PLU21702403 Micro Swirl PLU21702404 Power Storm ZX PLU21702741 Power Storm JX PLU21702740 1” Air Venturi PLU21700375 On/Off Drain Valve PLU21400350 Main Drain-Super High Flow Suction 2”, Sliver, 2002 PLU21400132 Screen, Large Mesh, Insert, Clean Water System ‘02 PLU21703103... - Page 147 Owner’s Manual Parts List Description Part Number ELECTRICAL Control Box CS 5000 ELE09000197 Control Box CS 5300 ‘03 (3 Pump) ELE09000194 Circuit Board 2100 C2100RIA (2000) ELE09100205 Topside Control Panel, CS 5000’03 ELE09200871 Kit Mount Plastic Sensor Housing ELE09900240 220V/110V Conversion KIt w/20’ Cord Installed ELE09700086 CD Player, AM/FM, Clarion Marine ELE09300017...
- Page 148 Parts List Owner’s Manual Description Part Number CABINETS Door Panel, Grey, Jet Wood Cabinet 26”x43 1/2” WOO27513194 Door Panel, Grey, Jet Wood Cabinet 28”x43 1/2” WOO27513159 Door Panel, Grey, Jet Wood Cabinet 34”x43 1/2” WOO27513017 Front Access, Grey, Jet Wood Cabinet 26”x8 1/2” WOO27513196 Front Access, Grey, Jet Wood Cabinet 28”x8”...
- Page 149 C.A.I. Customer Service Department 1462 East Ninth Street Pomona, CA 91766 Toll Free: 1-800-CAL-SPAS Fax: 1-909-629-3890 www.calspas.com...
- Page 150 2004 Owner’s Manual US and Canada SIGNATURE SERIES 5000, 7000 and 9000 ELECTRONIC CONTROL Duplication without written consent is strictly prohibited. This Owner’s Manual is for spas manufactured after January 1, 2004 Due to continuous improvement programs, all models, operation, and/or specifications are subject to change without prior notice. LTR17000177 www.calspas.com...
- Page 151 Starting Your Portable Spa ....................12 Filter Maintenance ......................13 Operating Instructions ......................14 5000, 7000 and 9000 Electrical Operation ..............17 Cal Spa Flow Diverter ......................22 Cal Spas Clear Water Plan ....................23 Filters and Filtration......................26 Cleaning and Maintenance....................27 Water and Your Spa ......................30 Frequently Asked Questions ....................37 Warranty ..........................38...
-
Page 152: Benefits Of Owning A Cal Spa
The size and shape of the hot tub, of course, will determine the specific types of exercises you can do in it. Cal Spas would like to share some tips on the benefits of warm water therapy. -
Page 153: Safety Instructions
Safety Instructions Owner’s Manual SAFETY INSTRUCTIONS When installing and using this electrical equipment, basic safety precautions should always be followed. READ AND FOLLOW ALL INSTRUCTIONS WARNING: To reduce the risk of injury, do not allow children to use the spa unless they are supervised at all times. -
Page 154: Contact Information
Owner’s Manual Contact Information Hyperthermia Danger Prolonged exposure to hot air/water can induce hyperthermia. Hyperthermia occurs when the internal temperature of the body reaches a level 3˚ to 6˚ above the normal body temperature of 37˚C (98.6˚F). While hyperthermia has many health benefits, it is important not to allow your body’s core temperature to rise above 103˚F. -
Page 155: Basic Spa Information
When empty, your spa should be cleaned with a non-abrasive cleaner, such as Cal Spas All Surface Cleaner, then rinsed thoroughly. When draining your spa, turn off all power to the spa and attach a garden hose to the hose-bib fixture located on the floor of the equipment area. -
Page 156: Delivery And Set-Up
Owner’s Manual Delivery and Set-Up DELIVERY AND SET-UP Please make a record of the following. It will be valuable if service is required. Cal Spa Model: Cal Spa Serial Number: Date Purchased: Date Installed: Cal Spa Dealer’s Phone Number: Cal Spa Dealer’s Address: Most cities and counties require permits for exterior construction and electrical circuits. - Page 157 Delivery and Set-Up Owner’s Manual Provide A View With Your Spa Think about the direction you will be facing when sitting in your spa. Do you have a special landscaped area in your yard that you find enjoyable? Perhaps there is an area that catches a soothing breeze during the day and lovely sunset in the evening.
- Page 158 Owner’s Manual Set-Up and Delivery PREPARING A GOOD FOUNDATION Your spa needs a solid and level foundation. The area that it sits on must be able to support the weight of the spa and the occupants who use it. If the foundation is inadequate, it may shift or settle after the spa is in place, causing stress that could DAMAGE YOUR SPA SHELL AND FINISH.
- Page 159 Electrical Installation Owner’s Manual ELECTRICAL INSTALLATION 110-Volt Installation Always follow applicable local, state and federal code and guidelines. 1. Use only a dedicated electrical line with a 20-amp breaker. 2. Do not use an extensions cord. 3. Always use a weatherproof-covered receptacle. 4.
- Page 160 Owner’s Manual Electrical Installation 220V Installation All 220V spas are required to have a dedicated 50-Amp GFCI breaker and should only be wired by a licensed electrician. To ensure proper wiring of your GFCI, follow these diagrams (Figure 2 and Figure 3). 1.
- Page 161 Electrical Installation Owner’s Manual Figure 3. GFCI Hook-Up Owner’s Manual Page 11...
-
Page 162: Starting Your Portable Spa
Owner’s Manual Starting Your Portable Spa STARTING YOUR PORTABLE SPA NOTE: Be careful not to over-tighten the plumbing fittings. NOTE: Never run the spa with the gate valves closed or without water circulating for long periods of time. Never fill your spa with soft water. Soft water makes it impossible to maintain the proper water NOTE: chemistry and may cause the water to foam, which will ultimately harm the finish of the spa and void your warranty. -
Page 163: Filter Maintenance
Filter Maintenance Owner’s Manual FILTER MAINTENANCE Portable Spas: Filtration starts on electronically-controlled spas as soon as the pumps are primed and water flow is steady. As the flow of water goes through the filter, dirt and debris is removed and accumulated in the filter cartridge. As the filter cartridge accumulates dirt and debris, water flow is restricted and jet production is reduced. -
Page 164: Operating Instructions
Owner’s Manual Operating Instructions OPERATING INSTRUCTIONS Your new Cal Spa is very versatile. You can direct the flow of water and air through various locations throughout your spa. The following list of features are available on most spas. Adjustable Jets (Figure 5) Almost all of the jets in your spa are adjustable. - Page 165 Owner’s Manual Operating Instructions Cal Zone Quest 2000 Ozonator Your new Cal Zone Quest 2000 Ozonator is a state-of-the-art bacteria killing machine. This unit will assist you in maintaining clean and clear spa water, while saving you time and money with spa chemicals. Operation Your Cal Zone Quest 2000 Ozonator will automatically operate during the filter cycles.
- Page 166 Owner’s Manual Operating Instructions Air Venturies Air venturies are the smaller knobs located around the top of your spa. Each one will let you add a mixture of air with the jet pressure. This is accomplished by simply rotating the air venturi knob to the left (counter-clock- wise) to increase the amount of airflow through the jets.
- Page 167 5000, 7000 and 9000 Electronic Operation Owner’s Manual 5000, 7000 and 9000 ELECTRONIC OPERATION When first powered-up, the 5000 Electronic System (Figure 8) will perform a self-diagnostic check and then it will automatically heat to, and maintain, a temperature of 100˚F until you change the set temperature as listed in the ‘Temperature Adjustment’...
-
Page 168: Initial Start Up
(if installed) will run. The filtration settings of F8 and FC are only intended for use with optional Cal Spas Filtration System. 7000 and 9000 You can preset up to 2 filter cycles a day by programming the start-end times for each cycle. - Page 169 5000, 7000 and 9000 Electronic Operation Owner’s Manual Optional Filter Cycle Programming Mode Press Time and then “ Prog” within 3 seconds and the display will show PROGRAM, FILTER 1, and START TIME icons. Use the Cursor to select the start time hour and repeat to select the minutes (each minute press changes in increments of 5).
- Page 170 Owner’s Manual 5000, 7000 and 9000 Electronic Operation (optional Blower, Mister or a 3 rd Pump) Option 7000 and 9000 Option - Press the Option button to turn on the Blower. Turn “OFF” after 15 minutes Blower - Set B Dip Switch #3 to the “ON” position and plug cord into J6 Mister - Set B Dip Switch #11 to the “ON”...
- Page 171 5000, 7000 and 9000 Electronic Operation Owner’s Manual Freeze Protection If the temperature sensors detects a drop of 44˚F on the heater, the pump will automatically power-up to provide freeze protection. The equipment will stay “ON” for 4 minutes after the sensor detects a water temperature of 45˚F or higher.
-
Page 172: Cal Spas Flow Diverter
CAL SPAS FLOW DIVERTER The Cal Spas Flow Diverter system uses one or more motorized valve(s) to vary the jet action between certain zones in the spa. These valve(s) are preset to stop at 7 different positions. Those positions are represented by the LED lights on the Flow Diverter control panel. -
Page 173: Cal Spas Clear Water Plan
Chemical Directions: • All directions in this program are calculated for Cal Spas chemicals only. Other chemicals may have similar names and/or usage descriptions. However, all chemicals are manufactured differently, increasing the likeli- hood of under or over dosing spa chemicals. - Page 174 Yet this same pump seal will fail in numerous spas because the owners were not following a chemical plan. Chemical damage is not covered by Cal Spas limited warranty. So, in addition to wasted expenses on excess chemicals, you will find yourself with a huge expense of replacing chemically damaged parts.
- Page 175 A chemical maintenance plan for your spa is not much different. Follow the Cal Spas’ Clear Water Plan, or replace your spa every two years. We know you don’t want to become a chemists. You just to enjoy your new spa. That is why the Cal Spas’ Clear Water plan is so effective.
-
Page 176: Filters And Filtration
The Cal Spas Exclusive Bio-Clean filter is the only antibacterial filter cartridge on the market today. What does this mean to you? Having a filter cartridge that prevents bacteria growth is simply added protection for those times you forget to clean the filter. We recom- mend that you only replace your spas filter cartridge with a Bio-Clean filter cartridge for ensured protection and peace of mind. - Page 177 Always rinse thoroughly when transferring between a swimming pool and a spa. Clean the spas filter(s) regularly as described in the Cal Spas Clear Water Plan. Spa Brite: (Water Clarifier) Spa Brite: This chemical is used to help clear up cloudy water.
- Page 178 Enzyme Oil Gone: (Oil Remover) Enzyme Oil Gone: This chemical will help break-down excessive amounts of body and other oils in the spa water. Body oil, perspiration, lotions and tanning oil will quickly accumulate in your spa if your not careful. The best solution is prevention.
- Page 179 Vinegar: You would need to use 100 times the amount of vinegar to equal 1/2 oz. of Cal Spas “pH / Alkalinity Down”. Vinegar will also add a large amount of organic waste in the spa water requiring the need for more sanitizers.
- Page 180 5. Use “Stain and Scale Defense” weekly as described in the Clear Water Plan. 6. Applying Cal Spas “Fast Sheen” to the spas acrylic surface when you drain and clean your spa will greatly help your spas finish pro- tect itself from scale build-up.
- Page 181 (Mineral Control at Start-up) Your Cal Spas’ Clear Water Plan recommends draining and refilling of your spa every three (3) to four (4) months. Upon doing so, you will want to add 3 oz. of Metal Protector to the center of the spa. Make sure all of the jets are on high speed.
- Page 182 Due to the constant punishment your spa cover and pillows receive, you should protect them by applying Vinyl & Leather Cleaner as a part of monthly maintenance. Cal Spas’ Vinyl & Leather Cleaner is specifically designed to protect spa covers and pillows from chemical and ultraviolet damage.
- Page 183 7. Allow Fast Sheen to dry until white and powdery. 8. Buff clean with a soft cloth, rotating frequently. Important: Cal Spas Fast Sheen should not be used on spas full of water. Only apply to a clean, cool, dry surfaces. Incorrect product usage may cause water clarity issues.
- Page 184 Sanitizers: (Bromine and Chlorine) How Sanitizers Work: Sanitizers such and Bromine and Chlorine, basically kill bacteria and other organic waste by breaking them down to unharmful levels, thus eliminating them from the water. You will need to know how each sanitizer performs this task to maximize their efficiency. Bromine: Bromine is generally in tablet form, and requires a small plastic floater to dissolve slowly into the spa water.
- Page 185 Test Levels Without Quest 2000 Ozonator: 1 to 3 Parts Per Million (ppm) 2. Add 1 to 2 tablespoons of Cal Spas’ Granular Chlorine to the spa water weekly. Chlorine dissipation rate will be faster at higher water temperatures and slower at lower temperatures.
- Page 186 5. Pour in 3 oz. of Cal Spas Metal Protector to the center of the spa. 6. Sprinkle 2 oz. of Cal Spas Oxidizer Shock in the center of the spa and leave spa uncovered and turn on the jets for 30 minutes prior to recovering.
- Page 187 Cal Spas Clear Water Plan (Chlorine) This plan and its chemical dosages are intended for Cal Spas’ Chemicals only. Most chemical manufacturers use different chemical formulas and strengths. Only Cal Spas’ chemicals are specially formulated to provide proper chemical balance at lower dosages.
-
Page 188: Frequently Asked Questions
Q: When is the best time to use Oxidizer Shock? A: Every week, as described in Cal Spas’ Clear Water Plan, and after heavy bather loads. You may use Cal Spas’ Oxidizer Shock as often as you like, as long as you allow you spa to run for 30 minutes with the spa cover at least half off. - Page 189 Special Extra Strength spa components and effecting oils, suntan lotion, and other contami- formula for spas and hot tubs. performance. nates found in spas and hot tubs. TO ORDER CAL SPAS’ CHEMICALS, PLEASE CALL 1-800-CALSPAS Page 48 Owner’s Manual...
-
Page 190: Warranty
WARRANTY LIMITED This limited warranty is effective for Signature Series spas manufactured after January 1, 2004 Spa Shell / Structural Warranty Equipment Warranty Signature Spas: C.A.I. warranties against the loose Signature Series Spas: C.A.I. warranties the of water through the spa shell due to defects in spas electrical and electronic component- materials and workmanship for a period of 10 years specific, the control system, pumps and air... - Page 191 Warranty Information Owner’s Manual WARRANTY INFORMATION See your Cal Spas dealer for a copy of the applicable warranty, details, and any questions you may have regarding the warranty coverage on your spa. Warranty Limitations The 2004 Limited Warranty is void if the spa has been subject to negligence, alteration, misuse, abuse, repairs by non-C.A.I.
-
Page 192: Draining Your Spa
Open all filters. Remove all filter(s). Hook up the female end to a garden hose to the Cal Spas drain fitting and the other end in a convenient place for draining. Let spa drain completely, then remove garden hose and replace the drain cap. -
Page 193: Appendix
The items that will be covered in this section will consist of the following: Chemicals Warranty Information Cal Spas Entertainment System Part Numbers In order for your retailer to expedite your order, for parts and accessories, it is recommended that you have the information that you attained in the Set-Up and Delivery section. - Page 194 Owner’s Manual Cal Spa Entertainment System CAL SPA ENTERTAINMENT SYSTEM Splash Stereo System Figure 11. Cal Flame Entertainment System This system can be used to listen to AM or FM Stereo signals, CD’s and also audio from the optional DVD and TV Tuner on our Entertainment Cal Flame unit.
-
Page 195: Cal Spas Entertainment System
Cal Spas Entertainment System Owner’s Manual 17” TV Monitor Operation: (Optional) Turning On the TV Monitor: Once the TV has been opened (either by manual or automatic operation) you will be able to operate the TV with the silver TV remote control. - Page 196 Owner’s Manual Cal Spa Entertainment System Figure 12. 17” TV Remote Power - Turns the TV Off/On. Memory - Store favorite channels or teletext pages. Display - Shows current status of TV. 4A. CH./Page Up - Go up to the next channel/page. 4B.
- Page 197 Owner’s Manual Cal Spas Entertainment System 42” TV Monitor and Lift Operation: (Optional) Figure 13. 42” Plasma Display Screen This system can be used to listen to AM or FM Stereo signals, CD’s and also audio from the optional DVD and TV Tuner on our Entertainment Cal Flame unit.
- Page 198 Owner’s Manual Cal Spas Entertainment System Figure 14. 42” TV Remote 1. Remote Control Cable Jack (not included) 2. Display - Press button and the menu display will appear on the screen. Press again and it disappears. 3. Video A, Video B, Compo./ RGB B and RGB A - Use this button to switch between components.
- Page 199 Cal Spas Entertainment System Owner’s Manual Cal Spas Entertainment System Operation DVD Player and Surround Sound Processor (Optional) This system contains the DVD player and DVD remote controller. Although encased in a plastic housing with weather seals, this system and remote control are not NOTE: waterproof.
- Page 200 Owner’s Manual Cal Spas Entertainment System Operating the DVD System In TV Mode: Figure 16. DVD Player The DVD system is used to feed the audio signal from the TV Tuner to the stereo. You will need to switch the audio and Video modes with DVD remote to properly receive picture and sound.
-
Page 201: Parts List
Parts List Owner’s Manual PARTS LIST Description Part Number SHELL ACR03400000 ACRYLIC REPAIR KIT ACR03400020 QUARITE REPAIR KIT ACR03400030 QUARITE REPAIR KIT DARK TWILITE ACR03400035 QUARITE REPAIR KIT LIGHT TWILGHT ACR03400045 QUARITE REPAIR KIT SAHARA ACR03400050 QUARITE REPAIR KIT SAPPHIRE ACR03400055 QUARITE REPAIR KIT SATURN ACR03400060... - Page 202 Owner’s Manual Parts List Description Part Number PLUMBING PLU21700748 BARREL ASSY, PULSE SS CX (CS2126519-2SS) PLU21700747 BARREL ASSY, SWIRL SS SX (CS2126509-2SS) PLU21702748 BARREL ASSY, PULSE SILVER CX (CS2126519-2S) PLU21702747 BARREL ASSY, SWIRL SILVER SX (CS2126509-2S) PLU21703140 MINI STORM ROTO RF 2 TONE (CS2127939-2S) PLU21703130 INSERT POLY STORM TWIN ROTO LG (CS2128179-2S) PLU21702713...
- Page 203 Parts List Owner’s Manual Description Part Number LITE LIT16100150 5" SPA LIGHT(2EA) ASSEMBLY COMPLETE '2003 LIT16100151 BULB, #912 12.8V 100A 12.8W, JUMBO SPA LIGHT, '03 [813-4370] LIT16100153 WALL FITTING, CLEAR LENS CAP, JUMBO SPA LIGHT, 5" SCALLOP '03 [215-4370] LIT16100154 BACK CAP, JUMBO SPA LIGHT, '03 [611-4110] LIT16100155 RED LENS INSERT, JUMBO SPA LIGHT, '03 [611-4304]...
- Page 204 Owner’s Manual Parts List Description Part Number CABINETS WOO27513307 CAB BACK PNL 24 1/2 X 49 1/4, CAL SELECT, RED WOO27513308 CAB BACK PNL 24 1/2 X 49 1/4, CAL SELECT, GREY WOO27513309 CAB BACK PNL 26 X 38 1/2, CAL SELECT, GREY WOO27513310 CAB BACK PNL 26 X 38 1/2, CAL SELECT, RED WOO27513311...
- Page 205 Parts List Owner’s Manual Description Part Number CABINETS WOO27513361 CAB FRNT PNL 24 1/2 X 7, CAL SELECT, RED WOO27513362 CAB FRNT PNL 26 X 1 1/2, CAL SELECT, GREY WOO27513363 CAB FRNT PNL 26 X 1 1/2, CAL SELECT, RED WOO27513364 CAB FRNT PNL 26 X 4 1/4, CAL SELECT, GREY WOO27513365...
- Page 206 Owner’s Manual Parts List Description Part Number CABINETS WOO27513409 CAB SIDE PNL 24 1/2 X 68 1/2, CAL SELECT, GREY WOO27513410 CAB SIDE PNL 24 1/2 X 68 1/2, CAL SELECT, RED WOO27513411 CAB SIDE PNL 24 1/2 X 68 1/2, CAL SELECT, GREY WOO27513412 CAB SIDE PNL 24 X 68 1/2, CAL SELECT, RED WOO27513413...
- Page 207 C.A.I. Customer Service Department 1462 East Ninth Street Pomona, CA 91766 Toll Free: 1-800-CAL-SPAS Fax: 1-909-629-3890 www.calspas.com...
- Page 208 2004 Owner’s Manual US and Canada HOME SERIES 1500 and 9000 ELECTRONIC CONTROL Duplication without written consent is strictly prohibited. This Owner’s Manual is for spas manufactured after May 3, 2004 Due to continuous improvement programs, all models, operation, and/or specifications are subject to change without prior notice. LTR17000176 www.calspas.com...
- Page 209 9000 and 1500 Electrical Operation ................17 Ajustable Therapy System ....................25 Cal Spa Flow Diverter ......................27 Multi-Colored Spa Light Operation..................28 Splash Stereo and Entertainment ..................29 Cal Spas Clear Water Plan ....................35 Filters and Filtration......................38 Cleaning and Maintenance....................39 Water and Your Spa ......................42 Frequently Asked Questions ....................49 Chemicals ..........................50...
-
Page 210: Benefits Of Owninga Cal Spa
The size and shape of the hot tub, of course, will determine the specific types of exercises you can do in it. Cal Spas would like to share some tips on the benefits of warm water therapy. -
Page 211: Safety Instructions
Safety Instructions Owner’s Manual SAFETY INSTRUCTIONS When installing and using this electrical equipment, basic safety precautions should always be followed. READ AND FOLLOW ALL INSTRUCTIONS To reduce the risk of injury, do not allow children to use the spa unless they are supervised at all WARNING: times. -
Page 212: Contact Information
Owner’s Manual Contact Information WARNING: WATER TEMPERATURES IN EXCESS OF 100 DEGREES FARENHEIT OR 38 DEGREES CELCIUS MAY BE INJURIOUS TO YOUR HEALTH j. WARNING: BEFORE ENTERING SPA OR HOT TUB MEAASURE THE WATER TEMPERATURE WITH AN ACCURATE THEMOMETER. k. WARINING: DO NOT USE A SPA OR HOTTUB IMMEDIATELY FOLLWOING STRENOUOS EXER- CISE. -
Page 213: Basic Spa Information
When empty, your spa should be cleaned with a non-abrasive cleaner, such as Cal Spas All Surface Cleaner, then rinsed thoroughly. When draining your spa, turn off all power to the spa and attach a garden hose to the hose-bib fixture located on the floor of the equipment area. -
Page 214: Delivery And Set-Up
Owner’s Manual Delivery and Set-Up DELIVERY AND SET-UP Please make a record of the following. It will be valuable if service is required. Cal Spa Model: Cal Spa Serial Number: Date Purchased: Date Installed: Cal Spa Dealer’s Phone Number: Cal Spa Dealer’s Address: Most cities and counties require permits for exterior construction and electrical circuits. - Page 215 Delivery and Set-Up Owner’s Manual Provide A View With Your Spa Think about the direction you will be facing when sitting in your spa. Do you have a special landscaped area in your yard that you find enjoyable? Perhaps there is an area that catches a soothing breeze during the day and lovely sunset in the evening.
- Page 216 Owner’s Manual Set-Up and Delivery PREPARING A GOOD FOUNDATION Your spa needs a solid and level foundation. The area that it sits on must be able to support the weight of the spa and the occupants who use it. If the foundation is inadequate, it may shift or settle after the spa is in place, causing stress that could DAMAGE YOUR SPA SHELL AND FINISH.
- Page 217 Electrical Installation Owner’s Manual ELECTRICAL INSTALLATION 110-Volt Installation Always follow applicable local, state and federal code and guidelines. 1. Use only a dedicated electrical line with a 20-amp breaker. 2. Do not use an extensions cord. 3. Always use a weatherproof-covered receptacle. 4.
- Page 218 Owner’s Manual Electrical Installation 220V Installation All 220V spas are required to have a dedicated 50-Amp GFCI breaker and should only be wired by a licensed electrician. To ensure proper wiring of your GFCI, follow these diagrams (Figure 2 Figure 1.
- Page 219 Electrical Installation Owner’s Manual Figure 3. GFCI Hook-Up Owner’s Manual Page 11...
-
Page 220: Starting Your Portable Spa
Owner’s Manual Starting Your Portable Spa STARTING YOUR PORTABLE SPA Be careful not to over-tighten the plumbing fittings. NOTE: NOTE: Never run the spa with the gate valves closed or without water circulating longer than 1 minute. Operating the spa in this manner may damage your ppump or cause a dry fire condition. NOTE: Never fill your spa with soft water. -
Page 221: Filter Maintenance
Filter Maintenance Owner’s Manual FILTER MAINTENANCE Portable Spas: Filtration starts on electronically controlled spas as soon as the pumps are primed and water flow is steady. As the flow of water goes through the filter, dirt and debris is removed and accumulated in the filter cartridge. As the filter cartridge accumulates dirt and debris, water flow is restricted and jet production is reduced. -
Page 222: Operating Instructions
Owner’s Manual Operating Instructions OPERATING INSTRUCTIONS Your new Cal Spa is very versatile. You can direct the flow of water and air through various locations throughout your spa. The following list of features are available on most spas. Adjustable Jets (Figure 5) Almost all of the jets in your spa are adjustable. - Page 223 Owner’s Manual Operating Instructions Cal Zone Quest 2000 Ozonator Your new Cal Zone Quest 2000 Ozonator is a state-of-the-art bacteria killing machine. This unit will assist you in maintaining clean and clear spa water, while saving you time and money with spa chemicals. Operation Your Cal Zone Quest 2000 Ozonator will automatically operate during the filter cycles.
- Page 224 Owner’s Manual Operating Instructions Venturies Air venturies are the smaller knobs located around the top of your spa. Each one will let you add a mixture of air with the jet pressure. This is accomplished by simply rotating the air venturi knob to the left (counter-clock- wise) to increase the amount of airflow through the jets.
- Page 225 9000 Electronic Operation Owner’s Manual 9000 ELECTRONIC OPERATION Pump Display Pump Display Jets1 Time Jets 2 Option Light LED Temp. Indicator Invert Cursor Up Light Temperature Display Display Mode Cursor Prog Down Heat Ozone Safety Suction Clock (Not available with the 7000) Figure 9.
- Page 226 Owner’s Manual 9000 Electronic Operation Initial Start Up 9000 Electronic Control System One Pump Equipment When the spa is powered on, it will display configuration digits to let the user know that it will go into Priming Mode, which can last 4 minutes. (Priming Mode is a self check & can exit at ant time by pressing either Curser. Initial start up in STANDARD Mode Temp Set (80˚F - 104˚F / 26˚C - 40˚C) (Start-up temperature set @100˚F - 37.5˚C)
- Page 227 9000 Electronic Operation Owner’s Manual Optional Filter Cycle Programming Mode Press Time and then “ Prog” within 3 seconds and the display will show PROGRAM, FILTER 1, and START TIME icons. Use the Cursor to select the start time hour and repeat to select the minutes (each minute press changes in increments of 5).
- Page 228 Owner’s Manual 9000 Electronic Operation (optional Blower, Mister or a 3 rd Pump) Option Option - Press the Option button to turn on the Blower. Turn “OFF” after 15 minutes Blower - Set B Dip Switch #3 to the “ON” position and plug cord into J6 Mister - Set B Dip Switch #11 to the “ON”...
- Page 229 9000 Electronic Operation Owner’s Manual Freeze Protection If the temperature sensors detects a drop of 44˚F on the heater, the pump will automatically power-up to provide freeze protection. The equipment will stay “ON” for 4 minutes after the sensor detects a water temperature of 45˚F or higher.
- Page 230 Owner’s Manual 1500 Electronic Operation 1500 Electronic Operation Temperature Adjustment (Range 80°F to 104°F) The display screen will always display the actual water temperature. Example: The actual water temperature is 100°F, the topside display will read 100. To display the set temperature, simply depress the Temp pad and the temperature setting will flash on and off on the display panel.
- Page 231 The first cycle will start after the spa is powered up. The second filtration cycle will begin twelve hours later. The filter cycle duration is preset for 2 hours. If spa usage is heavy, your Cal Spas authorized service technician can reconfigure your system to run two five hour filter cycle.
- Page 232 Owner’s Manual Cal Zone Quest 1000 Ozonator General Operating Instructions (Continued) Cal Zone Quest 1000 Ozonator Your new Cal Zone Quest 1000 Ozonator is a state-of-the-art bacteria killing machine. This unit will assist you in maintaining clean and clear spa water, while saving you time and expense with spa chemicals. Operation Your Cal Zone Quest 1000 Ozonator will automatically operate during the filter cycles and any other time the spa is running on low speed.
-
Page 233: Ajustable Therapy System
Owner’s Manual Adjustable Therapy System Adjustable Therapy System (Optional) Spas equipped with this system, allow you complete control of the therapy seat and/or lounger. This unique system offers convenient operation with its seat side controls, seven different massage modes, a soothing demo mode and all at a touch of a button. - Page 234 Owner’s Manual Adjustable Therapy System (1-7) MASSAGE MODES Demo Mode After turning on the Pump and Pulse modes, press and hold both the UP and Down Buttons together for two seconds then release. In this mode, every twenty (20) seconds this system will automatically switch to the next massage mode. Once the user finds the perfect massage mode, pressing either the UP or DOWN button will Time Reset Mode Pulse will normally run for 15 minutes then time-out.
- Page 235 SPAS FLOW DIVERTER The Cal Spas Flow Diverter system uses one or more motorized valve(s) to vary the jet action between certain zones in the spa. These valve(s) are preset to stop at 7 different positions. Those positions are represented by the LED lights on the Flow Diverter control panel.
-
Page 236: Multi-Colored Spa Light Operation
Owner’s Manual Multi-Color Spa Light Operation MULTI-COLORED SPA LIGHT OPERATION 10 Dramatic Lighting Modes Experience each different lighting mode by turningthe spa light off and on to change lighting effects: • WHITE: pure, bright white • SPECTRUM SLOW DANCE: vibrant,slow fade through all colors •... - Page 237 • Always close the CD protection door. Remember, water damage is not covered by the warranty. Entertainment Systems Cal Spas Entertainment System units equipped with the TV / DVD systems use this Splash stereo to broad- cast the TV or DVD audio signals.
- Page 238 Cal Spas Entertainment System Owner’s Manual Figure 12. 17” LCD Display Screen 17” TV Monitor Operation: (Optional) Turning On the TV Monitor: Once the TV has been opened (either by manual or automatic operation) you will be able to operate the TV with the silver TV remote control.
- Page 239 Owner’s Manual Cal Spa Entertainment System Figure 13. 17” TV Remote Power - Turns the TV Off/On. Memory - Store favorite channels or teletext pages. Display - Shows current status of TV. 4A. CH./Page Up - Go up to the next channel/page. 4B.
- Page 240 These instructions are to describe basic functions. Please see the DVD manufacturers operating instructions for other features and functions. These instructions are delivered with the Cal Spas owners manual in a clear plastic bag. Operation Press the POWER button on the DVD unit or remote control to turn the system on.
- Page 241 Owner’s Manual Cal Spas Entertainment System Operating the DVD System In TV Mode: Figure 17. DVD Player The DVD system is used to feed the audio signal from the TV Tuner to the stereo. You will need to switch the audio and Video modes with DVD remote to properly receive picture and sound.
- Page 242 Appendix Owner’s Manual APPENDIX The items that will be covered in this section will consist of the following: Clear Water Plan Chemicals Warranty Information Part Numbers In order for your retailer to expedite your order, for parts and accessories, it is recommended that you have the information that you attained in the Set-Up and Delivery section.
-
Page 243: Cal Spas Clear Water Plan
Chemical Directions: • All directions in this program are calculated for Cal Spas chemicals only. Other chemicals may have similar names and/or usage descriptions. However, all chemicals are manufactured differently, increasing the likeli- hood of under or over dosing spa chemicals. - Page 244 Yet this same pump seal will fail in numerous spas because the owners were not following a chemical plan. Chemical damage is not covered by Cal Spas limited warranty. So, in addition to wasted expenses on excess chemicals, you will find yourself with a huge expense of replacing chemically damaged parts.
- Page 245 A chemical maintenance plan for your spa is not much different. Follow the Cal Spas’ Clear Water Plan, or replace your spa every two years. We know you don’t want to become a chemists. You just to enjoy your new spa. That is why the Cal Spas’ Clear Water plan is so effective.
-
Page 246: Filters And Filtration
The Cal Spas Exclusive Bio-Clean filter is the only antibacterial filter cartridge on the market today. What does this mean to you? Having a filter cartridge that prevents bacteria growth is simply added protection for those times you forget to clean the filter. We recom- mend that you only replace your spas filter cartridge with a Bio-Clean filter cartridge for ensured protection and peace of mind. - Page 247 Always rinse thoroughly when transferring between a swimming pool and a spa. Clean the spas filter(s) regularly as described in the Cal Spas Clear Water Plan. Spa Brite: (Water Clarifier) Spa Brite: This chemical is used to help clear up cloudy water.
- Page 248 Enzyme Oil Gone: (Oil Remover) Enzyme Oil Gone: This chemical will help break-down excessive amounts of body and other oils in the spa water. Body oil, perspiration, lotions and tanning oil will quickly accumulate in your spa if your not careful. The best solution is prevention.
- Page 249 Vinegar: You would need to use 100 times the amount of vinegar to equal 1/2 oz. of Cal Spas “pH / Alkalinity Down”. Vinegar will also add a large amount of organic waste in the spa water requiring the need for more sanitizers.
- Page 250 5. Use “Stain and Scale Defense” weekly as described in the Clear Water Plan. 6. Applying Cal Spas “Fast Sheen” to the spas acrylic surface when you drain and clean your spa will greatly help your spas finish pro- tect itself from scale build-up.
- Page 251 (Mineral Control at Start-up) Your Cal Spas’ Clear Water Plan recommends draining and refilling of your spa every three (3) to four (4) months. Upon doing so, you will want to add 3 oz. of Metal Protector to the center of the spa. Make sure all of the jets are on high speed.
- Page 252 Due to the constant punishment your spa cover and pillows receive, you should protect them by applying Vinyl & Leather Cleaner as a part of monthly maintenance. Cal Spas’ Vinyl & Leather Cleaner is specifically designed to protect spa covers and pillows from chemical and ultraviolet damage.
- Page 253 7. Allow Fast Sheen to dry until white and powdery. 8. Buff clean with a soft cloth, rotating frequently. Important: Cal Spas Fast Sheen should not be used on spas full of water. Only apply to a clean, cool, dry surfaces. Incorrect product usage may cause water clarity issues.
- Page 254 Sanitizers: (Bromine and Chlorine) How Sanitizers Work: Sanitizers such and Bromine and Chlorine, basically kill bacteria and other organic waste by breaking them down to unharmful levels, thus eliminating them from the water. You will need to know how each sanitizer performs this task to maximize their efficiency. Bromine: Bromine is generally in tablet form, and requires a small plastic floater to dissolve slowly into the spa water.
- Page 255 Test Levels Without Quest 2000 Ozonator: 1 to 3 Parts Per Million (ppm) 2. Add 1 to 2 tablespoons of Cal Spas’ Granular Chlorine to the spa water weekly. Chlorine dissipation rate will be faster at higher water temperatures and slower at lower temperatures.
- Page 256 5. Pour in 3 oz. of Cal Spas Metal Protector to the center of the spa. 6. Sprinkle 2 oz. of Cal Spas Oxidizer Shock in the center of the spa and leave spa uncovered and turn on the jets for 30 minutes prior to recovering.
- Page 257 Cal Spas Clear Water Plan (Chlorine) This plan and its chemical dosages are intended for Cal Spas’ Chemicals only. Most chemical manufacturers use different chemical formulas and strengths. Only Cal Spas’ chemicals are specially formulated to provide proper chemical balance at lower dosages.
-
Page 258: Frequently Asked Questions
Q: When is the best time to use Oxidizer Shock? A: Every week, as described in Cal Spas’ Clear Water Plan, and after heavy bather loads. You may use Cal Spas’ Oxidizer Shock as often as you like, as long as you allow you spa to run for 30 minutes with the spa cover at least half off. - Page 259 Special Extra Strength lotion and other contami- causing wastes. and effecting performance. formula for spas and hot nant’s found in spas and tubs. hot tubs. TO ORDER CAL SPAS’ CHEMICALS PLEASE CALL 1-800-CALSPAS...
- Page 260 Open all filters. Remove all filter(s). Hook up the female end to a garden hose to the Cal Spas drain fitting and the other end in a convenient place for draining. Let spa drain completely, then remove garden hose and replace the drain cap.
- Page 261 Warranty Information Owner’s Manual WARRANTY INFORMATION See your Cal Spas dealer for a copy of the applicable warranty, details, and any questions you may have regarding the warranty coverage on your spa. Warranty Limitations The 2004 Limited Warranty is void if the spa has been subject to negligence, alteration, misuse, abuse, repairs by non-C.A.I.
- Page 262 LIMITED This limited warranty is effective for Home Series spas manufactured after May 3, 2004 Spa Shell / Structural Warranty Equipment Warranty Home Spas: C.A.I. warranties against the loose of Home Series Spas: C.A.I. warranties the water through the spa shell due to defects in mate- spas electrical and electronic component- rials and workmanship for a period of 10 years from specific, the control system, pumps and air...
-
Page 263: Parts List
Parts List Owner’s Manual PARTS LIST Part Number Description SHELL ACR03400000 ACRYLIC REPAIR KIT ACR03400020 QUARITE REPAIR KIT ACR03400030 QUARITE REPAIR KIT DARK TWILITE ACR03400035 QUARITE REPAIR KIT LIGHT TWILGHT ACR03400045 QUARITE REPAIR KIT SAHARA ACR03400050 QUARITE REPAIR KIT SAPPHIRE ACR03400055 QUARITE REPAIR KIT SATURN ACR03400060... - Page 264 Owner’s Manual Parts List Part Number Description PLUMBING PLU21700748 BARREL ASSY, PULSE SS CX (CS2126519-2SS) PLU21700747 BARREL ASSY, SWIRL SS SX (CS2126509-2SS) PLU21702748 BARREL ASSY, PULSE SILVER CX (CS2126519-2S) PLU21702747 BARREL ASSY, SWIRL SILVER SX (CS2126509-2S) PLU21703140 MINI STORM ROTO RF 2 TONE (CS2127939-2S) PLU21703130 INSERT POLY STORM TWIN ROTO LG (CS2128179-2S) PLU21702713...
- Page 265 Parts List Owner’s Manual Part Number Description LITE LIT16100150 5" SPA LIGHT(2EA) ASSEMBLY COMPLETE '2003 LIT16100151 BULB, #912 12.8V 100A 12.8W, JUMBO SPA LIGHT, '03 [813-4370] LIT16100153 WALL FITTING, CLEAR LENS CAP, JUMBO SPA LIGHT, 5" SCALLOP '03 [215-4370] LIT16100154 BACK CAP, JUMBO SPA LIGHT, '03 [611-4110] LIT16100155 RED LENS INSERT, JUMBO SPA LIGHT, '03 [611-4304]...
- Page 266 Owner’s Manual Parts List Part Number Description CABINETS WOO27513307 CAB BACK PNL 24 1/2 X 49 1/4, CAL SELECT, RED WOO27513308 CAB BACK PNL 24 1/2 X 49 1/4, CAL SELECT, GREY WOO27513309 CAB BACK PNL 26 X 38 1/2, CAL SELECT, GREY WOO27513310 CAB BACK PNL 26 X 38 1/2, CAL SELECT, RED WOO27513311...
- Page 267 Parts List Owner’s Manual Part Number Description CABINETS WOO27513361 CAB FRNT PNL 24 1/2 X 7, CAL SELECT, RED WOO27513362 CAB FRNT PNL 26 X 1 1/2, CAL SELECT, GREY WOO27513363 CAB FRNT PNL 26 X 1 1/2, CAL SELECT, RED WOO27513364 CAB FRNT PNL 26 X 4 1/4, CAL SELECT, GREY WOO27513365...
- Page 268 Owner’s Manual Parts List Part Number Description CABINETS WOO27513409 CAB SIDE PNL 24 1/2 X 68 1/2, CAL SELECT, GREY WOO27513410 CAB SIDE PNL 24 1/2 X 68 1/2, CAL SELECT, RED WOO27513411 CAB SIDE PNL 24 1/2 X 68 1/2, CAL SELECT, GREY WOO27513412 CAB SIDE PNL 24 X 68 1/2, CAL SELECT, RED WOO27513413...
- Page 269 Owner’s Manual Parts List Part Number Description CABINETS OPT98934R H901 CAB, CAL SELECT, RED, W/O RAIL WOO27500274 CABINET PANELS, COMPLETE, CAL SELECT, RED WOO27500277 CAB DOOR PNL, 26 X 36 1/2”, CSR WOO27500276 CAB FRNT PNL, 26 X 26”, CSR WOO27513333 CAB CRNR PNL, 26 X 12”, CSR WOO27500275...
- Page 270 ® ¤ LISTED 77K8 C.A.I. Customer Service Department 1462 East Ninth Street Pomona, CA 91766 Toll Free: 1-800-CAL-SPAS Fax: 1-909-629-3890 ¤ www.calspas.com LISTED 77K8 ® SP-1137...
- Page 271 2004 Owner’s Manual US and Canada CLASSIC SERIES 5000, 7000 and 9000 ELECTRONIC CONTROL Duplication without written consent is strictly prohibited. This Owner’s Manual is for spas manufactured after January 1, 2004 Due to continuous improvement programs, all models, operation, and/or specifications are subject to change without prior notice. LTR17000176 www.calspas.com...
- Page 272 Starting Your Portable Spa ....................12 Filter Maintenance ......................13 Operating Instructions ......................14 5000, 7000 and 9000 Electrical Operation ..............17 Cal Spa Flow Diverter ......................22 Cal Spas Clear Water Plan ....................23 Filters and Filtration......................26 Cleaning and Maintenance....................27 Water and Your Spa ......................30 Frequently Asked Questions ....................37 Warranty ..........................38...
-
Page 273: Benefits Of Owning A Cal Spa
The size and shape of the hot tub, of course, will determine the specific types of exercises you can do in it. Cal Spas would like to share some tips on the benefits of warm water therapy. -
Page 274: Safety Instructions
Safety Instructions Owner’s Manual SAFETY INSTRUCTIONS When installing and using this electrical equipment, basic safety precautions should always be followed. READ AND FOLLOW ALL INSTRUCTIONS WARNING: To reduce the risk of injury, do not allow children to use the spa unless they are supervised at all times. -
Page 275: Contact Information
Owner’s Manual Contact Information Hyperthermia Danger Prolonged exposure to hot air/water can induce hyperthermia. Hyperthermia occurs when the internal temperature of the body reaches a level 3˚ to 6˚ above the normal body temperature of 37˚C (98.6˚F). While hyperthermia has many health benefits, it is important not to allow your body’s core temperature to rise above 103˚F. -
Page 276: Basic Spa Information
When empty, your spa should be cleaned with a non-abrasive cleaner, such as Cal Spas All Surface Cleaner, then rinsed thoroughly. When draining your spa, turn off all power to the spa and attach a garden hose to the hose-bib fixture located on the floor of the equipment area. -
Page 277: Delivery And Set-Up
Owner’s Manual Delivery and Set-Up DELIVERY AND SET-UP Please make a record of the following. It will be valuable if service is required. Cal Spa Model: Cal Spa Serial Number: Date Purchased: Date Installed: Cal Spa Dealer’s Phone Number: Cal Spa Dealer’s Address: Most cities and counties require permits for exterior construction and electrical circuits. - Page 278 Delivery and Set-Up Owner’s Manual Provide A View With Your Spa Think about the direction you will be facing when sitting in your spa. Do you have a special landscaped area in your yard that you find enjoyable? Perhaps there is an area that catches a soothing breeze during the day and lovely sunset in the evening.
- Page 279 Owner’s Manual Set-Up and Delivery PREPARING A GOOD FOUNDATION Your spa needs a solid and level foundation. The area that it sits on must be able to support the weight of the spa and the occupants who use it. If the foundation is inadequate, it may shift or settle after the spa is in place, causing stress that could DAMAGE YOUR SPA SHELL AND FINISH.
- Page 280 Electrical Installation Owner’s Manual ELECTRICAL INSTALLATION 110-Volt Installation Always follow applicable local, state and federal code and guidelines. 1. Use only a dedicated electrical line with a 20-amp breaker. 2. Do not use an extensions cord. 3. Always use a weatherproof-covered receptacle. 4.
- Page 281 Owner’s Manual Electrical Installation 220V Installation All 220V spas are required to have a dedicated 50-Amp GFCI breaker and should only be wired by a licensed electrician. To ensure proper wiring of your GFCI, follow these diagrams (Figure 2 and Figure 3). 1.
- Page 282 Electrical Installation Owner’s Manual Figure 3. GFCI Hook-Up Owner’s Manual Page 11...
-
Page 283: Starting Your Portable Spa
Owner’s Manual Starting Your Portable Spa STARTING YOUR PORTABLE SPA Be careful not to over-tighten the plumbing fittings. NOTE: Never run the spa with the gate valves closed or without water circulating for long periods of time. NOTE: NOTE: Never fill your spa with soft water. Soft water makes it impossible to maintain the proper water chemistry and may cause the water to foam, which will ultimately harm the finish of the spa and void your warranty. -
Page 284: Filter Maintenance
Filter Maintenance Owner’s Manual FILTER MAINTENANCE Portable Spas: Filtration starts on electronically-controlled spas as soon as the pumps are primed and water flow is steady. As the flow of water goes through the filter, dirt and debris is removed and accumulated in the filter cartridge. As the filter cartridge accumulates dirt and debris, water flow is restricted and jet production is reduced. -
Page 285: Operating Instructions
Owner’s Manual Operating Instructions OPERATING INSTRUCTIONS Your new Cal Spa is very versatile. You can direct the flow of water and air through various locations throughout your spa. The following list of features are available on most spas. Adjustable Jets (Figure 5) Almost all of the jets in your spa are adjustable. - Page 286 Owner’s Manual Operating Instructions Cal Zone Quest 2000 Ozonator Your new Cal Zone Quest 2000 Ozonator is a state-of-the-art bacteria killing machine. This unit will assist you in maintaining clean and clear spa water, while saving you time and money with spa chemicals. Operation Your Cal Zone Quest 2000 Ozonator will automatically operate during the filter cycles.
- Page 287 Owner’s Manual Operating Instructions Air Venturies Air venturies are the smaller knobs located around the top of your spa. Each one will let you add a mixture of air with the jet pressure. This is accomplished by simply rotating the air venturi knob to the left (counter-clock- wise) to increase the amount of airflow through the jets.
- Page 288 5000, 7000 and 9000 Electronic Operation Owner’s Manual 5000, 7000 and 9000 ELECTRONIC OPERATION When first powered-up, the 5000 Electronic System (Figure 8) will perform a self-diagnostic check and then it will automatically heat to, and maintain, a temperature of 100˚F until you change the set temperature as listed in the ‘Temperature Adjustment’...
- Page 289 (if installed) will run. The filtration settings of F8 and FC are only intended for use with optional Cal Spas Filtration System. 7000 and 9000 You can preset up to 2 filter cycles a day by programming the start-end times for each cycle.
- Page 290 5000, 7000 and 9000 Electronic Operation Owner’s Manual Optional Filter Cycle Programming Mode Press Time and then “ Prog” within 3 seconds and the display will show PROGRAM, FILTER 1, and START TIME icons. Use the Cursor to select the start time hour and repeat to select the minutes (each minute press changes in increments of 5).
- Page 291 Owner’s Manual 5000, 7000 and 9000 Electronic Operation (optional Blower, Mister or a 3 rd Pump) Option 7000 and 9000 Option - Press the Option button to turn on the Blower. Turn “OFF” after 15 minutes Blower - Set B Dip Switch #3 to the “ON” position and plug cord into J6 Mister - Set B Dip Switch #11 to the “ON”...
- Page 292 5000, 7000 and 9000 Electronic Operation Owner’s Manual Freeze Protection If the temperature sensors detects a drop of 44˚F on the heater, the pump will automatically power-up to provide freeze protection. The equipment will stay “ON” for 4 minutes after the sensor detects a water temperature of 45˚F or higher.
- Page 293 CAL SPAS FLOW DIVERTER The Cal Spas Flow Diverter system uses one or more motorized valve(s) to vary the jet action between certain zones in the spa. These valve(s) are preset to stop at 7 different positions. Those positions are represented by the LED lights on the Flow Diverter control panel.
-
Page 294: Cal Spas Clear Water Plan
Chemical Directions: • All directions in this program are calculated for Cal Spas chemicals only. Other chemicals may have similar names and/or usage descriptions. However, all chemicals are manufactured differently, increasing the likeli- hood of under or over dosing spa chemicals. - Page 295 Yet this same pump seal will fail in numerous spas because the owners were not following a chemical plan. Chemical damage is not covered by Cal Spas limited warranty. So, in addition to wasted expenses on excess chemicals, you will find yourself with a huge expense of replacing chemically damaged parts.
- Page 296 A chemical maintenance plan for your spa is not much different. Follow the Cal Spas’ Clear Water Plan, or replace your spa every two years. We know you don’t want to become a chemists. You just to enjoy your new spa. That is why the Cal Spas’ Clear Water plan is so effective.
-
Page 297: Filters And Filtration
The Cal Spas Exclusive Bio-Clean filter is the only antibacterial filter cartridge on the market today. What does this mean to you? Having a filter cartridge that prevents bacteria growth is simply added protection for those times you forget to clean the filter. We recom- mend that you only replace your spas filter cartridge with a Bio-Clean filter cartridge for ensured protection and peace of mind. - Page 298 Always rinse thoroughly when transferring between a swimming pool and a spa. Clean the spas filter(s) regularly as described in the Cal Spas Clear Water Plan. Spa Brite: (Water Clarifier) Spa Brite: This chemical is used to help clear up cloudy water.
- Page 299 Enzyme Oil Gone: (Oil Remover) Enzyme Oil Gone: This chemical will help break-down excessive amounts of body and other oils in the spa water. Body oil, perspiration, lotions and tanning oil will quickly accumulate in your spa if your not careful. The best solution is prevention.
- Page 300 Vinegar: You would need to use 100 times the amount of vinegar to equal 1/2 oz. of Cal Spas “pH / Alkalinity Down”. Vinegar will also add a large amount of organic waste in the spa water requiring the need for more sanitizers.
- Page 301 5. Use “Stain and Scale Defense” weekly as described in the Clear Water Plan. 6. Applying Cal Spas “Fast Sheen” to the spas acrylic surface when you drain and clean your spa will greatly help your spas finish pro- tect itself from scale build-up.
- Page 302 (Mineral Control at Start-up) Your Cal Spas’ Clear Water Plan recommends draining and refilling of your spa every three (3) to four (4) months. Upon doing so, you will want to add 3 oz. of Metal Protector to the center of the spa. Make sure all of the jets are on high speed.
- Page 303 Due to the constant punishment your spa cover and pillows receive, you should protect them by applying Vinyl & Leather Cleaner as a part of monthly maintenance. Cal Spas’ Vinyl & Leather Cleaner is specifically designed to protect spa covers and pillows from chemical and ultraviolet damage.
- Page 304 7. Allow Fast Sheen to dry until white and powdery. 8. Buff clean with a soft cloth, rotating frequently. Important: Cal Spas Fast Sheen should not be used on spas full of water. Only apply to a clean, cool, dry surfaces. Incorrect product usage may cause water clarity issues.
- Page 305 Sanitizers: (Bromine and Chlorine) How Sanitizers Work: Sanitizers such and Bromine and Chlorine, basically kill bacteria and other organic waste by breaking them down to unharmful levels, thus eliminating them from the water. You will need to know how each sanitizer performs this task to maximize their efficiency. Bromine: Bromine is generally in tablet form, and requires a small plastic floater to dissolve slowly into the spa water.
- Page 306 Test Levels Without Quest 2000 Ozonator: 1 to 3 Parts Per Million (ppm) 2. Add 1 to 2 tablespoons of Cal Spas’ Granular Chlorine to the spa water weekly. Chlorine dissipation rate will be faster at higher water temperatures and slower at lower temperatures.
- Page 307 5. Pour in 3 oz. of Cal Spas Metal Protector to the center of the spa. 6. Sprinkle 2 oz. of Cal Spas Oxidizer Shock in the center of the spa and leave spa uncovered and turn on the jets for 30 minutes prior to recovering.
- Page 308 Cal Spas Clear Water Plan (Chlorine) This plan and its chemical dosages are intended for Cal Spas’ Chemicals only. Most chemical manufacturers use different chemical formulas and strengths. Only Cal Spas’ chemicals are specially formulated to provide proper chemical balance at lower dosages.
-
Page 309: Frequently Asked Questions
Q: When is the best time to use Oxidizer Shock? A: Every week, as described in Cal Spas’ Clear Water Plan, and after heavy bather loads. You may use Cal Spas’ Oxidizer Shock as often as you like, as long as you allow you spa to run for 30 minutes with the spa cover at least half off. - Page 310 Special Extra Strength spa components and effecting oils, suntan lotion, and other contami- formula for spas and hot tubs. performance. nates found in spas and hot tubs. TO ORDER CAL SPAS’ CHEMICALS, PLEASE CALL 1-800-CALSPAS Page 48 Owner’s Manual...
-
Page 311: Warranty
WARRANTY LIMITED This limited warranty is effective for Classic Series spas manufactured after January 1, 2004 Spa Shell / Structural Warranty Equipment Warranty Classic Spas: C.A.I. warranties against the loose of Classic Series Spas: C.A.I. warranties the water through the spa shell due to defects in mate- spas electrical and electronic component- rials and workmanship for a period of 10 years from specific, the control system, pumps and air... - Page 312 Warranty Information Owner’s Manual WARRANTY INFORMATION See your Cal Spas dealer for a copy of the applicable warranty, details, and any questions you may have regarding the warranty coverage on your spa. Warranty Limitations The 2004 Limited Warranty is void if the spa has been subject to negligence, alteration, misuse, abuse, repairs by non-C.A.I.
- Page 313 Open all filters. Remove all filter(s). Hook up the female end to a garden hose to the Cal Spas drain fitting and the other end in a convenient place for draining. Let spa drain completely, then remove garden hose and replace the drain cap.
-
Page 314: Appendix
The items that will be covered in this section will consist of the following: Chemicals Warranty Information Cal Spas Entertainment System Part Numbers In order for your retailer to expedite your order, for parts and accessories, it is recommended that you have the information that you attained in the Set-Up and Delivery section. -
Page 315: Cal Spas Entertainment System
Owner’s Manual Cal Spa Entertainment System CAL SPAS ENTERTAINMENT SYSTEM Splash Stereo System Figure 11. Cal Flame Entertainment System This system can be used to listen to AM or FM Stereo signals, CD’s and also audio from the optional DVD and TV Tuner on our Entertainment Cal Flame unit. - Page 316 Cal Spas Entertainment System Owner’s Manual 17” TV Monitor Operation: (Optional) Turning On the TV Monitor: Once the TV has been opened (either by manual or automatic operation) you will be able to operate the TV with the silver TV remote control.
- Page 317 Owner’s Manual Cal Spa Entertainment System Figure 12. 17” TV Remote Power - Turns the TV Off/On. Memory - Store favorite channels or teletext pages. Display - Shows current status of TV. 4A. CH./Page Up - Go up to the next channel/page. 4B.
- Page 318 Owner’s Manual Cal Spas Entertainment System 42” TV Monitor and Lift Operation: (Optional) Figure 13. 42” Plasma Display Screen This system can be used to listen to AM or FM Stereo signals, CD’s and also audio from the optional DVD and TV Tuner on our Entertainment Cal Flame unit.
- Page 319 Owner’s Manual Cal Spas Entertainment System Figure 14. 42” TV Remote 1. Remote Control Cable Jack (not included) 2. Display - Press button and the menu display will appear on the screen. Press again and it disappears. 3. Video A, Video B, Compo./ RGB B and RGB A - Use this button to switch between components.
- Page 320 Cal Spas Entertainment System Owner’s Manual Cal Spas Entertainment System Operation DVD Player and Surround Sound Processor (Optional) This system contains the DVD player and DVD remote controller. Although encased in a plastic housing with weather seals, this system and remote control are not NOTE: waterproof.
- Page 321 Owner’s Manual Cal Spas Entertainment System Operating the DVD System In TV Mode: Figure 16. DVD Player The DVD system is used to feed the audio signal from the TV Tuner to the stereo. You will need to switch the audio and Video modes with DVD remote to properly receive picture and sound.
-
Page 322: Parts List
Parts List Owner’s Manual PARTS LIST Part Number Description SHELL ACR03400000 ACRYLIC REPAIR KIT ACR034000094 QUARITE REPAIR KIT SPRUCE ACR034000095 QUARITE REPAIR KIT BGRASS ACR03400020 QUARITE REPAIR KIT ACR03400030 QUARITE REPAIR KIT DARK TWILITE ACR03400035 QUARITE REPAIR KIT LIGHT TWILGHT ACR03400040 QUARITE REPAIR KIT WINE ACR03400045... - Page 323 Owner’s Manual Parts List PLUMBING PLU21702723 ADJ CLUSTER STORM METAL SC STAINLESS (CS2121529-2SS) PLU21700748 BARREL ASSY, PULSE SS CX (CS2126519-2SS) PLU21700747 BARREL ASSY, SWIRL SS SX (CS2126509-2SS) PLU21702748 BARREL ASSY, PULSE SILVER CX (CS2126519-2S) PLU21702747 BARREL ASSY, SWIRL SILVER SX (CS2126509-2S) PLU21703140 MINI STORM ROTO RF 2 TONE (CS2127939-2S) PLU21703130...
- Page 324 Parts List Owner’s Manual LITE LIT16100150 5" SPA LIGHT(2EA) ASSEMBLY COMPLETE '2003 LIT16100151 BULB, #912 12.8V 100A 12.8W, JUMBO SPA LIGHT, '03 [813-4370] LIT16100153 WALLFITTING, CLEAR LENS CAP, JUMBO SPA LIGHT, 5" SCALLOP '03 [215-4370] LIT16100154 BACK CAP, JUMBO SPA LIGHT, '03 [611-4110] LIT16100155 RED LENS INSERT, JUMBO SPA LIGHT, '03 [611-4304] LIT16100156...
- Page 325 Owner’s Manual Parts List ELECTRICAL ELE09900395 FUSE 25A POWER INPUT ELE09900400 FUSE 20A POWER INPUT ELE09700085 220/110V CONVERSION KIT, PNEUMATIC CABINET WOO27513307 CAB BACK PNL 24 1/2 X 49 1/4, CAL SELECT, RED WOO27513308 CAB BACK PNL 24 1/2 X 49 1/4, CAL SELECT, GREY WOO27513309 CAB BACK PNL 26 X 38 1/2, CAL SELECT, GREY WOO27513310...
- Page 326 Parts List Owner’s Manual CABINET WOO27513356 CAB DOOR PNL 32 1/2 X 43 1/2, CAL SELECT, RED WOO27513357 CAB FRNT PNL 24 1/2 X 7 1/2, CAL SELECT, GREY WOO27513358 CAB FRNT PNL 24 1/2 X 7 1/2, CAL SELECT, RED WOO27513359 CAB FRNT PNL 24 1/2 X 7, CAL SELECT, GREY WOO27513361...
- Page 327 Owner’s Manual Parts List CABINET WOO27513406 CAB SIDE PNL 24 1/2 X 48 1/4, CAL SELECT, RED WOO27513407 CAB SIDE PNL 24 1/2 X 58 1/2, CAL SELECT, GREY WOO27513408 CAB SIDE PNL 24 1/2 X 58 1/2, CAL SELECT, RED WOO27513409 CAB SIDE PNL 24 1/2 X 68 1/2, CAL SELECT, GREY WOO27513410...
- Page 328 ® C.A.I. Customer Service Department 1462 East Ninth Street Pomona, CA 91766 Toll Free: 1-800-CAL-SPAS Fax: 1-909-629-3890 www.calspas.com ® ® SP-1137...