Table of Contents
Advertisement
Available languages
Available languages
Quick Links
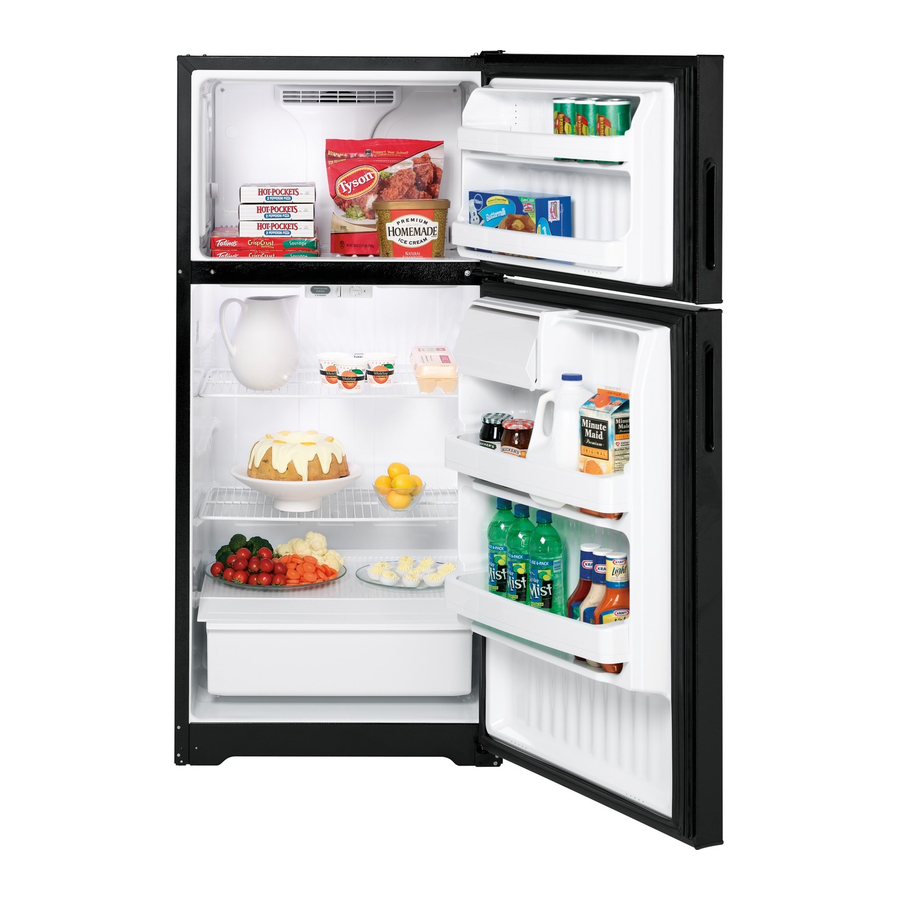
Write the model and serial
numbers here:
Model # __________________
Serial # __________________
You can find them on a label on
the upper left side of the fresh food
compartment.
Owner's Manual and Installation Instructions
www.AmericanaAppliances.com
Printed in the United States
Printed on Recycled Paper
Top-Freezer
Refrigerators
Safety Information
Adapter Plugs . . . . . . . . . . . . . . . . . 3
Connecting Electricity . . . . . . . . . . 3
Extension Cords . . . . . . . . . . . . . . . 2
Safety Precautions . . . . . . . . . . . . . . 2
Operating Instructions
Automatic Icemaker . . . . . . . . . . . .8
Care and Cleaning . . . . . . . . . . 9, 10
Shelves . . . . . . . . . . . . . . . . . . . . .5, 6
Storage Drawers . . . . . . . . . . . . . .6, 7
Temperature Controls . . . . . . . . . . .4
Installation Instructions
Preparing to Install
the Refrigerator . . . . . . . . . . . . . . 11
Reversing the Door Swing . . . 16-20
Water Line Installation . . . . . . 12-16
Troubleshooting Tips
Before You Call
For Service . . . . . . . . . . . . . . . .22, 23
Normal Operating Sounds . . . . . .21
Consumer Support
Consumer Support . . . . . . . . . . . . 28
Product Registration . . . . . . . . 25, 26
Warranty . . . . . . . . . . . . . . . . . . . . 27
197D5984P001
Models 15, 16, 17, 18
49-60318
01-04 JR
Advertisement
Chapters
Table of Contents

Related Manuals for AMERICANA 15


Summary of Contents for AMERICANA 15
-
Page 1: Table Of Contents
Product Registration ..25, 26 Warranty ....27 Models 15, 16, 17, 18 197D5984P001... -
Page 2: Important Safety Information
However, if you must use an extension cord, it is absolutely necessary that it be a UL-listed, 3-wire grounding type appliance extension cord having a grounding type plug and outlet and that the electrical rating of the cord be 15 amperes (minimum) and 120 volts. In refrigerators with automatic icemakers,... -
Page 3: How To Connect Electricity
WARNING! HOW TO CONNECT ELECTRICITY Do not, under any circumstances, cut or remove the third (ground) prong from the power cord. For personal safety, this appliance must be properly grounded. The power cord of this appliance is equipped with a 3-prong (grounding) plug which mates with a standard 3-prong (grounding) wall outlet to minimize the possibility of electric shock hazard from this appliance. -
Page 4: Control Settings
About the temperature control dial. Turning the dial to 0 stops cooling in both compartments—fresh food and freezer. It does not shut off power to the refrigerator. Control Settings Temperature Control Dial The temperature control dial has nine settings plus 0. 1 is the warmest. 9 is the coldest. At first, set the dial at 5. - Page 5 About the fresh food compartment shelves. Shelf supports at various levels allow you to custom-space your shelves. Not all features are on all models. Half-Width Shelves One end of the shelf rests on a molded 2 Lift up and out side-wall support;...
- Page 6 About the freezer compartment shelves. Some models have an ice-tray shelf and some have a full-width step shelf. Ice-Tray Shelf Plug Supports To remove the ice-tray shelf, lift the left side of the shelf off its supports, then pull the shelf to the left to free it of the plug supports.
- Page 7 About storage drawer and cover removal. Not all features are on all models. Adjustable Humidity Drawer Slide the control all the way to the HIGH setting to provide high humidity recommended for most vegetables. Drawer and Cover Removal Drawers can be removed easily by grasping the sides and lifting up slightly while pulling drawers past the stop location.
-
Page 8: Automatic Icemaker
You will hear a buzzing sound each time Feeler arm model the icemaker fills with water. The icemaker will fill with water when it cools to 15°F. A newly-installed refrigerator may take 12 to 24 hours to begin making ice cubes. Icemaker Accessory Kit... -
Page 9: Shelves
Use warm water and baking soda solution—about a tablespoon (15 ml) of baking soda to a quart (1 liter) of water. This both cleans and neutralizes odors. Rinse and wipe dry. -
Page 10: The Refrigerator
0 position, and clean the interior with a baking soda solution of one tablespoon (15 ml) of baking soda to one quart (1 liter) of water. Leave the doors open. Preparing to Move Secure all loose items such as grille, shelves and drawers by taping them securely in place to prevent damage. -
Page 11: Before You Begin
• Install it on a floor strong enough to support it fully loaded. Refrigerator Models 15, 16, 17, 18 CLEARANCES Allow the following clearances for ease of installation, proper air circulation and plumbing and electrical connections. -
Page 12: Installing The Water Line
Approved plastic refrigerator tubing kits are available in the following lengths: 2′ (0.6 m) 6′ (1.8 m) 15′ (4.6 m) 25′ (7.6 m) Be sure that the kit you select allows at least 8′ (2.4 m) as described above. NOTE: The only approved plastic tubing is that supplied in the refrigerator tubing kits listed above. - Page 13 Installation Instructions WHAT YOU WILL NEED • A water supply kit (containing tubing, shutoff valve and fittings listed below) is available at extra cost from your dealer or from Parts and Accessories, 1.888.261.3055. • A cold water supply. The water pressure must be between 20 and 120 p.s.i.
- Page 14 INSTALLING THE WATER LINE FASTEN THE SHUTOFF VALVE Fasten the shutoff valve to the cold water pipe with the pipe clamp. Pipe Clamp Saddle-Type Shutoff Valve NOTE: Commonwealth of Massachusetts Plumbing Codes 248CMR shall be adhered to. Saddle valves are illegal and use is not permitted in Massachusetts. Consult with your licensed plumber.
-
Page 15: Shutoff Valve
Installation Instructions CONNECT THE TUBING TO THE REFRIGERATOR NOTES: • Before making the connection to the refrigerator, be sure the refrigerator power cord is not plugged into the wall outlet. • We recommend installing a water filter if your water supply has sand or particles that could clog the screen of the refrigerator’s water valve. -
Page 16: Reversing The Door Swing
ON (down) position. The icemaker will not begin to operate until it reaches its operating temperature of 15°F (–9°C) or below. It will then begin operation automatically. NOTE: In lower water pressure conditions, the water valve may turn on up to 3 times to deliver enough water to the icemaker. -
Page 17: Before You Start
Installation Instructions BEFORE YOU START 1.1 Unplug the refrigerator from its electrical outlet. 1.2 Empty all door shelves, including the dairy compartment. CAUTION: Do not let either door drop to the floor. To do so could damage the door stop. REMOVE THE FREEZER DOOR 2.1 Tape the door shut with masking tape. -
Page 18: Remove The Freezer Door
REVERSING THE DOOR SWING REMOVE THE FREEZER DOOR (CONT.) 2.6 Transfer the 2 screws from the opposite side of the cabinet to the screw holes vacated by the top hinge removal. REMOVE THE FRESH FOOD DOOR 3.1 Tape the door shut with masking tape. 3.2 Using a 5/16″... - Page 19 Installation Instructions REVERSING THE HARDWARE 4.1 Remove the base grille (if your refrigerator has one) by pulling it straight out. 4.2 Move the bottom hinge bracket (and shim glued to it) and plastic washer from the right side to the left side.
-
Page 20: Rehanging The Doors
REVERSING THE DOOR SWING REHANGING THE DOORS 5.1 Rehang the fresh food door 5.1.1 Lower the fresh food door onto the bottom hinge pin. Be sure the washer is in place on the pin. Hinge Plastic Bracket Hinge Washer Bracket Models with a hinge bracket Models with a hinge bracket that has 2 screw holes. -
Page 21: Normal Operating Sounds
Normal operating sounds. Newer refrigerators sound different from older refrigerators. Modern refrigerators have more features and use newer technology. Do you hear what I hear? These sounds are normal. HUMMM... WHOOSH... The new high efficiency compressor may run faster and longer than your old refrigerator and you may hear a high-pitched hum or pulsating sound while it is operating. -
Page 22: Before You Call For Service
Before you call for service… Troubleshooting Tips Save time and money! Review the charts on the following pages first and you may not need to call for service. Problem Possible Causes Refrigerator does not Refrigerator in defrost cycle. operate Temperature control dial in 0 position. - Page 23 Problem Possible Causes Automatic icemaker Icemaker power switch does not work is not on. (on some models) Water supply turned off or not connected. Freezer compartment too warm. Piled up cubes in the storage bin cause the icemaker to shut off. Frequent “buzzing”...
- Page 24 Notes.
- Page 25 GE Service Protection Plus GE, a name recognized worldwide for quality and dependability, offers you Service Protection Plus ™ —comprehensive protection on all your appliances— No Matter What Brand! Benefits Include: • Backed by GE • All brands covered • Unlimited service calls •...
-
Page 26: Serial Number
Consumer Product Ownership Registration Dear Customer: Thank you for purchasing our product. Registration for Americana Thank you for placing your confidence in us. We are proud to have you as a customer! Follow these three steps to protect your new appliance investment: 1 2 3 Complete and mail your Consumer... -
Page 27: Refrigerator Warranty
Refrigerator Warranty. All warranty services for Americana Service Centers, or an authorized Customer Care To schedule service, call 800.432.2737. For The Period Of: We Will Replace: One Year Any part of the refrigerator which fails due to a defect in materials or workmanship. From the date of the During this full one-year warranty, we will also provide, free of charge, all labor original purchase... -
Page 28: Consumer Support
Consumer Support. Schedule Service Expert GE repair service is only one step away from your door. Schedule service at your convenience by calling 800.432.2737 during normal business hours. In Canada, call 1.800.361.3400 Extended Warranties Purchase a GE extended warranty and learn about special discounts that are available while your warranty is still in effect. - Page 29 ....16–20 Instalación de la tubería del agua ....12–15 Preparación para instalar el refrigerador .
-
Page 30: Precauciones De Seguridad
Unidos) o en la lista CSA (en Canadá), que tenga un enchufe de tipo conexión a tierra y salida y que el grado eléctrico del cable sea de 15 amperios (mínimo) y 120 voltios. los dedos o las manos en el mecanismo de la máquina de hielos mientras el refrigerador esté... -
Page 31: Cómo Conectar La Electricidad
¡ADVERTENCIA! CÓMO CONECTAR LA ELECTRICIDAD Bajo ninguna circunstancia, no corte ni retire la tercera pata (conexión a tierra) del cable de electricidad. Por seguridad personal, este aparato debe estar correctamente conectado a tierra. El cable eléctrico de este aparato está provisto de un enchufe de tres patas (conexión a tierra) que encaja en un tomacorriente estándar de 3 orificios (conexión a tierra) para minimizar la posibilidad... -
Page 32: Control
Sobre el dial de control de la temperatura. Girar el dial a 0 interrumpe el enfriamiento en ambos compartimientos: el compartimiento de alimentos frescos y el congelador, aunque no apaga el suministro de corriente hacia el refrigerador. Niveles de control Dial de control de la temperatura El dial de control de la temperatura tiene nueve niveles más 0. -
Page 33: Estantes
Sobre los estantes del compartimiento de alimentos frescos. Los soportes de los estantes en diferentes niveles le permiten adaptar el espacio de los estantes según sus necesidades. No todas las características están presentes en todos los modelos. Estantes medios Un extremo del estante descansa sobre Levante hacia arriba un soporte moldeado en el costado;... -
Page 34: Gavetas De Almacenamiento
Sobre los estantes del compartimiento del congelador. Algunos modelos tienen un estante con bandeja para hielo y otros tienen un estante completo de escalón. Estante con bandeja para hielo Soportes de tapón Para retirar el estante con bandeja para hielo, levante el lado izquierdo del estante de sus soportes, luego hale el estante hacia la izquierda para liberarlo de los soportes de tapón. - Page 35 Sobre la remoción de la gaveta de almacenamiento y cubierta. No todas las características están presentes en todos los modelos. Gaveta preservadora de humedad ajustable Deslice el control completamente hasta la posición HIGH (alto) para ofrecer la alta humedad recomendada para la mayoría de los vegetales.
-
Page 36: Máquina De Hielos Automática
Escuchará un zumbido cada vez que la máquina de hielos se llene de agua. La máquina de hielos se llenará de agua cuando se enfríe hasta 15°F. Un refrigerador recién instalado se puede tomar entre 12 y 24 horas para empezar a hacer cubos de hielo. - Page 37 Use una solución de agua tibia y bicarbonato—una cucharada (15 ml) de bicarbonato para un cuarto (1 litro) de agua. Esto limpia y neutraliza los olores. Enjuague y seque.
- Page 38 Gire el dial de control de la temperatura hacia la posición 0 (apagado), y limpie el interior con una solución de una cucharada de bicarbonato (15 ml) y un cuarto (1 litro) de agua. Deje las puertas abiertas. Fije el interruptor eléctrico en la posición de O (apagado) o mueva el brazo de llenado a la posición STOP (hacia arriba)
- Page 39 • Instálela en un piso fuerte para que lo soporte con carga completa. Refrigerador Modelos 15, 16, 17, 18 ÁREA Permita el siguiente espacio para una fácil instalación, apropiada circulación del aire y conexiones de plomería y eléctricas.
- Page 40 GE están disponibles en las siguientes longitudes: 2′ (0,6 m) 6′ (1,8 m) 15′ (4,6 m) 25′ (7,6 m) Asegúrese de que el kit que haya seleccionado permita al menos 8 pies (2,4 m) como se describe arriba. NOTA: La única tubería de plástico aprobada de GE es la que viene provista con los kits de tubería para el...
- Page 41 Instrucciones para la instalación QUÉ NECESITA (CONT.) • Un kit de suministro de agua de GE (contiene tubería, válvula de cierre y accesorios enumerados abajo) está disponible a un costo adicional en su tienda o por medio de Partes y Accesorios, 800.626.2002. •...
- Page 42 Instrucciones para la instalación CÓMO INSTALAR LA TUBERÍA DEL AGUA INSTALE LA VÁLVULA DE CIERRE Una la válvula de cierre a la tubería de agua fría con la abrazadera para el tubo. Abrazadera para el tubo Válvula de cierre tipo silla NOTA: Se deberán seguir los Códigos 248CMR de Plomería para el Estado de Massachusetts.
- Page 43 I (encendido). En los modelos de brazo de llenado mueva el brazo de llenado a la posición ON (hacia abajo). La máquina de hielos no empezará a operar hasta que alcance su temperatura de operación de 15°F (–9°C) o menor. Luego, empezará a operar automáticamente. Interruptor...
- Page 44 Instrucciones para la instalación CÓMO INVERTIR EL VAIVÉN DE LA PUERTA NOTAS IMPORTANTES Al invertir el vaivén de la puerta: • Lea las instrucciones completamente antes de empezar. • Maneje las partes con cuidado para evitar raspar la pintura. • Ponga los tornillos con su parte correspondiente para evitar usarlas en el lugar equivocado.
- Page 45 Instrucciones para la instalación RETIRE LA PUERTA DEL CONGELADOR 2.1 Pegue la puerta cerrada con cinta de enmascarar. 2.2 Con un destornillador de casquillo de cabeza hexagonal de 5/16,″ retire los tornillos que sostienen la bisagra superior del gabinete. 2.3 Levante la bisagra (y la lámina adjunta) directamente hacia arriba para liberar el pasador de la bisagra del casquillo en la parte superior de la puerta y colóquela a un lado,...
-
Page 46: Instrucciones Para La Instalación Cómo Invertir El Vaivén De La Puerta
Instrucciones para la instalación CÓMO INVERTIR EL VAIVÉN DE LA PUERTA RETIRE LA PUERTA DE ALIMENTOS FRESCOS 3.1 Pegue la puerta cerrada con cinta de enmascarar. 3.2 Usando un destornillador de casquillo de cabeza hexagonal de 5/16″ y una llave abierta de 5/16,″... - Page 47 Instrucciones para la instalación CÓMO INVERTIR LOS ELEMENTOS DE SOPORTES 4.1 Retire la rejilla de la base (si su refrigerador la incluye) halándola directamente hacia fuera. 4.2 Mueva el gancho de la bisagra inferior (y lámina pegada a ésta) y la arandela plástica del lado derecho al izquierdo.
- Page 48 Instrucciones para la instalación CÓMO INVERTIR EL VAIVÉN DE LA PUERTA CÓMO VOLVER A COLGAR LAS PUERTAS 5.1 Vuelva a colgar la puerta de los alimentos frescos 5.1.1 Baje la puerta de los alimentos frescos al pasador de la bisagra inferior. Asegúrese de que la arandela esté...
- Page 49 Sonidos normales de operación. Los refrigeradores más nuevos producen sonidos diferentes a los modelos más antiguos. Los refrigeradores modernos tienen más funciones y usan tecnología más reciente. ¿Usted escucha lo que yo escucho? Estos sonidos son normales. HMMMM... WHOOSH... El nuevo compresor de alta eficiencia puede funcionar más rápido y durar más que el de su refrigerador anterior y puede escuchar un zumbido de tono alto o un sonido pulsante mientras opera.
-
Page 50: El Refrigerador
Antes de llamar a solicitar servicio… Consejos para la solución de problemas ¡Ahorre tiempo y dinero! Revise las tablas en las siguientes páginas primero y quizás no necesite llamar a solicitar el servicio. Problema Posibles causas El refrigerador no opera El refrigerador está... - Page 51 Problema Posibles causas La maquina de hielos El interruptor de corriente de automática no funciona de la máquina de hielos no está (en algunos modelos) encendido. El suministro del agua está apagado o no está conectado. El compartimiento del congelador no es muy frío. Hay cubos amontonados en en el recipiente de almacenamiento que causan que la máquina de...
- Page 52 Notas.
- Page 53 Notas. www.AmericanaAppliances.com...
- Page 54 Notas.
-
Page 55: Garantía
Garantía del Refrigerador. Todos los servicios de la garantía para Americana proporcionados por GE centros de fábrica o nuestros prestadores Customer Care una cita de servicio, llame al 1.800.432.2737. Durante: GE reemplazará: Un año Cualquier parte del refrigerador que falle debido a un defecto en materiales o mano de obra. A partir de la fecha Durante este año de garantía completa, GE también proporcionará, sin costo, mano de obra y de compra original... -
Page 56: Soporte Al Consumidor
Soporte al Consumidor. Solicite una reparación El servicio de expertos GE está a tan sólo un paso de su puerta. Programe el servicio a su conveniencia llamando al 800.432.2737 durante horas normales de oficina. Garantías ampliadas Compre una garantía ampliada y obtenga detalles sobre descuentos especiales disponibles mientras su garantía está...