Table of Contents
Advertisement
Advertisement
Table of Contents

Related Manuals for HTC T-Mobile myTouch 4G


Summary of Contents for HTC T-Mobile myTouch 4G
- Page 1 Your T-Mobile myTouch 4G User guide...
- Page 2 And finally, a few important words from our legal team (LIMITATION OF DAMAGES) To the maximum extent permitted by applicable law, in no event shall HTC or its affiliates be liable to you, any user, or third party for any indirect, special, consequential, incidental or punitive damages of any kind,...
-
Page 3: Conventions Used In This Guide
Conventions used in this guide In this user guide, we use the following symbols to indicate useful and important information: This is a note. A note often gives additional information, such as what happens on your phone when you choose to do or not to do a certain action. A note also provides information that may only be applicable to some situations. -
Page 4: Table Of Contents
Adding folders on your Home screen ................26 Rearranging or removing widgets and icons on your Home screen ....27 Phone calls Making calls ..........................28 Receiving calls ........................... 30 HTC Caller ID..........................31 Using in-call options........................31 Using Call log ..........................33 Wi-Fi calling..........................34 Call services ..........................34... -
Page 5: Contacts
Accounts and sync Synchronizing with online accounts ..................55 Synchronizing with your computer..................57 About Multimedia Sync by doubleTwist ................62 Social Facebook for HTC Sense......................63 Tweeting on your phone [Update screenshots]............64 Friend Stream ..........................66 Chatting in Google Talk ......................68 Email Using Gmail...........................71... - Page 6 Contents Changing Calendar settings ....................87 About the Calendar widget....................88 Clock and Weather About the Clock app....................... 89 Using Desk Clock........................89 Using World Clock ........................90 Setting the alarm clock ......................91 Checking weather........................92 Internet connections Data connection........................95 Wi-Fi ..............................
- Page 7 Contents Maps and location Turning on location services....................128 Google Maps ..........................128 More apps Watching videos on YouTube.................... 135 Reading news feeds ....................... 136 Working on documents, spreadsheets, and presentations ........138 Keeping track of your stocks....................139 Listening to FM Radio......................140 Recording your voice ......................
-
Page 8: Inside The Box
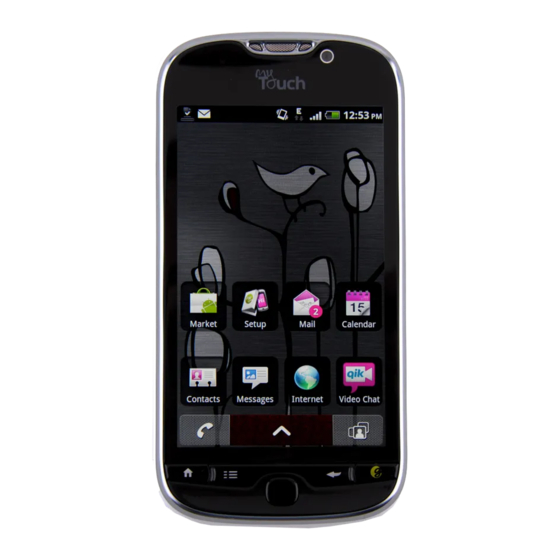
Basics Basics Inside the box You will find the following inside the box: T-Mobile myTouch 4G phone Battery (preinstalled) microSD card (preinstalled) USB cable 3.5mm stereo headset Power adapter Quick start guide Safety and regulatory guide Your phone Front panel... -
Page 9: Contacts
Basics Left and right panels 1 VOLUME UP 2 VOLUME DOWN 3 Dock contacts 4 USB connector 5 CAMERA Back panel 1 LED flashlight 2 5 megapixel camera 3 Speaker 4 Back cover Top panel 1 POWER 2 3.5mm headset jack... -
Page 10: Back Cover
Basics Back cover Removing the back cover Remove the bottom cover to access the battery compartment, SIM card slot, and storage card slot. 1. With the phone switched off, hold your phone securely with the front facing down. 2. With your finger, lift up the back cover from the small opening at the back of the phone to remove it. -
Page 11: Storage Card
Basics 2. With the SIM card’s gold contacts facing down and its cut-off corner facing out, push the SIM card all the way into the SIM card slot. Removing the SIM card 1. Take the back cover off. See "Removing the back cover". 2. -
Page 12: Battery
Basics Removing the storage card while the phone is on When you need to remove the storage card while the phone is on, unmount the storage card first to prevent corrupting or damaging the files in the storage card. 1. On the Home screen, press MENU, and then tap Settings. 2. -
Page 13: Contacts
Basics Inserting the battery 1. Remove the back cover. See "Removing the back cover". 2. Insert the contacts side of the battery first and then gently push the battery into place. Charging the battery The battery is partially charged when shipped. Before you turn on and start using your phone, it is recommended that you charge the battery. -
Page 14: Switching Your Phone On Or Off
Basics Switching your phone on or off Switching your phone on Press the POWER button. Easy. When you turn on the phone for the first time, you’ll need to set it up. See the Getting started chapter for details. Switching your phone off 1. -
Page 15: Getting Started
Getting started Getting started Setting up your phone for the first time When you turn on your phone for the first time, your phone guides you to set up your Home screen with widgets and shortcuts and add email, Mobile Web Cam, and social network accounts. -
Page 16: Status And Notifications
Getting started Press HOME to return to the main Home screen (that is, the center home screen). Need more? You can add 2 more screens to your Home screen for a total of 7 screens. To add 2 more screens, press HOME > MENU, tap Settings > Personalize, and then select the Home screen pages check box. -
Page 17: Contacts
Getting started HSDPA connected Speakerphone on HSDPA in use Wired microphone headset connected Roaming Wired headset connected No signal Bluetooth is on No SIM card installed Connected to a Bluetooth device Connected to a Wi-Fi network Airplane mode Data synchronizing GPS is on Alarm is set Notification icons... -
Page 18: Notifications Panel
Getting started Bluetooth pairing request Storage card is safe to remove or storage card is being prepared Phone software update available No storage card installed on the phone Faves event notification Storage card is low on free space Song is playing General notification FM Radio app in use More (not displayed) notifications... - Page 19 Getting started Opening the Notifications panel Press and hold the status bar, then slide your finger downward to open the Notifications panel. If you have several notifications, you can scroll down the screen to see them all. You can also open the Notifications panel on the Home screen by pressing MENU and then tapping Notifications.
-
Page 20: Connecting Your Phone To A Computer
Select this option to synchronize contacts, calendar, and other information between your computer and your phone. You need to download and install HTC Sync first on your computer before this option is made available. For more information, see "Synchronizing with your computer"... -
Page 21: Searching Your Phone And The Web
Getting started 6. Do one of the following: Disconnect the phone from the computer. If you want to keep the phone connected to the computer but want the phone to be able to access the storage card, open the Notifications panel, tap Disk drive, select an option except Disk drive, and then tap Done. -
Page 22: Adjusting The Volume
Getting started Adjusting the volume Adjusting the ringer volume changes the volume level of the phone ringtone, while adjusting the media volume changes the volume level of sound notifications and music or video playback. Adjusting the ringer volume Press the VOLUME UP or VOLUME DOWN button on the left panel of the phone to adjust the ringer volume to your desired level. - Page 23 Getting started Switching to Sleep mode Quickly press the POWER button to turn off the display and switch your phone to Sleep mode. Your phone also automatically goes into Sleep mode when it’s idle for a while. Waking up from Sleep mode Your phone automatically wakes up when you have an incoming call.
-
Page 24: Personalizing
Personalizing Personalizing Personalizing your phone with myModes Your phone becomes multiple phones in one when you use myModes. By using myModes, you instantly turn your phone into a perfect kid-centric phone, work phone, or when-you’re-at-home phone. Using a preset mode Your phone features preset modes, each preconfigured with a different wallpaper and collection of widgets that reflect different moments in your life. -
Page 25: Changing Your Wallpaper
Personalizing Changing your wallpaper Personalizing your wallpaper with your favorite photo is a quick and easy way to change the feel of your phone and give it a fresh look. Browse the collection of wallpapers included in your phone or choose from photos that you have taken with the camera. -
Page 26: Adding Icons And Other Shortcuts On Your Home Screen
Personalizing Adding icons and other shortcuts on your Home screen Place app icons on your Home screen to open apps quicker. You can also add shortcuts to settings and specific information such as a bookmarked webpage, someone’s phone number, a music playlist, and many other items, to your Home screen. -
Page 27: Rearranging Or Removing Widgets And Icons On Your Home Screen
Personalizing Rearranging or removing widgets and icons on your Home screen Rearrange the widgets and icons on your Home screen to give room for adding more items to the Home screen. You can also remove widgets and icons that you don’t frequently use. -
Page 28: Phone Calls
Phone calls Phone calls Making calls Your T-Mobile SIM card is preset with a PIN (personal identification number) that is provided by T-Mobile. When prompted, enter the preset PIN, then tap Enter. If you enter the wrong PIN three times, the SIM card is blocked. If this happens, you can unblock it with the PUK (PIN Unblocking Key) obtained from T-Mobile. - Page 29 Phone calls Assigning a speed dial key 1. On the Home screen, tap 2. Press MENU, and then tap Speed dial > Add new. 3. Enter the name of the contact you want to add. When the name comes up in the list, tap the name.
-
Page 30: Receiving Calls
Phone calls 5. When the phone dialer screen opens with the phone number already entered, tap Call. To find out more about using email on your phone, see the Email chapter. Making an emergency call You can make emergency calls from your phone even if you don’t have a SIM card installed or your SIM card has been blocked. -
Page 31: Htc Caller Id
If the phone is already facing down, the phone will still ring when there are subsequent incoming calls. HTC Caller ID Everytime you make a call or your friend gives you a ring, you get to see your friend’s latest status update from social networks like Facebook or Twitter right on the call screen. - Page 32 Phone calls 2. To switch between the calls, tap the person you want to talk to on the screen. 3. To end the current call and return to the other call, tap End call. Setting up a conference call Conference calling with your friends, family, or co-workers is easy. Make the first call (or accept a call), and then simply dial each subsequent call to add to the conference.
-
Page 33: Using Call Log
Phone calls Ending a call Do one of the following to end the call: On the call screen, tap End call. If the phone display is off, press POWER to turn on the screen so you can tap End call. Slide open the Notifications panel, then tap If you are using the provided wired headset, press the button to end the call. -
Page 34: Wi-Fi Calling
Phone calls When saving the number to an existing contact, tap a contact stored on your phone, and then select the number type. 4. Tap Save. To find out how to add new contacts or edit the contact information, see the Contacts chapter. -
Page 35: Turning Airplane Mode On Or Off
Phone calls Additional settings Enable or disable operator services such as caller ID and call waiting. Turning Airplane mode on or off In many countries, you are required by law to turn off the phone while on board an aircraft. A way to turn off the phone function is to switch your phone to Airplane mode. -
Page 36: About Contacts
2. On the Contacts tab, tap Me. If you are logged in to your Facebook account through Facebook for HTC Sense, instead of Me, you will see the name you use in Facebook. Tap your name, press MENU, and then... -
Page 37: Ways Of Getting Contacts Into Your Phone
Contacts 3. Enter your name and contact details. 4. Tap Save. Ways of getting contacts into your phone Gmail Google contacts are imported to your phone after you sign in to your Google Account. You can also create more Google contacts right from your phone. -
Page 38: Merging Contact Information
Contacts Importing a contact from an Exchange ActiveSync account You can search for a work contact from your Exchange ActiveSync account, and then copy it to your phone. You need to have your Exchange ActiveSync account set up on your phone first. To find out how, see "Adding a Microsoft Exchange ActiveSync account"... -
Page 39: Your Contacts List
Contacts Viewing a list of all your linked contacts 1. On the Home screen, tap Contacts. 2. On the Contacts tab, press MENU, and then tap More > Linked contacts. 3. The All linked contacts list then opens where you can check the account types and information merged. -
Page 40: Filtering Your Contacts List
Contacts 1 Tap to edit your My contact card. 2 SIM card contact 3 Online status of a contact whom you are friends with in Google Talk. Online status icons are displayed if you’re signed in to Google Talk using your Google Account. For details, see "Chatting in Google Talk"in the Social chapter. -
Page 41: Contact Information And Conversations
Contacts 3. Tap the contact to open his or her contact details screen. See "Contact information and conversations"in this chapter for details. Backing up your contacts to the storage card 1. On the Home screen, tap Contacts. 2. On the Contacts tab, press MENU, and then tap Import/Export > Export to SD card. - Page 42 You’ll be able to see updates such as posted status messages, uploads, and profile changes from all these accounts. To find out more about Facebook for HTC Sense, see the Social chapter. 5 Gallery tab Shows the contact’s Facebook and Flickr photo albums. Tap an album to look at the photos in the album.
-
Page 43: Keyboard
Keyboard Keyboard Using the onscreen keyboard When you start an app or select a field that requires text or numbers, the onscreen keyboard becomes available. After entering your text, press BACK to close the onscreen keyboard. Entering text Use the following keys while entering text using the onscreen keyboard: Press and hold keys with white characters at the top to enter numbers, symbols, or accented letters. -
Page 44: Entering Text By Speaking
Keyboard Adjusting Swype settings 1. From the Home screen, press MENU, and then tap Settings. 2. Scroll down the screen, and then tap Language & keyboard > Swype. Switching to another input method By default, the Swype input method is used. You can choose to change the input method so you can use the compact QWERTY, phone keyboard, or voice to enter text. -
Page 45: Editing Text
Keyboard Editing text You can select, copy, or cut the text you enter using the onscreen keyboard, then paste it in another text field within or across apps. Some apps may offer their own way of selecting or copying text. Selecting text Highlight a portion of a text or select all that you want to copy or cut. -
Page 46: Adjusting Touch Input Settings
Keyboard Adjusting touch input settings To open the keyboard settings, on the Home screen, press MENU, and then tap Settings > Language & keyboard > Touch Input. Touch Input settings Keyboard types Select the keyboard layout to use. You can choose from QWERTY, Phone Keypad, or Compact QWERTY. -
Page 47: Messages
Messages Messages About Messages Keep in touch with important people in your life. Use the Messages app to compose and send text (SMS) and picture messages (MMS). On the Home screen, tap Messages. On the All messages screen, all your sent and received messages are neatly grouped into conversations, by contact name or phone number. -
Page 48: Sending A Picture Message (Mms)
Messages Enter the first few letters of a contact name or starting digits of a mobile number. As you type, matching names with phone numbers from your stored contacts are displayed. Tap a name or one of the contact’s number. Tap the icon, and then select the phone numbers of the contacts to whom you want to send the message. - Page 49 Messages 4. To add a subject line, press MENU and then tap Add subject. 5. Tap the box that says “Tap to add text”, and then enter your message. 6. Tap and then choose the type of attachment. Photo Select Camera to take a photo and attach it, or Gallery to attach a photo from your storage card.
-
Page 50: Resuming A Draft Message
Messages Resuming a draft message 1. On the All messages screen, press MENU, and then tap Drafts. 2. Tap the message to resume editing it. 3. When you finish editing the message, tap Send. Viewing and replying to a message Depending on your notification settings, the phone plays a ringtone, vibrates, or displays the message briefly in the status bar when you receive a new message. - Page 51 Messages Replying to another phone number of the contact When a contact has multiple phone numbers stored on your phone, you’ll see the particular phone number used within the message. There’s also a bold letter before the phone number to indicate the number type (for example, M stands for Mobile). Keep in mind that your response will be sent to the phone number of the latest message you’ve received from this contact.
-
Page 52: Managing Message Conversations
Messages Viewing all your push messages 1. On the Home screen, tap Messages. 2. Press MENU, and then tap Push messages. Managing message conversations Protecting a message from deletion You can lock a message so that it will not be deleted even if you delete the other messages in the conversation. -
Page 53: Setting Message Options
Messages Deleting a conversation 1. On the All messages screen, press and hold a contact (or phone number) whose messages you want to delete, and then tap Delete. While looking at the exchange of messages in a conversation, you can also press MENU and then tap Delete >... - Page 54 Messages MMS settings Delivery reports Receive a report on the delivery status of your message. Read reports Receive a report whether each recipient has read the message or deleted it without reading. Auto-retrieve Automatically retrieve all your picture messages completely. When selected, the picture message header plus the message body and attachments will automatically download to your phone.
-
Page 55: Accounts And Sync
Accounts and sync Accounts and sync Synchronizing with online accounts About online accounts These are some of the types of information your phone can sync with your online accounts: Gmail™ and Exchange ActiveSync email. Google and Exchange ActiveSync contacts, as well as your friends’ contact information in Facebook®... - Page 56 Accounts and sync Forgot your Google Account password? You need your Google Account password to sync Gmail, Calendar, and Google contacts to your phone. You also need this password to use Google Talk and download apps from Android Market. You need your Google Account password to sync Gmail, Calendar, and Google contacts to your phone.
-
Page 57: Synchronizing With Your Computer
Easily import your captured photos and videos from your phone to your computer. Sync bookmarks inside the “HTC Bookmarks” favorites folder on your computer and all bookmarks stored on your phone’s web browser. Install third-party mobile phone apps (not downloaded from Android Market) from your computer. - Page 58 (check the bottom-right side of your computer screen). You can double-click this icon to open HTC Sync. Visit the HTC support website from time to time to check for the most recent HTC Sync upgrade so you can download and install it.
- Page 59 Accounts and sync Setting the Music sync options Bring the music tracks and songs you play on your computer to your phone. If you have playlists created in iTunes® or Windows Media® Player, you can sync these too and enjoy them on the go. You can sync audio files in these formats: *.aac, *.amr, *.m4a, *.mid, *.midi, *.mp3, *.wav, and *.wma.
- Page 60 If you are using Firefox® and have selected it to sync with your phone, make sure to close all Firefox browser windows before you begin synchronization. When conflicting information are found on both the phone and computer, HTC Sync keeps the information from your computer.
- Page 61 Accounts and sync Setting Documents sync options You can sync files and documents from your computer to your phone. Make sure that your phone has the app needed to open or view such files and documents. Usually, your phone can open and view these file types: Microsoft Office 2003 and 2007 Word (.doc), Excel (.xls), and PowerPoint (.ppt), PDF files (.pdf), Text files (.txt).
-
Page 62: About Multimedia Sync By Doubletwist
Installing apps from your computer to your phone If you have app (*.apk files) on your computer, you can use HTC Sync to install them to your phone. We strongly recommend that you install only app that you trust. -
Page 63: Social
If you signed in to your Facebook account when you turned on and set up your phone for the first time, that means your Facebook account is linked to Facebook for HTC Sense on your phone. (If you did not do this, see the Accounts and sync chapter to find out how to sign in to Facebook for HTC Sense.) -
Page 64: Tweeting On Your Phone [Update Screenshots]
“Adding a social network account” in the Accounts and sync chapter. Twitter for HTC Sense and Peep share the same login credentials. This means that when you use Peep on your phone for tweeting, you can also link your contacts to their Twitter profiles via Twitter for HTC Sense. - Page 65 Social 5 All tweets tab. View all the tweets from people you follow and tweets that you have posted. 6 Mentions tab. View all tweets that mention your username using the “@[your username]” convention. 7 Direct message tab. View all private/direct messages that you have received or sent. 8 Favorites tab.
-
Page 66: Friend Stream
Accounts and sync chapter. To use your Facebook account on Friend Stream, you need to be signed in via Facebook for HTC Sense. See "Facebook for HTC Sense" in this chapter. 1 Tap in this area to compose and send a status update. - Page 67 Social 4 When you tap someone’s name, you can: Check the person’s profile details. Look at the person’s Facebook wall. Check the person’s posted tweets. 5 Slide to the other tabs to view social network updates grouped as status updates only, photo uploads, links, updates from members of your Facebook list, or social network notifications.
-
Page 68: Chatting In Google Talk
Social Commenting on and liking Facebook posts After tapping someone’s status update on the All updates tab, you can do the following: 1 Tap a photo or the album name shown in the status update to view and comment on the album photos using the Gallery app. - Page 69 Social 5. While chatting, press MENU and then tap any of these options: Chat off record Your Google Talk messages are stored in the Chats folder of your Gmail account. Tap this option if you don’t want to store your chat messages. Switch chats If you have more than one chat going, tap this to switch chat with another friend.
- Page 70 Social View all friends Initially, only those friends that you often chat with — the most popular — are shown in the Friends list. To view all your friends, press MENU, and then tap All friends. To view only friends that you often chat with, press MENU, and then tap Most popular.
-
Page 71: Email
Email Email Using Gmail Gmail is Google’s web-based email service. When you first set up your phone, make sure you sign into your Google Account so you can send and receive Gmail messages. If you didn’t do so, go to the Accounts & sync setting to sign in. You can also set up more than one Google Account on your phone, and then switch between accounts in Gmail. - Page 72 Email Sending a new message 1. From the Home screen, tap > Gmail. 2. In the Inbox, press MENU and then tap Compose. 3. Enter the message recipient’s email address in the To field. If you are sending the email to several recipients, separate the email addresses with a comma. As you enter email addresses, any matching addresses from your contacts list are displayed.
- Page 73 Email Replying to or forwarding an email message 1. From the Home screen, tap > Gmail. 2. In the Inbox, tap the email message or conversation. If the email message is long, swipe your finger up the screen. 3. Tap Reply, Reply to all, or Forward. 4.
- Page 74 Email Filtering conversations You can choose to display conversations that have the same label or only those that are starred. 1. From the Home screen, tap > Gmail. 2. In the Inbox or in another conversation list, press MENU, and then tap Go to labels.
-
Page 75: Using Mail
Email Batch operations When selected, this adds a check box to the left of each conversation so you can add it to a batch. Clear search history Remove the searches you have performed. Labels Set how many days and which Gmail labels to synchronize. See "Changing Gmail synchronization settings"... - Page 76 Email If this is your first time to add an email account in Mail, tap Microsoft Exchange ActiveSync on the Choose a mail provider screen. If you’ve already added an email account in Mail, press MENU, and then tap More > New account. If the Choose a mail provider screen is displayed, tap Microsoft Exchange ActiveSync.
- Page 77 Email Different views of your inbox If you have lots of email messages, it may take you some time to browse through the long list and find a single email or related email messages. To skim through your email messages easier, tap one of the following tabs to change the view of your inbox: Displays email messages as individual items.
- Page 78 Email 2. Press and hold your two fingers on any email message, and then slightly drag downward without lifting your fingers. Your screen then jumps to the next or previous set of email messages based on your chosen sorting order. For instance: If your email messages are arranged by date, your screen jumps to the email messages received on the previous or next date, depending on your sorting order.
- Page 79 Email Deleting all messages 1. First tap the check box of any email message. 2. Press MENU, and then tap Select all. 3. Tap Delete. Switching to other mail folders 1. Without any email message selected, press MENU, and then tap Folders. 2.
- Page 80 Email 7. Tap Send to send the message immediately, or tap Save as draft to send it later. If there’s no Wi-Fi or data connection available or Airplane mode is on when you send your email, the email will be saved to the Outbox folder. Once there’s Wi-Fi or data connection available, the saved email will be sent automatically next time your phone syncs.
- Page 81 Email 4. Set the dates and times for the period when you will be out of the office. 5. Enter the auto-reply message. 6. Tap Save. Sending a meeting request 1. Switch to your Exchange ActiveSync account. 2. Press MENU, and then tap More > New Meeting invitations. 3.
-
Page 82: Calendar
Google accounts. If you have not signed in to your Google Account yet, see the Accounts and sync chapter to find out how to sign in. If you’re using Microsoft Outlook on your computer, you can set up HTC Sync on your computer to sync Outlook Calendar with your phone’s Calendar. See "Synchronizing with your computer"... -
Page 83: Changing Calendar Views
Calendar If it is a special occasion such as a birthday or a whole-day event, set the From and To date, then select the All day check box. 6. Enter the event location and description. 7. Set the reminder time. You can add another reminder time in a Google Calendar event. - Page 84 Calendar Month view In Month view, you’ll see markers on days that have events. When in Month view: on the bottom left of the screen to switch to Agenda view. Tap on the bottom right to create a new event. Tap a day to view the events of that day.
-
Page 85: Managing Calendar Events
Calendar Week view Week view displays a chart of the events of one week. When in Week view: You can press and hold on a time slot to create a new event at that time. Tap an event to view its details. Slide left or right across the screen to view earlier or later weeks. -
Page 86: Calendar Event Reminders
Calendar Deleting an event There are a number of ways to delete an event. While viewing the summary of an event on the Event details screen, press MENU and then tap Delete event. In Day, Agenda or Week view, press and hold an event and then tap Delete. When editing an event, scroll down to the bottom of screen and then tap Delete. -
Page 87: Displaying And Synchronizing Calendars
Calendar Displaying and synchronizing calendars You can select which calendars to show or hide on your phone’s Calendar, and which ones to keep synchronized. Showing or hiding calendars In any Calendar view, press MENU, tap More > Calendars, and then select or clear a calendar to show or hide it. -
Page 88: About The Calendar Widget
Calendar Set alerts & notifications Configure event reminders to open an alert, send you a notification, or turn off event notifications on your phone. Default reminder time Choose how soon before an event you want to be notified. Select ringtone Choose a ringtone to sound when you receive an event reminder. -
Page 89: Clock And Weather
Clock and Weather Clock and Weather About the Clock app Get more from the Clock app than just the regular date and time. Use your phone as a desk clock complete with weather information. Or let it serve as a night clock or a screensaver. -
Page 90: Using World Clock
Clock and Weather You can change the Desk Clock screen to display the date and time of another time zone. To find out how to select a different time zone, see "Setting the time zone, date, and time". Using World Clock Use the Clock app’s World Clock screen to check the current time in several places around the globe simultaneously. -
Page 91: Setting The Alarm Clock
Clock and Weather 8. Tap the Use 24-hour format check box to toggle between using a 12-hour or a 24-hour time format. 9. Tap Select date format then select how you want dates to be displayed. (The selected date format also applies to the date displayed in the alarm clock.) From the Home screen, you can also press MENU and then tap Settings >... -
Page 92: Checking Weather
Clock and Weather Select the Vibrate check box if you want your phone to also vibrate when the alarm goes off. 6. When you’ve finished setting the alarm, tap Done. To turn off an alarm, tap (clear) the check box of that alarm. If you need to set more than three alarms, press MENU while you’re on the Alarms screen and then tap Add alarm. - Page 93 Clock and Weather 2. On the Home screen, slide to the panel where the Weather widget is located. 3. On the Weather widget, you’ll first see your current location’s weather. To check the weather in other cities, swipe your finger up or down the screen. 4.
- Page 94 Clock and Weather Deleting cities from the Weather widget 1. On the Home screen, slide to the panel where the Weather widget is located, and then tap the widget. 2. On the Weather screen, press MENU and then tap Delete. You can also open the Weather screen through the Clock and Desk dock apps.
-
Page 95: Internet Connections
Internet connections Internet connections Data connection Your phone will be automatically set up to use T-Mobile’s data connection when you turn on your phone (if the SIM card is inserted) for the first time. Turning the data connection on or off Turning your data connection off can help save battery life and save money on data charges. - Page 96 Internet connections 5. Tap the Wi-Fi network you want to connect to. If you selected an open network, you’ll be automatically connected to the network. If you selected a network that is secured with WEP, enter the key and then tap Connect.
-
Page 97: Adding Connection Widgets
Internet connections Adding connection widgets Add the Mobile Network and Wi-Fi widgets or the Data dashboard widget to the Home screen to make it faster for you to turn on or off these connections. Tap the widget or icon on the dashboard to turn on or off the connection. To find out how to add widgets, see "Adding a widget"... -
Page 98: Using Your Phone As A Modem (Tethering)
Internet connections Connecting to a VPN 1. From the Home screen, press MENU, and then tap Settings. 2. Tap Wireless & networks > VPN settings. 3. In the VPNs section, tap the VPN that you want to connect to. 4. When asked, enter your log in credentials, and then tap Connect. When you’re connected, the VPN connected icon appears in the notification area of the title bar. - Page 99 Internet connections The password is the key other people need to enter on their device so they can connect and use your phone as a wireless router. 5. Select the Portable Wi-Fi Hotspot check box to turn on your phone’s wireless router.
-
Page 100: Web Browser
Web browser Web browser Using your phone’s web browser You must have an active data connection or Wi-Fi connection to access the Internet. To open the web browser and start surfing the Web, on the Home screen, tap Internet. Going to a webpage 1. - Page 101 Web browser Choosing when to show Flash content Choose which Flash® content you want to see by switching to On demand. By switching to On demand, you decide when Flash content appear on a webpage. 1. From the browser screen, press MENU, and then tap More > Settings > Enable plugins.
- Page 102 Web browser Opening a new browser window Open multiple browser windows to make it easier for you to switch from one website to another. You can open up to 4 browser windows. 1. While viewing a webpage, press MENU and then tap Windows. 2.
-
Page 103: Copying Text And Sharing
Web browser Viewing your downloads While viewing a webpage, press MENU and then tap More > Downloads. Copying text and sharing You can select text and then: Copy it. Share the text in a new email, text, or multimedia message or in your status update on a social network. -
Page 104: Viewing Bookmarks And Previously Visited
Web browser Copying and pasting text 1. After you have selected the text you want to copy, tap . The selected text is then copied to the clipboard. 2. In a text entry field (for example while composing a message), press and hold at the point where you want to paste the text. -
Page 105: Setting Browser Options
Web browser Viewing a page that you often visit 1. While viewing a webpage, press MENU, and then tap Bookmarks. 2. On the Most visited tab , navigate to the page you want to view, and then tap the page. Clearing the list of most visited pages 1. -
Page 106: Bluetooth
Bluetooth Bluetooth Bluetooth basics Turning Bluetooth on or off 1. From the Home screen, press MENU, and then tap Settings > Wireless & networks. 2. Select or clear the Bluetooth check box. An even easier way to turn Bluetooth on or off is with the Bluetooth widget or Bluetooth setting shortcut on the Home screen. -
Page 107: Disconnecting Or Unpairing From A Bluetooth Device
Bluetooth The pairing and connection status is displayed below the hands-free headset or car kit name in the Bluetooth devices section. When the Bluetooth headset or car kit is connected to your phone, the Bluetooth connected icon is displayed in the status bar. -
Page 108: Sending Information Using Bluetooth
Bluetooth Sending information using Bluetooth You can use Bluetooth to send information from your phone to another Bluetooth enabled device such as a phone or notebook computer. You can send the following types of information, depending on the device you are sending to: Photos and videos Calendar events Contacts... -
Page 109: Receiving Information Using Bluetooth
Bluetooth Where sent information is saved When you send information from your phone using Bluetooth, the location where it’s saved depends on the type of information and the receiving device. If you send a calendar event or contact, it is normally added directly to the corresponding app on the receiving device. - Page 110 Bluetooth When you open a received file, what happens next depends on the file type: Media files and documents are usually opened directly in a compatible app. For example, if you open a music track, it starts playing in the Media Room app.
-
Page 111: Camera
Camera Camera Camera basics Whether traveling for business or fun, enjoy taking photos and videos of your trip and encounters with your phone’s camera. Be sure to plug in your microSD card before you use your phone’s camera. Photos and videos captured with the camera will be stored onto your microSD card. -
Page 112: Taking A Photo
Camera Zooming Before taking a photo or video, you can first use the onscreen zoom bar to zoom in or out of your subject. When you’ve just opened the camera or switched between photo and video modes, the zoom bar shows on screen for a few seconds. To display it again so you can zoom, do the following: Tap anywhere on the Viewfinder screen. - Page 113 Camera Auto focusing Whenever you point the camera at a different subject or location, it shows the auto focus indicator at the center of the Viewfinder screen. Let the camera auto focus on the center of the screen. Or you can tap another area on the screen that you want to focus on.
-
Page 114: Recording Video
Camera Recording video 1. From the Home screen, tap > Camera. 2. Choose the video quality and other camera settings you want to use. See "Changing camera settings" for details. To record video in HD, set video quality to HD 720P. Or for sharing on the Web, select Online (HD). -
Page 115: Adding Effects
Camera Adding effects Want to make your photos look more interesting? Easy. Use the available camera effects to make your photos look like they’ve been taken through special lenses and filters. You can also add certain effects to videos. Choose an effect first before you start taking a photo or video. Just tap . - Page 116 Camera Widescreen When this check box is selected (default), photo resolutions (photo mode only) available for selection are in 5:3 ratio and you can use the entire Viewfinder screen to frame your subject. When not selected, photo resolutions available for selection are in standard 4:3 ratio.
-
Page 117: Photos, Videos, And Music
Photos, videos, and music Photos, videos, and music Browsing your Gallery About the Gallery app Relive the fun while viewing photos and videos of your latest travels or your pet’s newest tricks. Get an audience by tagging your Facebook and Flickr friends. You can even play your media on a TV screen. - Page 118 Photos, videos, and music All videos lets you view all videos that are stored in all the folders on the storage card. All downloads lets you view photos and videos that you downloaded. Folders in your storage card that contain photos and videos will also be treated as albums and will be listed below the preset albums.
- Page 119 Photos, videos, and music Zooming in or out on a photo There are two ways you can zoom in or out of a photo: Tap the screen twice quickly to zoom in, then tap the screen twice quickly again to zoom out. You can also use pinch zooming.
- Page 120 Photos, videos, and music 3. In the menu that opens, tap Edit > Crop. You’ll see a crop box around the photo. 4. To adjust the crop box size, press and hold the edge of the box. When directional arrows appear, drag your finger inward to or outward to resize the crop box.
- Page 121 2. Tap the album where the photos or videos you want to share are in. 3. Tap , and then tap Facebook for HTC Sense. 4. Select the photos or videos you want to share and then tap Next. 5. Enter a different caption on each photo or video.
- Page 122 Photos, videos, and music 6. Slide to the left to go to the next photo or video. 7. Tap Upload. 8. Select which album to upload to and set privacy settings for the uploaded photos or videos. 9. Tap Done. Sharing photos or videos on Flickr You need to be logged in to your Flickr account to be able to upload photos or videos.
- Page 123 Photos, videos, and music 7. Tap Upload. 8. Select which album to upload to and set privacy settings for the uploaded photos or videos. 9. Tap Done. Sharing photos on Picasa You need to be signed in to a Google Account to be able to upload photos to the Picasa™...
-
Page 124: Listening To Music
Photos, videos, and music 3. Tap your account name or your friend’s account on the list to view the photos in the account. You can view photos in your online albums the same way as how you view photos in your storage card. Viewing photos on Flickr You need to be logged in to your Flickr account to view Flickr photos. - Page 125 Photos, videos, and music Tap the onscreen icons to control music playback, select a song to play, repeat songs, and more. 1 Tap the stars to rate the song. 2 Go to the Library. 3 Press and drag your finger across the progress bar to jump to any part of the song. 4 Turn shuffle on or off.
- Page 126 Photos, videos, and music Flipping through your albums Swipe your finger left or right across the screen to go to the next or previous music album. Browsing music in the Library on the Playback screen or Now playing list to go to the Library. In the Library, your music is organized by categories such as artists and albums.
-
Page 127: Sharing Media On Your Home Network
Photos, videos, and music Deleting playlists 1. In the Library, tap Playlists. 2. Press MENU and then tap Delete playlist. 3. Select the playlists to delete and then tap Delete. Sharing music using Bluetooth You can choose a song from the Library and send it to someone’s phone or your computer using Bluetooth. -
Page 128: Maps And Location
Maps and location Maps and location Turning on location services In order to find your location on your phone, you need to enable location sources. 1. From the Home screen, press MENU, and then tap Settings > Location. 2. Select one or both of the following: Use wireless networks Uses Wi-Fi or your mobile data connection to find your approximate location. - Page 129 Maps and location View information 1 Press and hold a location on the map. A balloon opens over for a random the location, with the address and a thumbnail from street location view (if available). 2 Tap the balloon to see more information. You can get directions to the location, check for nearby places of interest, and more.
-
Page 130: Searching For A Location
Maps and location 1. From the Home screen, tap > Maps. 2. Press MENU, and then tap Layers. 3. Select any of the following: Traffic (Available only in selected areas.) Real-time traffic conditions are displayed over roads as color-coded lines. Each color represents how fast the traffic is moving. - Page 131 Maps and location Details about the selected location displays on the screen. 6. Do any of the following: Tap the onscreen buttons to view the location on a map, get directions, view the location in Street View, if available, and more. Scroll down the screen to view more options.
- Page 132 Maps and location 7. Tap Show on map to view the directions on the map. 8. Tap the arrow buttons on the map to follow the directions. When you’re finished viewing or following the directions, press MENU and then tap More >...
- Page 133 Maps and location Responding to an invitation When you get a sharing request from a friend, you can: Accept and share back You and your friend can see each other’s locations. Accept, but hide my location You can see your friend’s location, but they can’t see yours.
- Page 134 Maps and location Changing privacy settings You have control over how and when you can be found by your friends. Only the last location sent to Latitude is stored with your Google Account. If you turn off Latitude or are hiding, no location is stored. 1.
-
Page 135: More Apps
More apps More apps Watching videos on YouTube Use the YouTube app to check out what’s popular on the online video-sharing website. Videos are conveniently categorized into Most viewed, Most discussed, and Top rated. You need an active Wi-Fi or data connection to access YouTube. The first time you use certain YouTube functions such as video sharing, sign in using your YouTube or Google Account, if you’re asked to do so. -
Page 136: Reading News Feeds
More apps Reading news feeds Don’t get left behind with yesterday’s stories. Use the News app to subscribe to news feeds that cover breaking news, sports, top blogs, and more. You can also get updates based on specific keywords you want. From the Home screen, tap >... - Page 137 More apps Reading a story 1. From the Home screen, tap > News. 2. On the Subscriptions tab, tap a channel. 3. Tap a story to read it. While reading the story, you can: Star the story as a favorite. Share a link to the story from the available options.
-
Page 138: Working On Documents, Spreadsheets, And Presentations
More apps News content Choose how to read news stories by default: whether as a summary or as a full web page article. Adding the News widget Read snippets of stories that you have subscribed to right on the Home screen. To find out how to add this widget to your Home screen, see "Adding a widget"... -
Page 139: Keeping Track Of Your Stocks
More apps Creating a new document or worksheet 1. On the Quickoffice main screen, press MENU, and then tap New. 2. Choose a file type to create: Word 97- 2003 document Excel 97 - 2003 workbook 3. Press MENU, and then tap Edit to use the online keyboard. For information about the onscreen keyboard, see the Keyboard chapter. -
Page 140: Listening To Fm Radio
More apps Deleting stock quotes and indices 1. On the Stocks main screen, press MENU, and then tap Delete. 2. Select the items you want to delete, and then tap Delete. Manually updating stock information On the Stocks main screen, press MENU, and then tap Update. Changing update schedule and color settings Downloading stock information automatically may incur additional fees from your mobile operator. - Page 141 More apps The first time you open FM Radio, it automatically scans for available FM stations, saves them as presets, and plays the first FM station found. 1 Drag to tune in to a frequency on the FM band. 2 Tap to fine tune the radio frequency by -0.1 MHz. 3 View the All presets list.
-
Page 142: Recording Your Voice
More apps To turn off completely and close FM Radio: on the upper-right corner of the FM Radio screen. Recording your voice Don’t just think out loud. Use Voice Recorder to quickly capture your thoughts. You can also record your voice and set it as a ringtone. You need to have a microSD card on your phone to use Voice Recorder. -
Page 143: Using Flashlight
More apps Using Flashlight Never get caught in the dark again. Use the Flashlight app to turn on your phone’s LED flashlight to shine a light wherever you need it. On the Home screen, tap > Flashlight.. To adjust the brightness of the light, simply tap the onscreen power button on the flashlight handle. -
Page 144: Finding And Installing Apps From Android Market
More apps Finding and installing apps from Android Market Android Market™ is the place to go to find new apps for your phone. Choose from a wide variety of free and paid apps ranging from productivity apps, entertainment, to games. When you find an app you want, you can easily download and install it on your phone with just a few taps of your finger. - Page 145 More apps 3. When you find the app that you like, tap it and read its description and user comments. 4. Tap Install (for free apps) or Buy (for paid apps). The subsequent screen notifies you whether the app will require access to your personal information or access to certain functions or settings of your phone.
- Page 146 More apps Uninstalling an app You can uninstall any app that you have downloaded and installed from Android Market. 1. From the Home screen, tap > Market > Downloads. 2. Tap the app you want to uninstall, and then tap Uninstall. 3.
-
Page 147: T-Mobile Applications
T-Mobile Applications Faves Gallery Faves Gallery helps you stay connected to the people who matter most in your life. Adding Faves contacts To add Faves contacts, you can create new contacts or add existing contacts from your phone. 1. On the Home screen, tap If you do not have any contacts in your Faves, a message box will appear to let you add Faves contacts quickly. -
Page 148: T-Mobile My Account
Email Editing a Faves contact 1. On the Home screen, tap 2. Select the myFaves contact you want to edit by positioning the contact’s photo in the center of the screen. 3. Press and hold the contact’s photo, and then tap Edit Fave on the options menu. 4. -
Page 149: T-Mobile My Device
Email My Account tabs There are four tabs in My Account: Activity, Alerts, Billing, and Plan & Services. Tap the tab to view the available options. Activity Check a summary of your phone usage. Alerts Check for alerts from T-Mobile. Billing Pay your bill online. -
Page 150: T-Mobiletv
Email Downloading and installing apps 1. On the Home screen, tap > AppPack. 2. Select the app you want to download. 3. Tap Install. T-MobileTV Watch TV right on your phone with T-MobileTV. Using T-Mobile TV 1. On the Home screen, tap >... -
Page 151: Security
Security Security Protecting your SIM card with a PIN Add another layer of security for your phone by assigning a PIN (personal identification number). Make sure you have the default SIM PIN provided by your mobile operator before continuing. 1. From the Home screen, press MENU, and then tap Settings > Security. 2. - Page 152 Security 4. On the Security screen, tap Lock phone after, then specify the idle time you can allow before the screen is locked. You can also clear the Use visible pattern on the Security screen if you don’t want your screen lock pattern to display as you draw it onscreen.
-
Page 153: Settings
Settings Settings Settings on your phone Control and customize phone settings on the Settings screen. From the Home screen, press MENU, and then tap Settings. Personalize Expand the Home screen, set the theme to use, and set the default ring tone to use for incoming calls. Wireless &... -
Page 154: Changing Display Settings
Settings Applications Manage running applications, move applications to or from the storage card, and install or uninstall programs. SD & phone storage Check the available storage card and phone memory. From this screen, be sure to unmount your microSD card before you remove it from your phone. -
Page 155: Changing Sound Settings
Settings Turning automatic screen rotation off By default, the screen orientation automatically adjusts depending on how you hold the phone. Automatic rotation is not supported in all application screens. 1. From the Home screen, press MENU, and then tap Settings. 2. -
Page 156: Changing The Phone Language
Settings Choosing the notification sound You can choose a default sound for your phone to play whenever there are new notifications. 1. From the Home screen, press MENU, and then tap Settings. 2. Tap Sound > Notification sound. 3. Select your preferred notification sound in the list, and then tap OK. To use different sounds for different types of notifications, set the notification sounds in the respective applications. -
Page 157: Optimizing Your Phone's Battery Life
Settings Optimizing your phone’s battery life You can set the phone to automatically switch to power saving mode when the battery level reaches a certain level. 1. From the Home screen, press MENU, and then tap Settings. 2. Tap Power saver. 3. -
Page 158: Checking Information About Your Phone
Check the version and other information about the Android information platform being used by the phone. You can also check the version of the web browser. Legal information Read legal information from HTC and Google, and licenses used by the phone. -
Page 159: Update And Reset
Update and reset Update and reset Updating the phone software From time to time, software updates for your phone may be available. Your phone can check and then notify you if there’s a new update. You can then download and install the software update using your phone’s Wi-Fi or data connection. - Page 160 Update and reset Performing a factory reset (hard reset) If you’re passing your phone on to someone else or your phone has a persistent problem that cannot be solved, you can do a factory reset (also called a hard reset). This returns your phone to the state it was in before the first time you turned it on.
-
Page 161: Trademarks And Copyrights
T-Mobile is a federally registered trademark of Deutsche Telekom AG. Copyright © 2010 HTC Corporation. All Rights Reserved. The HTC logo, the HTC quietly brilliant logo, HTC Sense, HTC Sync, and HTC Care are trademarks and/or service marks of HTC Corporation. -
Page 162: Index
Index Index Charging the battery 13 Chat invitations Adding a city to the Weather screen 93 - accepting 69 Adding a city to the World Clock - inviting a friend in Google Talk 69 screen 91 Chatting in Google Talk 68 Airplane mode 35 Checking information about your Alarm clock 91... - Page 163 Home city 90 Facebook Home page 100 - commenting photos 124 Home screen 26 - Facebook for HTC Sense 63 - adding folders 26 - sharing photos 121 - adding icons and shortcuts 26 - view photos 123 - adding widgets 25...
- Page 164 Index - moving 78 Onscreen keyboard 43 - POP3 /IMAP account 75 Optimizing your phone’s battery life 157 - quick browsing 77 - reading and replying 80 - selecting email messages 78 Peep 64 - sending 79 Personalizing 24 - setting priority 80 Phone - settings 81 - front, top, left, and back panels 8...
- Page 165 - alarm sound 91 Tweeting on your phone 64 - calendar 87 Twitter 64 - camera 115 - Twitter for HTC Sense 64 - date and time 90 - Twitter widget 66 Sharing 86 - photo 115 - video 115...
- Page 166 Index Viewing 50 Viewing photos 123 Voice Recorder 142 Volume - adjusting the earpiece volume for calls 22 - adjusting the media volume 22 - adjusting the ringer volume 22 - adjusting via settings 22 VPN 97 wallpaper 25, 115 Web browser 100 Widgets 25, 138, 140 - adding 25...