Table of Contents
Advertisement
Owner's Manual
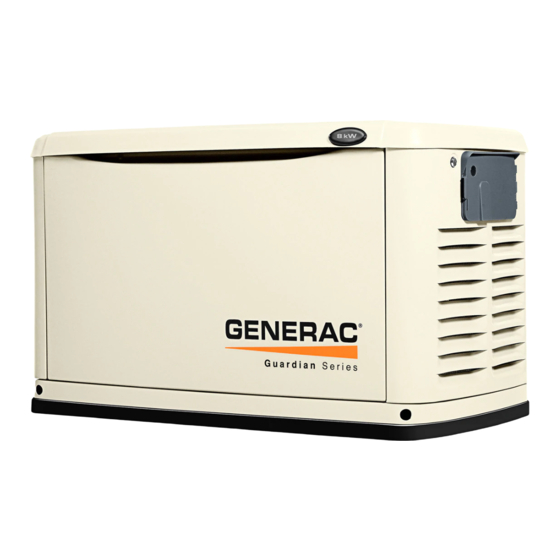
Automatic Standby Generator
NOT INTENDED FOR USE IN CRITICAL LIFE SUPPORT APPLICATIONS.
ONLY QUALIFIED ELECTRICIANS OR CONTRACTORS SHOULD ATTEMPT
INSTALLATION.
DEADLY EXHAUST FUMES! OUTDOOR INSTALLATION ONLY!
Reference all appropriate documentation.
This manual should remain with the unit.
Home Standby Models:
8kW to 20kW
Advertisement
Table of Contents

Related Manuals for Generac Power Systems Automatic Standby Generator


Summary of Contents for Generac Power Systems Automatic Standby Generator
- Page 1 Owner’s Manual Automatic Standby Generator Home Standby Models: 8kW to 20kW NOT INTENDED FOR USE IN CRITICAL LIFE SUPPORT APPLICATIONS. ONLY QUALIFIED ELECTRICIANS OR CONTRACTORS SHOULD ATTEMPT INSTALLATION. DEADLY EXHAUST FUMES! OUTDOOR INSTALLATION ONLY! Reference all appropriate documentation. This manual should remain with the unit.
- Page 2 SERVICE DEALER, please call this number: 1-800-333-1322 or, visit the dealer locator at: www.generac.com/Service/DealerLocator/ WARNING! California Proposition 65 Engine exhaust and some of its constituents are known to the state of California to cause cancer, birth defects, and other reproductive harm.
-
Page 3: Table Of Contents
Table of Contents Section 1 — Safety ................1 1.1 —... - Page 4 This page intentionally left blank.
-
Page 5: Section 1 - Safety
Section 1 INTRODUCTION: Thank you for purchasing this compact, high performance, air-cooled, engine-driven stationary automatic standby generator set. Every effort was made to make sure that the information and instructions in this manual were both accurate and current at the time the man- ual was written. -
Page 6: General Safety
Never use the generator or any of its parts as a step. Stepping on the unit can stress and break parts, and may result in dangerous operating conditions from leaking exhaust gases, fuel leakage, oil leakage, etc. Automatic Standby Generator Owner’s Manual... -
Page 7: Exhaust Hazards
• This is an Automatic Standby Generator, the generator may crank and start at any time when utility is lost. When this occurs, load circuits are transferred to the STANDBY (generator) power source. To prevent injury, before working on this generator (for inspection, service or mainte- nance), always put the generator into the OFF mode and remove the 7.5 Amp fuse from the generator control panel. - Page 8 (NEC 702). Failure to isolate an electrical system by such means will result in damage to the generator and also may result in injury or death to utility power workers due to backfeed of electrical energy. Automatic Standby Generator Owner’s Manual...
-
Page 9: Section 2 - General Information
ENCLOSURE FUEL FUEL INLET INLET (BACK) (BACK) FUEL FUEL REGULATOR REGULATOR COMPOSITE BASE BATTERY COMPARTMENT COMPOSITE BASE OIL FILTER BATTERY COMPARTMENT OIL FILL CAP OIL FILTER OIL FILL CAP Figure 2-2: GH-530 Engine 11kW Unit Automatic Standby Generator Owner’s Manual... -
Page 10: Protection Systems
The control panel contains a display which alerts the operator when a fault condition occurs. The above list is not all inclusive. For more informa- tion about alarms and control panel operation, see Section 3 Operation. Automatic Standby Generator Owner’s Manual... -
Page 11: Emission Information
Air Cleaner • Fuel Metering System • Carburetor / Mixer Assembly • Fuel Regulator • Ignition System • Spark Plug • Ignition Module • Exhaust System • Exhaust Manifold • Muffler • Catalyst (11kW generator only) Automatic Standby Generator Owner’s Manual... -
Page 12: Specifications
60 Amp 65 Amp 65 Amp 90 Amp Phase Rated AC Frequency 60 Hz Battery Requirement Group 26R, 12 Volts and 525 CCA Minimum (Generac Part No. 0H3421S) Weight (unit only in 360/163.3 407/184.6 435/197.3 435/197.3 471/213.6 471/213.6 Steel - 451/204.6... -
Page 13: Accessories
Natural gas, which is lighter than air, tends to collect in high areas. LP gas is heavier than air and tends to settle in low areas 2.4.4 — Battery Requirements Group 26R, 12V, minimum 525CCA (Generac Part No. 0H3421S). For proper battery maintenance procedures, see Section 4 Maintenance. 2.4.5 — Battery Charger The battery charger is integrated into the control panel module in all models. - Page 14 This page intentionally left blank. Automatic Standby Generator Owner’s Manual...
-
Page 15: Section 3 - Operation
Then, place a “DO NOT OPERATE” tag on the generator panel and on the transfer switch. NOTE: The generator is to be run with all appropriate panels in place, including during troubleshooting by a technician. Automatic Standby Generator Owner’s Manual... -
Page 16: Using The Auto/Off/Manual Buttons
To get to the MENU, use the “Escape” button from any page. It may require pressing it many times before getting to the MENU page. Navigate to ↑ ↓ the desired menu by using the buttons. When the desired menu is displayed and flashing, press the “Enter” button. See Figure 3-3. Automatic Standby Generator Owner’s Manual... - Page 17 Figure 3-3: Navigation Menu Automatic Standby Generator Owner’s Manual...
-
Page 18: Automatic Transfer Operation
Will not exercise if generator is already running in either AUTO or MANUAL mode. • During exercise, the controller will only transfer if utility fails during exercise for 10 seconds, and will switch to AUTO. Automatic Standby Generator Owner’s Manual... -
Page 19: Turning The Generator Off When Operating Under Load
Allow the engine to stabilize and warm up for a few minutes. Set the Main Circuit Breaker (Generator Disconnect) to its ON (CLOSED) position. The standby power source now powers the loads. Figure 3-4: Manual Transfer Switch Operation Automatic Standby Generator Owner’s Manual... -
Page 20: Side Compartment
Red LED “Alarm” light is on when the generator is OFF or a fault is detected and means contact your authorized servicing dealer. • Yellow LED “Maintenance” light. Note: Yellow LED may be on at the same time as either the Red or Green LEDs. Automatic Standby Generator Owner’s Manual... -
Page 21: Alarm Response Procedures
The exerciser will only work in the AUTO mode and will not work unless this procedure is performed. The current date/time will need to be reset every time the 12 volt battery is disconnected and then reconnected, and/or when the fuse is removed. Automatic Standby Generator Owner’s Manual... - Page 22 This page intentionally left blank. Automatic Standby Generator Owner’s Manual...
-
Page 23: Section 4 - Maintenance
Maintenance Section 4 NOTE: Proper maintenance and proper and safe operation is crucial to the life of the generator. Genuine Generac parts MUST be used to ensure warranty coverage. NOTE: Since most maintenance alerts will occur at the same time (most have two year intervals), only one will appear on the Control Panel display at any one time. -
Page 24: Checking Engine Oil Level
Never operate the engine with the oil level below the “Add” mark on the dipstick. Doing so could damage the engine. Hot oil may cause burns. Avoid prolonged or repeated skin exposure with used oil. Thoroughly wash exposed areas with soap. Automatic Standby Generator Owner’s Manual... - Page 25 4.3.1— Engine Oil Recommendations To maintain the warranty, genuine Generac replacement parts MUST be used, including Generac oil kits (which include an oil and air filter). Gen- erac oil kits can be obtained through an Authorized Dealer or purchased on-line. To purchase on-line, access the maintenance kits page through www.generac.com or directly at shop.generac.com.
-
Page 26: Changing The Engine Air Cleaner
Check the spark plug gap using a wire feeler gauge. See Figure 4-3. Adjust the gap by carefully bending the ground electrode to: • For 8, 11, and 20kW units - 0.76 mm (0.030 inch) • For 13, 14, 15, 16, 17kW units - 1.02 mm (0.040 inch) Figure 4-3: Spark Plug Gap Adjustment Automatic Standby Generator Owner’s Manual... -
Page 27: Valve Lash Adjustment
NOTE: Start all four screws before tightening or it will not be possible to get all the screws in place. Make sure the valve cover gasket is in place. • Install spark plugs. • Re-attach the spark plug wire to the spark plug. • Repeat the process for the other cylinder, if necessary. Automatic Standby Generator Owner’s Manual... -
Page 28: Battery Maintenance
Use tools with insulated handles. • Wear rubber gloves and boots. • Do not lay tools or metallic objects on top of the battery. • Disconnect the charging source prior to connecting or disconnecting battery terminals. Automatic Standby Generator Owner’s Manual... -
Page 29: Attention After Submersion
Attach a tag to the engine indicating the viscosity and classification of the new oil in the crankcase. 10. Remove the spark plug(s) and spray a fogging agent into the spark plug(s)’ threaded openings. Reinstall and tighten the spark plug(s). Automatic Standby Generator Owner’s Manual... - Page 30 12. Turn on the utility power to the transfer switch. 13. Set the Control Panel to AUTO. The generator is ready for service. NOTE: When a battery is dead or has been disconnected, the exercise timer and current date and time must be reset. Automatic Standby Generator Owner’s Manual...
-
Page 31: Section 5 - Troubleshooting
Adjust oil to proper level. amounts of oil. Engine breather defective. Improper type or viscosity of oil. See “Engine Oil Recommendations”. Damaged gasket, seal or hose. Check for oil leaks. *Contact an Authorized Service Dealer for assistance. Automatic Standby Generator Owner’s Manual... - Page 32 This page intentionally left blank. Automatic Standby Generator Owner’s Manual...
-
Page 33: Section 6 - Quick Reference Guide
Unit will not start in AUTO with utility UNDER LEDs/Screen Contact servicing dealer. loss. VOLTAGE for alarms. Check the Unit will not start in AUTO with utility LEDs/Screen UNDERSPEED Contact servicing dealer. loss. for alarms. Automatic Standby Generator Owner’s Manual... - Page 34 Yellow LED illuminated in any state. YELLOW for additional SERVICE B press ENTER to clear. information. Check screen Yellow LED illuminated in any state. YELLOW for additional Inspect Battery Inspect battery; press ENTER to clear. information. Automatic Standby Generator Owner’s Manual...
- Page 36 Part No. 0J9943 Rev. D 05/24/2013 Printed in USA Generac Power Systems, Inc. © Generac Power Systems, Inc. All rights reserved S45 W29290 Hwy. 59 Specifications are subject to change without notice. Waukesha, WI 53189 No reproduction allowed in any form without prior written 1-888-GENERAC (1-888-436-3722) consent from Generac Power Systems, Inc.