Table of Contents
Advertisement
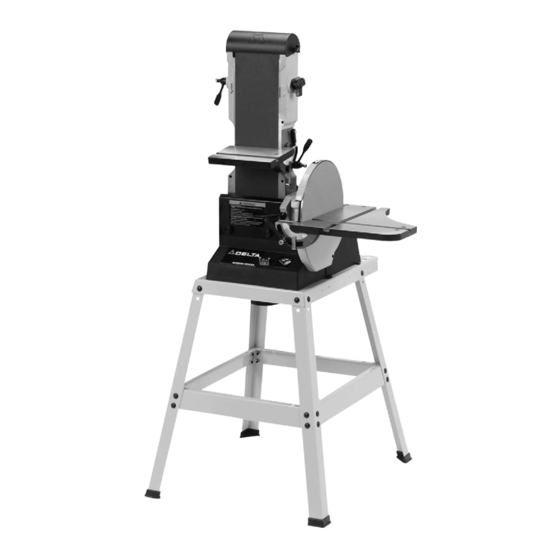
Sanding Center
6" Belt/12" Disc Sander
(Model 31-280)
PART NO. 406-12-651-0004 - 07-31-01)
Copyright © 2001 Delta Machinery
To learn more about DELTA MACHINERY
visit our website at: www.deltamachinery.com.
For Parts, Service, Warranty or other Assistance,
1-800-223-7278 (
1-800-463-3582).
please call
In Canada call
Advertisement
Table of Contents

Related Manuals for Delta 31-280


Summary of Contents for Delta 31-280
- Page 1 Sanding Center 6" Belt/12" Disc Sander (Model 31-280) PART NO. 406-12-651-0004 - 07-31-01) Copyright © 2001 Delta Machinery To learn more about DELTA MACHINERY visit our website at: www.deltamachinery.com. For Parts, Service, Warranty or other Assistance, 1-800-223-7278 ( 1-800-463-3582). please call...
- Page 2 If you have any questions relative to a particu- lar application, DO NOT use the machine until you have first contacted Delta to determine if it can or should be performed on...
-
Page 3: Power Connections
ADDITIONAL SAFETY RULES FOR SANDING CENTER WARNING: Do not operate this tool until assembly and installation are complete, according to instructions. WARNING: Unguarded rotating shafts can create an entanglement hazard. ALWAYS COVER THE POWER TAKE- OFF SHAFT when accessories are not in use. IF YOU ARE NOT thoroughly familiar with the operation of Belt and Disc Sanders, obtain advice from your supervisor, instructor, and/or other qualified persons. -
Page 4: Grounding Instructions
GROUNDING INSTRUCTIONS WARNING: THIS TOOL MUST BE GROUNDED WHILE IN USE TO PROTECT THE OPERATOR FROM ELECTRIC SHOCK. A temporary adapter, which looks like the adapter illustrated in 1. All grounded, cord-connected tools: Fig. 2, may be used to connect this plug to a matching 2- In the event of a malfunction or breakdown, grounding conductor receptacle as shown in Fig. -
Page 5: Extension Cords
EXTENSION CORDS Use proper extension cords. Make sure your extension cord is in good condition and is a 3-wire extension cord which has a 3-prong grounding type plug and matching receptacle which will accept the tool’s plug. When using an extension cord, be sure to use one heavy enough to carry the current of the tool. -
Page 6: Unpacking And Cleaning
OPERATING INSTRUCTIONS FOREWORD Delta Model 31-280 is a powerful 1-1/2 HP belt/disc sander. The induction-type, ball-bearing motor provides long-lasting, smooth performance. The Sanding Center can provide 1971 SFM with the belt, and the disc will revolve at 2500 RPM. UNPACKING AND CLEANING Carefully unpack the tool and all loose items from the shipping container(s). -
Page 7: Attaching Sanding Disc
ATTACHING TOOL TO STAND Use a helper to lift and position the tool and top shelf (A) Fig. 8 on the four legs (B). Fasten the top shelf to the six top holes in the legs (four of which are shown). Insert the six 5/8" carriage bolts (C), then attach the flat washers, and hex nuts. -
Page 8: Operating Controls And Adjustments
ATTACHING DUST CHUTE Attach the dust chute (A) Fig. 11 to the bottom of the top shelf (B) using the four 5/8" self-tapping screws. MOVING SANDING ARM TO THE VERTICAL POSITION The sanding arm is shipped in the horizontal position (Fig. 12). -
Page 9: Overload Protection
OVERLOAD PROTECTION The motor supplied with your sander is equipped with a reset overload relay button (A) Fig. 16. If the motor shuts off or fails to start because of overloading (sanding too heavy, using a worn sanding belt or disc, using the sander beyond its capacity), or low voltage, turn the switch (A) Fig. - Page 10 ADJUSTING SANDING BELT TABLE 90 DEGREES TO BELT DISCONNECT TOOL FROM POWER SOURCE. Loosen the table tilting lock handle (A) Fig. 21, move the stop (B) into position, and rotate the table (C) until the trunnion (D) contacts the stop (B). Tighten the lock handle (A). NOTE: The lock handle (A) is spring-loaded and can be repo- sitioned by pulling out the handle, moving it, and letting it spring back into position.
- Page 11 Fig. 26 Fig. 25 To adjust, loosen the two screws (E) Figs. 25 and 26. Move the table (A) until the miter gauge slot is parallel to the sanding belt. Tighten the two screws (E). NOTE: When making this adjustment, tighten the table lock handle. IMPORTANT: MAINTAIN A MAXIMUM DISTANCE OF 1/16"...
- Page 12 Fig. 29 Fig. 30 The stop (D) Fig. 30 ensures that the table can rapidly return 90 degrees to the disc after the table has been tilted. Adjust pointer, if necessary, using the wrench supplied with the tool. Fig. 31 Fig.
-
Page 13: Accessory Holder
Fig. 35 Fig. 36 ADJUSTING SANDING DISC GUARD DISCONNECT TOOL FROM POWER SOURCE. Adjust the sanding disc guard (A) Fig. 35, so that the front edge of the guard is slightly in front of the sanding disc for small work, and slightly behind the sanding disc for large work. To adjust, move the guard (A) Fig. -
Page 14: Power Take-Off Shaft
POWER TAKE-OFF SHAFT DISCONNECT TOOL FROM POWER SOURCE. A power take-off shaft is provided on the lower end of the sanding belt arm to accommodate accessories. For access to the power take-off shaft, remove the two screws (A) Fig. 43, and cover (B). WARNING: Unguarded rotating shafts (C) Fig 41 can create an entanglement hazard. -
Page 15: Parts, Service Or Warranty Assistance
Two Year Limited Warranty Delta will repair or replace, at its expense and at its option, any Delta machine, machine part, or machine accessory which in normal use has proven to be defective in workmanship or material, provided that the customer returns the product pre- paid to a Delta factory service center or authorized service station with proof of purchase of the product within two years and provides Delta with reasonable opportunity to verify the alleged defect by inspection. - Page 16 Parts and accessories for Porter-Cable ·Delta products should be obtained by contacting any Porter-Cable·Delta Distributor, Authorized Service Center, or Porter-Cable·Delta Factory Service Center. If you do not have access to any of these, call 800-223-7278 and you will be directed to the nearest Porter-Cable·Delta Factory Service Center. Las Estaciones de Servicio Autorizadas están ubicadas en muchas grandes ciudades.