Table of Contents

Related Manuals for Alesis Performance Pad Pro


Summary of Contents for Alesis Performance Pad Pro
- Page 1 QUICKSTART GUIDE ENGLISH ( 3 – 15 ) MANUAL DE INICIO RÁPIDO ESPAÑOL ( 16 – 28 ) GUIDE D'UTILISATION RAPIDE FRANÇAIS ( 29 – 41 ) GUIDA RAPIDA ITALIANO ( 42 – 54 ) KURZANLEITUNG DEUTSCH ( 55 – 67 )
-
Page 3: Box Contents
QUICKSTART GUIDE (ENGLISH) BOX CONTENTS Please make sure the following items can be located in the box: PerformancePad Pro Power Adapter (12V DC 500mA) Quickstart Manual Reference Manual Safety and Warranty Information READ THE SAFETY AND WARRANTY INFORMATION BOOKLET BEFORE USING THIS PRODUCT! CONNECTION DIAGRAM As you hook up the PerformancePad Pro, the... -
Page 4: Patterns Vs. Songs
INTRODUCTION TO THE PerformancePad Pro Welcome to the PerformancePad Pro Professional Drum Machine. The PerformancePad Pro allows you to quickly and easily program drum, percussion and bass sounds into rhythm Patterns and to turn these Patterns into Songs. Let’s begin with a quick explanation of some of the key elements: PATTERNS VS. -
Page 5: Overview Of The Controls
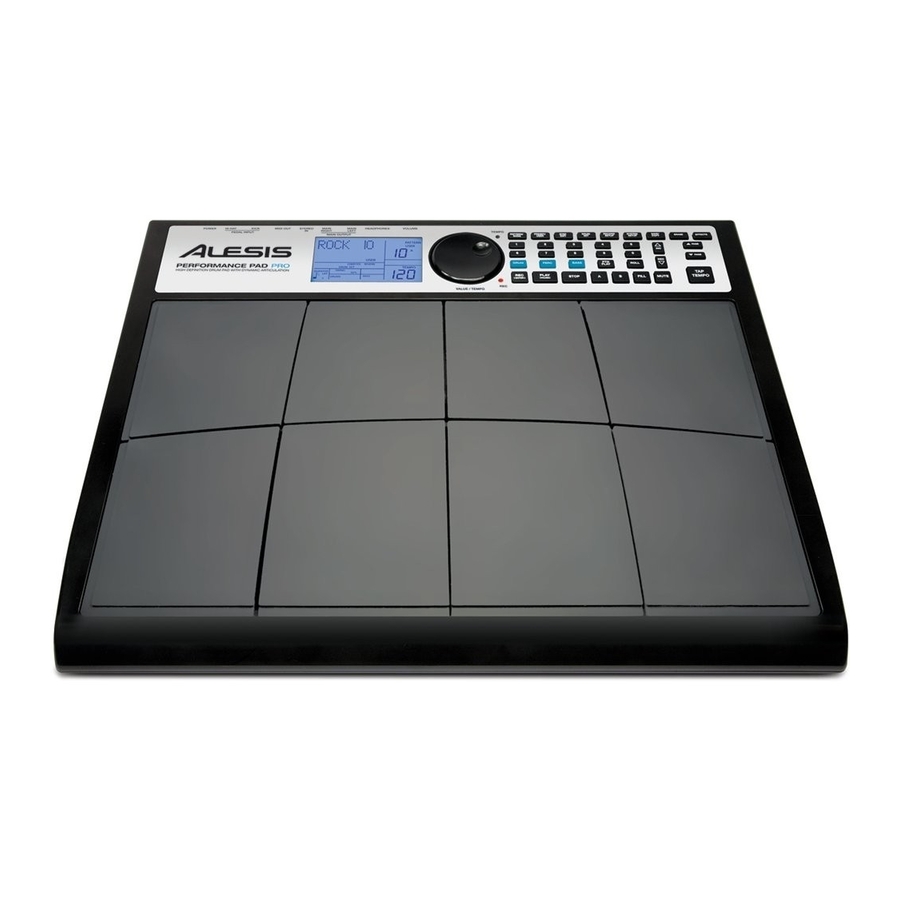
OVERVIEW OF THE CONTROLS Now that we have introduced you to the infrastructure of the PerformancePad Pro, let’s dive in and take a closer look at some of the controls. 16 17 18 GENERAL CONTROLS: LCD – The display helps you keep track of system parameters and settings as you use the PerformancePad Pro. -
Page 6: Navigation Buttons
A & B – Each Pattern consists of two Main sub-patterns – A & B. You can select each of the two sub-patterns by pressing its corresponding button. These sub-patterns allow you to program variation in your Patterns (i.e. sub-pattern A is the verse, sub-pattern B is the chorus). FILL –... -
Page 7: Mode Buttons
MODE BUTTONS: PATTERN / SONG – This button toggles between the two different modes on the PerformancePad Pro. In Pattern Mode, you can play, record and edit individual patterns. Patterns are short (i.e. 8- beat, 16-beat, etc) rhythm sequences which are assembled together to create Songs. A Song is a sequence of Patterns. -
Page 8: Playing Patterns
PLAYING PATTERNS STEP 1 If the display’s upper right window shows SONG, press the PATTERN / SONG button once to select Pattern Mode. STEP 2 If the display’s upper right window shows USER, press the PRESET / USER button once until USER disappears;... - Page 9 PLAYING FILLS STEP 1 Begin by selecting a Pattern and pressing PLAY. STEP 2 Press and release the FILL button while the main A Pattern is playing. You’ll hear a drum fill that leads right into the associated B Pattern. STEP 3 Press the FILL button again.
- Page 10 RECORDING YOUR OWN PATTERNS STEP 1 If the display’s upper right window shows SONG, press the PATTERN / SONG button once to select Pattern Mode (PATTERN will be displayed). STEP 2 If the display’s upper right window does not show USER, press the PRESET / USER button once to select User Patterns (USER will be displayed in the upper right corner).
- Page 11 STEP 9 You will hear a metronome sound and the top line of the screen will display the Pattern’s current Beat Number. Play the pads to the beat. As the Pattern loops, you can add more layers until you are satisfied. Note that the Quantization and Swing settings will affect how your pattern is recorded.
- Page 12 LOADING AND CREATING DRUM SETS The PerformancePad Pro has 100 Preset and 100 Editable Drum Sets (groups of sounds). After pressing the DRUM SET button, you can use the INC / DEC buttons, the VALUE dial, or the number buttons to select a different set (each set can have its own sounds, tuning, volume, panning, etc). You may also edit individual pad sounds within each kit.
- Page 13 STEP 7 Note that Drums and Percussion sounds are grouped in each Drum Set. This means that changing the drum sounds to a different set on page 1 of the Drum Set menu will cause the Percussion sounds to change as well (although individual pad sounds may be replaced freely once a Drum Set has been loaded).
-
Page 14: Creating And Erasing Songs
CREATING AND ERASING SONGS The PerformancePad Pro can remember the order in which you selected Patterns, which variations were selected, and when you selected fills. Recording this information in PerformancePad Pro’s Song Mode creates a complete Song. Begin with the PerformancePad Pro stopped. STEP 1 Select Song Mode by pressing the PATTERN / SONG button so the display says SONG. -
Page 15: Factory Reset
STEP 7 Once you have finished creating the sequence of Patterns for your Song, press the STOP button to stop the recording. STEP 8 You will see the screen displayed on the right. The top line will indicate the last step of the Song (STEP 48 in this example) and the bottom line will say END. -
Page 16: Diagrama De Conexión
GUÍA DE INICIO RÁPIDO (ESPAÑOL) CONTENIDO DE LA CAJA Asegúrese de que la caja contenga los siguientes elementos: • PerformancePad Pro • Adaptador de alimentación (12 V CC 500 mA) • Manual de inicio rápido • Manual de referencia • Información sobre la seguridad y la garantía ¡LEA EL FOLLETO DE INFORMACIÓN SOBRE LA SEGURIDAD Y LA GARANTÍA ANTES DE USAR ESTE PRODUCTO! - Page 17 INTRODUCCIÓN A PerformancePad Pro Bienvenido a la caja de ritmos profesional PerformancePad Pro. La PerformancePad Pro le permite programar rápida y fácilmente sonidos de tambores, percusión y bajo en patrones de ritmo y convertir estos patrones en temas musicales. Comencemos por explicar rápidamente algunos de los elementos más importantes: PATRONES Y TEMAS MUSICALES PATRONES - Al grabar con una caja de ritmos, a menudo es más fácil dividir un tema en patrones individuales y trabajar sobre estos en vez de grabar toda el tema.
-
Page 18: Controles Generales
DESCRIPCIÓN GENERAL DE LOS CONTROLES Ahora que le hemos introducido en la infraestructura de la PerformancePad Pro, echemos un vistazo más detenido a algunos de los controles. 16 17 18 CONTROLES GENERALES: LCD – La pantalla le ayuda a mantener el seguimiento de los parámetros y valores de ajuste del sistema mientras usa la PerformancePad Pro. -
Page 19: Botones De Navegación
LED REC – Este LED se enciende cuando la PerformancePad Pro está grabando. Parpadea cuando se le requiere que confirme o cancele una acción. A y B – Cada patrón consiste en dos subpatrones principales – A y B. Puede seleccionar cada uno de los dos subpatrones pulsando su botón correspondiente. - Page 20 BOTONES DE MODO: PATTERN / SONG – Este botón conmuta entre los dos modos diferentes de la PerformancePad Pro. En modo Pattern (Patrón), puede reproducir, grabar y editar patrones individuales. Los patrones son breves secuencias de ritmos (de 8 beats, 16 beats, etc.) que se ensamblan para crear temas musicales. Un tema es una secuencia de patrones.
- Page 21 CÓMO REPRODUCIR PATRONES PASO 1 Si la ventana superior derecha de la pantalla muestra SONG (Tema), presione el botón PATTERN/SONG una vez para seleccionar el modo de patrón. PASO 2 Si la ventana superior derecha de la pantalla muestra USER (Usuario), pulse botón...
- Page 22 CÓMO REPRODUCIR RELLENOS PASO 1 Comience seleccionando un patrón y pulse PLAY. PASO 2 Presione y suelte el botón FILL (relleno) mientras se está reproduciendo el patrón principal A. Escuchará un relleno de batería que conduce directamente al patrón B correspondiente. PASO 3 Presione el botón FILL otra vez.
- Page 23 CÓMO GRABAR SUS PROPIOS PATRONES PASO 1 Si la ventana superior derecha de la pantalla muestra SONG (Tema), presione botón PATTERN/SONG una vez para seleccionar el modo de patrón (aparece PATTERN). PASO 2 Si en la ventana superior derecha de la pantalla no aparece USER, pulse el botón PRESET / USER una vez para seleccionar los patrones del usuario (aparece USER en la esquina superior derecha).
- Page 24 PASO 8 De esta forma queda listo para comenzar a grabar su patrón. Pulse y retenga el botón REC y pulse PLAY para iniciar la grabación. Se ilumina el LED REC para hacerle saber que está grabando. PASO 9 Escuchará un sonido de metrónomo y la línea superior de la pantalla mostrará...
- Page 25 CÓMO CARGAR Y CREAR CONFIGURACIONES DE BATERÍA La PerformancePad Pro cuenta con 100 configuraciones de batería (grupo de sonidos) predeterminados y 100 editables. Después de pulsar el botón DRUM SET, puede usar los botones INC / DEC, el cuadrante VALUE o los botones de números para seleccionar una configuración diferente (cada configuración puede tener sus propios sonidos, afinación, volumen, panning, etc).
- Page 26 PASO 7 Tome nota de que los sonidos de tambores y percusión se agrupan en cada configuración de batería. Esto significa que cambiar los sonidos de tambores a un conjunto diferente en la página 1 del menú Drum Set causa que los sonidos de percusión cambien también (si bien los sonidos de pads individuales se pueden reemplazar libremente una vez cargada una configuración...
- Page 27 CÓMO CREAR Y BORRAR TEMAS La PerformancePad Pro puede recordar el orden en que el usuario seleccionó los patrones, qué variaciones fueron seleccionadas y cuándo se seleccionaron los rellenos. Al grabarse esta información en el modo de canción de PerformancePad Pro, se crea un tema completo. Comience con la PerformancePad Pro detenida.
-
Page 28: Restablecimiento De Los Valores Predeterminados De Fábrica
PASO 7 Una vez que termine de crear la secuencia de patrones de su tema, pulse el botón STOP para detener la grabación. PASO 8 Verá la pantalla ilustrada a la derecha. La línea superior indica el último paso del tema (STEP 48 en este ejemplo) y la línea inferior indicará... -
Page 29: Schéma De Connexion
GUIDE D’UTILISATION RAPIDE (FRANÇAIS) CONTENUE DE LA BOÎTE Assurez-vous que tous les articles énumérés ci-dessous se retrouvent dans la boîte : PerformancePad Pro Bloc d’alimentation (12 V CA 500 mA) Guide d'utilisation simplifié Guide de référence Consignes de sécurité et information sur la garantie AVANT D'UTILISER CE PRODUIT, VEUILLEZ LIRE LES CONSIGNES DE SÉCURITÉ... - Page 30 INTRODUCTION AU PerformancePad Pro Voici la boîte à rythmes professionnelle PerformancePad Pro. La PerformancePad Pro vous permet de programmer rapidement et facilement des sons de batterie, percussion et de grosse caisse dans enchaînements rythmiques puis de tourner ces enchaînements en chansons. Commençons avec une petite explication de certains éléments clés : ENCHAÎNEMENTS CONTRE CHANSONS PATTERNS –When recording with a drum machine, it's often easier to divide a song into shorter...
-
Page 31: Commandes Principales
SURVOL DES COMMANDES Maintenant que nous vous avons présenté l’infrastructure du PerformancePad Pro, nous regarderons les commandes de plus près. 16 17 18 COMMANDES PRINCIPALES : ACL – L’écran d’affichage vous permet de garder un oeil sur les paramètres et les réglages du système du PerformancePad Pro. - Page 32 A et B – Chaque enchaînement est fait de deux sous enchaînements principaux, A et B. Vous pouvez sélectionner chacun des deux sous enchaînements en appuyant sur la touche correspondante. Ces sous enchaînements vous permettent d'ajouter des variations dans vos enchaînements (par exemple, le sous enchaînement A est le couplet, le sous enchaînement B est le refrain).
- Page 33 TOUCHES DES MODES : PATTERN/SONG – Cette touche permet d'alterner entre les deux modes différents du PerformancePad Pro. En Pattern Mode, il est possible des faire la lecture, enregistrer et de modifier des enchaînements individuels. Les enchaînements sont de courtes séquences rythmiques (par exemple, 8 mesures, 16 mesures, etc.) qui sont rassemblées afin de créer des chansons.
- Page 34 TOUCHES DE DÉFILEMENT : PLAY - If the PerformancePad Pro is stopped, pressing PLAY will play the sequence from the current position. Si le PerformancePad Pro est en cours de lecture et que la touche PLAY est enfoncée, la séquence sera pausée. Pour retourner au début de l’enchaînement encours (ou étape en cours si vous êtes en mode Song) appuyez sur les touches PAGE DOWN.
- Page 35 UTILISATION DE SÉQUENCES D’ENCHAÎNEMENTS ÉTAPE 1 Commencez par sélectionner un enchaînement et en appuyant ensuite sur la touche PLAY. ÉTAPE 2 Si un enchaînement A joue, appuyez sur la touche B (ou A si c’est un enchaînement B qui joue). L’enchaînement d’alternance commence à jouer aussitôt que l’enchaînement en cours se termine.
- Page 36 ÉTAPE 3 Frappez un autre pad. L'enchaînement assigné au pad commencera à jouer dès l’enchaînement précédent tire à sa fin. ÉTAPE 4 Pour modifier l’enchaînement assigné à un pad, appuyez sur la touche PAGE HAUT. Appuyez sur le pad que vous désirez modifier. Maintenant, utilisez la molette VALUE, les touches INC/DEC ou les touches numérotées pour sélectionner un enchaînement qui sera déclenché...
- Page 37 ÉTAPE 5 Sur la page 1 (indiqué dans le coin inférieur droit de l’écran) du menu de configuration d’enregistrement (Record Setup), vous pouvez sélectionner l’intervalle de quantification à l’aide des touches INC/DEC ou de la molette VALUE. La quantification modifie le son au rythme spécifié lorsque vous jouez, alors il est préférable de choisir la valeur désirée avant d'essayer vos rythmes.
- Page 38 ÉTAPE 12 Une fois satisfait avec l’enchaînement que vous avez enregistré, appuyez sur la touche STOP afin de faire arrêter l’enregistrement. ÉTAPE 13 Pour écouter l’enchaînement, appuyez sur la touche PLAY. ÉTAPE 14 Pour enregistrer d’autres enchaînements, sélectionnez un autre enchaînement à l’aide des touches INC/DEC ou de la molette VALUE, et répétez la procédure ci-dessus.
- Page 39 ÉTAPE 4 Pour changer le son du pad, utilisez les touches INC/DEC, la molette VALUE, ou encore les touches numérotées afin de sélectionner un son différent. ÉTAPE 5 Pour changer les sons d’un autre pad, appuyez simplement sur le pad et répétez l’étape ÉTAPE 6 Depuis le mode Drum Set, appuyez sur la touche PAGE HAUT afin de visionner les autres pages des paramètres tels que le volume, la syntonisation, le panoramique, etc.
- Page 40 LA COMPOSITION ET LA SUPPRESSION DE CHANSONS Le PerformancePad Pro peut mémoriser l'ordre des enchaînements sélectionnés, quelles variations ont été sélectionnées et où vous avez placé des sons de remplissage. L’enregistrement de cette information en mode Song dans le PerformancePad Pro permet de composer une chanson complète. Commencez lorsque le PerformancePad Pro est à...
-
Page 41: Réinitialisation Des Paramètres D'usine
ÉTAPE 7 Une fois satisfait avec la séquence d’enchaînement que vous avez enregistré pour votre chanson, appuyez sur la touche STOP afin de faire arrêter l’enregistrement. ÉTAPE 8 La fenêtre de droite s’affiche. La première ligne indique la dernière étape de la chanson (STEP 48, dans cet exemple) et la dernière ligne indique END. -
Page 42: Schema Dei Collegamenti
GUIDA RAPIDA (ITALIANO) CONTENUTI DELLA CONFEZIONE Assicurarsi che tutti gli elementi elencati di seguito si trovino nella confezione: PerformancePad Pro Adattatore di alimentazione (12V CC 500mA) Manuale rapido Manuale di riferimento Istruzioni di sicurezza e garanzia PRIMA DI UTILIZZARE IL PRODOTTO, LEGGERE ATTENTAMENTE LE ISTRUZIONI DI SICUREZZA E LA GARANZIA! SCHEMA DEI COLLEGAMENTI Al momento di collegare l’PerformancePad Pro, volume... - Page 43 INTRODUZIONE ALL’ PerformancePad Pro Benvenuti alla Drum Machine Professionale PerformancePad Pro. L’PerformancePad Pro permette di programmare rapidamente e con facilità suoni di batterie, percussioni e bassi in pattern ritmici e di trasformare tali pattern in canzoni. Cominciamo con una rapida spiegazione di alcuni degli elementi chiave: PATTERN VS.
-
Page 44: Panoramica Dei Comandi
PANORAMICA DEI COMANDI Ora che vi abbiamo introdotto all’infrastruttura dell’PerformancePad Pro, tuffiamoci più in profondità e osserviamo più da vicino alcuni dei comandi. 16 17 18 COMANDI GENERALI: LCD – Il display vi aiuta a tenere d’occhio i parametri e le impostazioni di sistema durante l’uso dell’PerformancePad Pro. - Page 45 LED REC – Questo LED si accende quando l’PerformancePad Pro sta registrando. Lampeggerà quando è necessario confermare o annullare un’azione. A & B – Ogni Pattern è composto da due sub-pattern principali: A & B. Si può selezionare ciascuno dei due sub-pattern premendo il pulsante corrispondente. Questi sub-pattern vi permettono di programmare variazioni a livello dei pattern (ad es.
- Page 46 TASTI MODE (MODALITÀ) : PATTERN / CANZONE (SONG) – Questo tasto commuta tra le due modalità sull’PerformancePad Pro. In modalità Pattern si possono suonare, registrare e modificare pattern singoli. I pattern sono brevi (cioè 8 battiti, 16 battiti, ecc.) sequenze ritmiche che vengono unite a creare canzoni. Una Canzone è una sequenza di Pattern.
- Page 47 RIPRODUZIONE DI PATTERN FASE 1 Se la finestra superiore destra del display mostra la scritta SONG, premere il tasto PATTERN / SONG una volta per selezionare la modalità Pattern. FASE 2 Se la finestra superiore destra del display mostra la scritta USER, premere il tasto PRESET / USER una volta fino a quando la scritta USER non scompare: così...
- Page 48 RIPRODUZIONE DI FILL FASE 1 Iniziare selezionando un Pattern e premendo PLAY. FASE 2 Premere e rilasciare il tasto FILL mentre il pattern A principale viene riprodotto. Si sentirà un fill di batteria che porta direttamente al pattern B associato. FASE 3 Premere nuovamente il tasto FILL.
- Page 49 REGISTRAZIONE DI PATTERN PERSONALIZZATI FASE 1 Se la finestra superiore destra del display mostra SONG, premere una volta il tasto PATTERN / SONG selezionare modalità Pattern (PATTERN apparirà a display). FASE 2 Se la finestra superiore destra del display non mostra USER, premere una volta il tasto PRESET / USER per selezionare “User Patterns”...
- Page 50 FASE 8 Ora siete pronti a registrare il vostro pattern. Premere e tenere premuto il tasto REC, quindi premere PLAY per iniziare a registrare. Il LED REC si illuminerà per farvi sapere che state registrando. FASE 9 Si sentirà il suono di un metronomo e la linea superiore dello schermo mostrerà...
- Page 51 CARICARE E CREARE DRUM SET L’PerformancePad Pro è dotato di 100 Drum Set predefiniti (Preset) e di 100 Drum Set modificabili (gruppi di suoni). Dopo aver premuto il tasto DRUM SET, si possono utilizzare i tasti INC / DEC, la rotella VALUE o i tasti numerici per selezionare un set diverso (ogni set può...
- Page 52 FASE 7 Va notato che i suoni di Batteria e Percussioni sono raggruppati in ciascun Drum Set. Ciò significa che modificando i suoni di batteria ad un set diverso a pagina 1 del menu Drum Set farà sì che i suoni delle Percussioni cambieranno a loro volta (nonostante suoni individuali di ogni pad possano essere sostituiti liberamente una volta caricato un Drum Set).
- Page 53 CREARE E CANCELLARE CANZONI L’PerformancePad Pro è in grado di ricordare l'ordine in cui vengono selezionati i pattern, quali variazioni vengono selezionate e quando sono stati selezionati fill. La registrazione di queste informazioni nella modalità Song dell’PerformancePad Pro crea una canzone completa. Iniziare con l’PerformancePad Pro fermo.
- Page 54 FASE 7 Una volta finito di creare la sequenza di pattern per la vostra canzone, premere il tasto STOP per interrompere la registrazione. FASE 8 Apparirà la schermata illustrata a sinistra. Da linea superiore indicherà l'ultimo intervallo della canzone (STEP 48 in questo esempio) e da linea inferiore dirà...
-
Page 55: Inhalt Der Verpackung
AUFBAUANLEITUNG (DEUTSCH) INHALT DER VERPACKUNG Überprüfen Sie bitte, dass folgende Bestandteile in der Verpackung enthalten sind: PerformancePad Pro Netzteil (12V DC 500mA) Kurzanleitung Bedienungsanleitung Sicherheits- und Garantieinformationen BITTE LESEN SICHERHEITS- GARANTIEINFORMATIONEN VERWENDUNG DES PRODUKTS! ANSCHLUSSÜBERSICHT Beim Anschluss der PerformancePad Pro sollten der Lautstärkeregler Verstärkers PerformancePad Pro zugedreht sein. - Page 56 EINFÜHRUNG ZUR PerformancePad Pro Willkommen zur PerformancePad Pro Professional Drum Machine. Die PerformancePad Pro ermöglicht es Ihnen, auf einfache Weise Drum-, Percussion- und Bass-Sounds zu einem rhythmischen Pattern zusammenzufügen. Patterns lassen sich wiederum zu ganzen Songs kombinieren. Beginnen wir mit einer kurzen Erklärung der Grundelemente: PATTERNS UND SONGS PATTERNS –...
-
Page 57: Allgemeine Bedienelemente
ÜBERBLICK ÜBER DIE BEDIENELEMENTE Nun, da wir die Grundfunktionen der PerformancePad Pro kennen gelernt haben, PerformancePad Pro, sollten wir uns die Bedienelemente des Gerätes genauer ansehen. 16 17 18 ALLGEMEINE BEDIENELEMENTE: LCD – Das Display hilft Ihnen bei der Arbeit und zeigt Systemparameter und Einstellungen der PerformancePad Pro an. - Page 58 REC LED – Wenn diese LED leuchtet, nimmt die PerformancePad Pro auf. Die LED blinkt, wenn ein Vorgang eine Bestätigung benötigt oder abgebrochen werden soll. A & B – Jedes Pattern besteht aus 2 Main Sub-Patterns – A & B. Jedes dieser zwei Sub-Patterns lässt sich durch drücken der jeweiligen dazugehörigen Taste auswählen.
- Page 59 MODE TASTEN: PATTERN / SONG – Mit diesen beiden Tasten schalten Sie zwischen den beiden Modi der PerformancePad Pro um. Im Pattern Modus können Sie unterschiedliche Patterns abspielen, aufnehmen und bearbeiten. Patterns sind meistens kurze (8 Takte oder 16 Takte zum Beispiel) Rhythmus- Sequenzen, sie sich zu Songs zusammenstellen lassen.
- Page 60 PATTERNS ABSPIELEN SCHRITT 1 Falls das Display in der oberen rechten Ecke SONG anzeigt, drücken Sie die PATTERN / SONG Taste einmal, um den Pattern Modus auszuwählen. SCHRITT 2 Wenn im rechten oberen Displaybereich USER angezeigt wird, drücken Sie PRESET / USER einmal, bis USER verschwindet;...
- Page 61 FILLS ABSPIELEN SCHRITT 1 Wählen Sie ein Pattern aus und drücken Sie PLAY. SCHRITT 2 Drücken Sie während der Wiedergabe des Main A Patterns die FILL Taste und lassen Sie sie los. Sie hören nun ein Drum Fill, welches dann zum dazugehörigen B Pattern führt. SCHRITT 3 Drücken Sie noch einmal die FILL Taste.
- Page 62 AUFNAHME IHRER EIGENEN PATTERNS SCHRITT 1 Falls in der rechten oberen Seite des Displays SONG anzeigt, drücken Sie einmal die PATTERN / SONG Taste, um den Pattern Modus auszuwählen (PATTERN wird dann angezeigt). SCHRITT 2 Wenn in der rechten oberen Ecke des Displays nicht USER steht, drücken Sie einmal die PRESET / USER Taste.
- Page 63 SCHRITT 8 Nun können Sie mit der Aufnahme Ihres Patterns beginnen. Halten Sie die REC Taste gedrückt und drücken Sie dabei PLAY zum Starten der Aufnahme. Die REC LED leuchtet und zeigt Ihnen an, dass die Aufnahme läuft. SCHRITT 9 Nun hören Sie einen Metronomsound und in der oberen Zeile des Displays sehen Sie die aktuelle Taktnummer des Patterns.
- Page 64 DRUM SETS LADEN UND ERZEUGEN In der PerformancePad Pro befinden sich 100 Preset und 100 editierbare Drum Sets (Soundgruppen). Nachdem Sie mit der DRUM SET Taste in den Drum Set Modus gewechselt sind, haben Sie die Möglichkeit mit den INC / DEC Tasten, dem VALUE Rad oder dem Ziffernblock ein Drum Set auszuwählen.
- Page 65 SCHRITT 7 Beachten Sie dass Drums und Percussion Sounds in jedem Drum Set zusammengefasst sind. Das bedeutet, dass bei der Änderung der Drum Sounds zu einem anderen Set auf Seite 1 des Drum Set Menüs sich auch die Percussion Sounds ändern (auch wenn sich einzelne Pad Sounds nach dem Laden eines Drum Sets austauschen lassen).
- Page 66 SONGS ERZEUGEN UND LÖSCHEN Die PerformancePad Pro ist in der Lage, sich die Reihenfolge der von Ihnen ausgewählten Patterns, der gewählten Variationen und die gewählten Fills zu merken. Die Aufnahme dieser Informationen im Song Modus der PerformancePad Pro erzeugt einen kompletten Song. Beginnen wir bei gestoppter Wiedergabe.
- Page 67 SCHRITT 7 Nachdem Sie Ihre Pattern Sequenz als Song aufgenommen haben, drücken Sie die STOP Taste, um die Song Aufnahme zu beenden. SCHRITT 8 Nun sehen Sie im Display die hier rechts dargestellte Anzeige. Die obere Zeile zeigt den letzten Step des Songs (STEP 48 in diesem Beispiel) an.
-
Page 68: Technical Specifications
Step Editing, Stereo Samples, Reverb and Compressor / EQ effects. Power: Input 12VDC 500mA, center pin ground Weight: 7.1 lbs (3.2 kg) Dimensions (W x D x H): 17.2" x 14" x 2.5" (437 mm x 356 mm x 64 mm) www.alesis.com/performancepadpro 7-51-0337-A...