Table of Contents
Advertisement
Advertisement
Table of Contents

Related Manuals for Husqvarna Viking Eden Rose 250C Limited Edition


Summary of Contents for Husqvarna Viking Eden Rose 250C Limited Edition
- Page 1 User’s Guide L I M I T E D E D I T I O N K E E P I N G T H E WO R L D S E W I N G...
-
Page 2: Important Safety Instructions
This household sewing machine is designed to comply with IEC/EN 60335-2-28 and UL1594 IMPORTANT SAFETY INSTRUCTIONS When using an electrical appliance, basic safety precautions should always be followed, including the following: Read all instructions before using this household sewing machine. DANGER –... - Page 3 PRESSER FOOT KIT A limited edition accessory foot package is packed in the box with your HUSQVARNA VIKING ® ® EDEN ROSE™ sewing machine. The package contains the following optional presser feet: GATHERING FOOT (4127971-45) Gather fabric or gather and attach a ruffl e in one step. Suitable for light to medium weight fabrics.
-
Page 4: Table Of Contents
CONTENTS Machine Overview ..............5 SET Menu ................19 Mirror Side to Side .............19 Included Accessories .............. 6 Exclusive SEWING ADVISOR™ ........19 Getting Ready To Sew Sewing Mode ................20 Selecting a Stitch ..............21 Unpacking ................. 7 Selecting a Font ..............21 Packing away after sewing ............. -
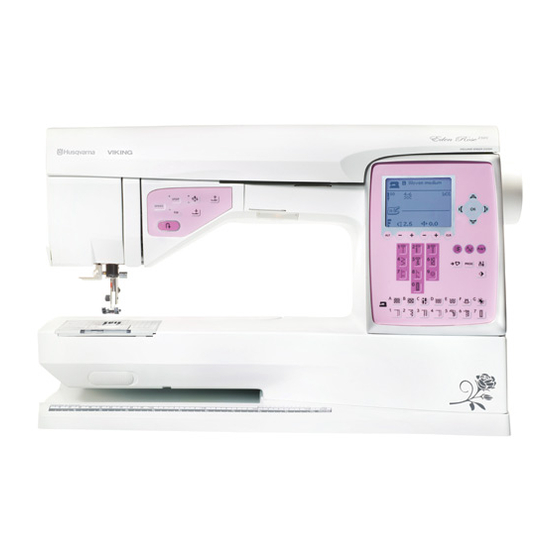
Page 5: Machine Overview
MACHINE OVERVIEW 1. Lid 13. Stitch plate 25. Thread cutter for bobbin thread 2. Pre-tension thread guide 14. Bobbin cover 26. Handwheel 3. Thread tension disks 15. Free arm 27. GraphicDisplay 4. Thread take-up lever 16. Drop feed teeth switch 28. -
Page 6: Included Accessories
INCLUDED ACCESSORIES Presser Feet Utility Foot A Attached on the machine upon delivery. This foot is used mainly for straight stitching and zigzag stitching with a stitch length longer than 1.0. Utility Foot B When sewing decorative stitches or short zigzag stitches and other utility stitches with less than 1.0 mm stitch length, use this foot. -
Page 7: Getting Ready To Sew
UNPACKING 1. Place the machine on a sturdy, fl at surface, remove the packaging and lift off the cover. 2. Remove the packing material and the foot control. 3. The machine is delivered with an accessory bag, a power cord and a foot control cord. 4. -
Page 8: Connecting The Foot Control Cord
CONNECTING THE FOOT CONTROL CORD Among the accessories you will fi nd the foot control cord and the power cord. Connecting the foot control cord to the foot control is only necessary the very fi rst time you are going to use the machine. 1. -
Page 9: Changing The Presser Foot
CHANGING THE PRESSER FOOT Press the ON/OFF switch to OFF. 1. Make sure the needle is in the highest position and the presser foot is lifted. Pull the presser foot towards you. 2. Line up the cross pin on the foot with the gap in the presser foot ankle. -
Page 10: Spool Pins And Spool Caps
SPOOL PINS AND SPOOL CAPS Your sewing machine has two spool pins, a main spool pin and an auxiliary spool pin. The spool pins are designed for all types of thread. The main spool pin is adjustable and can be used in a horizontal position (the thread reels off the stationary spool) or in a vertical position (the thread spool rotates). -
Page 11: Threading The Upper Thread
THREADING THE UPPER THREAD Make sure the presser foot is raised and the needle is in the up position Press the ON/OFF switch to OFF. 1. Place the thread on the spool pin and the spool cap on 4. Continue threading in the direction indicated by the the spool pin as described on page 10. -
Page 12: Needle Threader
NEEDLE THREADER The needle must be in the up position to use the built-in needle threader. We also recommend lowering the presser foot. 1. Use the handle to pull the needle threader all the way down, catching the thread under the guide (A). 2. -
Page 13: Threading For Twin Needles
3. Guide the thread through the hole in the bobbin (D) from the inside to the outside. Note: When using an earlier version of HUSQVARNA VIKING® bobbins that do not have a hole, wind several turns of thread on the bobbin to get started. -
Page 14: Winding The Bobbin
1. Place an empty bobbin on the bobbin spindle on the top of the machine. The bobbin only fi ts on one way, with the logo facing up. Use only original HUSQVARNA VIKING® bobbins. 2. Place the large spool holder and a felt pad under the spool on the main spool pin set in the vertical position. -
Page 15: Inserting The Bobbin
INSERTING THE BOBBIN Press the ON/OFF switch to OFF. 1. Remove the bobbin cover by sliding it towards you. 2. Place the bobbin in the bobbin case. It drops in only one way with the logo facing up. The thread unreels from the left of the bobbin. -
Page 16: Exclusive Sensor System™ (Ess)
EXCLUSIVE SENSOR SYSTEM™ (ESS) Sensor Foot Pressure With the Sensor Foot Pressure, the presser foot actually senses the thickness of fabric and stitching to sew over it smoothly and evenly with perfect fabric feeding. If you want to see the actual setting of the presser foot pressure for the selected fabric and adjust the pressure manually, go to the SET Menu (see page 25). -
Page 17: Operating The Machine
4. STOP STOP is used to conclude a stitch or to sew just one unit of the stitch. Your sewing machine ties off the thread and stops automatically when one stitch unit or stitch program has been completed. The LED next to the button is lit when STOP is activated. -
Page 18: Function Buttons On The Touch Panel
11. Clear Press this button to delete a single stitch or all stitches in a stitch program. Or use it to delete your saved stitches and stitch programs in the My Stitches Menu. This button is also used to activate tapering for Decorative Tapering Stitches. -
Page 19: Set Menu
19. SET Menu Press this button to open the menu for machine settings. Make changes and selections by using the arrow buttons (13). Press the button again to exit the SET Menu. 20. Mirror Side to Side Press this button to mirror the selected stitch side to side. If the button is pressed when straight stitch with left needle position is selected, the needle position is changed from left to right. -
Page 20: Sewing Mode
SEWING MODE Sewing Mode is the fi rst view on the GraphicDisplay after you turn on the machine. Here you will fi nd all the basic information you need to start sewing. This is also the menu where you adjust the settings of your stitch. -
Page 21: Selecting A Stitch
Selecting a Stitch Press the Stitch Menu button to select a stitch menu. Use the arrow buttons to select among the menus: 1. Utility stitches 2. Quilt stitches 3. Decorative stitches 4. Decorative stitches U. My Stitches The name and number of the selected menu is shown at the bottom of the display. -
Page 22: Programming
“Husqvarna” and “VIKING” are in the same program. For instance, a name and an address should be in the same program with a STOP after the name. - Page 23 Add Stitches or Letters at other Positions If you wish to add a stitch or letter at another position in the program, move the cursor by pressing the arrow buttons. The stitch or letter will be inserted to the right of the cursor. Note: When programming letters, press the arrow down button to activate the cursor in the stitch program instead of in the alphabet.
- Page 24 Sew Out the Stitch Program When you are done with your program press the My Stitches button to save it (see next page) or, if still in Programming Mode, press the PROG button or step on the foot control to switch to Sewing Mode. Once you are in Sewing Mode and step on the foot control the machine will sew out your stitch program.
-
Page 25: Set Menu
SET MENU You can change the pre-set machine settings and make manual adjustments to the automatic functions in the SET Menu. Open the menu by pressing the SET Menu button and select the setting you wish to adjust by pressing the up/down arrow buttons. -
Page 26: Free Motion Floating
Free Motion Floating* To sew in free motion with the included Embroidery/Darning Foot R or with any optional Free Motion Floating presser foot, set the machine in Free Motion Floating mode. The drop feed teeth recommendation will be activated. The setting remains when the machine is turned off. A pop-up reminds you of the setting when you turn on the machine. -
Page 27: Pop-Up Messages
POP-UP MESSAGES Bobbin Winding On This pop-up message appears when the bobbin winding spindle is pushed to the right and bobbin winding is activated. Presser Foot too High Your machine will not sew if there is too much fabric under the presser foot. - Page 28 Restart the Buttonhole? If you are sewing a buttonhole and stop to adjust the length settings you will get this question once you start sewing again. If you select “Yes”, the machine will restart and sew the buttonhole from the beginning with the new settings. If you select “No”, the change will be cancelled and the machine will continue sewing the rest of the buttonhole with the previous settings.
- Page 29 The Stitch Cannot be Programmed This message is shown if you try to program or add a buttonhole, bartack or the sew on button stitch to a program. All stitches in your sewing machine are programmable except for these. Close the pop-up message by pressing the OK button.
-
Page 30: Basic Sewing Techniques
EXCLUSIVE SEWING ADVISOR™ Your sewing machine has the Exclusive HUSQVARNA VIKING® SEWING ADVISOR™ feature. The Exclusive SEWING ADVISOR™ feature automatically sets the best stitch, stitch length, stitch width, sewing speed and sensor foot pressure for your project. The stitch is displayed on screen with presser foot, thread tension and needle recommendations. -
Page 31: Seam
SEAM A seam sews two pieces of fabric together with a seam allowance that usually will be pressed open. In most cases, edges of the seam allowance are fi nished with an overcast stitch before sewing the seam. Seams on stretch fabric must stretch with the fabric. The Stretch Stitch makes a stretchy seam that is suitable for 1:1 Straight Stitch sewing together pieces of light stretch fabric. -
Page 32: Seam And Overcast
SEAM AND OVERCAST The Seam/Overcast stitch sews the seam and overcasts the edge all at one time. There are a number of different Seam/ Overcast stitches on your sewing machine, to give the best result for your chosen fabric. 1:7 Overcast Stitch Stretch light or woven light/ Fabric: medium, cut in two. -
Page 33: Baste
BASTE Basting is temporary stitching for fi tting garments, gathering and marking. The Exclusive SEWING ADVISOR™ feature automatically sets a long stitch length so the threads are easy to remove or to pull for gathering. 1:15 Baste Stitch Place the fabrics right sides together. Put the fabric in All types of fabric. -
Page 34: Blind Hem
BLIND HEM The blind hem creates an invisible hem on garments. There are two types of blind hem; one is recommended for medium to heavy stretch fabric, the other for medium to heavy woven fabric. Fold the fabric as illustrated. Make sure the folded edge 1:16 Stretch Blind Hem Stitch 1:17 Woven Blind Hem Stitch of the fabric follows the inside of the right “toe”... -
Page 35: Hem
The Hem technique on your Exclusive SEWING ADVISOR™ feature will select the visible or topstitch hem that is best for your fabric weight and type. For woven fabric and leather and vinyl, a straight stitch is selected. For stretch fabrics, stitches that stretch are selected. Jeans Hem 1:1 Jeans hem When sewing over seams in extra heavy fabric or a jeans... -
Page 36: Sewing Buttonholes
SEWING BUTTONHOLES The buttonholes in your sewing machine are specially adjusted for different kinds of fabric and garments. Look at the stitch table on the last pages in this book to fi nd descriptions of each buttonhole. The Exclusive SEWING ADVISOR™ feature will select the best buttonhole and stitch settings for your fabric. - Page 37 Manual Buttonholes 1:0, 1:23-28 Buttonhole Stitches A buttonhole can also be sewn step by step without the Fabric: All types of fabric. Sensor One-Step Buttonhole Foot connected. Use the The fabric you are using Select: reverse button to set the length of the buttonhole. and the Buttonhole technique (The 1.
-
Page 38: Sewing On Buttons
SEWING ON BUTTONS 1:9 Sew on button Sew buttons, snaps, hooks and eyes quickly with your Fabric: All types of fabric. sewing machine. Select: The fabric you are using and 1. Snap off the presser foot and lower the feed teeth. the stitch for sewing on buttons, 1:9. -
Page 39: Sewing Zippers
SEWING ZIPPERS The Zipper Foot E can be snapped on either the right or the left of the needle, making it easy to sew both sides of the zipper. To sew the other side of the zipper, reposition the Zipper Foot. Move the needle position far left or far right to stitch close to the zipper teeth or cording. -
Page 40: Free Motion Quilting
FREE MOTION QUILTING Free Motion Floating When sewing free motion at a low speed, the foot will raise and lower with each stitch to hold the fabric on the stitch plate while the stitch is being formed. When sewing at a high speed, the foot fl oats over the fabric while sewing. The feed teeth must be lowered and the fabric is moved manually. -
Page 41: Taking Care Of The Machine
Only use light bulbs of a type as indicated on the front of the machine (24V, 5W). They are available at your authorized HUSQVARNA VIKING® dealer. Change the light bulbs as described below. Press the ON/OFF switch to OFF. -
Page 42: Trouble Shooting
• Turn machine off and on to reset. • Turn machine off and on to reset. • Change needle, rethread top and bobbin threads. • Consult your Authorized HUSQVARNA VIKING® • Use stabilizer. dealer for service. 42 – Taking Care of the Machine... - Page 43 • The sockets and function buttons on the machine can be sensitive to static electricity. If the function buttons do not respond to touch, turn the machine off and then on again. If the problem persists, contact your authorized HUSQVARNA VIKING dealer. ® HAVE YOUR SEWING MACHINE SERVICED...
-
Page 44: Stitch Table - Menu 1, Utility Stitches
STITCH TABLE - MENU 1, UTILITY STITCHES Stitch Stitch no. / Presser Foot Application Stitch name 0 – Bartack Sensor One- Standard buttonhole for most fabric weights. Buttonhole Step Buttonh. Foot/C 1 – Straight Stitch, For all types of sewing. Select 29 different needle positions. center needle pos. - Page 45 Stitch Stitch no. / Presser Foot Application Stitch name 21 – Darning Darn and mend small holes in work clothes, jeans, tablecloths and more. Stitch over the hole, Stitch (forward and press reverse for continuous darning and auto stop. backward) 22 –...
-
Page 46: Stitch Overview
STITCH OVERVIEW Menu 1: Utility Stitches Menu 2: Quilt Stitches Menu 3: Satin and Heirloom Stitches Menu 4: Decorative Stitches Stitches 0-9 are the same in all four stitch menus. Alphabets Block Brush Line Cyrillic and Hiragana Russian and Japanese alphabets. See the fonts on the GraphicDisplay of your sewing machine. - Page 47 VIKING, KEEPING THE WORLD SEWING & Design, EDEN ROSE, EXCLUSIVE SENSOR SYSTEM and SEWING ADVISOR are trademarks of KSIN Luxembourg II, S.ar.l. HUSQVARNA and the “crowned H-mark” are trademarks of Husqvarna AB. All trademarks are used under license by VSM Group AB.
- Page 48 ww w. hu sqv a r navi k in g.co m...