Kenwood TS-990S Instruction Manual
Hf/50 mhz transceiver
Hide thumbs
Also See for TS-990S:
- Instruction manual (290 pages) ,
- Service manual (245 pages) ,
- In-depth manual (107 pages)

Related Manuals for Kenwood TS-990S


Summary of Contents for Kenwood TS-990S
-
Page 1: Instruction Manual
INSTRUCTION MANUAL HF/50 MHz TRANSCEIVER TS-990S ©B62-2389-40 1.05 09 08 07 06 05 04... -
Page 2: Prior To Your First Qso
PRIOR TO YOUR FIRST QSO NOTICE TO THE USER Thank you for purchasing this TS-990S transceiver. This chapter, Prior to your first QSO, gives you a product One or more of the following statements may be overview, conditions of your use, notations applied to applicable for this equipment. -
Page 3: Precautions
For example, avoid use near a bathtub, sink, swimming pool, or in a damp basement or attic. • The presence of an unusual odor or smoke is often a sign of trouble. Immediately turn the power OFF and remove the power cable. Contact a KENWOOD service station or your dealer for advice. Index Contents... -
Page 4: Transportation, Installation And Packing Material Storage
A user is required to obtain approval from JVC KENWOOD corporation, in writing, prior to redistributing this document on a personal web page or via packet communication. -
Page 5: Software Copyrights
This product employs the software component in accordance strictly prohibited. with the End User License Agreement (hereinafter referred A user is required to obtain approval from JVC KENWOOD to as the "EULA") stipulated by JVC KENWOOD Corporation corporation, in writing, prior to redistributing this manual and/or the respective bona fide holder. -
Page 6: Trademarks
The latest URL and contacts of JVC KENWOOD • JVC KENWOOD Corporation has the right to change or improve Corporation at the time when this manual was written the product specifications, etc., described in this manual without prior notice. - Page 7 PRIOR TO YOUR FIRST QSO ■ SCREEN AND MESSAGES ■ NOTATION FOR KEYS, CONTROLS AND DISPLAYS Information that appears on the main screen after pressing In this manual, each key, control, and display are described. the MENU key or by a long press of any particular key is Notation Example Overview...
- Page 8 PRIOR TO YOUR FIRST QSO ■ NOTATIONS FOR USER OPERATION In this manual, various user operations are described, as below. Notation Example Overview Press down Press the main power switch (I/O) the main located on the rear panel, to the "I" power (ON) or "O" (OFF) position. switch (I/O) Press [ Press [...
-
Page 9: Table Of Contents
TREATMENT OF YOUR IMPORTANT DATA ......... V MAIN AND SUB SCREEN DISPLAYS ..........4-3 TROUBLESHOOTING ................V MAIN SCREEN ..................4-3 ABOUT THE URL AND CONTACTS OF JVC KENWOOD SUB SCREEN ..................4-4 CORPORATION ..................V CONFIGURING THE SCREEN TYPE ..........4-5 NOTATIONS APPLIED TO THIS MANUAL .......... - Page 10 TABLE OF CONTENTS RX ANTENNA ...................4-21 SELECTING THE CHANNEL NUMBER TO SAVE THE CONTEST DRIVE OUTPUT (DRV) ..............4-21 NUMBER FORMAT (TEXT ENTRY ONLY) ..........5-24 INTERNAL ANTENNA TUNER ............4-21 SELECTING THE CONTEST NUMBER FORMAT (TEXT ENTRY ONLY) ..5-25 CONFIGURING THE FIRST CONTEST NUMBER (TEXT ENTRY ONLY) .5-25 SECURING THE MATCHING TO THE ANTENNA .........4-21 PRESET ....................4-22 DECREMENTING THE CONTEST NUMBER (TEXT ENTRY ONLY) ..5-26 PLAYING AND TRANSMITTING A CW MESSAGE ......5-27 CHANGING THE ANTENNA BEHAVIOR FOR RECEPTION ....4-22 INTERRUPTING THE KEYING ..............5-27 TRANSMIT HOLD AFTER ANTENNA TUNING COMPLETES .....4-23...
- Page 11 TABLE OF CONTENTS USING THE USB KEYBOARD TO TRANSMIT A TEXT STRING ..5-56 SHIFTING THE SCOPE AREA BY PLACING THE MARKER NEAR TRANSMITTING THE ENTERED TEXT STRING AS ENTERED ..5-56 CENTER (FIXED MODE) ................7-6 DISPLAYING THE MAXIMUM WAVEFORM VALUE ........7-7 TEMPORARILY STORING AND TRANSMITTING THE TEXT STRING IN PAUSING THE WAVEFORM DISPLAY ............7-7 THE BUFFER ..................5-56 UTILIZING AN PSK MESSAGE MEMORY ........5-57...
- Page 12 TABLE OF CONTENTS 15 CLOCK DISPLAY AND TIMER CLEARING THE MEMORY CHANNEL ..........10-7 CONFIGURING NAMES FOR MEMORY CHANNELS .....10-7 CONFIGURING THE DATE AND TIME ..........15-1 QUICK MEMORY ................10-8 CONFIGURING THE DATE FOR THE LOCAL CLOCK ......15-1 QUICK MEMORY CHANNELS ............10-8 CONFIGURING THE TIME FOR THE LOCAL CLOCK ......15-1 CONFIGURING IN QUICK MEMORY ..........10-8 CONFIGURING THE TIMEZONE FOR THE LOCAL CLOCK ....15-2...
- Page 13 REVERSING THE PKS SIGNAL POLARITY ........16-29 CROSSBAND REPEATER..............16-29 PREPARATION ..................16-29 OPERATION ..................16-30 SKY COMMAND SYSTEM II ............16-30 PREPARATION ..................16-30 TS-990S + TH-D72A/E, TM-D710A/E OR TM-D700A (G) (TRANSPORTER) CONFIGURATION ..........16-31 CONTROLLING THE LINEAR AMPLIFIER ........16-31 CONTROLLING THE LINEAR AMPLIFIER FOR OPERATION IN THE HF BAND ....................16-31 CONTROLLING THE LINEAR AMPLIFIER AT 50 MH .......16-32...
-
Page 14: Installing And Connecting The Transceiver
1 INSTALLING AND CONNECTING THE TRANSCEIVER PRECAuTIONS FOR INSTALLATION connected to the ground terminal before plugging the AC plug into the outlet. Likewise, remove the ground To carry and install the transceiver requires two or more connection only after unplugging the AC plug. Failure to persons. -
Page 15: Torque Adjustment For Tuning (M) Control
1 INSTALLING AND CONNECTING THE TRANSCEIVER ACCESSORIES CONNECTIONS (FRONT TORQUE ADJUSTMENT FOR TUNING (M) CONTROL PANEL) You can change the rotation torque of the Tuning (M) control as desired by pinching the ring at the back of the dial, then rotating the dial. Clockwise increases the HEADPHONES (PHONES) rotation torque and counterclockwise decreases it. -
Page 16: Microphone (Mic)
INSTALLING AND CONNECTING THE TRANSCEIVER 1 MICROPHONE (MIC) USB FLASH DRIVE/USB KEYBOARD ( The MIC jack accepts a microphone with an impedance of You can connect any commercially available USB flash 250Ω to 600Ω. drive or USB keyboard to the USB-A port. Connect the microphone plug to the MIC socket on Connect it securely to the (USB-A) port. -
Page 17: Key For Cw (Key)
1 INSTALLING AND CONNECTING THE TRANSCEIVER KEY FOR CW (KEY) For CW operation without using the built-in electronic keyer, the plug from a electronic key, a straight key, a external electronic keyer or a PC keyer can be connected. The KEY jack accepts a 2-conductor (mono) plug with a 3.5 mm (1/8") diameter. -
Page 18: Connection To A Pc
◆ To control the transceiver via the USB connector using a PC, you need to install the virtual COM port driver onto the PC. ◆ To use the USB audio, the driver available in your PC as standard will be used. You can down load the ARUA-10 USB Audio Controller from the KENWOOD web site. RS-232C Straight Cable... -
Page 19: Connection To The Linear Amplifier
Note: ◆ TL-922 have been discontinued and is no longer available. CONNECTION TO THE TL-922 TL-922 TS-990S Supplied 7-pin DIN Plug (Use a self-made connection cable using the 7-pin DIN plug supplied with the transceiver.) CONTROL RELAY Allocate pin number 2 (COM) in the REMOTE connector to connect to... -
Page 20: Connection To Other Kenwood Transceivers With A Tnc Terminal
{page 16-27} You can connect the TS-990S to a TM-D710A/E or RC-D710 using an optional PG-5G and a commercially available RS- 232C cross-cable. If the RS-232C cross-cable has female plugs or male plugs, use a female to male conversion plug. -
Page 21: Connection To An External Antenna Tuner At-300
◆ If you connect the AT-300 to the AT terminal, the transmit power will be limited to 100 W. (Depending on the specifications for AT-300) ◆ The AT-300 has been discontinued and is no longer available. ANT 1 connector TS-990S AT-300 CONNECTION TO A TNC, MCP, ETC. -
Page 22: Connecting To Your Lan
INSTALLING AND CONNECTING THE TRANSCEIVER 1 CONNECTING TO YOuR LAN To connect the transceiver to your LAN so as to automatically correct the clock or to operate with KNS (KENWOOD NETWORK COMMAND SYSTEM), use an Ethernet cable (straight type) as shown in the illustration below. -
Page 23: Terminal Descriptions
1 INSTALLING AND CONNECTING THE TRANSCEIVER TERMINAL DESCRIPTIONS ab c d e COM CONNECTOR Pin No. Pin Name Function Input/Output No connection — Sends the serial data to a PC. Receives the serial data from a PC. No connection — Ground —... -
Page 24: Acc2 Connector
INSTALLING AND CONNECTING THE TRANSCEIVER 1 ACC2 CONNECTOR Pin No. Pin Name Function Input/Output Audio Output for the Sub Band Audio Sends the audio signal to external devices, such as TNC, MCP and PC. • The audio output level cannot be changed with the AF control on the front panel. SANO •... -
Page 25: Ext.at Connector
1 INSTALLING AND CONNECTING THE TRANSCEIVER a b c d e f EXT.AT CONNECTOR Pin No. Pin Name Function Input/Output Ground — EXT.AT control (TTI/TTO) Ground — No connection — EXT.AT control (TSI/TSO) 13.8 V DC source for EXT.AT MIC CONNECTOR Pin No. -
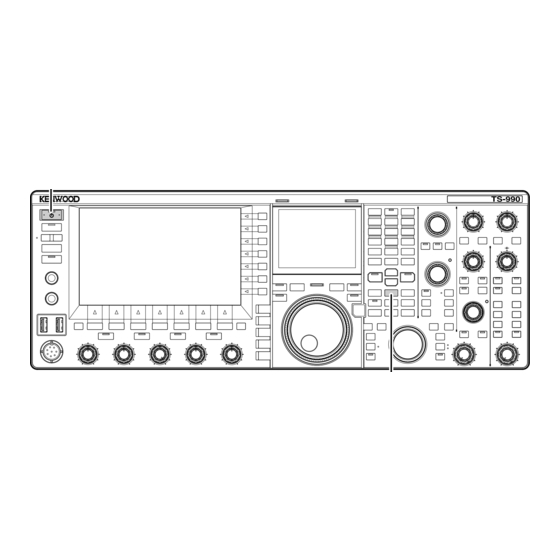
Page 26: Panel Description
2 PANEL DESCRIPTION FRONT PANEL f PHONES jack a Power Switch: [ ](POWER) Connect a set of headphones(4 to 32Ω). {page 1-2} Press to turn the transceiver power ( ) ON or OFF. {page 4-1} g PADDLE jack " " LED Connect a paddle for CW operation. {page 1-3} Lights green when the transceiver power ( ) is ON. - Page 27 2 PANEL DESCRIPTION xy z A FM/AM/FM-N key: [FM/AM/FM-N] Press to toggle the Speech Processor between active and inactive. {page 9-6} Press to toggle between FM mode and AM mode. Press and hold to open or close the Speech Processor Press and hold to toggle FM mode between narrow (FM-N) screen.
- Page 28 PANEL DESCRIPTION 2 and inactive. {page 5-3} y TX (Main band) key: [TX] (M) Press to switch Split mode to Simplex mode. {page 5-1} "RX" (Sub band) LED "TX" (Main band) LED Lights green while the sub band is in receive mode. Lights green while in Simplex mode.
- Page 29 2 PANEL DESCRIPTION X Down key: [DOWN] Press to decrease the frequency in steps of 1 MHz. Hold the key down to continuously decrease the frequency. While a configuration screen is open, press to execute the key task which varies depending on the configuration screen. For example, press to decrease or continuously decrease the parameter in the proper step size.
- Page 30 PANEL DESCRIPTION 2 "APF" (Sub band) LED Lights green while Audio Peak Filter for the sub band is active. {page 6-7}, {page 6-8} RF (S) control AF (S) control: Rotate to adjust the AF level for the sub band. RF (R) control: Rotate to adjust the RF level for the sub band. Mute key for Sub band received audio: [MUTE] (S) Press to toggle the mute for the received audio of the sub band between On and Off.
- Page 31 2 PANEL DESCRIPTION Noise Blanker 2 (Main band) key: [NB2] (M) Press to toggle the Noise Blanker 2 for the main band between active and inactive. {page 6-9} Noise Reduction 1 (Main band) key: [NR1] (M) Press to toggle the Noise Reduction 1 for the main band between active and inactive.
- Page 32 PANEL DESCRIPTION 2 Memory keys Quick Memory keys [M/V] key [MR] key Press to toggle between Memory Channel mode and VFO Press to toggle the Quick Memory mode between active and mode. {page 10-4} inactive. {page 10-8} Press and hold to switch between Dual Memory Channel Press and hold to clear all the operating data stored in Quick mode and VFO mode.
- Page 33 2 PANEL DESCRIPTION LO/WIDTH control MULTI/CH control High Cut/Low Cut mode: Rotate to adjust the low cut Rotate to increment or decrement the frequency step while in frequency. {page 6-4} VFO mode. {page 4-13} Shift/Width mode: Rotate to adjust the Rotate to increment or decrement the channel number bandwidth.
-
Page 34: Rear Panel
COM connector Connects to a PC and LAN so as to operate with KNS This is an RS-232C connector for connection to a PC. (KENWOOD NETWORK COMMAND SYSTEM) or to This enables PC control and memory management. automatically correct the clock. - Page 35 2 PANEL DESCRIPTION this connector replace those from ANT1 - ANT4 (for RX l DISPLAY connector only). {page 4-21} Connects to an external display unit. You can mirror the main screen display onto an external monitor. {page 16-18} No signals from the ANT1 to ANT4 connectors can be input if the reception antenna I/O is turned ON by pressing [RX The DISPLAY connector contains a DVI-I connector which ANT].
-
Page 36: Microphone (Option)
PANEL DESCRIPTION 2 MICROPHONE (OPTION) a PTT (Push-to-talk) switch Hold down this switch to transmit. Release the switch to receive. b UP/ DOWN keys: [UP]/[DOWN] (microphone) Press to increment or decrement the VFO frequency or select the previous or next items in the following mode. Press and hold these keys to continuously increment or decrement the parameters. -
Page 37: Main Screen
2 PANEL DESCRIPTION MAIN SCREEN Area Display Description Ref. Page Displays the antenna number. The antenna number changes when you change the antenna. {page 4-20} Disappears when the transmit signal is sent through the DRV connector to a transverter. Appears while the antenna dedicated for reception is active. {page 4-21} Appears if "-6 dB", "-12 dB"... - Page 38 PANEL DESCRIPTION 2 Area Display Description Ref. Page Displays the RIT or XIT frequency in the range from -9.999 kHz to 9.999 kHz. {page 5-13} The status varies depending on the audio source for the transmit audio selected using the Data VOX.
- Page 39 2 PANEL DESCRIPTION Area Display Description Ref. Page Displays the receiving band. {page 5-1} Appears while the VFO mode or auto mode frequency is being configured. {page 4-11} Displays the entry history while in VFO mode or in frequency entry mode. {page 4-15} Appears while transmitting or receiving using the operating information from a memory channel.
-
Page 40: Sub-Screen
PANEL DESCRIPTION 2 SUB-SCREEN Dual Frequency Display Single Frequency Display (Main Band Frequency and Sub-band Frequency) (Main Band Frequency/Dial) Note: ◆ Pressing [S.DISP/SEL] changes the sub screen displays. Refer to "BASIC OPERATIONS" for further details. {page 4-4} Area Display Description Ref. - Page 41 2 PANEL DESCRIPTION Vector Scope X-Y Scope Area Display Description Ref. Page Appears while decoding in RTTY (FSK) or PSK mode. {page 5-35} Displays the selected band to decode, either the main band or the sub band. {page 5-36} Displays the selected IF filter. {page 9-8} Displays the passband width for the IF filter.
-
Page 42: Menu
3 MENU MENU CONFIGURATIONS OPENING THE SUB MENU In the Menu screen, you can configure and edit various 1 Press [MENU] to open the Menu screen. functions of this transceiver as well as change the 2 Press the function key for the key guide on the right operating environment. -
Page 43: Switching The Operating Data Between Config A And Config B
3 MENU SWITCHING THE OPERATING DATA BETWEEN CONFIG Note: A AND CONFIG B ◆ The current status of the operating environment, either "CONFIG A" or "CONFIG B", appears on the status bar of the Menu screen. Also, the operating environment data can be stored to or read from Parameters configured in the menu and various a USB flash drive. - Page 44 MENU 3 Basic Configurations (Group 0) Reference Menu Display Configuration Range Default Page Assignment of the programmable Refer to the programmable Message 0-21 External PF 3: Key Assignment 16-7 function to [PF 3] (Keypad) function key list. Memory CH3 Assignment of the programmable Refer to the programmable Message 0-22...
- Page 45 3 MENU Decoding & Encoding (Group 2) Reference Menu Display Configuration Range Default Page FSK Decode Averaging in the FFT scope (RTTY 2-00 FFT Scope Averaging (RTTY Decode) 0 to 9 (in steps of 1) 5-38 Decode) 2-01 RX UOS RX Unshift On Space Off, On 5-42...
- Page 46 MENU 3 Memory Channels & Scan (Group 4) Reference Menu Display Configuration Range Default Page Memory 4-00 Number of Quick Memory Channels The number of quick memory channels 3, 5, 10 [ch] 5 [ch] 10-8 Temporary Change (Memory Channel Temporary change of configurations for 4-01 Off, On 10-5...
- Page 47 3 MENU TX/RX Filter & Misc. (Group 6) Reference Menu Display Configuration Range Default Page Message Last 10 [s], Last 20 [s], Last 30 6-00 Playback Time (Full-time Recording) Playback time for the full-time recording Last 30 [s] 13-5 Location of holder where the recorded files 6-01 Recorded Audio File Storage Location Internal, USB...
- Page 48 MENU 3 Audio output from the rear panel 7-14 Audio Output Type (Rear Connectors) All, Received Audio Only 16-6 connectors 7-15 Speaker Output Configuration Speaker output format Normal, Reversed, Mixed Normal 16-17 7-16 USB: Audio Output Configuration USB: Audio output format Normal, Reversed, Mixed Normal 16-21...
- Page 49 3 MENU Selecting the upper limit frequency Fixed Mode 10 MHz Band Upper Limit 8.005.000 [MHz] to 11.000.000 10.150.000 8-20 for the 10 MHz Band in Fixed mode (max. 11 MHz) [MHz] (in steps of 0.001 [MHz]) [MHz] (maximum 11 MHz) Selecting the lower limit frequency Fixed Mode 14 MHz Band Lower Limit 11.000.000 [MHz] to 14.995.000...
-
Page 50: Reset Menu Items
Secondary DNS Server Secondary DNS server 1.0.0.0 to 223.255.255.255 blank MAC Address MAC Address Unique for each transceiver 16-13 A maximum of 8 alphanumeric Administrator ID Administrator ID admin 16-14 characters A maximum of 8 alphanumeric Administrator Password Administrator Password Kenwood 16-14 characters Contents Index... -
Page 51: Advanced Menu Items
3 MENU ADVANCED MENU ITEMS Reference Menu Display Configuration Range Default Page Automatic, TX Power, ALC, Drain Output signal type (main band) to an Indication Signal Type (Main Band) Voltage (Vd), Compression Level Automatic 16-15 external meter (COMP), Current (Id), SWR TX Power, ALC, Drain Voltage Output signal type (sub band) to an Indication Signal Type (Sub Band) -
Page 52: List Of Usb Menu Items
MENU 3 LIST OF USB MENU ITEMS Reference Display Configuration Page Read Configuration Data Reading the transceiver configuration data 12-2 Save Configuration Data Saving the transceiver configuration data 12-2 USB Flash Drive Formatting Formatting the USB flash drive 12-1 Safe Removal of USB Flash Drive Safe removal of a USB flash drive 12-1 3-11... -
Page 53: Basic Operations
4 BASIC OPERATIONS TURNING THE TRANSCEIVER ON PRECAUTION Prior to switching the main power (I/O) ON, read ◆ When the transceiver power ( ) is first turned ON, be sure that carefully through "INSTALLING AND CONNECTING you set the clock (your local time) for the first time. The clock is utilized for time stamping of various types of the files. -
Page 54: Enabling The Standby State Low Power Consumption
4 BASIC OPERATIONS Note: ◆ If Standby State Low Power Consumption is enabled, the transceiver cannot accept a PC command. To start up the transceiver using a PC, be sure to disable, in Advanced Menu 22, the Standby State Low Power Consumption. ◆... -
Page 55: Cooling Fan And Temperature Protection For Final Unit
BASIC OPERATIONS 4 COOLING FAN AND TEMPERATURE PROTECTION FOR FINAL UNIT To protect internal circuits from high temperatures, the transceiver senses the temperature of the final unit regardless of the operation state, either transmitting or receiving, and controls the cooling fan rotation speed for the final unit and the transmit power as described below. -
Page 56: Sub Screen
4 BASIC OPERATIONS ■ Function Keys on the right side of the Main Screen ■ S witching to the Standard Mode and to the Enhanced Mode • [ANT] (F) {page 4-20} 1 Press and hold [S.DISP/SEL] to switch to the standard Press to switch the antenna configuration. or enhanced mode. Press and hold to open the Antenna Name screen. A long press displays or hides a dial on the sub-display. -
Page 57: Configuring The Screen Type
BASIC OPERATIONS 4 CONFIGURING THE SCREEN TYPE The background color or the font type can be changed as desired. CHANGING THE BACKGROUND COLOR You can select the background color for the main screen and sub screen from three options. 1 Select Group No. 0, "Basic Configurations", from the The selected band frequency The selected band frequency (enhanced) Audio Band Scope Display... -
Page 58: Changing The Dial Color (Sub Screen)
4 BASIC OPERATIONS SELECTING THE DIMMER 4 Press [-] (F4) or [+] (F5) to select "Font 1", "Font 2", or "Font 3". Dimmer is a function to change the brightness of the The default is "Font 1". screen and LED as you wish. 5 Press [ ] (F1). -
Page 59: Swapping The Operating Data Between Main Band And Sub Band
BASIC OPERATIONS 4 SWAPPING THE OPERATING DATA BETWEEN ADJUSTING THE AF GAIN MAIN BAND AND SUB BAND You can adjust the speaker volume. Two independent AF controls are available for the main band and for the sub There two independent receivers in this transceiver, such band, respectively. -
Page 60: Adjusting The Rf Gain
4 BASIC OPERATIONS ADJUSTING THE RF GAIN CONFIGURING THE OPERATING BAND You can adjust the received sensitivity gain. Two You can select your desired operating band. independent RF controls are available for the main band The band can be configured for the main band and the and for the sub band, respectively. - Page 61 BASIC OPERATIONS 4 ■ Band Memory Defaults Default (MHz) and Mode Band Name and Frequency Range (MHz) Band Memory 1 Band Memory 2 Band Memory 3 Band Memory 4 Band Memory 5 1.8/ CW (K-type) 1.81/ CW (K-type) 1.82/ CW (K-type) 1.83/ CW (K-type) 1.84/ CW (K-type) 1.8 MHz/ 1.62 to 2.00 1.83/ CW (E-type)
-
Page 62: Selecting The Operating Mode
4 BASIC OPERATIONS SELECTING THE OPERATING MODE CONFIGURING THE DATA MODE The operating mode can be selected. The transceiver The DATA mode is the operating mode with which you can can be operated in SSB (LSB/USB), CW (CW-R), FSK connect external equipment to the transceiver, enabling (FSK-R), PSK (PSK-R), FM and AM modes. -
Page 63: Auto Mode
BASIC OPERATIONS 4 AUTO MODE CONFIGURING AUTO MODE FREQUENCY POINTS You can configure up to 32 auto mode frequency points. Auto Mode is a convenient function allowing you to automatically switch to the correct operating mode 1 Press [MENU]. according to your band plan. 2 Press [A.MODE] (F1) to open the Auto Mode screen. -
Page 64: Tuning The Frequency
4 BASIC OPERATIONS TUNING THE FREQUENCY While Auto Mode is active, you can select the operating band automatically assigned to each channel. For normal There are another methods to tune the frequency other Amateur Radio use, LSB mode should be selected for than the basic methods of rotating the Tuning control or SSB frequencies lower than 10.1 MHz and USB mode pressing [UP] or [DOWN] (microphone). -
Page 65: Using The Microphone Keys
BASIC OPERATIONS 4 USING THE MICROPHONE KEYS ROUNDING OFF THE FREQUENCY When selecting a frequency using the MULTI/CH control, 1 Press [UP] (microphone) or [DOWN] (microphone) to the new frequency may fall between two integer points, increment or decrement the frequency. thus the frequency will be rounded off to the nearest Note: integer. -
Page 66: Fine Tuning
4 BASIC OPERATIONS FINE TUNING TUNING IN MHZ STEP You can change the frequency step size of the Tuning 1 Press [UP] or [DOWN] to change the frequency in control to be 1/10th of the default step size. Fine Tuning steps of 1 MHz. -
Page 67: Directly Entering The Frequency
BASIC OPERATIONS 4 The default is “Off” (K-type) and “On” (E-type). Note: ◆ The maximum frequency you can enter is 59.99999 MHz for Fine 5 Press [ ] (F1). Tuning, you cannot enter 60 MHz. 6 Press [MENU] to exit. ◆... -
Page 68: Using The Frequency Lock
4 BASIC OPERATIONS USING THE FREQUENCY LOCK Keys/Controls Remarks Frequency Lock can lock particular keys and controls Tuning (M) and Tuning (S) The Tuning (M) control can be rotated so they are not accidentally operated to change the controls during your operation with TF-SET. frequency. -
Page 69: Transmitting
Clockwise increases the transmit power and counterclockwise decreases it. The available transmit power range varies, depending on the band and operating mode. Refer to the following table. TS-990S Other than AM HF Band 5 to 200 [W] 5 to 50 [W] 1 Press down the [PTT] (microphone), or press [SEND]. -
Page 70: Transmit Power Limiter
4 BASIC OPERATIONS METER TRANSMIT POWER LIMITER You can place a limit on the transmit power of your The meter for the main band displays the signal as an transceiver. This function prevents the transmit power S-meter while receiving and as the selected meter while from exceeding the configured transmit power limit even transmitting. -
Page 71: Changing The Transmit Meter
BASIC OPERATIONS 4 S-meter for the sub band Note: ◆ If an analog meter is connected to the METER terminal on the rear Type 2 (Analog 1 Meter) panel, the signal level can be observed on both the front panel and the external meter. -
Page 72: Storing The Antenna Name
4 BASIC OPERATIONS A maximum of 5 alphanumeric characters and symbols can be entered. [SPACE] (F1): Press to enter one space. [-] (F2) or [+] (F3): Press to display the previous or next character. ] (F4) and [ ] (F5): Press to move the cursor to the left or right. -
Page 73: Internal Antenna Tuner
BASIC OPERATIONS 4 receiver and the sub band receiver. This will result in a • Following the configuration in Advanced Menus 11 (Linear sensitivity reduction of approximately 3 dB with a noise Amplifier Control (HF Band)) and 12 (Linear Amplifier level rise by 3 dB. - Page 74 4 BASIC OPERATIONS Preset Band (MHz) for the Internal Antenna Tuner 0.03 to 1.85 14.10 to 14.50 1.85 to 2.50 14.50 to 18.50 2.50 to 3.525 18.50 to 21.15 3.525 to 3.575 21.15 to 21.50 3.575 to 3.725 21.50 to 25.50 3.725 to 4.1 25.50 to 29.0 4.1 to 6.9...
- Page 75 BASIC OPERATIONS 4 Note: will be allocated to the left channel, and the received audio in the sub band will be allocated to the right channel. ◆ If Full Break-in for use in CW mode is active, the antenna tuner for reception can be active regardless of the above configuration.