
Related Manuals for Kenwood DDX7025BT


Summary of Contents for Kenwood DDX7025BT
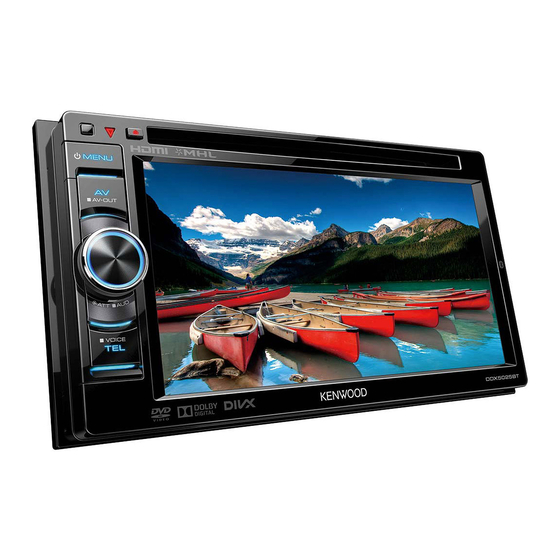
- Page 1 DDX7025BT DDX5025BT DDX7055BT DDX5055BT DDX5025DAB MONITOR WITH DVD RECEIVER INSTRUCTION MANUAL © 2014 JVC KENWOOD Corporation LVT2513-001A (EN/QN)
-
Page 2: Table Of Contents
How to read this manual: • Illustrations of DDX7025BT are mainly used for explanation. The displays and panels shown in this manual are examples used to provide clear explanations of the operations. For this reason, they may be different from the actual displays or panels. -
Page 3: How To Reset Your Unit
❏ How to reset your unit olacaktır. Notice: The sign “Pb” below the symbol for batteries DDX7025BT/DDX7055BT indicates that this battery contains lead. V Cautions on the monitor: • The monitor built into this unit has been... -
Page 4: Initial Settings
• You can also change the settings on the <Setup> screen. (Page 46) The <TOP MENU> screen is displayed. * Only for DDX7025BT/DDX7055BT . Setting the security function You can set a security code to protect your receiver • To clear the registered security code, perform system against theft. - Page 5 INITIAL SETTINGS ❏ Activating the security function Set the clock time. Clock settings You can activate the security function to protect Display the <TOP MENU> screen. your receiver system against theft. On the source control screen: Display the <System> setting screen. On the <TOP MENU>...
-
Page 6: Basics
MENU button Component names and functions • Displays the phone control screen. (Press) • Displays the <TOP MENU> screen. (Press) DDX7025BT/DDX7055BT (Page 34) (Page 8) • Activates voice dialing. (Hold) (Page 35) • Turns off the power. (Hold) (Page 7) 9 M (Eject) button •... -
Page 7: Common Operations
❏ Turning off the power ❏ Putting the unit in standby ❏ Adjusting the panel angle (only for DDX7025BT DDX5025DAB DDX7025BT/DDX7055BT ) Display all <TOP MENU> items. DDX7055BT DDX5025BT On the <TOP MENU> screen: Display the <Angle Adjust> screen. -
Page 8: Common Screen Operations
BASICS ❏ Turning off the screen Common operation buttons: <TOP MENU> screen 1 Displays other operation buttons. Displays the source control screen and settings DDX7025BT DDX5025DAB • Disabled when there are no other buttons. screen. DDX7055BT* DDX5025BT 2 Switches between the normal source control DDX5055BT* screen and easy control screen. -
Page 9: Selecting The Playback Source
BASICS ❏ Touch screen operations [AV-IN1][AV-IN2] Selecting the playback source Switches to an external component connected to the AV- On the <TOP MENU> screen: IN1 or iPod/AV-IN2 input terminal. (Page 27) When no navigation unit is connected, “No Navigation” appears. Only for DDX5025DAB. -
Page 10: Discs
• If the ejected disc is not removed within 60 seconds, the disc is automatically inserted again into the loading slot to protect it from dust. Playback information Closing the monitor panel (only for DDX7025BT/ 1 Media type DDX7055BT ) 2 Current playback item information After removing the disc, press M on the monitor •... - Page 11 DISCS Operation buttons Does not appear for DVD/DVD-VR/VCD. Operation buttons Search speed varies depending on the type of disc or file. Displays the easy control screen. Displays the easy control screen. Does not appear for DVD/DVD-VR. (Page 8) (Page 8) Appears only for DVD-VR. Displays the folder/track list.
- Page 12 DISCS ❏ Selecting a folder/track on the list ❏ Video menu operations [ZOOM]* Displays the picture size selecting screen. (Page 42) You can display the video menu screen during video [Aspect] Selects the aspect ratio. playback. (Page 42) • Available items on the screen differ depending on the types of the loaded disc and playback files.
- Page 13 DISCS ❏ Selecting playback mode For VCD • To select a track directly, press [Direct] to display the direct selecting buttons, then... Selects Repeat playback mode. Selects Random playback mode. • For DVD/DVD-VR: Repeat play is available. For VCD (without PBC)/CD/DivX/MPEG1/MPEG2/ MP3/WMA/AAC: Repeat and Random play are available.
- Page 14 DISCS Enter the 4-digit parental pass code (1), <Screen Select the monitor type to watch a Settings for disc playback Ratio>* wide screen picture on the external and press [Enter] (2). monitor. 16:9 (Initial) 4:3 LB 4:3 PS • The items available on the <DISC Mode> screen are different depending on the discs/files played back.
-
Page 15: Usb
[O] [N] Reverse/forward search.* ❏ Indications and buttons on the source Connecting a USB device Starts/pauses playback. [IW] control screen You can connect a USB mass storage class device Displays other operation buttons. such as a USB memory, Digital Audio Player etc. to •... -
Page 16: Ipod/Iphone
iPod/iPhone ❏ Setting <Picture Display Time> • On the <Category List>/<Folder List>: You Preparation can switch the file type to list: Press [ ] to list Set the interval between slides during slide-shows of ❏ Connecting iPod/iPhone audio files, [ ] to list video files, or [ ] to the picture files. - Page 17 iPod/iPhone Bluetooth connection • If [Enter] for <iPod Setup> cannot be • When selecting <USB + AV-IN> or <USB 1 Pair the iPod/iPhone through Bluetooth. (Page 30) selected, put the unit in standby. (Page 7) Wire>, go to step 5. • For iPhone 5/iPod touch (5th Generation)/iPod When selecting <HDMI + Bluetooth>...
- Page 18 iPod/iPhone ❏ Selecting preference settings for iPod/ Operation buttons Playback operations Displays the easy control screen. iPhone playback (Page 8) When the source is “iPod”... When the operation buttons are Displays the audio/video file list. not displayed on the screen, touch (Page 19) the area shown on the illustration.
-
Page 19: Apps
APPs iPod/iPhone ❏ Selecting an audio/video file from the You can use an App of the connected iPod touch/ Selects an audio/video file. [S] [T] iPhone/Android on this unit. menu Reverse/forward search. [O] [N] Preparation Starts/pauses playback. [IW] [MENU] Displays the <TOP MENU> screen. Connect the iPod touch/iPhone/Android. -
Page 20: Tuner
TUNER ❏ Changing the display information Operation buttons Listening to the radio [P1] – [P6] • Selects a stored station. (Press) ❏ Indications and buttons on the source • Stores the current station. (Hold) control screen [MODE] Changes the settings for tuner reception on the <Tuner Mode>... - Page 21 TUNER ❏ Selecting a preset station PTY Search starts. Presetting stations If there is a station broadcasting a program of ❏ Storing stations in the memory the same PTY code as you have selected, that station is tuned in. You can preset 6 stations for each band. •...
- Page 22 TUNER ❏ Tracing the same program—Network- ❏ Automatic TI station seek—Auto TP News Standby Reception Tracking Reception Seek When driving in an area where FM reception is not When traffic information station reception is poor, sufficient enough, this unit automatically tunes in to the unit automatically searches for another station another FM Radio Data System station of the same that can be received better.
-
Page 23: Digital Radio (Dab)
DIGITAL RADIO (DAB) (Only for DDX5025DAB) Operation buttons About DAB (Digital Audio Listening to Digital Radio [P>] Displays other preset numbers. Broadcasting) ❏ Indications and buttons on the source [P1] – [P15] • Selects a stored service. (Press) control screen What is DAB system? •... - Page 24 DIGITAL RADIO (DAB) ❏ Changing the display information Select a service from the list. Presetting services On the <Preset List> ❏ Storing services in the memory • You can change the page to display more items by pressing [J]/[K]. You can preset 15 services. Select a service you want to preset.
- Page 25 DIGITAL RADIO (DAB) ❏ Activating/deactivating TI Standby ❏ Entering the Replay mode Radio Data System features Reception ❏ Searching for Radio Data System programs—PTY Search You can search for your favorite programs being broadcast by selecting the PTY code. The unit is in standby to switch to Traffic Information (TI) if available.
- Page 26 DIGITAL RADIO (DAB) Operation b uttons <PTY W ATCH> If the service of the set <Seamless • ON (initial): Prevents audio • Skips back or forward by about 15 [S][T] program type begins with the Band> break when switching from seconds.
-
Page 27: Other External Components
OTHER EXTERNAL COMPONENTS ❏ Starting playback Using external audio/video Using a rear view camera Connect an external component to the players—AV-IN • To connect a rear view camera, see page 57 . AV-IN1 and iPod/AV-IN2 input terminals. • To use a rear view camera, a REVERSE lead When the operation buttons are (Page ... -
Page 28: Using A Smartphone-Hdmi/Mhl
❏ Displaying the screen of the control screen To display the picture from the rear view camera smartphone manually You can display the screen of your smartphone DDX7025BT/ DDX5025DAB DDX5025BT/ connected via HDMI/MHL input terminal. DDX7055BT* DDX5055BT* Connect your smartphone to the HDMI/ MHL input terminal. -
Page 29: Using The External Navigation Unit
OTHER EXTERNAL COMPONENTS To exit the navigation screen Using the external navigation unit DDX7025BT DDX5025DAB You can connect a navigation unit (KNA-G620T : DDX7055BT DDX5025BT optional accessory) to the navigation input terminal DDX5055BT so that you can view the navigation screen. -
Page 30: Bluetooth
BLUETOOTH Auto pairing Information for using Bluetooth® Connecting Bluetooth devices When <Auto Pairing> is set to [ON], iPhone is devices ❏ Registering a new Bluetooth device automatically paired when connected via USB. (Page 37) When you connect a Bluetooth device to the unit for the first time, pair the unit and the device. - Page 31 BLUETOOTH Pairing a Bluetooth device from the target device Change the PIN code. Select the unit (“DDX****”) on your using a PIN code (for Bluetooth 2.0) • If you wish to skip changing the PIN code, go Bluetooth device. to step 3. Display the <Bluetooth Setup>...
- Page 32 BLUETOOTH ❏ Deleting a registered Bluetooth device Pairing a Bluetooth device from this unit using a PIN code (for Bluetooth 2.0) Display the <Bluetooth Setup> screen. Display the <Bluetooth Setup> screen. (Page 31) (Page 31) Select the device you want to connect (1), then press [Connection] (2).
- Page 33 BLUETOOTH ❏ Adjusting the volume of calls/earpiece/ ❏ Reducing noise/adjusting the echo Using the Bluetooth mobile phone microphone cancel level ❏ Receiving a call While talking... While talking... When a call comes in... • Call information is displayed if acquired. •...
- Page 34 BLUETOOTH ❏ Sending text during a call ❏ Making a call From the preset list/phone book/call lists You can send text during a call using the DTMF (Dual Display the phone control screen. Tone Multi Frequency) function. On the <TOP MENU> screen: While talking...
- Page 35 • Press [K] repeatedly to change the page on the phone control screen. On the monitor panel: Select the initial. DDX7025BT/ DDX5025DAB DDX5025BT/ Select a phone number to call. • If the initial is a number, press [1,2,3...] and DDX7055BT DDX5055BT* then select the number.
- Page 36 BLUETOOTH ❏ Presetting phone numbers Playback information Using the Bluetooth audio player 1 Playback status* You can preset up to 5 phone numbers. 2 Playing time* Display the phone control screen. • To register a new device, see page 30. 3 Tag data (current track title/artist name/album •...
- Page 37 BLUETOOTH ❏ Setting items < Auto Pai ring> • ON (initial): Establishes Settings for Bluetooth devices pairing automatically with the <Paired Device Press [Enter] to show the list You can change various settings for using Bluetooth connected iOS device (such as List>...
-
Page 38: Settings
SETTINGS <USB 1 Wire> Select this when the iPod/ Settings for using applications of iPhone is connected using USB the iPod/iPhone/Android 2.0 cable (accessory of the iPod/ iPhone). Before using applications of the iPod/iPhone/ • If you do not need to change the setting, <HDMI + Select this when the iPod/ Android , select the device to use and connection... -
Page 39: Sound Adjustment
❏ Setting the car type and speakers • You can also display the <Equalizer> screen by Sound ad justment pressing AUD (for DDX7025BT/DDX7055BT) or by Display the <Car Setting> screen. ❏ Using the sound equalization pressing and holding the Volume/ATT/ AUD knob On the <TOP MENU>... - Page 40 SETTINGS — s i l Adjust the crossover frequency of the ❏ ❏ crossover frequency selected speaker. You can adjust the sound e ects according to your listening position. Display the <Speaker Select> screen. Display the <Position> screen. On the <TOP MENU> screen: On the <TOP MENU>...
-
Page 41: Adjustment For Video Playback
SETTINGS Adjusting the Digital Time Alignment (DTA) Determining the value for <Position DTA> Make ne adjustment of the delay time of the adjustment speaker output to have a more suitable environment ❏ If you specify the distance from the center of the for your vehicle. - Page 42 SETTINGS ❏ Zooming the picture Adjust the picture. Select the aspect ratio. You can zoom the picture. Zooming is available only when disc is played back. Display the adjustment menu. <Bright> Adjusts the brightness. (−15 to +15) <FULL>* For 16:9 original pictures <Contrast>...
-
Page 43: Changing Display Design
SETTINGS ❏ Storing your favorite image for the To select a panel color Changing display design background You can change the background and panel color. You can set your favorite image (JPEG/PNG/BMP file) Display the <User Customize> screen. stored on the connected USB device. On the <TOP MENU>... -
Page 44: Customizing The
SETTINGS Customizing the <TOP MENU> Customizing the system settings screen ❏ Memorizing/recalling the settings You can arrange the items to display on the <TOP • You can memorize the settings changed in the MENU> screen. <Setup> menu and recall the memorized settings anytime.Screen - Page 45 SETTINGS ❏ Locking the settings ❏ Adjusting the touch position You can lock the settings to prevent them from You can adjust the touch position on the touch being changed. panel if the position touched and the operation • is shown beside the settings that can be performed do not match.
-
Page 46: Setting Menu Items
SETTINGS Balance: Adjust the left and right speaker output <Car Setting> Setting menu items balance. Select a car type and speaker location. (Page 39) ❏ Displaying the <Setup> menu screen • L6 to R6 (Initial: 0) • Car type: Off (initial)/Compact/Full Size Car/ Press [J]/[K]/[H]/[I] or drag [ ] to adjust. - Page 47 Change the navigation settings. (Page 29) Adjust the panel angle. (Page 7) <OSD Clock> • ON: Displays the clock while a video source is * Only for DDX7025BT/DDX7055BT . playing. • OFF (Initial): Cancels. <Scroll> • ON (Initial): Scrolls the displayed information repeatedly.
- Page 48 • R-CAM: Displays the picture from the rear view < > information. This unit has its own Registration Code. Once you • English (initial for DDX7025BT/DDX5025DAB/ <Security Code> have played back a le with the Registration Code DDX5025BT)/Spanish/French/German/ recorded, this unit’s Registration Code is overwritten Italian/Dutch/Russian (initial for DDX7055BT/ for copyright protection.
-
Page 49: Remote Controller
REMOTE C ONTROLLER ❏ Remote Controller mode switch ❏ Battery installation Overview The functions operated from the remote controller Use two “AAA”/”R03”-size batteries. Optional Remote Controller KNA-RCDV331 is differ depending on the position of the mode switch. Insert the batteries with the + and – poles aligned designed for controlling this unit. -
Page 50: Operations From The Remote Controller
Aspect ratio changes each time directly. you press this key. Volume attenuating • DVD-VIDEO OPEN (Only for DDX7025BT/DDX7055BT ) – Chapter number Press the key once to lower the Adjusts the panel angle. – Title number volume. Press again to restore The panel angle changes each –... - Page 51 REMOTE CONTROLLER Numeric keypad Picture Angle Direct search • Specify the number to search Switches the picture angle each Pressing this key switches the for in direct search. time you press this key. features that can be searched for • Press to fast directly.
- Page 52 REMOTE CONTROLLER ❏ Radio (AUD mode) ❏ iPod (AUD mode) Numeric keypad Band switching • To use preset tuning, press Music/Video search the number of a programmed Switches to bands received by Selects the music/video to be broadcast station. ( –...
-
Page 53: Connection/Installation
• Only for DDX7025BT/DDX7055BT: start a fire. Always connect those wires to the Cooling fan If the console has a lid, make sure to install the power source running through the fuse box. - Page 54 CONNECTION/INSTALLATION ❏ Supplied accessories for installation ❏ Installation procedure Installing the unit 1 Wiring harness x 1 To prevent a short circuit, remove the key ❏ Installing the unit 2 Trim plate x 1 from the ignition and disconnect the ·...
-
Page 55: Connecting Wires To Terminals
Blue with white stripe (Power control/aerial control wire) To the terminal that is grounded when either the telephone rings or during conversation. (To connect the Kenwood navigation system, consult your Brown (Mute control wire) navigation manual.) -
Page 56: Connecting A Usb Device
CONNECTION/INSTALLATION ❏ Connecting a USB device ❏ Connecting an iPod/iPhone iPod/iPhone except for iPhone 5/iPod touch iPhone 5/iPod touch (5th Generation)/iPod USB device* (5th Generation)/iPod nano (7th Generation) nano (7th Generation) (commercially available) (commercially available) (commercially available) KCA-iP102 Lightning-Digital (optional accessory) AV adapter (accessory of the iPod/iPhone) - Page 57 CONNECTION/INSTALLATION ❏ Connecting a Smartphone ❏ Connecting external components 9 Subwoofer preout (monaural output) • Subwoofer left output (White) Android, etc. Android, etc • Subwoofer right output (Red) (with HDMI) (with MHL) p Rear preout (commercially available) (commercially available) • Audio left output (White) •...
- Page 58 CONNECTION/INSTALLATION ❏ Connecting microphone for Bluetooth ❏ Removing the unit Removing the unit Connect the microphone (5) to MIC terminal. Remove the trim plate. (See the left ❏ Removing the trim plate • To install the microphone, peel off the adhesive column.) tape, fix on the installation position, then adjust Engage the catch pins on the extraction...
-
Page 59: References
REFERENCES ❏ To keep discs clean Maintenance More information Dirty discs may not play correctly. ❏ Caution on cleaning the unit ❏ File playback If a disc does become dirty, wipe it with a soft cloth Playing DivX les (for discs only) Do not use any solvent (for example, thinner, in a straight line from the center to the edge. - Page 60 • Files recorded in VBR have a discrepancy in elapsed time indication. DVD Region code: For DDX7025BT/DDX5025DAB/DDX5025BT: 2 For DDX7055BT/DDX5055BT: 5 If you insert a DVD Video disc of an incorrect Region Code, “Region Code Error” appears on the screen.
- Page 61 REFERENCES ❏ About data stored in the connected Unplayable discs • The maximum number of characters (when the • Unplayable disc types and formats are as follows: characters are 1 byte): USB device/iPod/iPhone – DVD-Audio/DVD-ROM discs – Folder names: 128 characters •...
- Page 62 • When operating an iPod/iPhone, some operations Welsh Greenlandic Rhaeto-Romance may not be performed correctly or as intended. In Bhutani Cambodian Kirundi Ukrainian this case, visit the following KENWOOD web site: Greek Kannada Rumanian Urdu <www.kenwood.com/cs/ce/ipod> • For some iPod/iPhone models, the performance Esperanto Korean (KOR)
-
Page 63: Error Message List
REFERENCES “Authorization Error”: “Initialize Error”: Error message list • Check whether the connected iPod/iPhone is • The unit has failed to initialize the Bluetooth compatible with this unit. (Page 62) module. Try the operation again. If an error occurs while using the unit, a message appears. -
Page 64: Troubleshooting
REFERENCES ❏ Discs ❏ USB Troubleshooting Recordable/Rewritable discs cannot be played “Reading...” does not disappear from the screen. What appears to be trouble is not always serious. back. • Turn the power off and on again. Check the following points before calling a service •... - Page 65 REFERENCES ❏ Tuner ❏ Bluetooth A lot of noise is generated. • Turn off (uncheck) “VoiceOver” on the iPod/ AME automatic presetting does not work. Phone sound quality is poor. iPhone. For details, visit <http://www.apple.com>. • Store stations manually. (Page 21 ) •...
-
Page 66: Specifications
Sampling Frequency Picture Size (W x H) Enter the same PIN code for both the unit and 44.1 kHz/48 kHz/96 kHz DDX7025BT/DDX7055BT : target device. If the PIN code of the device is not Quantifying Bit Number 6.95 inches (diagonal) wide indicated in its instructions, try “0000”... - Page 67 REFERENCES ❏ MHL interface section ❏ DSP section ❏ FM tuner section Supported Version Graphics equalizer Frequency Range (50 kHz) MHL 2 BAND 7 Band 87.5 MHz to 108.0 MHz Maximum Power Supply Current Frequency (Hz) (BAND1-7) Usable Sensitivity (S/N: 26 dB Dev 22.5 kHz) DC 5 V 900 mA 62.5/160/400/1k/2.5k/6.3k/16k...
- Page 68 Video Input Level (RCA jacks) 1 Vp-p/75 Ω Weight Apple Inc., registered in the U.S. and other DDX7025BT/DDX7055BT: countries. Video Output Level (RCA jacks) • Lightning is a trademark of Apple Inc. 2.5 kg 1 Vp-p/75 Ω...
- Page 69 Bluetooth SIG, BUT NOT LIMITED TO, THE IMPLIED WARRANTIES 4 VISUAL PATENT PORTFOLIO LICENSE FOR Inc. and any use of such marks by JVC KENWOOD OF MERCHANTABILITY AND FITNESS FOR A PARTICULAR PURPOSE ARE DISCLAIMED. THE PERSONAL AND NON-COMMERCIAL USE Corporation is under license.
- Page 70 Français Español 1999/5/EC. Latviešu Par la présente JVC KENWOOD déclare que l’appareil Por medio de la presente JVC KENWOOD declara que el Suomi Ar šo, JVC KENWOOD, apstiprina, ka “DDX7025BT/ “DDX7025BT/DDX7055BT/DDX5025DAB/DDX5025BT/ “DDX7025BT/DDX7055BT/DDX5025DAB/DDX5025BT/ JVC KENWOOD vakuuttaa täten että “DDX7025BT/ DDX7055BT/DDX5025DAB/DDX5025BT/DDX5055BT”...