Yamaha R-S300 Owner's Manual
Hide thumbs
Also See for R-S300:
- Owner's manual (322 pages) ,
- Service manual (77 pages) ,
- Manuel d'utilisation (8 pages)
Table of Contents
Advertisement
Available languages
Available languages
Advertisement
Chapters
Table of Contents

Related Manuals for Yamaha R-S300


Summary of Contents for Yamaha R-S300
- Page 1 Receiver OWNER’S MANUAL MANUAL DE INSTRUCCIONES...
- Page 2 Yamaha will not be held responsible for any damage resulting from use of this unit with a voltage other than specified.
-
Page 3: Table Of Contents
CONTENTS INTRODUCTION ADVANCED OPERATION USEFUL FEATURES ..........2 SETTING THE OPTION MENU SUPPLIED ACCESSORIES ......... 3 FOR EACH INPUT SOURCE......29 CONTROLS AND FUNCTIONS ......4 Option menu items........... 29 ADVANCED SETUP ..........31 Front panel ..............4 Front panel display ............ 6 Changing the ADVANCED SETUP Rear panel .............. -
Page 4: Introduction
Bluetooth™ Bluetooth is a registered trademark of the Bluetooth SIG and is used by Yamaha in accordance with a license agreement. • y indicates a tip for your operation. • Some operations can be performed by using either the buttons on the front panel of this unit or those on the remote controls. In case the button names differ between this unit and the remote controls, the names of the buttons on the remote controls are given in parentheses. -
Page 5: Supplied Accessories
SUPPLIED ACCESSORIES SUPPLIED ACCESSORIES Please check that you received all of the following parts. Remote control AM loop antenna Indoor FM antenna Batteries (x2) (AA, R6, UM-3) ■ Notes on remote control and batteries • Do not spill water or other liquids on the remote control. •... -
Page 6: Controls And Functions
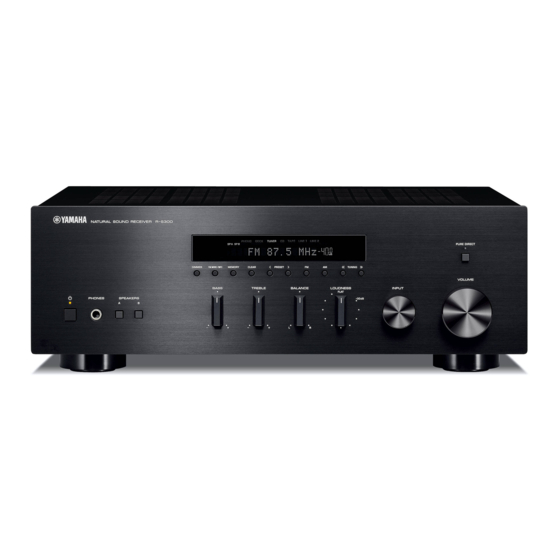
CONTROLS AND FUNCTIONS CONTROLS AND FUNCTIONS Front panel 1 A (power) 5 FM MODE/INFO Turns on and off the power of this unit (see page 14). Changes the FM radio wave reception mode (stereo or On position: Pushed inward monaural) when TUNER is selected as the input source Off position: Released outward (see page 19). - Page 7 CONTROLS AND FUNCTIONS A TUNING jj / ii Selects the tuning frequency when TUNER is selected as the input source (see page 18). B Remote control sensor Receives infrared signals from the remote control. C PURE DIRECT and indicator Allows you to listen to a source in the purest possible sound (see page 15).
-
Page 8: Front Panel Display
CONTROLS AND FUNCTIONS Front panel display 1 SP (SPEAKERS) A/B indicators Light up according to the set of speakers selected. Both indicators light up when both sets of speakers are selected. 2 Input source indicators Light up brightly to indicate the input source that is currently selected. -
Page 9: Rear Panel
B SPEAKERS terminals Used to connect speakers (see page 10). 4 DOCK jack Used to connect an optional Yamaha Universal Dock for C IMPEDANCE SELECTOR switch iPod (such as the YDS-12), Wireless System for iPod Used to select the impedance setting (see page 11). -
Page 10: Remote Control
Remote control This section describes the function of each button on the 3 DIMMER remote control used to control this unit or a Yamaha CD Changes the brightness level of the front panel display. player. Choose brightness from 3 levels by pressing this button repeatedly. -
Page 11: Using The Remote Control
■ FM/AM controls ■ Yamaha CD player controls The following buttons can be used when TUNER is The following buttons can be used to control a Yamaha selected as the input source. CD player when CD is selected as the input source. -
Page 12: Preparation
PREPARATION CONNECTIONS CONNECTIONS Connecting speakers and source components CAUTION • Do not connect this unit or other components to the main power until all connections between components are complete. • All connections must be correct: L (left) to L, R (right) to R, “+” to “+” and “–” to “–”. If the connections are faulty, no sound will be heard from the speakers, and if the polarity of the speaker connections is incorrect, the sound will be unnatural and lack bass. -
Page 13: Impedance Selector Switch
CONNECTIONS ■ IMPEDANCE SELECTOR switch ■ Bi-wire connection Bi-wire connection separates the woofer from the CAUTION combined midrange and tweeter section. A bi-wire compatible speaker has four binding post terminals. These Do not change the IMPEDANCE SELECTOR switch two sets of terminals allow the speaker to be split into two while the power of this unit is turned on, as doing so may independent sections. -
Page 14: Connecting The Fm And Am Antennas
Indoor antennas for receiving FM and AM broadcasts are included with this unit. In general, these antennas should provide sufficient signal strength. Connect each antenna correctly to the designated terminals. Note If you experience poor reception quality, install an outdoor antenna. Consult the nearest authorized Yamaha dealer or service center about outdoor antennas. Outdoor FM antenna... -
Page 15: Connecting Power Cable
CONNECTIONS Connecting power cable VOLTAGE SELECTOR switch To the wall outlet with the power cable (Central/South America models) ■ VOLTAGE SELECTOR switch (Central/South America models only) The VOLTAGE SELECTOR switch on the rear panel of this unit must be set for your local main voltage BEFORE plugging the power cable into the wall outlet. -
Page 16: Basic Operation
BASIC OPERATION PLAYING AND RECORDING PLAYING AND RECORDING CAUTION Extreme caution should be exercised when you play back CDs encoded in DTS. If you play back a CD encoded in DTS on a CD player that does not support DTS, only noise will be heard, and this noise may damage your speakers. -
Page 17: Adjusting The Tonal Quality
PLAYING AND RECORDING ■ Adjusting the BASS and TREBLE Adjusting the tonal quality controls ■ Using the PURE DIRECT switch Routes input signals from your audio sources so that the input signals bypass the BASS, TREBLE, BALANCE and LOUDNESS controls, thus eliminating any alterations to the audio signals and creating the purest possible sound. - Page 18 PLAYING AND RECORDING ■ Adjusting the LOUDNESS control Rotate the LOUDNESS control until the desired volume is obtained. After setting the LOUDNESS control, enjoy listening to music at LOUDNESS VOLUME your preferred volume level. If the effect of the LOUDNESS control setting is too strong or weak, readjust the LOUDNESS control.
-
Page 19: Recording A Source
PLAYING AND RECORDING Recording a source Using the sleep timer Use this feature to automatically set this unit to standby Notes mode after a certain amount of time. The sleep timer is useful when you are going to sleep while this unit is •... -
Page 20: Fm/Am Tuning
FM/AM TUNING FM/AM TUNING There are 2 tuning methods; automatic and manual. Select either method according to your preference and the strength of station signals. Note Be sure to set the tuner frequency step according to the frequency spacing in your area before you tune into a radio station. See page 31 for the tuner frequency step setting. -
Page 21: Manual Tuning
FM/AM TUNING ■ Improving FM reception Manual tuning If the signal from the station is weak and the sound quality is not good, set the FM band reception mode to monaural Manual tuning is effective when station signals are weak. mode to improve reception. -
Page 22: Automatic Station Preset (Fm Stations Only)
FM/AM TUNING Automatic station preset Press FM on the front panel (or FM on the (FM stations only) remote control) to select FM as the reception band. You can use the automatic station preset function to FM is displayed on the front panel display. automatically register FM stations as presets. -
Page 23: Manual Station Preset
FM/AM TUNING Manual station preset Tune in to the desired FM/AM station. See pages 18 and 19 for tuning instructions. You can manually register up to 40 FM/AM stations (40 total). You can then easily recall any preset station by Press MEMORY on the front panel. -
Page 24: Recalling A Preset Station
FM/AM TUNING Recalling a preset station Clearing a preset station You can recall preset stations that were registered using Follow the steps below to clear a preset station. automatic station preset or manual station preset. CLEAR PRESET j / i RETURN PRESET j / i Select the desired preset station number. -
Page 25: Clearing All Preset Stations
FM/AM TUNING Clearing all preset stations Press D / E on the remote control to select “YES”, and then press ENTER. Follow the steps below to clear all preset stations. To cancel without clearing the presets, select “NO”. When all presets have been cleared, “PRESET INPUT selector CLEARED”... -
Page 26: Playing Back Tunes From Your Iphone/Ipod/Bluetooth™ Component
Bluetooth™ COMPONENT Once you have connected an optional Yamaha Universal Dock for iPod (such as the YDS-12), Wireless System for iPod (YID-W10), or Bluetooth Wireless Audio Receiver (YBA-10) to the DOCK jack on the rear panel of this unit, you can enjoy playback of your iPhone/iPod or Bluetooth component using the remote control supplied with this unit. -
Page 27: Using A Universal Dock For Ipod
PLAYING BACK TUNES FROM YOUR iPhone/iPod/Bluetooth™ COMPONENT Using a Universal Dock for iPod ■ Controlling your iPhone/iPod After setting your iPhone/iPod in your dock, rotate the INPUT selector on the front panel (or press DOCK on the remote control) to select DOCK as the input source to play your iPhone/iPod. DOCK INFO MENU/ Ee / b / a... -
Page 28: Using A Wireless System For Ipod
PLAYING BACK TUNES FROM YOUR iPhone/iPod/Bluetooth™ COMPONENT ■ Controlling this unit with your iPhone/ Using a Wireless System for iPod iPod • When playback begins on an iPhone/iPod that is By connecting a Wireless System for iPod to this unit, you connected to a YID-W10 transmitter, and if the can play songs on your iPhone/iPod and listen to them YID-W10 transmitter is within range of the YID-W10... -
Page 29: Using A Bluetooth Wireless Audio Receiver
Receiver. When the component is recognized, it will be displayed in the Bluetooth component list, for DOCK example as “YBA-10 YAMAHA”. Select the Bluetooth Wireless Audio Receiver from the Bluetooth component list, and enter a pass key “0000” using the Bluetooth component. - Page 30 PLAYING BACK TUNES FROM YOUR iPhone/iPod/Bluetooth™ COMPONENT ■ Playing back Bluetooth components Press B / C on the remote control to select “Connect”, and then press ENTER. When wireless connection is complete, “Connected” is displayed on the front panel display. To exit the Option menu, press OPTION on the remote control.
-
Page 31: Advanced Operation
ADVANCED OPERATION SETTING THE OPTION MENU FOR EACH INPUT SOURCE SETTING THE OPTION MENU FOR EACH INPUT SOURCE The Option menu allows you to configure various settings for each input source and recall those settings automatically when an input source is selected. Also, you can view the signal information for certain input sources. The procedure for setting the Option menu items is described below. - Page 32 SETTING THE OPTION MENU FOR EACH INPUT SOURCE Details of the menu items are as follows. The Interlock configuration will be reflected to the input source ON*, OFF Choices: currently selected. When an iPhone/iPod is connected to this unit wirelessly using a Wireless System for iPod, the iPhone/iPod can be The default settings are marked with “*”.
-
Page 33: Advanced Setup
ADVANCED SETUP ADVANCED SETUP ■ ADVANCED SETUP menu parameters Changing the ADVANCED SETUP Change the initial settings to reflect the needs of your listening environment. menu parameters The ADVANCED SETUP menu is displayed in the front The default settings are marked with “*”. panel display. -
Page 34: Additional Information
Refer to the chart below if this unit does not function properly. If the problem you are experiencing is not listed below or if the instructions below do not help, turn off this unit, disconnect the power cable, and contact the nearest authorized Yamaha dealer or service center. ■ General... - Page 35 TROUBLESHOOTING Problem Cause Remedy page Incorrect cable connections. Connect the audio plugs firmly. If the problem A “humming” sound persists, the cables may be defective. can be heard. No connection from the turntable to the Make the GND connection between the turntable and GND terminal.
- Page 36 TROUBLESHOOTING ■ Tuner Problem Cause Remedy page The particular characteristics of the FM Check the antenna connections. FM stereo stereo broadcasts being received may Try using a high-quality directional FM antenna. reception is cause this problem when the transmitter is noisy.
- Page 37 TROUBLESHOOTING ■ iPhone/iPod The following messages may be displayed on the front panel display in certain situations. Message Status/Cause Remedy page There is a problem with the signal path Turn off the unit and reconnect the Universal Dock Connect error from your iPhone/iPod to the unit.
- Page 38 TROUBLESHOOTING ■ Bluetooth™ The following messages may be displayed on the front panel display in certain situations. Message Status/Cause Remedy page The Bluetooth Wireless Audio Receiver Searching... — and the Bluetooth component are in the process of pairing. The Bluetooth Wireless Audio Receiver and the Bluetooth component are in the —...
-
Page 39: Specifications
SPECIFICATIONS SPECIFICATIONS AUDIO SECTION • Harmonic distortion (1 kHz) Mono/Stereo ..............0.3%/0.3% • Minimum RMS output power (8 Ω, 20 Hz to 20 kHz, 0.04% THD) ....... 50 W + 50 W AM SECTION • Dynamic power per channel (IHF) (8/6/4/2 Ω) ............ - Page 40 Utilizar el aparato con una tensión superior a la especificada resulta peligroso y puede producir un incendio, daños en el aparato y/o lesiones a las personas. Yamaha no se hará responsable de ningún daño debido al uso de este aparato con una tensión diferente de la especificada.
- Page 41 ÍNDICE INTRODUCCIÓN MANEJO AVANZADO CARACTERÍSTICAS DE UTILIDAD ....2 AJUSTE DEL MENÚ OPTION PARA CADA ACCESORIOS SUMINISTRADOS ..... 3 FUENTE DE ENTRADA .........29 CONTROLES Y FUNCIONES......4 Elementos del menú Option ........29 PREPARACIÓN AVANZADA ......31 Panel frontal............... 4 Pantalla del panel delantero ........6 Cambio de los parámetros del menú...
-
Page 42: Introducción
Bluetooth™ Bluetooth es una marca registrada de Bluetooth SIG, y Yamaha la usa según un convenio de licencia. • y indica un consejo para su utilización. • Algunas operaciones se pueden realizar con los botones del panel frontal de la unidad o con los del mando a distancia. En los casos en los que los nombres de los botones de esta unidad y del mando a distancia no coincidan, se facilita el nombre del botón del mando a... -
Page 43: Accesorios Suministrados
ACCESORIOS SUMINISTRADOS ACCESORIOS SUMINISTRADOS Verifique que ha recibido los siguientes accesorios. Mando a distancia Antena de FM interior Antena de cuadro de AM Pilas (×2) (AA, R6, UM-3) ■ Notas sobre el mando a distancia y las pilas • No vierta agua ni otros líquidos sobre el mando a distancia. •... -
Page 44: Controles Y Funciones
CONTROLES Y FUNCIONES CONTROLES Y FUNCIONES Panel frontal 1 A (alimentación) 5 FM MODE/INFO Enciende y apaga la alimentación en esta unidad (vea la Cambia el modo de recepción de ondas de radio FM página 14). (estéreo o mono) cuando TUNER está seleccionado como Posición de encendido: botón presionado fuente de entrada (vea la página 19). - Page 45 CONTROLES Y FUNCIONES A TUNING jj / ii Selecciona la frecuencia de sintonización cuando TUNER está seleccionado como fuente de entrada (vea la página 18). B Sensor del mando a distancia Recibe las señales infrarrojas del mando a distancia. C PURE DIRECT e indicador Permite escuchar una fuente con el sonido más puro posible (vea la página 15).
-
Page 46: Pantalla Del Panel Delantero
CONTROLES Y FUNCIONES Pantalla del panel delantero 1 Indicadores SP (SPEAKERS) A/B Se iluminan según el conjunto de altavoces seleccionado. Ambos indicadores se iluminan cuando se han seleccionado los dos conjuntos de altavoces. 2 Indicadores de fuente de entrada Se iluminan fuertemente para indicar la fuente de entrada seleccionada en ese momento. -
Page 47: Panel Trasero
4 Toma DOCK durante un cierto periodo de tiempo (hay disponibles 3 ajustes; vea la página 31). Se utiliza para conectar una Dock Universal Yamaha para iPod opcional (como la YDS-12), un sistema inalámbrico B Terminales SPEAKERS para iPod (YID-W10) o un receptor de audio inalámbrico Se utilizan para conectar altavoces (vea la página 10). -
Page 48: Mando A Distancia
3 DIMMER mando a distancia utilizado para manejar la unidad o un Cambia el nivel de brillo de la pantalla del panel frontal. reproductor de CD Yamaha. Seleccione uno de los 3 niveles de brillo pulsando este botón de forma repetida. -
Page 49: Uso Del Mando A Distancia
Para más información, vea la página 24. 0 REPEAT Nota Aunque se utilice un reproductor de CD Yamaha, es posible que A MENU/ Ee / b / a / ENTER ciertos componentes y características no estén disponibles. Para E INFO más información, consulte el manual de instrucciones de su... -
Page 50: Preparación
PREPARACIÓN CONEXIONES CONEXIONES Conexión de los altavoces y los componentes fuente PRECAUCIÓN • No conecte esta unidad ni otros componentes a la toma principal de alimentación hasta que no haya finalizado las conexiones entre todos los componentes. • Todas las conexiones deben estar realizadas correctamente: L (izquierdo) con L, R (derecho) con R, “+” con “+” y “–” con “–”. - Page 51 CONEXIONES ■ Interruptor IMPEDANCE SELECTOR ■ Conexión de doble cable La conexión de doble cable separa el altavoz para graves del PRECAUCIÓN rango medio combinado y la sección de agudos. Un altavoz compatible con doble cable tiene cuatro terminales de No cambie el interruptor IMPEDANCE SELECTOR conexión.
-
Page 52: Conexión De Las Antenas De Fm Y Am
Conecte cada antena correctamente a los terminales designados. Nota Si tiene problemas con la recepción, instale una antena exterior. Consulte al centro de servicio o concesionario Yamaha autorizado acerca de las antena exteriores. Antena de FM exterior... -
Page 53: Conexión Del Cable De Alimentación
CONEXIONES Conexión del cable de alimentación Interruptor VOLTAGE SELECTOR A la toma de pared con el cable de alimentación (modelos para Centroamérica/Sudamérica) ■ Interruptor VOLTAGE SELECTOR (sólo modelos para Centroamérica/ Sudamérica) El interruptor VOLTAGE SELECTOR en el panel trasero de la unidad debe ajustarse según la tensión principal local ANTES DE enchufar el cable de alimentación a la toma de pared. -
Page 54: Manejo Básico
MANEJO BÁSICO REPRODUCCIÓN Y GRABACIÓN REPRODUCCIÓN Y GRABACIÓN PRECAUCIÓN Al reproducir CD codificados en DTS deben extremarse las precauciones. Si reproduce un CD codificado en DTS en un reproductor no compatible con DTS, sólo se escuchará ruido y dicho ruido podría dañar los altavoces. -
Page 55: Ajuste De La Calidad Tonal
REPRODUCCIÓN Y GRABACIÓN ■ Ajuste de los controles BASS y TREBLE Ajuste de la calidad tonal ■ Uso del interruptor PURE DIRECT Enruta señales de entrada desde las fuentes de audio para que las señales de entrada omitan los controles BASS, TREBLE, BALANCE y LOUDNESS, eliminando así... - Page 56 REPRODUCCIÓN Y GRABACIÓN ■ Ajuste del control LOUDNESS Gire el control LOUDNESS hasta obtener el volumen de sonido que desee. Una vez ajustado el control LOUDNESS, escuche la música al LOUDNESS VOLUME volumen que desee. Si el ajuste del control LOUDNESS es demasiado brusco o débil, reajuste el control LOUDNESS.
-
Page 57: Grabación De Una Fuente
REPRODUCCIÓN Y GRABACIÓN Grabación de una fuente Uso del temporizador de espera Utilice esta característica para ajustar automáticamente la Notas unidad al modo de espera una vez transcurrido un tiempo definido. El temporizador de espera resulta útil cuando se • El audio de la fuente de entrada actual se emite en las tomas TAPE REC y LINE 1 REC. -
Page 58: Sintonización De Fm/Am
SINTONIZACIÓN DE FM/AM SINTONIZACIÓN DE FM/AM Hay 2 métodos de sintonización: automática y manual. Seleccione cualquiera de los dos según sus preferencias y la fuerza de las señales de la emisora. Nota Asegúrese de establecer el paso de frecuencias del sintonizador según la separación de frecuencias de su zona antes de sintonizar una emisora de radio. -
Page 59: Sintonización Manual
SINTONIZACIÓN DE FM/AM ■ Mejorar la recepción de FM Sintonización manual Si la señal de la emisora es débil y la calidad del sonido no es buena, ajuste el modo de recepción de la banda de FM a La sintonización manual es eficaz cuando las señales de la mono para mejorar la recepción. -
Page 60: Presintonización Automática De Emisoras (Sólo Emisoras De Fm)
SINTONIZACIÓN DE FM/AM Presintonización automática de Pulse FM en el panel frontal (o FM en el emisoras (sólo emisoras de FM) mando a distancia) para seleccionar la banda de recepción FM. Puede utilizar la función de presintonización automática FM aparecerá en la pantalla del panel frontal. de emisoras para registrar automáticamente emisoras de FM como presintonías. -
Page 61: Presintonización Manual De Las Emisoras
SINTONIZACIÓN DE FM/AM Presintonización manual de las Sintonice la emisora de FM/AM deseada. Vea las páginas 18 y 19 para obtener instrucciones emisoras sobre la sintonización. Puede registrar manualmente hasta 40 emisoras de FM/AM (40 en total). Así podrá recuperar fácilmente Pulse MEMORY en el panel frontal. -
Page 62: Recuperación De Una Emisora Presintonizada
SINTONIZACIÓN DE FM/AM Recuperación de una emisora Borrar una emisora presintonizada presintonizada Siga estos pasos para borrar una emisora presintonizada. Puede recuperar emisoras presintonizadas registradas utilizando la presintonización automática o manual de emisoras. CLEAR PRESET j / i RETURN Seleccione el número de emisora presintonizada. -
Page 63: Borrado De Todas Las Emisoras Presintonizadas
SINTONIZACIÓN DE FM/AM Borrado de todas las emisoras Pulse D / E en el mando a distancia para presintonizadas seleccionar “YES” y, a continuación, pulse ENTER. Siga estos pasos para borrar todas las emisoras presintonizadas. Para cancelar sin borrar las presintonías, seleccione “NO”. Cuando se hayan borrado todas las presintonías, aparecerá... -
Page 64: Reproducción De Temas Desde Un Componente Iphone/Ipod/Bluetooth
REPRODUCCIÓN DE TEMAS DESDE UN COMPONENTE iPhone/iPod/Bluetooth™ Una vez que haya conectado una Dock Universal Yamaha para iPod opcional (como la YDS-12), un sistema inalámbrico para iPod (YID-W10) o un receptor de audio inalámbrico (YBA-10) a la toma DOCK del panel trasero de la unidad, podrá... -
Page 65: Uso De Una Dock Universal Para Ipod
REPRODUCCIÓN DE TEMAS DESDE UN COMPONENTE iPhone/iPod/Bluetooth™ Uso de una Dock Universal para iPod ■ Control del iPhone/iPod Tras colocar el iPhone/iPod en la base, gire el selector INPUT en el panel frontal (o pulse DOCK en el mando a distancia) para seleccionar DOCK como fuente de entrada para la reproducción del iPhone/iPod. -
Page 66: Uso De Un Sistema Inalámbrico Para Ipod
REPRODUCCIÓN DE TEMAS DESDE UN COMPONENTE iPhone/iPod/Bluetooth™ ■ Control de la unidad con el iPhone/iPod Uso de un sistema inalámbrico • Cuando comienza la reproducción en un iPhone/iPod conectado a un transmisor de YID-W10, y si el para iPod transmisor de YID-W10 está dentro del rango del receptor de YID-W10, la unidad se comporta tal y Al conectar un sistema inalámbrico para iPod a esta como sigue:... -
Page 67: Uso De Un Receptor De Audio Inalámbrico Bluetooth
Bluetooth. Una vez reconocido el componente, aparecerá en la lista de componentes Bluetooth, por ejemplo como “YBA-10 YAMAHA”. Seleccione el receptor de audio inalámbrico Bluetooth en la lista de componentes e introduzca una contraseña “0000” a través... - Page 68 REPRODUCCIÓN DE TEMAS DESDE UN COMPONENTE iPhone/iPod/Bluetooth™ ■ Reproducción de componentes Pulse B / C en el mando a distancia para Bluetooth seleccionar “Connect” y, a continuación, pulse ENTER. Una vez finalizada la conexión inalámbrica, “Connected” aparecerá en la pantalla del panel frontal.
-
Page 69: Manejo Avanzado
MANEJO AVANZADO AJUSTE DEL MENÚ OPTION PARA CADA FUENTE DE ENTRADA AJUSTE DEL MENÚ OPTION PARA CADA FUENTE DE ENTRADA El menú Option permite configurar varios ajustes para cada fuente de entrada y recuperarlos automáticamente al seleccionar una fuente de entrada. Además, puede ver la información de señal de ciertas fuentes de entrada. A continuación se describe el procedimiento para ajustar los elementos del menú... - Page 70 AJUSTE DEL MENÚ OPTION PARA CADA FUENTE DE ENTRADA A continuación se ofrece información detallada sobre los Interlock elementos de menú. La configuración reflejará la fuente ON*, OFF Opciones: de entrada seleccionada en ese momento. Cuando hay un iPhone/iPod conectado a esta unidad mediante un sistema inalámbrico para iPod, el iPhone/ iPod puede utilizarse para encender la unidad, ponerla en Los ajustes por defecto aparecen marcados con “*”.
-
Page 71: Preparación Avanzada
PREPARACIÓN AVANZADA PREPARACIÓN AVANZADA ■ Parámetros del menú ADVANCED Cambio de los parámetros del SETUP Cambian los ajustes iniciales para reflejar las necesidades menú ADVANCED SETUP del entorno de escucha. El menú ADVANCED SETUP aparece en la pantalla del panel frontal. Los ajustes por defecto aparecen marcados con “*”. -
Page 72: Información Adicional
Consulte el siguiente cuadro cuando el aparato no funcione bien. Si el problema surgido no aparece en la siguiente lista o las instrucciones no le ayudan, desactive el equipo, desconecte el cable de alimentación y consulte con un centro de servicio o con un distribuidor Yamaha autorizado. ■ Generales... - Page 73 SOLUCIÓN DE PROBLEMAS Vea la Problema Causa Remedio página Conexión incorrecta de los cables. Conecte los cables correctamente. Si el problema Sólo se escucha el persiste, los cables podrán estar defectuosos. altavoz de un lado. Ajuste incorrecto del control BALANCE. Ajuste el control BALANCE en la posición adecuada.
- Page 74 SOLUCIÓN DE PROBLEMAS ■ Sintonizador Vea la Problema Causa Remedio página Las características particulares de las Verifique las conexiones de la antena. La recepción de emisiones de FM estéreo que se están Intente utilizar una antena de FM direccional de alta FM estéreo tiene recibiendo pueden causar este problema calidad.
- Page 75 SOLUCIÓN DE PROBLEMAS ■ iPhone/iPod En ciertas situaciones, los siguientes mensajes pueden mostrarse en la pantalla del panel frontal. Vea la Mensaje Estado/causa Remedio página Hay un problema con la ruta de la señal Apague la unidad y vuelva a conectar la Dock Connect error desde el iPhone/iPod a la unidad.
- Page 76 SOLUCIÓN DE PROBLEMAS ■ Bluetooth™ En ciertas situaciones, los siguientes mensajes pueden mostrarse en la pantalla del panel frontal. Vea la Mensaje Estado/causa Remedio página El receptor de audio inalámbrico Searching... — Bluetooth y el componente Bluetooth están en proceso de emparejamiento. El receptor de audio inalámbrico Bluetooth y el componente Bluetooth —...
-
Page 77: Especificaciones
ESPECIFICACIONES ESPECIFICACIONES SECCIÓN DE AUDIO • Relación señal a ruido (IHF) Mono/estéreo ............. 74 dB/70 dB • Potencia de salida RMS mínima (8 Ω, de 20 Hz a 20 kHz, 0,04% THD) ....50 W + 50 W • Distorsión armónica (1 kHz) Mono/estéreo ............... - Page 78 © 2010 Yamaha Corporation Printed in Malaysia WV17420-2...