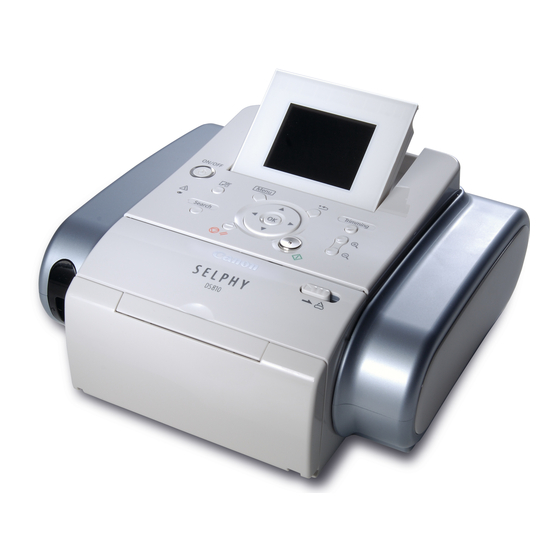
Canon SELPHY DS810 Service Manual
Photo printer
Hide thumbs
Also See for SELPHY DS810:
- User manual (82 pages) ,
- Photo printing manual (96 pages) ,
- Photo printing manual (108 pages)
Table of Contents
Advertisement
Advertisement
Table of Contents

Related Manuals for Canon SELPHY DS810


Summary of Contents for Canon SELPHY DS810
-
Page 1: Service Manual
SELPHY DS810 SERVICE MANUAL Canon Copyright 2005, Canon U.S.A. This technical publication is the proprietary and confidential information of Canon U.S.A. which shall be retained for reference purposes by Authorized Service Facilities of Canon U.S.A. Its unauthorized use is prohibited. - Page 2 This reference manual describes differences from the base model, SELPHY DS 700. When referring to the SELPHY DS700 Service Manual, Service Parts Number in it may be different from SELPHY DS810 model. Please refer to the SELPHY DS810 Parts Catalog (QY8-9077-D0C). QY8-13AE-000...
- Page 3 I. MANUAL OUTLINE This manual consists of the following three parts to provide information necessary to service the SELPHY DS810: Part 1: Maintenance Information on maintenance and troubleshooting of the SELPHY DS810 Part 2: Technical Reference New technology and technical information such as FAQ's (Frequently Asked Questions) of the SELPHY DS810...
-
Page 4: Table Of Contents
3. PRINT MODE 3-1. Resolution during Printing via Computer 3-2. Resolution in Card Direct / Camera Direct / Print Beam Printing 4. FAQ (Problems Specific to the SELPHY DS810 and Corrective Actions Part 3: APPENDIX 1. BLOCK DIAGRAM 2. CONNECTOR LOCATION AND PIN LAYOUT 2-1. -
Page 5: Part 1: Maintenance
Part 1 MAINTENANCE... -
Page 6: Adjustment, Periodic Maintenance, Periodic Replacement Parts, And Replacement Consumables By Service Engineer
1. MAINTENANCE 1-1. Adjustment, Periodic Maintenance, Periodic Replacement Parts, and Replacement Consumables by Service Engineer (1) Adjustment Approx. Adjustment Timing Purpose Tool time Destination At logic board ass'y replacement To set the destination. None. 1 min. settings (EEPROM settings) Language settings At logic board ass'y replacement To set the language to be displayed on None. -
Page 7: Customer Maintenance
BCI-16 Color: Approx. 70 pages (4" x 6", borderless printing, PP-101, standard mode printing from a computer) When do printing the Canon standard pattern on 4" x 6" Photo Paper Plus Glossy in borderless printing, with the default settings in the Windows XPdriver, using Windows XP Photo Printing Wizard. The number of pages above is an average value measured in continuous printing, using the ink tank immediately after it is unsealed until the ink runs out. -
Page 8: Special Tools
print mode, and type of paper used. Ink is consumed at power input and during printing to protect the print head and keep print quality. 1-4. Special Tools Name Tool no. Application Remarks MOLYKOTE CK-0562-000 To be applied to the sliding portion of the In common with PG641 access cover arm. -
Page 9: List Of Error Display / Indications
2. LIST OF ERROR DISPLAY / INDICATIONS Errors and warnings are displayed by the following ways: 1) Errors are indicated by the number of times the Power / Alarm LED lights / blinks. 2) Errors and warnings are displayed on the LCD monitor. 3) Errors and warnings are displayed on the printer driver's Status Monitor. -
Page 10: Warnings
- Timing slit disk ass'y (QL2-0843) - Paper feed motor ass'y (QM2-1746) - Feed roller ass'y (QM2-1970) - Platen (QC1-5176/5177) - Logic board ass'y (QM2-2880) 4 times Purge unit error [5C00] - Purge unit (QM2-1975) - Logic board ass'y (QM2-2880) 5 times ASF cam sensor error [5700] - Sheet feed unit (QM2-3264) - Page 11 Symptom Solution The power does not turn on. Replace the The power turns off immediately after power-on. - AC adapter, or - logic board ass'y The print head is not recognized. Remove and re-install the print head, or replace the The print head does not return to the home position.
- Page 12 - ink tank, or quality - print head , or perform print head alignment. Printing is incorrect. Replace the logic board ass'y Non-ejection of ink. Replace the - ink tank, or - print head Graphic or text is enlarged on printouts. When enlarged in the carriage movement direction, clean grease or oil off the timing slit...
-
Page 13: Repair
3. REPAIR 3-1. Notes on Service Part Replacement Service part Adjustment / settings Operation check Notes on replacement Logic board ass'y - Before removal of the logic board - Service test print After replacement: ass'y, remove the power cord, and (QM2-2880) 1. - Page 14 (QC1-5150) 1. Apply grease to the sliding portions. [See 3-3. Adjustment / Settings, (3) Grease application.] Timing slit strip film - Upon contact with the film, wipe the After replacement: - Service test print film with ethanol. (QC1-5153) 1. Perform the print head - Confirm no grease is on the film.
-
Page 15: Special Notes On Repair Servicing
3-2. Special Notes on Repair Servicing (1) Flexible cable and harness wiring, connection Exercise care when handling the flexible cables and harness wiring. Improper wiring or connection may cause a short-circuit, and may lead to ignition or emission of smoke. (I) Panel board ass'y and front I/F unit wiring (II) ... - Page 16 J603: Paper feed motor ass'y connector J701: USB harness ass'y connector J702: DSC harness ass'y connector J703: IR cable connector (III) Printer unit wiring <Enlarged View>...
- Page 17 <Wiring of Logic Board Ass'y assembled in Bottom Case Ass'y> (IV) Paper feed motor ass'y wiring (V) Carriage motor ass'y and PE sensor harness wiring (VI) Front I/F unit wiring...
- Page 18 (VII) Rear I/F unit wiring (VII) Panel cable unit wiring...
- Page 19 <Wiring in Bottom Case Ass'y> <Wiring in Access Panel Ass'y / Main Cover Ass'y> To the top <Part 1: 3. REPAIR (2)-1>...
- Page 20 (2) Notes on disassembly and re-assembly For DS810, only removal methods of external parts which are different from DS700 are described. Since external parts of DS810 contains the mirror / coated parts, make sure not to scratch or smear them. For notes on disassembly and re-assembly of parts other than the parts shown below, refer to DS700 Service Manual.
- Page 21 2) Release the two claws of the front cover from the lower right / left part of the main cover main cover. (Release the left claw first and the right claw next.) 3) Release the two claws of the front cover from the lower right / left part of the bottom case. (After lifting the printer's left side, release the left claw first with the paper output tray declined.) Side Cover R removal From the printer's bottom face, lift and remove the side cover R, using a flathead screwdriver or the like.
- Page 22 Access Panel / Access Panel Shield Plate removal 1) Remove the two screws from the upper portion of the access panel with the access panel cover closed. 2) With the access panel cover open, remove the two screws from the shield plate which is located behind the access panel. 3) Removing the hanging springs, detatch the access panel shield plate.
- Page 23 5) Remove the the right / left hinges of the access cover from the main cover. Main cover unit removal 1) Remove 2 screws from the left side and 2 screws from the right side. <Right Side> <Left Side> 2) Release the two claws on the back side.
- Page 24 3) Release the two claws located at the right / left side of the front side. To the top <Part 1: 3. REPAIR, (2)-2>...
-
Page 25: Adjustment / Settings
(Menu -> Tool box -> Maintenance) Bottom plate cleaning Use of operation panel buttons with Set Canon genuine paper MP-101 4" x 6", GP-401 4" x 6", or GP-501 4" x 6" the LCD monitor in the auto sheet feeder. - Page 26 LG = 02 English LG = 03 S. Chinese LG = 04 German LG = 05 French LG = 06 Italian LG = 07 Spanish LG = 08 Dutch LG = 09 Portuguese LG = 0B Swedish LG = 0E Russian LG = 0F Czecho LG = 10 Hungarian LG = 11 Polish...
- Page 27 7, 9 times: Alarm 7 to 10 times More than 12 Returns to the menu selection times 8, 10, 12 times: Power LED 5) After the function (menu) is selected, press the Power button. The Power LED lights, and the selected function is performed. (When the operation completes, the printer returns to the menu selection mode automatically.) Note: To exit the service mode, press the Power button.
- Page 28 4) When the access cover is opened with the entire screen being red, the following color pattern is displayed. When the access cover is opened without the entire screen becoming red in step 3), the following color pattern is not displayed. 5) When the Power button is pressed, a mode returns to the service mode menu selection.
-
Page 29: Verification Items
3-4. Verification Items (1) Service test print After repair, perform service test print, and confirm the items below. Note: Use a sheet of 4" x 6" (101.6 mm x 152.4 mm)-sized paper. <Print check items> On the service test print (sample below), confirm the following items: - Check 1, top of form accuracy: The line shall not extend off the paper. - Page 30 10: CLT(2005/07/06-15:00) 11:CH=00001 12:CT=00003 13:IS(C=0 M=0 Y=0) 14:IC(C=00016 M=00016 Y=00016) 15:P_ON(S=00006 H=00005) 16:P_OFF(S=00005) 17:M_REG=0 18:UR(A(Coe)=-01 B(SCoe)=+01 C(CLbi)=000 D(SCLbi)=+01) 19:LG=01 Japanese 20:WP=0193 21:CDIN(LG=000 PB=000 OPB=000) 22:BTIN=0 23:MSD(020) 24:PAGE(All=00133 PP=00000 HR+MP=00021 PR+SP+SG=00108 GP=00004 PC=00000) 25:CDPAGE(All=00000) 26:EDGE=00000 27:L=00120 28:DCR=001 29:DCRC=00000 30:Head Temp=26.5 31:Env Temp=26.5 32:FF(80 00 05) 33:OPP=00000 34:BTPAGE=00025 35:PrnB=00000 36:Seal=00000 37:CardPaper=00039 38:CardIns(0030) 39:CardPrn(0077) 40:CDD-PR(L=005 PC=005) 41:CDD-SP(L=010 PC=017) 42:CDD-MP(L=008 PC=000) 43:DCD-PP(L=001 PC=000)
- Page 31 20: Wiping count (WP = Wiping) 21: Camera Direct Print-supported device connection record (CDIN: Camera Direct Insert) LG = Legacy (Canon Bubble Jet Direct), PB = Canon PictBridge, OPB = Other PictBridge 22: Bluetooth-supported device connection record (BTIN = Bluetooth Insert) 23: Longest period of non-printing (MSD: Maximum Stop Date) 24: Number of pages fed (total, plain paper, High Resolution Paper &...
-
Page 32: Printer Transportation
4. PRINTER TRANSPORTATION This section describes the procedures for transporting the printer for returning after repair, etc. 1) Keep the print head and ink tank installed in the carriage. [See Caution 1 below.] 2) Turn off the printer to securely lock the carriage in the home position. (When the printer is turned off, the carriage is automatically locked in place.) [See Caution 2 below.] 3) Attach the left / right side packing and accessory packing to protect the printer, and set in the packing box. - Page 33 Memo: If the print head must be removed from the printer and transported alone, perform the following: (1) Install the ink tank (to prevent the nozzles from drying). (2) Attach the protective cap (used when the packing was opened) to the print head (to protect the print head face from damage due to shocks).
-
Page 34: Part 2: Technical Reference
Part 2 TECHNICAL REFERENCE... -
Page 35: New Technologies
1. NEW TECHNOLOGIES < Main difference from DS700 > DS810 DS700 Multi-supported AC100 - 120V 50/60Hz (1) AC adapter AC100 - 240V 50/60Hz AC220 - 240V 50/60Hz The mounted 2.5 color LCD monitor (2) Memory card TV screen images display (TV screen output: not supported) Camera Direct printing (standard photo Camera Direct printing (standard photo... -
Page 36: Cleaning Mode And Amount Of Ink Purged
2. CLEANING MODE AND AMOUNT OF INK PURGED To prevent printing problems due to bubbles, dust, or ink clogging, print head cleaning is performed before the start of printing, except in the following cases: - Cleaning on arrival: Performed when the access cover is closed. - Cleaning by dot count: Performed after ejection of paper. -
Page 37: Print Mode
3. PRINT MODE * Changes from DS700 are described in red. 3-1. Resolution during Printing via Computer Print direction, ink used, and resolution (dpi) Paper setting Paper type Quality 2 Quality 3 Quality 4 Quality 1 Quality 5 (High) (Standard) (Draft) 16 pass- 12 pass-... - Page 38 Notes on PictBridge supported digital camera: 1. Paper size and paper type settings in the camera When Default is selected for the paper size and paper type in the camera, printing is performed according to the printer's paper size and paper type settings.
- Page 39 4. FAQ (Problems Specific to the SELPHY DS810 and Corrective Actions) Possible call No. * Function Phenomenon Condition Cause Corrective Action or complaint Soiling on the After continuous In borderless 1. Perform Bottom plate cleaning (In - Paper gets back side of...
-
Page 40: Faq
The carriage - When installing When the print When the print head cannot be - Error (5100) error due to the the print head head lock lever is removed even after carrying out the occurred. mis-installed not pressed followings, repair is needed. (When replacing - Cyclical print head... -
Page 41: Part 3 Appendix
Part 3 APPENDIX... -
Page 42: Specifications
- Manual print head alignment is also available in the printer driver's Maintenance tab. : When do printing the Canon standard pattern on 4" x 6" Photo Paper Plus Glossy in borderless printing, with the default settings in the Windows XPdriver, using Windows XP Photo Printing Wizard. The print yield in the table above is an average value measured in continuous printing, using the ink tank immediately after it is unsealed until the ink runs out. - Page 43 Resolution Max. 1200 x 600dpi Photo Paper Plus Glossy, borderless printing, standard photo image, data of images equivalent to images of 5 million pixels taken with the Canon compact digital Throughput camera (from start of printing to paper ejecting): Approx. 72 sec.
- Page 44 <Print Head Specifications> Type Single head with 3 colors (C/M/Y) Each color: 256 nozzles (128 nozzles each for 2pl and 5pl) Print head Total: 768 nozzles (600dpi) Ink color Cyan, magenta, yellow Applicable ink tank BCI-16 Color (dye-based), single tank with 3 colors (C/M/Y) Weight (Net) Approx.