Table of Contents
Advertisement
Quick Links
LINEAR PCM RECORDER
LS-14/LS-12
Linear PCM Recorder
Linear PCM Recorder
DETAILED
INSTRUCTIONS
EN
Thank you for purchasing an Olympus Digital Voice Recorder. Please read these
instructions for information about using the product correctly and safely. Keep
the instructions handy for future reference. To ensure successful recording, we
recommend that you test the record function and volume before use.
Register your product on www.olympus-consumer.com/register and get additional benefits from Olympus!
Advertisement
Table of Contents

Related Manuals for Olympus LS-12


Summary of Contents for Olympus LS-12
- Page 1 Linear PCM Recorder DETAILED INSTRUCTIONS Thank you for purchasing an Olympus Digital Voice Recorder. Please read these instructions for information about using the product correctly and safely. Keep the instructions handy for future reference. To ensure successful recording, we recommend that you test the record function and volume before use.
- Page 2 Customer Support Center. • Olympus does not accept any liability for passive damages or damage of any kind incurred due to data loss resulting from a defect of the product, repair performed by a third party other than Olympus or an Olympus authorized service station, or for any other reason.
- Page 3 ▌ INDEX Introduction Getting started P.10 About recording P.26 About playback P.40 File management P.48 Menu setting P.64 About the tuner P.80 Using the recorder on your PC P.82 Other information P.89...
-
Page 4: Table Of Contents
Table of contents Introduction 2 About recording Safety precautions ........6 Recording tips for each instrument ... 26 Recording ..........28 1 Getting started [QUICK] mode .............28 [SMART] mode ............29 Main features.......... 10 [MANUAL] mode ..........30 Identification of parts ......12 Dividing a file while recording ....34 Display (LCD panel) ..........13 Using the overdubbing function ....35... - Page 5 Table of contents 4 File management 6 About the tuner Editing [OPTION]........48 Using the tuning function....80 Moving/Copying a file 7 Using the recorder on your PC [Move/Copy] ...........48 Protecting a file [File Lock] ......51 Operating environment ....... 82 Dividing a file [File Divide] ......54 Connecting to your PC ......
-
Page 6: Safety Precautions
PC or other media for backup. • Olympus bears no liability for any damage or lost earnings incurred by data loss due to a failure, repair by a third party not certified by Olympus, or other... -
Page 7: Handling The Recorder
Do not insert a card other than SD or SDHC Notes on record files card into the recorder. • Olympus bears no liability even if a record file is If you accidentally insert such a card, do not try to erased or becomes unplayable due to a failure of forcibly remove it but contact our repair center or the recorder or PC. -
Page 8: Battery Handling Precautions
Safety precautions f Caution: Battery handling precautions s Do not turn the volume up before starting f Danger: operation. Doing so could cause a hearing problem or s Do not put the battery near fire. hearing loss. s Do not throw the battery into fire or heat it. s Stop using the product if you notice an Doing so could cause a fire, blowout or ignition. - Page 9 Doing so could cause an electric shock or failure. 1 Immediately remove the battery carefully. s Do not use a battery whose package is 2 Contact your dealer or the Olympus Service scratched or damaged. Station for service. Leaving it could cause a fire Doing so could cause a blowout or heat or burn.
-
Page 10: Getting Started
Getting started Main features ▌ ▌ Smart mode ([SMART]) for facilitating Tresmic, a triple microphone system that high-quality recording enables high-quality recording of all sound frequencies from low to high The [ SMART ] Mode detects the maximum volume (LS-14 only) input during a set time interval and automatically optimizes the recording level. - Page 11 Main features ▌ ▌ A brand-new microphone design with Various other recording functions maximum sound pressure of 130dBspl In addition to the normal recording modes, two other functions can be selected: Overdubbing and The new built-in microphones with acoustic Pre-recording. You can select the recording mode resistance of 130dBspl are designed to produce and function according to your use: recording of high-quality and immersive recordings without...
-
Page 12: Identification Of Parts
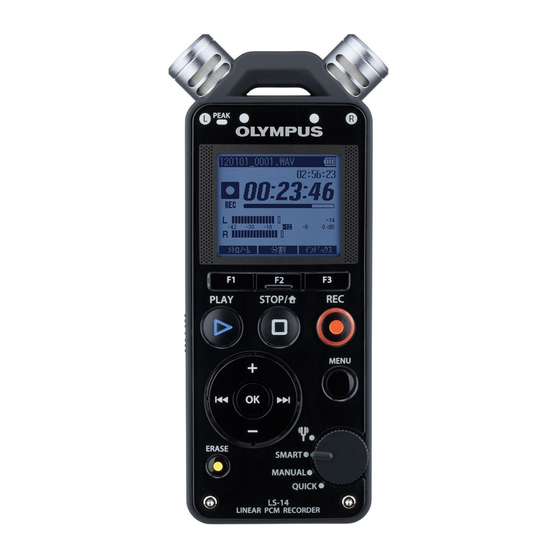
Identification of parts & 1 Built-in stereo microphone # F1 button, F2 button, F3 button $ PLAY ( ` ) button 2 Built-in center microphone (LS-14 only) 3 MIC (Microphone) jack % + button ^ 0 button 4 LINE IN jack 5 Card cover &... -
Page 13: Display (Lcd Panel)
Identification of parts e EAR (Earphone) jack t USB connector y POWER/HOLD switch r REMOTE jack u Strap hole Connect the receiver of the exclusive remote control set RS30W (optional). This enables operation of the start and stop recording functions through the remote control. - Page 14 Identification of parts ▌ File screen 1 Current file name 2 Battery indicator 3 [ OVERdub ] indicator, Metronome indicator, Folder name 4 Recorder status indicator [ H REC ]: Record indicator [ G PAUSE ]: Pause indicator [ F STOP ]: Stop indicator [ E PLAY ]: Play indicator [ I FF ]: Forwarding indicator [ J REW ]: Rewinding indicator...
-
Page 15: Inserting Batteries
Inserting batteries This recorder can be used with AA Alkaline Batteries. Battery indicator The battery indicator on the display changes as Press the battery cover release the batteries lose power. button, and then slide the battery cover open while lightly pressing it down. -
Page 16: Turning On/Off The Power
Turning on/off the power When the recorder is not being used, turn the power off to reduce battery consumption. Existing data, mode settings, and clock settings are not lost when the power is turned off. ▌ ▌ Turning on the power Turning off the power While the recorder is turned off, slide the Slide the POWER/HOLD switch in the... -
Page 17: Hold
HOLD If you set the recorder to HOLD mode, the current settings will be preserved and all buttons will be disabled. This feature is useful when the recorder has to be carried in a bag or pocket. This mode can also prevent you from accidentally stopping recording. -
Page 18: Setting The Time And Date [Time & Date]
Setting the time and date [ Time & Date ] If you set the time and date before using the recorder, recording time and date information is automatically stored for each file. Setting the time and date beforehand enables easier file management. When you use the recorder for the first time, or when the battery is inserted after the recorder has not been used for a long time, [ Set time &... - Page 19 Setting the time and date [Time & Date] Example: March 24, 2012 3M 24D 2012Y While the recorder is in stop mode at the (Initial setting) [ Home ] screen, press and hold the STOP / w ( 4 ) button to display [ Time & date ] and [ Remain ].
-
Page 20: Inserting And Ejecting An Sd Card
Inserting and ejecting an SD card “SD” indicated in the instruction manual refers to • Insert the SD card, keeping it straight. both SD and SDHC. This recorder enables you to store • Inserting the SD card in the wrong way or at data not only to the internal memory but also to a an angle could damage the contact area or commercially available SD card. -
Page 21: Ejecting An Sd Card
Push the SD card inward to unlock issues with this recorder. it, and let it eject partially. • See the Olympus website for a list of SD cards that have been confirmed to operate with this recorder in conditions prescribed by Olympus. The website http://olympus-imaging.jp/ introduces... -
Page 22: [Home] Screen Operations
[ Home ] screen operations When you turn on the recorder, the [ Home ] screen will be displayed. The [ Home ] screen is the main screen used for accessing each function. In addition, you can also verify the current settings for recording and playback. ▌... - Page 23 [Home] screen operations ▌ Verifying the current settings Press and hold the F3 ( INFO ) button on the The following settings will be displayed. [ Home ] screen. You can also check it while 1 [ Mic Gain ] ( ☞ P.66) recording is paused.
-
Page 24: Notes On The Folders
Folder for recorded files: Recorded files will be saved in the [ RECORDER ] folder. RECORDER LS-14 LS-12 Library folder Notes on the library folder: It is possible to divide and store files saved in the [ RECORDER ] folder into folders [ 01 ] to [ 03 ]. -
Page 25: Selecting Folders And Files
Selecting folders and files Change folders while the recorder is stopped. For information on the layered structure of the folders, see the section entitled “ Notes on the folders ” ( ☞ P.24). [ Home ] screen Folder list screen File list screen File screen Folder list screen... -
Page 26: About Recording
About recording Recording tips for each instrument ▌ Recorder position examples Voice Wind instrument Position the recorder slightly away from the singer's Position the recorder pointing to the center of the so- face. If breathing noises are audible, adjust the called "bell."... - Page 27 Recording tips for each instrument Acoustic guitar Electric guitar Position the recorder pointing to a place slightly away To record sound directly from the speaker of a guitar from the sound hole of the guitar. For a rhythm guitar, amplifier, position the recorder slightly away from keep a certain distance from the main body of the the speaker and pointing to the center of the speaker guitar.
-
Page 28: Recording
Recording The recorder has three recording modes that can be [ QUICK ] mode selected by using the Mode dial. Use them according to your needs. [ QUICK ] mode: In this mode the recording level will be adjusted automatically. This mode is useful if you want to start recording immediately. -
Page 29: [Smart] Mode
Recording [ SMART ] mode Elapsed recording time Remaining memory bar indicator Remaining recording time Level meter (changes according to the recording level and recording function settings) • If the recording level is low, please change Switch the Mode dial to the the [ Mic Gain ] setting to [ Hi ] or [ Mid ] ( ☞... -
Page 30: [Manual] Mode
Recording [ MANUAL ] mode Elapsed recording time Remaining memory bar indicator Remaining recording time Level meter (changes according to the recording level and recording function settings) • The recording level will be adjusted automatically depending on the volume input within the set time. During recording level adjustment, [ Setting Rec Level ] Switch the Mode dial to the and the remainder of the set time will be... - Page 31 Recording Press the REC ( s ) or PLAY ( ` ) button to start recording. • The recording indicator light turns on and [ H ] appears on the display. a Remaining recording time b Remaining memory bar indicator c Level meter (changes according to the recording level and recording function settings) Press the 9 or 0 button to...
- Page 32 Recording ▌ Recording more than 2 GB of data in Notes • Inputting a very loud sound may produce noise linear PCM format even when the Mode dial is set to [ QUICK ] or Recording will continue even if the volume of a single [ SMART ].
- Page 33 Recording ▌ ▌ Pause Listening while audio is recorded If you start recording after inserting the earphones While the recorder is in recording mode, into the EAR jack on the recorder, you can hear the press the REC ( s ) or PLAY ( ` ) button. audio being recorded.
-
Page 34: Dividing A File While Recording
Recording Dividing a file while recording At the position where you want to divide the file, press the You can also divide files while recording. This is useful, F2 ( DIVIDE ) button. for example, when you want to have different files for each movement of a concert. -
Page 35: Using The Overdubbing Function
Recording Using the overdubbing function Connect earphones to the EAR jack of the recorder. The overdubbing function enables you to dub sound over a file while listening to it. The recorded file is • The file to be dubbed over will be played saved under a different name. -
Page 36: Using The Metronome Function
Recording Using the metronome function Press the 9 or 0 button to adjust the recording level. The metronome is a useful rhythm guide and can be used during recording. • You can adjust the recording level by using the 9 or 0 button depending on the volume level during playback. - Page 37 Recording Notes • The sound of the metronome will be output from the EAR jack. Connect earphones to hear the metronome. • When [ Rec Monitor ] is set to [ Off ], no metronome sound is output. File names are automatically created for files recorded by this recorder.
-
Page 38: Recording From An External Microphone
Recording Recording from an external Notes • The built-in microphone becomes inoperable microphone or other device when an external microphone is plugged into the recorder’s MIC jack. An external microphone or other device can be • Microphones supported by plug-in power can also connected and audio can be recorded. - Page 39 Recording ▌ ▌ Recording audio from another device Recording audio from this recorder with with this recorder another device Audio can be recorded when you have connected Audio from this recorder can be recorded to another the audio output terminal (earphone jack) of another device by connecting the audio input terminal device and the LINE IN jack of the recorder using the (microphone jack) of the other device and the EAR...
-
Page 40: About Playback
About playback Playback a File name, Folder name The recorder can play back WAV and MP3 format files. To play back a file recorded with another device, you b Elapsed playback time need to transfer (copy) it from a computer. c Playback position bar indicator d File length e Level meter... - Page 41 Playback ▌ ▌ Settings relating to playback Forwarding You can select the desired [ Play Mode ] ( ☞ P.70) playback range and repeat playback. [ Skip Space ] ( ☞ P.70) The skip interval can be set. ▌ Playback through the earphones While the recorder is in stop mode in The earphones can be connected to the EAR jack of the File screen, press and hold the 9...
- Page 42 Playback ▌ ▌ Rewinding Locating the beginning of a file While the recorder is in stop mode in While the recorder is in stop mode or the File screen, press and hold the 0 playback mode, press the 9 button. button.
-
Page 43: Changing The Playback Speed
Playback Changing the playback speed Notes • When you skip to the beginning of the file during playback, the recorder stops at the position of the The tone will be automatically adjusted digitally index mark or temp mark. Index marks and temp without changing the voice so it sounds natural. -
Page 44: Setting An Index Mark Or A Temp Mark
Index marks can only be placed into files created by Olympus voice recorders, but temp marks can be used to temporarily remember desired locations. - Page 45 Playback • Even after an index or temp mark has been • The index or temp mark is erased. placed into a file, recording or playback will • Index or temp numbers after the erased continue so you can place index or temp index or temp number automatically marks in other locations in a similar manner.
-
Page 46: How To Begin Segment Repeat Playback
Playback While [ y ] is displayed, you can fast forward, • How to begin segment repeat rewind, or change the playback speed in playback the same way as in normal mode to find the end position ( ☞ P.41, P.43). This function enables repeated playback of part of the •... - Page 47 Playback ▌ Canceling the segment repeat playback function Pressing any of the following buttons releases segment repeat playback. a Press the F1 ( CANCEL ) button Pressing the F1 ( CANCEL ) button releases segment repeat playback, and it will return to normal playback mode.
-
Page 48: File Management
File management Editing [ OPTION ] ▌ Recorded files options Moving/Copying a file [ Move/Copy ] Files can also be moved or [ Move/Copy ] copied between memory. Files saved in the internal memory or an SD card can Locking a file keeps important [ File Lock ] ( ☞... - Page 49 Editing [OPTION] [ Move to memory ]: Move a file from the While the recorder is in stop mode, internal memory or SD card to another press the F2 ( OPTION ) button. folder within the internal memory. [ Copy to memory ]: Copy a file from the internal memory or SD card to another folder within •...
- Page 50 Editing [OPTION] Press the OK button to move to the Press the + or − button to select the respective setting. folder to which you want to move or copy the file. If you selected [ One file ]: 1 Press the + or − button to select the file you want to move or copy.
-
Page 51: Protecting A File [File Lock]
Editing [OPTION] Protecting a file [ File Lock ] Press the F3 ( EXIT ) button to close the [ OPTION ] screen. Locking a file keeps important data from being accidentally erased. Locked files are not erased when you select to erase all files from a folder ( ☞ P.62). You can edit a single selected file or multiple files. - Page 52 Editing [OPTION] Press the + or − button to select Press the OK button to move to the [ File Lock ]. respective setting. If you selected [ One file ]: 1 Press the + or − button to select the file you want to protect.
- Page 53 Editing [OPTION] Press the + or − button to select [ On ] Press the F3 ( EXIT ) button to close or [ Off ]. the [ OPTION ] screen. File list screen a File Lock [ On ]: Locks the file and prevents it from being erased.
-
Page 54: Dividing A File [File Divide]
Editing [OPTION] Dividing a file [ File Divide ] Press the + or − button to select [ File Divide ]. Files with large capacities and long recording times can be divided so that they are easier to manage and edit. - Page 55 Editing [OPTION] Notes Press the + button to select [ Start ]. • [ File Divide ] is available only from the File screen. • The recorder cannot divide files when the number of files in the folder exceeds 999. •...
-
Page 56: Partially Erasing A File [Partial Erase]
Editing [OPTION] Partially erasing a file Press the + or − button to select [Partial Erase] [ Partial Erase ]. An unwanted part of a file can be erased. 2,6, Press the OK button. Press the PLAY ( ` ) button and play the file to the position where you •... - Page 57 Editing [OPTION] At the position where you want to end partial erase, press the F2 ( END ) button again. a This is the part that will be erased. • The recorder stops the beginning of the edited file. Press the + button to select [ Start ]. Press the F3 ( EXIT ) button to close the [ OPTION ] screen.
-
Page 58: Trimming A File [Trimming]
Editing [OPTION] Trimming a file [Trimming] Press the + or − button to select (LS-14 only) [ Trimming ]. A file can be trimmed down to just the required portion and then re-saved. 2,6, Press the OK button. Press the PLAY ( ` ) button and play the file to the position where you •... - Page 59 Editing [OPTION] At the position where you want to end trimming, press the F2 ( END ) button again. a This is the part that will be erased. • The recorder stops the beginning of the edited file. Press the + button to select [ Start ]. Press the F3 ( EXIT ) button to close the [ OPTION ] screen.
-
Page 60: Confirming A File In Memory
Editing [OPTION] Confirming a file in memory Press the OK button. [ Property ] • The [ Property ] screen appears on the display. File information can be confirmed from the menu screen. • [ Name ] (File name), [ Date ] (Time stamp), Select the file for which you want [ Size ] (File size), [ Bit Rate ] * (File format) and to check information ( ☞... -
Page 61: Erasing
Erasing Erasing a file Press the + button to select [ Start ]. A selected file can be erased from a folder. Press the OK button. • The display changes to [ Erasing! ] and erasing starts. • [ Erased ] is displayed when the file is erased. File numbers are reassigned automatically. -
Page 62: Erasing Multiple Files At Once
Erasing Erasing multiple files at once Press the + or − button to select [ Selected files ] or [ All files ]. 4,6, [ Selected files ]: Erase multiple selected files. [ All files ]: Erase all files in a folder. Press the OK button. - Page 63 Erasing Notes Press the + button to select [ Start ]. • You cannot recover a file once it has been erased. Please check carefully before erasing. • When an SD card is inserted into the recorder, be sure to confirm the recording media as either [ Internal memory ] or [ SD card ] so that there is no mistake ( ☞...
-
Page 64: Menu Setting
Menu setting Menu setting method Items in menus are categorized by area, so select an Press the + , − , 9 or 0 button area first and move to the desired item to set it. You to move to the area that contains can set each menu item as follows. - Page 65 Menu setting method Notes Press the + or − button to change • The recorder stops if you leave it idle for 3 minutes the setting. during a menu setup operation and do not set a selected item. • When menu settings are entered during recording or playback, the menu settings are canceled if 8 seconds elapse with no buttons being pressed.
-
Page 66: Rec Menu
Menu setting method , Rec Menu Limiter Switch to the automatic adjustment function Mic Gain according to the input level during recording. [ Music ]: Recording sensitivity is adjustable to meet recording Select this setting for clarity of sound volume. This setting is suitable for music recordings. - Page 67 Menu setting method Plug-in Power Select the recording rate. External microphones supported by plug-in power When [ PCM ] *1 is selected: can also be used. You can configure the recorder [ 96.0 kHz/24 bit ] to [ 44.1 kHz(mono) ] *2 according to whether or not you want to supply When [ MP3 ] is selected: power to external microphones.
- Page 68 Menu setting method Pre-Recording Rec Monitor Pre-recording enables you to record up to 2 seconds * of sound Select whether or not to output audio while recording before you actually press the recording button. This function from the earphone jack (EAR). allows you, for example, to start recording birdsong up to 2 [ On ]: Enables the recording monitor function.
- Page 69 Menu setting method When [ Volume ] is selected: Change the settings. Set the volume between [ Volume 1 ] and [ Volume 5 ]. When [ Tempo ] is selected: Set a Tempo speed between [ 40 ] and [250]. •...
-
Page 70: Play Menu
Menu setting method - Play Menu • In [ File ] mode, when the recorder comes to the end of the last file in the folder, [ End ] flashes for two seconds on the display and the recorder stops at the start of the last file. -
Page 71: Lcd/Sound Menu
Menu setting method ▌ . LCD/Sound Menu Forward/Reverse Skip Playback Press the PLAY ( ` ) button to start Backlight playback. The display will remain lit for about 10 (Initial setting) seconds when a button on the recorder is pressed. Press the 9 or 0 button. -
Page 72: Device Menu
Menu setting method / Device Menu Beep The recorder beeps to alert you to button operations Memory Select or warn you of errors. System sounds may be turned off. When an SD card is inserted, you can select to record [ Volume 3 ]: to either the internal memory or to the SD card Increase the volume of beeps. -
Page 73: Initial Settings
Menu setting method . LCD/Sound Menu : USB Settings [ Backlight ] [ 10 sec. ] [ Contrast ] [ Level 06 ] You can switch the USB class according to your usage. [ LED ] [ On ] See “ Changing the USB class [ USB Settings ] ” [ Beep ] [ Volume 2 ] ( ☞... -
Page 74: Guidance [Voice Guide] (Ls-14 Only)
Menu setting method 4 On/Off ] setting: Guidance [ Voice Guide ] (LS-14 only) 1 Press the + or – button to select between This feature gives audio announcements of recorder [ On ] and [ Off ]. operating conditions. Adjust the speed and the [ On ]: Guidance will be provided. -
Page 75: Changing The Time And Date
Menu setting method Changing the time and date Press the + or − button to change [ Time & Date ] the value. If the current time and date are not correct, set them using the procedure below. Select [ Time & Date ] from the menu on the [ Device Menu ]. -
Page 76: Changing The Usb Class [Usb Settings]
Menu setting method Changing the USB class Press the OK button. [ USB Settings ] You can select [ PC ] to connect the recorder to a PC Press the + or − button to change to send and receive files, or [ AC adapter ] to connect the setting. - Page 77 Menu setting method When [ USB Class ] is selected: Notes • When you first connect the recorder to your PC as an external storage device, the driver for the recorder will be automatically installed in your PC. • The PC cannot recognize that the recorder is connected to the PC if [ USB Connection ] is set to [ AC Adapter ].
-
Page 78: Formatting The Recorder [Format]
Menu setting method Formatting the recorder [ Format ] Press the OK button. If you format the recorder, all files will be erased and all function settings will return to the defaults except Press the + button to select [ Start ]. the date and time settings. - Page 79 Menu setting method Notes Press the OK button. • Never format the recorder from a PC. • When the recorder is formatted, all the saved data, • Formatting begins and [ Formatting! ] including locked files and read-only files, is erased. flashes on the display.
-
Page 80: About The Tuner
About the tuner Using the tuning function You can use the recorder’s chromatic tuning function Tune the musical instrument by to tune musical instruments. The difference between playing a single note. the reference tone and the input sound is measured and displayed on screen. - Page 81 Using the tuning function Adjust while looking at the tuning Switch the Mode dial to a position other than [ v ] to exit the tuning meter and the indicators. mode. • Tune accurately with the needle pointing to the center of the meter. •...
-
Page 82: Using The Recorder On Your Pc
Using the recorder on your PC When connected to a PC, the recorder enables you to do the following: • You can transfer files from a computer and play them back. • This recorder is compatible with MP3 and WAV files. •... - Page 83 Operating environment Precautions on using the recorder connected to a PC • When you are downloading a file from the recorder or uploading a file to the recorder, do not remove the USB cable even if the screen is indicating you can. Data is still being transferred while the PEAK indicator light is blinking.
-
Page 84: Connecting To Your Pc
Connecting to your PC • [ Remote (Storage) ] is displayed on the Boot the PC. recorder if the USB connector is connected. • The recorder does not establish a connection with a PC if [ AC Adapter ] is Connect the USB cable to the USB selected in the USB connection setting. -
Page 85: Disconnecting From Your Pc
Connecting to your PC Disconnecting from your PC ▌ ▌ Windows Macintosh Click [ ] on the task bar located Drag and drop the recorder’s drive at the lower-right corner of the icon on the desktop to the Recycle screen. Click [ Safely remove USB Bin icon. -
Page 86: Transferring Voice Files To Your Pc
Transferring voice files to your PC The four folders on this recorder will be displayed as [ RECORDER ], [ 01 ], [ 02 ] and [ 03 ] when connecting the recorder to a PC. Copy them to the folder of your choice on your PC. ▌... - Page 87 Transferring voice files to your PC ▌ Drive names and folder names when a PC is connected Internal memory Drive name Folder name RECORDER LS_14 LS_12 Recognized by the drive name of the product. SD card Drive name Folder name Windows Removable Disk RECORDER...
-
Page 88: Usage As External Memory Of Your Pc
Usage as external memory of your PC With the recorder connected to your PC, you can download data from the memory to your PC and upload data stored on your PC to the memory. ▌ ▌ Windows Macintosh Connect the recorder to your PC Connect the recorder to your PC ( ☞... -
Page 89: Other Information
[ Memory error ] Error in the memory. Error in the memory. an Olympus service station for repair ( ☞ P.99). SD card is not recognized Remove the SD card and insert it again [ Card error ] Error in the memory. - Page 90 Alarm message list Message Meaning Explanation Action [ Can't create the The file for management system file. Connect The management file cannot cannot be created due to Connect the recorder to a computer and to PC and erase be created. a shortage of remaining delete unnecessary files.
-
Page 91: Troubleshooting
Troubleshooting Symptom Probable cause Action Verify that the battery polarities = and - The battery is not loaded properly. are correct ( ☞ P.15). Nothing appears on the display Replace with new batteries ( ☞ P.15). Battery power is getting low. Turn the power on ( ☞... - Page 92 Troubleshooting Symptom Probable cause Action Adjust the recording level and then try The recording level has not been adjusted. recording once more ( ☞ P.31). Recording level too high If you cannot record clearly even This could potentially be because the after adjusting the recording level, recording level and output level for then adjust the output level for the...
- Page 93 Troubleshooting Symptom Probable cause Action If the built-in speaker amps are used to monitor recording, there is a risk that audio feedback will occur while recording. It is recommended that you use earphones to monitor recording, or turn [ Rec Monitor ] to [ Off ] before starting recording ( ☞...
-
Page 94: Accessories (Optional)
Accessories (optional) Accessories exclusive to the Olympus voice recorder can be purchased directly from Online Shop on our company’s website. Availability of accessories differs depending on the country. s Stereo microphone: ME51S s Telephone pickup microphone: TP8 The built-in large-diameter microphone enables This earphone-type microphone can be placed sensitive stereo recording. -
Page 95: Specifications
General Built-in NAND FLASH memory: 4 Recording format: LS-14 : 4 GB Linear PCM (Pulse Code Modulation) LS-12 : 2 GB MP3 (MPEG-1 Audio Layer3) SD card: 4 Input level: 2 GB to 32 GB * The recorder uses some of its memory capacity [ Mic Gain ]: to maintain a management file. - Page 96 74 h. 30 min. 60 Hz to 20 kHz ([ Central Mic OFF ]) 64 kbps (mono) approx. 149 h. LS-12: 60 Hz to 20 kHz (However, when recording in MP3 format, the upper limit value of the frequency response depends on the recording format.)
- Page 97 The following values are strictly for reference only. 4 Linear PCM format: Internal memory SD card Recording format LS-14 (4 GB) LS-12 (2 GB) 32 GB 16 GB 8 GB 96.0 kHz 24 bit 1 h. 35 min. 40 min.
- Page 98 64 kbps (mono) 86 h. Notes • Battery life is measured by Olympus. It varies greatly according to the type of battery used and the conditions of use. • Battery life may be shorter when using an SD card. Specifications and design are subject to change...
-
Page 99: Technical Assistance And Support
Technical assistance and support The following contact information relates to technical support for Olympus recorders and software only. s Technical Hotline Number in the U.S. and Canada 1-888-553-4448 s User Support E-mail address in the U.S. and Canada distec@olympus.com Declaration of Conformity:... - Page 100 OLYMPUS IMAGING CORP. 2951 Ishikawa-machi, Hachioji-shi, Tokyo 192-8507, Japan. Tel. +81 (0)42-642-6162 http://www.olympus.com OLYMPUS IMAGING AMERICA INC. 3500 Corporate Parkway, P.O. Box 610, Center Valley, PA 18034-0610, U.S.A. Tel. 1-888-553-4448 http://www.olympusamerica.com EN-BD3652-01 AP1209...