Table of Contents
Advertisement
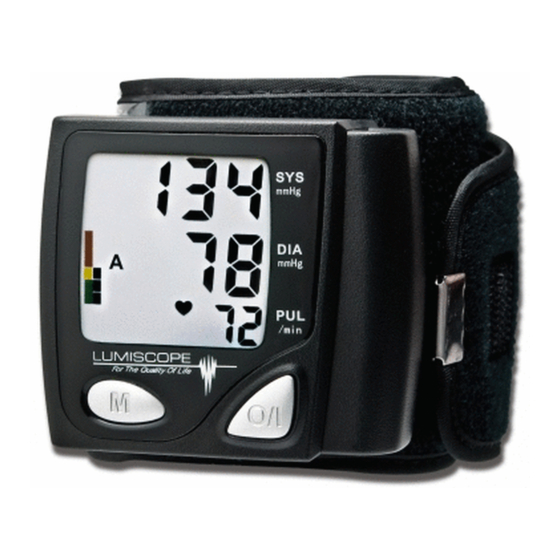
DIGITAL BLOOD PRESSURE MONITOR
Important! Read and understand these instructions before using the
Lumiscope Blood Pressure Monitor. If you do not understand any part
of these instructions, contact your medical professional or GF dealer for
direction in the use of this product.
If components are damaged or missing, contact your GF dealer immedi-
ately. DO NOT use substitute parts.
GF Health Products, Inc. assumes no responsibility for any damage or
injury caused by improper assembly or use of this product.
WRIST TYPE
MODEL 1143
INSTRUCTION MANUAL
1143-INS-LAB-RevB09
Advertisement
Table of Contents

Related Manuals for Lumiscope 1143


Summary of Contents for Lumiscope 1143
- Page 1 INSTRUCTION MANUAL Important! Read and understand these instructions before using the Lumiscope Blood Pressure Monitor. If you do not understand any part of these instructions, contact your medical professional or GF dealer for direction in the use of this product.
-
Page 2: Table Of Contents
CONTENTS PARTS AND COMPONENTS ......................3 SYMBOLS ............................4 GENERAL ...........................5 PRINCIPLE OF OPERATION ....................5 TIPS ON TAKING BLOOD PRESSURE MEASUREMENT ............7 BATTERY INSTALLATION ......................10 CORRECT POSTURE FOR MEASUREMENT ................11 SETTING THE DATE AND TIME ....................12 TAKING A MEASUREMENT .....................14 AUTOMATIC INFLATION ....................15 RAPID DEFLATION DURING MEASUREMENT ..............15 MEMORY FUNCTION ......................16 MEMORY RECALL......................16... -
Page 3: Parts And Components
PARTS AND COMPONENTS 1. Main Body 2. Display 3. Wrist Cuff 4. Button ‘O/I’ 5. Button ‘M’ 6. Batteries 7. Storage Case... -
Page 4: Symbols
SYMBOLS Symbol Meaning Symbol for the marking of electrical and electronics devices according to Directive 2002/96/EC. The device, accessories and packing must be disposed of as waste correctly at the end of the usage. Please follow Local Ordinances or Regulations for disposal. CE marking in conformity with EC directive 93/42/EEC Attention, consult accompanying documents Type B Applied Part... -
Page 5: General
1 GENERAL This instruction manual is intended to assist the user in safe and efficient operation of the wrist type digital blood pressure monitor (hereinafter: device) model 1143. The device must be used in accordance with the procedures described in the manual. - Page 6 Note: This device cannot provide reasonable accuracy if used or stored at temperature or humidity beyond the range stated in the <SPECIFICATIONS> section of this manual.
-
Page 7: Tips On Taking Blood Pressure Measurement
2 TIPS ON TAKING BLOOD PRESSURE MEASUREMENT 1. It is necessary to know that arterial blood pressure is subjected to sharp fluctuations. The level of the arterial blood pressure depends on many factors. Generally arterial blood pressure is lower in the summer and higher in the winter. - Page 8 The illustration above is from The British Hypertension Society 2. Patients with cardiovascular diseases: Take measurement under doctor’s instruction. Under no circumstances should you alter the dosage of any drug pre- scribed by your doctor! 3. Accurate measurement of blood pressure may be difficult in people with serious arteriosclerosis, weak pulse, or in patients with irregular heart rates.
- Page 9 4. Keep quiet and relax during measurement. To obtain accurate readings, wait one hour after a meal or smoking before taking a measurement. 5. Wait at least 5 minutes before taking the next measurement. Atherosclerosis and diabetes patients require longer intervals (10-15 minutes), since vessel elasticity may have decreased in these pathologies.
-
Page 10: Battery Installation
3 BATTERY INSTALLATION 1. Open the battery cover and install two alkaline AAA batteries in the battery compartment as indicated. Check polarity and ensure the batteries are correctly positioned; 2. Close the battery compartment cover. • Replace the batteries when the replacement indicator appears in the display or when the unit does not turn on when button ‘O/I’... -
Page 11: Correct Posture For Measurement
4 CORRECT POSTURE FOR MEASUREMENT Sit down and place your elbow on a table. Ensure the wrist is at approximately the same level as the heart, and the forearm is extended naturally, palm up. Wrap the cuff around the left wrist as shown in the illustration, and ensure the cuff is attached to the wrist securely with the display facing the user. -
Page 12: Setting The Date And Time
5 SETTING THE DATE AND TIME The device has a 12-hour time format. The icon ‘AM’ indicates the time of Ante Meridiem and the icon ‘PM’ indicates the time of Post Meridiem. To get accurate date and time, the user should preset the date and time correctly before the first use of this device. - Page 13 3. Press button ‘M’ again to increase the number, and press button ‘O/I’ for confirmation; 4. When the year setup is confirmed, the month number will flash automatically. Follow the same instruction as above to set month, day and time; Fig.3 5.
-
Page 14: Taking A Measurement
6 TAKING A MEASUREMENT 1. Before taking a measurement, take 3 ~ 5 deep breaths and relax. Do not talk or move your arm during measurement; 2. Press button ‘O/I’, all symbols will display for 2 seconds as in Fig.4; then ‘0’ will display. -
Page 15: Automatic Inflation
5. Press button ‘O/I’ to return to standby mode. Wait for at least 5 minutes before taking another measurement. If the device remains unused for 3 minutes, it will return to standby mode automatically. AUTOMATIC INFLATION This device has 4 levels of inflation pressure: 190 mmHg, 230 mmHg, 270 mmHg and 300 mmHg. -
Page 16: Memory Function
7 MEMORY FUNCTION MEMORY RECALL 1. Model 1143 can store 90 sets of readings and will automatically calculate the average of the last 3 readings. When memory is full (90 sets of readings are stored), the oldest reading will be replaced by the newest. Memory will not clear even if the batteries are removed;... -
Page 17: Deleting The Memory
3. Press button ‘M’ again, the device displays ‘01’; then after 1-2 seconds the latest reading will display as in Fig.9; Fig.9 4. Press button ‘M’ again, the device displays ‘02’; then after 1-2 seconds the second-to-the-last reading will display. DELETING THE MEMORY To clear memory: After a measurement is finished or when the device is in standby mode, press and hold button ‘M’... -
Page 18: Who Blood Pressure Classification
8 WHO BLOOD PRESSURE CLASSIFICATION The World Health Organization (WHO) has established standards for assessment of high or low blood pressure, regardless of age, as shown in the chart below: This device has an indicator located on the display which displays a segment, based on the current data, corresponding to the WHO classification. - Page 19 Note: If the systolic blood pressure and diastolic blood pressure fall into different categories, use the higher value for classification.
-
Page 20: Error And Low Battery Information
9 ERROR AND LOW BATTERY INFORMATION INDICATION POSSIBLE REASON CORRECTION METHODS The wrist cuff is positioned Ensure wrist cuff is correctly incorrectly positioned; repeat measurement Movement of arm (or hand) or Repeat measurement, following talking during measurement recommendations of this manual The wrist cuff is not inflated to Repeat measurement sufficient pressure... -
Page 21: Care, Storage, Repair And Recycling
10 CARE, STORAGE, REPAIR AND RECYCLING 1. It is necessary to protect this device against high moisture, direct sunlight, shock, alcohol and gasoline. 2. Remove the batteries if the device is to be stored for a long period of time, and keep the batteries away from children. -
Page 22: Troubleshooting
11 TROUBLESHOOTING SYMPTOM CHECK POINT REMEDY No display when The batteries need to be Replace both batteries with button ‘O/I’ is pressed replaced new ones Install the batteries in correct The batteries are incorrectly position positioned Clean the battery terminals with The battery contacts are a dry cloth corroded... - Page 23 Troubleshooting continued The reading is Is the wrist cuff at the same Ensure your posture is correct extremely low or high level as the heart? Is the wrist cuff wrapped Wrap the wrist cuff correctly correctly? Did you strain your arm (or Relax during measurement hand) during measurement? Did you talk or move your arm...
-
Page 24: Specifications
12 SPECIFICATIONS Model 1143 Size (L x W x H) " x 2 " x 1 " (70 mm x 60 mm x 30 mm) Weight (without batteries) ~ .24 lb (110 g) Measuring method Oscillometry Measuring range 40 to 260 mmHg (blood pressure) - Page 25 Specifications continued Memory 90 sets of measurements Temperature and humidity Operation: 50°F to 104°F (10℃ to 40℃), RH 85% and below Storage: -4°F to 122°F (-20℃ to 50℃), RH 85% and below Cuff size Fits wrist size 5" - 8" (127 mm - 203 mm ) Complete kit Main body, wrist cuff, storage case, 2 alkaline AAA batteries, instruction manual, gift box...
-
Page 26: Two-Year Limited Warranty
13 TWO-YEAR LIMITED WARRANTY GF Health Products, Inc. guarantees this product free from defects in material and workmanship for a period of two years from the date of purchase, except as noted below: This product warranty does not cover damage caused by misuse or abuse, the attachment of any unauthorized accessory, alteration to the product, or any other conditions whatsoever that are beyond the control of GF Health Products, Inc. - Page 27 Warranty is solely through the Repair Department. Service of this product by anyone other than the Repair Department voids warranty. Graham-Field ® and Lumiscope ® are registered trademarks of GF Health Products, Inc. Packaging, warranties, products, and specifications are subject to change without...
- Page 28 GF Health Products, Inc. 2935 Northeast Parkway Atlanta, Georgia 30360 telephone: 800-347-5678, 770-447-1609 fax: 800-726-0601, 678-291-3232 © October 2009 GF Health Products, Inc. Made in China www.grahamfield.com...