TRENDnet TPE-224WS User Manual
24-port 10/100 mbps web smart poe
Hide thumbs
Also See for TPE-224WS:
- User manual (77 pages) ,
- Quick installation manual (23 pages) ,
- Troubleshooting (5 pages)
Table of Contents
Advertisement
Quick Links
Advertisement
Table of Contents

Related Manuals for TRENDnet TPE-224WS


Summary of Contents for TRENDnet TPE-224WS
- Page 1 Cover Page TRENDnet User’s Guide...
-
Page 2: Table Of Contents
Create a private VLAN..................38 Configure your switch ports and view port status ..........19 View the current VLAN database ............... 39 Spanning Tree (STP, RSTP, MSTP) ................21 GVRP (GARP VLAN Registration Protcol) ..............39 © Copyright 2014 TRENDnet. All Rights Reserved. - Page 3 Configure Port Access Control ................65 System Requirements ....................87 Create Dial-In Users (Local Authentication Method) ......... 66 Installation ........................87 Add RADIUS Servers (RADIUS Authentication Method) ........67 Add TACACS+ Servers (TACACS+ Authentication Method) ........ 68 © Copyright 2014 TRENDnet. All Rights Reserved.
- Page 4 Launching the Utility ..................88 Discovery List ..................... 89 Monitor List ....................... 89 Device Setting ....................90 Main Menu Options ................... 91 Switch Management Page Structure ..........92 Technical Specifications..............93 Troubleshooting ................96 Appendix ..................97 © Copyright 2014 TRENDnet. All Rights Reserved.
-
Page 5: Product Overview
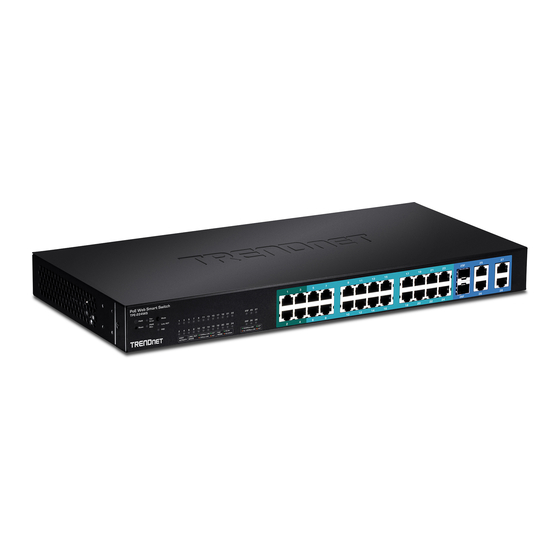
Product Overview Features TRENDnet’s 24-Port 10/100 Mbps Web Smart PoE+ Switch, model TPE-224WS, offers 24 x 10/100 Mbps PoE ports (Ports 1-4 support PoE+), 4 x Gigabit ports, 2 x shared SFP slots, and a PoE Power budget of 193 Watts. This IPv6 ready switch offers advanced traffic management, troubleshooting, access control, energy saving GREENnet, and monitoring features at a reduced cost. -
Page 6: Product Hardware Features
25 & 26 are shared with SFP slots 25F-26F. • SFP slots (25F-26F) – Supports optional 1000BASE-SX/LX mini-GBIC The link is disconnected or not established. modules. When these are activated, ports 25-26 will be disabled. © Copyright 2014 TRENDnet. All Rights Reserved. -
Page 7: Application Diagram
: When the Amber LED lights on, the link is established at (Amber) 100Mbps. Blinking When the LED is blinking, the port is transmitting or receiving data. The link is disconnected or not established. © Copyright 2014 TRENDnet. All Rights Reserved. -
Page 8: Switch Installation
• When installing the Switch on a level surface, attach the rubber feet to the Then, use screws provided with the equipment rack to mount each switch in the rack. bottom of each device. The rubber feet cushion the hub and protect the hub case from scratching. © Copyright 2014 TRENDnet. All Rights Reserved. -
Page 9: Basic Installation
8. Click Save Settings to Flash (menu). Note: User name and password are case sensitive. 9.Click Save Settings to Flash (button), then click OK. Note: Once the settings are saved, you can connect the switch to your network. © Copyright 2014 TRENDnet. All Rights Reserved. -
Page 10: Connect Additional Devices To Your Switch
Note: If you encounter issues connecting to your network, there may be a problem with your computer or device network settings. Please ensure that your computer or device network settings (also called TCP/IP settings) are configured properly within the network subnet your switch is connected. © Copyright 2014 TRENDnet. All Rights Reserved. -
Page 11: Configure Your Switch
Note: User Name and Password are case sensitive. Hardware Information • Version: Displays your switch hardware version. • DRAM Size: Displays your switch RAM memory size. • Flash Size: Displays your switch Flash memory size. © Copyright 2014 TRENDnet. All Rights Reserved. - Page 12 • Subnet Mask – Displays the current IPv4 subnet mask assigned to your switch. DHCP client. • Default Gateway – Displays the current gateway address assigned to your switch. • IPv6 DHCP Client Mode: Displays if your switch IPv6 address setting is set to DHCP client. © Copyright 2014 TRENDnet. All Rights Reserved.
-
Page 13: System
• System Contact - Specifies the name of the network administrator responsible for managing the switch. This contact name is optional and may contain up to 30 characters. © Copyright 2014 TRENDnet. All Rights Reserved. -
Page 14: Set Your Ipv4 Settings
• System IP Mode: Click the drop-down list and select Static to manually specify your IP address settings or DHCP to allow your switch to obtain IP address settings automatically from a DHCP server on your network. © Copyright 2014 TRENDnet. All Rights Reserved. -
Page 15: Set Your Ipv6 Settings
IPv6 Dynamic Gateway: To configure the switch to automatically obtain its IP this entry replaces the address in the configuration. configuration from a DHCP server on your network. • Link Local Address/Prefix length: Enter the Link Local Address/Prefix Length. © Copyright 2014 TRENDnet. All Rights Reserved. -
Page 16: Add Ipv6 Neighbors
3. Review the settings. When you have completed making changes, click Apply to save the settings. • Neighbor IPv6 Address: Specifies the neighbor IPv6 address. © Copyright 2014 TRENDnet. All Rights Reserved. -
Page 17: Restrict Access To Switch Management Page
Delete All to delete all entries in the table. When you have completed entering the IPv4 and IPv6 address entries, click the IP Restriction Status drop-down list at the top and select Enabled, then click Apply. © Copyright 2014 TRENDnet. All Rights Reserved. -
Page 18: Change Administrator Password And Add Accounts
Note: The password consists of up to 12 alphanumeric characters. Note: This step saves all configuration changes to the NV-RAM to ensure that if the switch is rebooted or power cycled, the configuration changes will still be applied. © Copyright 2014 TRENDnet. All Rights Reserved. -
Page 19: Enable Or Disable Snmp And Modify Idle Timeout Settings
Disabled - When you enable this parameter, the SNMP agent is inactive. • Web Server Status – Displays the current SNMP status. © Copyright 2014 TRENDnet. All Rights Reserved. -
Page 20: Set The Switch Date And Time
5. Click Save Settings to Flash (button), then click OK. Note: This step saves all configuration changes to the NV-RAM to ensure that if the switch is rebooted or power cycled, the configuration changes will still be applied. © Copyright 2014 TRENDnet. All Rights Reserved. -
Page 21: Enable Https/Ssl (Secure Socket Layer) Management Access
If enabling SSL management access, you will need to access the switch management page using HTTPS instead of HTTP. (e.g. https://192.168.10.200) Click Continue, Proceed to this website, and accept the certificate if prompted. © Copyright 2014 TRENDnet. All Rights Reserved. -
Page 22: Enable Dhcp Auto Configuration
Facility - Click the drop-down list and which facility to store the logging. (Options: local0 – local7) Note: You can define the facility to store logging on your external syslog server. This helps to ensure you have separate logging sections for different devices. © Copyright 2014 TRENDnet. All Rights Reserved. -
Page 23: Physical Interface
• Trunk - This parameter indicates the trunk group number. A number in this column indicates that the port has been added to a trunk using static or dynamic 802.3ad LACP link aggregation. © Copyright 2014 TRENDnet. All Rights Reserved. - Page 24 Disabled - This parameter indicates that the port is not permitted to Auto (1000F) -This parameter indicates the port is configured for use flow control. 1000Mbps operation in Auto-Negotiation mode. © Copyright 2014 TRENDnet. All Rights Reserved.
-
Page 25: Configure Spanning Tree Protocol Settings
Note: This step saves all configuration changes to the NV-RAM to ensure that if the • Hello Time: The Hello Time is frequency with which the root bridge sends out a switch is rebooted or power cycled, the configuration changes will still be applied. BPDU. © Copyright 2014 TRENDnet. All Rights Reserved. -
Page 26: Configure Spanning Tree Protocol Port Settings
Port cost can be set automatically or as a metric value. Define a value between 1 and 200000000 to determine the external cost. The lower the number, the greater the probability the port © Copyright 2014 TRENDnet. All Rights Reserved. - Page 27 P2P ports are similar to edge ports however they are restricted in that a P2P port must operate in full-duplex. Like edge ports, P2P ports transition to a forwarding state rapidly thus benefiting from RSTP. A P2P value of Forcefalse indicates that the port cannot © Copyright 2014 TRENDnet. All Rights Reserved.
-
Page 28: Configure Spanning Tree Protocol Mst Settings (Mstp)
VID List (1 - 4094): Displays the VID List. Click Add to add into MST Table below. • Priority: Enter the new priority in the Priority field. The user may set a priority value between 0-61440. © Copyright 2014 TRENDnet. All Rights Reserved. -
Page 29: View Your Spanning Tree Protocol Instance Information (Mstp)
5. Click Save Settings to Flash (button), then click OK. Note: This step saves all configuration changes to the NV-RAM to ensure that if the switch is rebooted or power cycled, the configuration changes will still be applied. © Copyright 2014 TRENDnet. All Rights Reserved. -
Page 30: Trunk Config (Link Aggregation)
5. Click Save Settings to Flash (button), then click OK. Note: This step saves all configuration changes to the NV-RAM to ensure that if the switch is rebooted or power cycled, the configuration changes will still be applied. © Copyright 2014 TRENDnet. All Rights Reserved. -
Page 31: View Your Trunk Group Status Information
5. Click Save Settings to Flash (button), then click OK. Note: This step saves all configuration changes to the NV-RAM to ensure that if the switch is rebooted or power cycled, the configuration changes will still be applied. © Copyright 2014 TRENDnet. All Rights Reserved. -
Page 32: Mirroring
Check the port to monitor or copy inormation from. (Source) To copy data received on a specific port, check the port number(s) under the Ingress Port section or you could click All to copy data received on all ports. © Copyright 2014 TRENDnet. All Rights Reserved. -
Page 33: Loopback Detection
5. Click Save Settings to Flash (button), then click OK. Note: This step saves all configuration changes to the NV-RAM to ensure that if the switch is rebooted or power cycled, the configuration changes will still be applied. © Copyright 2014 TRENDnet. All Rights Reserved. -
Page 34: Static Unicast
Note: This step saves all configuration changes to the NV-RAM to ensure that if the switch is rebooted or power cycled, the configuration changes will still be applied. Click Apply to add the Static Unicast entry to the list. © Copyright 2014 TRENDnet. All Rights Reserved. -
Page 35: Static Multicast
Group Member – Check the port(s) where the MAC address will reside. Note: You can click All to select all ports. Click Apply to add the Static Multicast Group entry to the list. © Copyright 2014 TRENDnet. All Rights Reserved. -
Page 36: Igmp Snooping
In the VLAN ID router port list, you can configure your Static and Dynamic Router ports. IGMP Snooping Router Port configured manually is a Static Router Port, and a Dynamic Router Port is dynamically configured by the Switch when a query control message is received. © Copyright 2014 TRENDnet. All Rights Reserved. -
Page 37: Bandwidth Control
5. Click Save Settings to Flash (button), then click OK. Note: This step saves all configuration changes to the NV-RAM to ensure that if the switch is rebooted or power cycled, the configuration changes will still be applied. © Copyright 2014 TRENDnet. All Rights Reserved. -
Page 38: Set Ingress Rate Limiting
Note: This step saves all configuration changes to the NV-RAM to ensure that if the switch is rebooted or power cycled, the configuration changes will still be applied. switch is rebooted or power cycled, the configuration changes will still be applied. © Copyright 2014 TRENDnet. All Rights Reserved. -
Page 39: Vlan
In the sections Static Tagged, Static Untagged, and Not Member, you can add the type of VLAN ports to add to the new VLAN (Tagged or Untagged) and assign ports that are not members (Forbidden) of the new VLAN. © Copyright 2014 TRENDnet. All Rights Reserved. -
Page 40: Configure Vlan Port Settings
Note: Modifying settings in the row marked All, will apply the settings to all switch is rebooted or power cycled, the configuration changes will still be applied. ports. 4. Click Save Settings to Flash (menu). 5. Click Save Settings to Flash (button), then click OK. © Copyright 2014 TRENDnet. All Rights Reserved. -
Page 41: Configure The Vlan Forwarding Table Mode
3. Click the learning mode drop-down list to select the forwarding table mode and click Apply to save settings. Note: The default mode is IVL. 4. Click Save Settings to Flash (menu). 5. Click Save Settings to Flash (button), then click OK. © Copyright 2014 TRENDnet. All Rights Reserved. -
Page 42: Create A Private Vlan
Press Apply for changes to take effect. switch is rebooted or power cycled, the configuration changes will still be applied. • Set the Source Port to one of the following choices from the pull-down menu: All, 01 – 10. © Copyright 2014 TRENDnet. All Rights Reserved. -
Page 43: View The Current Vlan Database
5. Click Save Settings to Flash (button), then click OK. Note: This step saves all configuration changes to the NV-RAM to ensure that if the switch is rebooted or power cycled, the configuration changes will still be applied. © Copyright 2014 TRENDnet. All Rights Reserved. -
Page 44: Set Gvrp Port Settings
Restricted VLAN Registration field. In other words, each port is set individually. Enable - The Restricted VLAN Registration is active for the port row selected. Disable - The Restricted VLAN Registration is de-active for the port row selected. © Copyright 2014 TRENDnet. All Rights Reserved. -
Page 45: Set Gvrp Time Settings
Note: To ensure compatibility between network devices, you need to configure the same values for the GARP Join Timer, GARP Leave Timer, and GARP Leave All Timer on all participating GVRP devices in your network. © Copyright 2014 TRENDnet. All Rights Reserved. -
Page 46: Qos (Quality Of Service)
Note: This step saves all configuration changes to the NV-RAM to ensure that if the 3. Review the settings. Click Apply to save the settings. switch is rebooted or power cycled, the configuration changes will still be applied. © Copyright 2014 TRENDnet. All Rights Reserved. -
Page 47: Set Port Priority
5. Click Save Settings to Flash (button), then click OK. Note: This step saves all configuration changes to the NV-RAM to ensure that if the switch is rebooted or power cycled, the configuration changes will still be applied. © Copyright 2014 TRENDnet. All Rights Reserved. -
Page 48: Set The Scheduling Algorithm
5. Click Save Settings to Flash (button), then click OK. Note: This step saves all configuration changes to the NV-RAM to ensure that if the switch is rebooted or power cycled, the configuration changes will still be applied. © Copyright 2014 TRENDnet. All Rights Reserved. -
Page 49: Configure The Ipv6 Traffic Class Priority Settings
5. Click Save Settings to Flash (button), then click OK. Note: This step saves all configuration changes to the NV-RAM to ensure that if the switch is rebooted or power cycled, the configuration changes will still be applied. © Copyright 2014 TRENDnet. All Rights Reserved. -
Page 50: Snmp
5. Click Save Settings to Flash (button), then click OK. Note: This step saves all configuration changes to the NV-RAM to ensure that if the switch is rebooted or power cycled, the configuration changes will still be applied. © Copyright 2014 TRENDnet. All Rights Reserved. -
Page 51: Configure The Snmp Group Access Table
Auth-Protocol has a password assigned and the Priv- Protocol has been selected as none on the SNMP User/Group page. AuthPriv: When the Auth-Protocol or Priv-Protocol have been enabled, choose this selection. • Click the Add button. © Copyright 2014 TRENDnet. All Rights Reserved. -
Page 52: Configure The Snmp User/Group Table
- Specifies no encryption is applied to SNMP data. Note: This step saves all configuration changes to the NV-RAM to ensure that if the switch is rebooted or power cycled, the configuration changes will still be applied. © Copyright 2014 TRENDnet. All Rights Reserved. -
Page 53: Configure The Snmp Community Table
5. Click Save Settings to Flash (button), then click OK. Note: This step saves all configuration changes to the NV-RAM to ensure that if the switch is rebooted or power cycled, the configuration changes will still be applied. © Copyright 2014 TRENDnet. All Rights Reserved. -
Page 54: Configure The Snmp Trap Management
SNMP Community Table page. If you enter a Community Name that has not been pre-defined, the Trap Host entry is displayed, but agent/manager communication fails. • Click Add. The new host is added to the table. © Copyright 2014 TRENDnet. All Rights Reserved. -
Page 55: Access Control Config
5. Click Save Settings to Flash (button), then click OK. Note: This step saves all configuration changes to the NV-RAM to ensure that if the switch is rebooted or power cycled, the configuration changes will still be applied. © Copyright 2014 TRENDnet. All Rights Reserved. - Page 56 DSCP - The DSCP (Differentiated Services Code Point) value in the IP header ranging from 0 - 63. Source Layer 4 Port - Indicates the source layer 4 port ranging from 1 - 65535. © Copyright 2014 TRENDnet. All Rights Reserved.
- Page 57 Replaced-CoS or Replaced-DSCP to be processed by the switch. Note: You must enter a selection for Deny/Permit field even if the Profile Action ID that you have entered ignores both the Replaced- DSCP and Replaced-CoS fields. © Copyright 2014 TRENDnet. All Rights Reserved.
- Page 58 5. Click Save Settings to Flash (button), then click OK. Note: This step saves all configuration changes to the NV-RAM to ensure that if the switch is rebooted or power cycled, the configuration changes will still be applied. © Copyright 2014 TRENDnet. All Rights Reserved.
-
Page 59: Configure Rate Control
You can also click Delete All to delete all of the entries in the table. If the entries span multiple pages, you can navigate page number in the Page field and click Go or you can click First, Previous, Next, and Last Page to navigate the pages. © Copyright 2014 TRENDnet. All Rights Reserved. -
Page 60: View Your Policy Database
6. Click Save Settings to Flash (button), then click OK. Note: This step saves all configuration changes to the NV-RAM to ensure that if the switch is rebooted or power cycled, the configuration changes will still be applied. © Copyright 2014 TRENDnet. All Rights Reserved. -
Page 61: Configure Parameters For Rmon Ethernet Statistics
Owner: This parameter is used to identify the person who created an entry. It is primarily intended for switches that are managed by more than one person, and is an optional field. Click Add to add the entry to the table. © Copyright 2014 TRENDnet. All Rights Reserved. -
Page 62: Configure Parameters For Rmon History Control Settings
• Owner: This parameter is used to identify the person who created an entry. It is primarily intended for switches that are managed by more than one person, and is an optional field. © Copyright 2014 TRENDnet. All Rights Reserved. -
Page 63: Configure Parameters For Rmon Alarms
5. Click Save Settings to Flash (button), then click OK. Note: This step saves all configuration changes to the NV-RAM to ensure that if the switch is rebooted or power cycled, the configuration changes will still be applied. © Copyright 2014 TRENDnet. All Rights Reserved. - Page 64 Note: This step saves all configuration changes to the NV-RAM to ensure that if the and is an optional field. switch is rebooted or power cycled, the configuration changes will still be applied. © Copyright 2014 TRENDnet. All Rights Reserved.
-
Page 65: Configure Parameters For Rmon Events
5. Click Save Settings to Flash (button), then click OK. Note: This step saves all configuration changes to the NV-RAM to ensure that if the switch is rebooted or power cycled, the configuration changes will still be applied. © Copyright 2014 TRENDnet. All Rights Reserved. -
Page 66: Voice Vlan
If the IP phone(s) that you are installing cannot be configured with a VLAN ID, then the same, then no other IP phone MAC addresses need to be entered into the configuration. switch ports should be configured as Static tagged ports within the voice VLAN. © Copyright 2014 TRENDnet. All Rights Reserved. -
Page 67: Create A Voice Vlan
VLAN IDs that have been defined. Aging Time - This parameter indicates the amount of time, in hours, after the last IP phone's OUI was received on a port, after which this © Copyright 2014 TRENDnet. All Rights Reserved. -
Page 68: Configure Voice Vlan Oui Settings
User Defined OUI - Description field. This parameter can be up to 20 characters Note: This step saves all configuration changes to the NV-RAM to ensure that if the in length. switch is rebooted or power cycled, the configuration changes will still be applied. © Copyright 2014 TRENDnet. All Rights Reserved. -
Page 69: Security
Note: This step saves all configuration changes to the NV-RAM to ensure that if the 2. Click on Security and click on Port Access Control. switch is rebooted or power cycled, the configuration changes will still be applied. © Copyright 2014 TRENDnet. All Rights Reserved. -
Page 70: Create Dial-In Users (Local Authentication Method)
If you enter 0, this field will be ignored. Click Add to add the entry to the table. © Copyright 2014 TRENDnet. All Rights Reserved. -
Page 71: Add Radius Servers (Radius Authentication Method)
1813. • Shared Secret – Enter the default authentication and encryption key for RADIUS communication between the device and the RADIUS server. Click Add to add the entry to the table. © Copyright 2014 TRENDnet. All Rights Reserved. -
Page 72: Add Tacacs+ Servers (Tacacs+ Authentication Method)
Shared Secret – Enter the default authentication and encryption key for switch is rebooted or power cycled, the configuration changes will still be applied. TACACS+ communication between the device and the TACACS+ server. Click Add to add the entry to the table. © Copyright 2014 TRENDnet. All Rights Reserved. -
Page 73: Destination Mac Filter
Note: This step saves all configuration changes to the NV-RAM to ensure that if the switch is rebooted or power cycled, the configuration changes will still be applied. 3. Enter the MAC Address to add to the destination filter table. Click Add. © Copyright 2014 TRENDnet. All Rights Reserved. -
Page 74: Denial Of Service (Dos)
6. Click Save Settings to Flash (button), then click OK. Note: This step saves all configuration changes to the NV-RAM to ensure that if the switch is rebooted or power cycled, the configuration changes will still be applied. © Copyright 2014 TRENDnet. All Rights Reserved. -
Page 75: Poe Configuration
Low level receive power only when all 15.4W 6.49W to 12.95W the ports assigned to the Critical and High 34.2W 25.5W to 38.9W levels are already receiving power. This level is the default setting. © Copyright 2014 TRENDnet. All Rights Reserved. -
Page 76: Configure Poe Settings
Current(mA) - Indicates the Current in milliamps that the port is supplyng to Note: This step saves all configuration changes to the NV-RAM to ensure that if the the PD. switch is rebooted or power cycled, the configuration changes will still be applied. © Copyright 2014 TRENDnet. All Rights Reserved. -
Page 77: Dhcp Snooping
Enable - Allows an Option 82 packet to be passed through the switch without being altered. Disable - Blocks an Option 82 packet from passing through the switch. • Verify MAC Address - Select one of the following choices from the pull-down menu: © Copyright 2014 TRENDnet. All Rights Reserved. -
Page 78: Enable Dhcp Snooping
5. Click Save Settings to Flash (button), then click OK. Note: This step saves all configuration changes to the NV-RAM to ensure that if the switch is rebooted or power cycled, the configuration changes will still be applied. © Copyright 2014 TRENDnet. All Rights Reserved. -
Page 79: Set Trusted Interfaces
5. Click Save Settings to Flash (button), then click OK. Note: This step saves all configuration changes to the NV-RAM to ensure that if the switch is rebooted or power cycled, the configuration changes will still be applied. © Copyright 2014 TRENDnet. All Rights Reserved. - Page 80 Static- The host IP Address is statically assigned. See “Static IP Addresses” on page 300 for more information. • Lease Time: This parameter is the time that IP address assignment by the DHCP server is valid. © Copyright 2014 TRENDnet. All Rights Reserved.
-
Page 81: Lldp (Link-Layer Discovery Protocol)
The range is from 2 to 10. Message TX Interval: Sets the transmit interval, which is the interval between regular transmissions of LLDP advertisements. The range is from 1 to 10 seconds. © Copyright 2014 TRENDnet. All Rights Reserved. - Page 82 5. Click Save Settings to Flash (button), then click OK. Note: This step saves all configuration changes to the NV-RAM to ensure that if the switch is rebooted or power cycled, the configuration changes will still be applied. © Copyright 2014 TRENDnet. All Rights Reserved.
-
Page 83: View Lldp Neighbor Information
Go or you can click First, Previous, Next, and Last Page to navigate the pages. packets in packets per second. • OutNUcastPkts: Outbound Non-unicast Packets (Pkts), number of outbound non-unicast (such as broadcast and multicast packets) packets. • OutDiscards: Outbound Discards (Pkts), number of outbound discarded packets. © Copyright 2014 TRENDnet. All Rights Reserved. -
Page 84: View Error Information Statistics
Fragments: Number of fragments (packets with less than 64 octets, excluding framing bits, but including FCS octets) received. • Collisions: Number of collisions received. If Jumbo Frames are enabled, the threshold of Jabber Frames is raised to the maximum size of Jumbo Frames. © Copyright 2014 TRENDnet. All Rights Reserved. -
Page 85: Switch Maintenance
TRENDnet may periodically release firmware upgrades that may add features or fix 2. Click on Tools, click on Firmware Upgrade, and click via HTTP. problems associated with your TRENDnet switch model and version. To check if there is a firmware upgrade available for your device, please check your TRENDnet model and 3. -
Page 86: Firmware Upgrade Via Tftp Settings
4. A separate file navigation window should open. 5. Select the router configuration file to restore and click Restore. (Default Filename: config.bin). If prompted, click Yes or OK. 6. Wait for the switch to restore settings. © Copyright 2014 TRENDnet. All Rights Reserved. -
Page 87: Backup/Restore Via Tftp Settings
TFTP Server IP: Enter the IP address of your TFTP server. config.bin) • Config File Name: Enter the configuration file name for the backup. (Default: config.bin) 5. Wait for the switch to restore settings. © Copyright 2014 TRENDnet. All Rights Reserved. -
Page 88: Cable Diagnostics Test
2. Click on Tools and click on Cable Diagnostic. 3. Click on the Port drop-down list to select which port to run the cable diagnostic and click Test Now to run the test. © Copyright 2014 TRENDnet. All Rights Reserved. -
Page 89: Enable Ieee 802.3Az Power Saving Mode
5. Click Save Settings to Flash (button), then click OK. Note: This step saves all configuration changes to the NV-RAM to ensure that if the switch is rebooted or power cycled, the configuration changes will still be applied. © Copyright 2014 TRENDnet. All Rights Reserved. -
Page 90: Network Connectivity Test (Ping Tool)
Number of Ping Requests - Specifies the number of ping requests you want the switch to perform. The switch factory default settings are below. Administrator User Name admin Administrator Password admin Switch IP Address 192.168.10.200 Switch Subnet Mask 255.255.255.0 © Copyright 2014 TRENDnet. All Rights Reserved. -
Page 91: Using The Web Smart Switch Management Utility
4. At the Utility installation window, click Next. The Powerline Utility allows you to do the following: • You can easily discover all TRENDnet web smart switches on your network using the discover feature. • You can modify the IP address settings, change the admin password, and upgrade firmware for multiple switches. -
Page 92: Using The Utility
7. In the Completion window, click Finish. You can also launch the utility from the Start Menu programs. Start > Programs (or All Programs) > TRENDnet Management Utility > TRENDnet Powerline Utility.exe © Copyright 2014 TRENDnet. All Rights Reserved. -
Page 93: Discovery List
Add Item: To add a device to the Monitor List manually, enter the IP Address of Group Interval: the device that you want to monitor. Delete Item: To delete the device in the Monitor List. © Copyright 2014 TRENDnet. All Rights Reserved. -
Page 94: Device Setting
“Set” to process the data change immediately. The default password of TRENDnet Web Smart Switches is “admin”. Access Web: Double click the device in the Monitor List or select a device in the Monitor List and press this “Web Access”... -
Page 95: Main Menu Options
Choose 15 secs, 30 secs, 1 min, 2 min and 5 min to select the time of monitoring. Group Interval: 120~1225 In the “Help TAB”, there is About function, it will show out the version of the Web Management Utility. © Copyright 2014 TRENDnet. All Rights Reserved. -
Page 96: Switch Management Page Structure
• GVRP Save Settings to Flash • TACACS+ • • Destination MAC Filter SNMP • Denial of Service • Engine ID PoE Configuration • View Table • Group Access Table • SNMP User/Group © Copyright 2014 TRENDnet. All Rights Reserved. -
Page 97: Technical Specifications
Data Transfer Rate • LLDP-MIB IEEE 802.1ab • Ethernet: 10 Mbps (half duplex), 20 Mbps (full duplex) • Ping MIB RFC 2925, RFC 4560 • Fast Ethernet: 100 Mbps (half duplex), 200 Mbps (full duplex) © Copyright 2014 TRENDnet. All Rights Reserved. - Page 98 Up to 256 multicast entries • Rack mountable Port Mirror Power • RX, TX, or Both • Input: 100 - 240 V AC, 50/60 Hz, internal power supply • One-to-one • Consumption: 239.7 Watts (max.) • Many-to-one © Copyright 2014 TRENDnet. All Rights Reserved.
- Page 99 Operating Humidity • Max. 90% non-condensing Dimensions • 440 x 210 x 44.45 mm (17.3 x 8.27 x 1.75 in.) • Rack mountable 1U height Weight • 3.23 kg (7.12 lbs.) Certifications • • © Copyright 2014 TRENDnet. All Rights Reserved.
-
Page 100: Troubleshooting
Then click Use the following IP address, and make sure to assign your network adapter an IP address in the subnet of 192.168.10.x. Click OK Note: If you are experiencing difficulties, please contact your computer or operating system manufacturer for assistance. © Copyright 2014 TRENDnet. All Rights Reserved. -
Page 101: Appendix
From the Location drop-down list, select Automatic. 2. In the Network Preference window, next to "Show:", select Network Status. You'll see d. Select and view your Ethernet connection. your network status and your IP address settings displayed. © Copyright 2014 TRENDnet. All Rights Reserved. - Page 102 1. Apple Menu > System Preferences > Network 2. Select Ethernet from the list on the left. 3. Click the Advanced button. 3. On the Ethernet tab, the Ethernet ID is your MAC Address. © Copyright 2014 TRENDnet. All Rights Reserved.
- Page 103 Note: The country code selection is for non-US model only and is not available to all US model. Per FCC regulation, all WiFi product marketed in US must fixed to US operation channels only. © Copyright 2014 TRENDnet. All Rights Reserved.
- Page 104 TPE-224WS TRENDnet User’s Guide nuostatas. TRENDnet tímto prohlašuje, že tento TPE-224WS je ve shodě se Česky [Czech] základními požadavky a dalšími příslušnými ustanoveními směrnice Hierbij verklaart TRENDnet dat het toestel TPE-224WS in Nederlands 2004/108/ES a 2009/95/ES. overeenstemming is met de essentiële eisen en de andere relevante [Dutch] bepalingen van richtlijn 2004/108/EG en 2006/95/EG.
- Page 105 Download section limited to, duty, tax, and other fees. and look for the desired TRENDnet product to access to the GPL Code or LGPL Code. These codes are distributed WITHOUT WARRANTY and are subject to the copyrights of WARRANTIES EXCLUSIVE: IF THE TRENDNET PRODUCT DOES NOT OPERATE AS the developers.