Planet GRT-101 User Manual
G.shdsl bridge/router
Hide thumbs
Also See for GRT-101:
- User manual (150 pages) ,
- Quick installation manual (16 pages) ,
- User manual (73 pages)
Table of Contents
Advertisement
Quick Links
Download this manual
See also:
User Manual
Advertisement
Table of Contents

Related Manuals for Planet GRT-101


Summary of Contents for Planet GRT-101
- Page 1 PLANET Technology GRT-101 User’s Manual Networking & Communication G.SHDSL Bridge/Router GRT-101 User’s Manual - 0 -...
-
Page 2: Ce Mark Warning
PLANET has made every effort to ensure that this User’s Manual is accurate; PLANET disclaims liability for any inaccuracies or omissions that may have occurred. -
Page 3: Table Of Contents
PLANET Technology GRT-101 User’s Manual Table of Contents TABLE OF CONTENTS...................2 CHAPTER 1 OVERVIEW ................4 CHAPTER 2 INSTALLATION................7 2.1 F .................7 RONT ANEL 2.2 R ..................7 ANEL ORTS 2.3 R ..............8 ANEL ONNECTIONS 2.4 S ..........9 ETTING UP THE HARDWARE ENVIRONMENT CHAPTER 3 CONFIGURATION..............10... - Page 4 PLANET Technology GRT-101 User’s Manual 3.8.4 WAN IP address ................34 3.8.5 ISP profile for PPP .................34 3.9 S ............35 YSTEM TATUS AND ERFORMANCE 3.10 U ..................37 ROFILE 3.11 M ...............38 ANAGEMENT ECURITY 3.11.1 Telnet port number ...............38 3.11.2 Legal client IP ................39 3.12 SNMP S...
-
Page 5: Chapter 1 Overview
SOHO customers while reducing deployment and operational costs from service providers. Via sending and receiving user’s datagram (often Internet service) over existing telephone lines, GRT-101 concentrates all traffic onto a single high-speed trunk for Internet activities or sharing a corporate intranet. - Page 6 PLANET Technology GRT-101 User’s Manual User authentication with PAP/CHAP/MS-CHAP Routing Capability IP routing with static routing and RIPv1/RIPv2 NAT/PAT with virtual server mapping DHCP server DNS proxy Bridging IEEE 802.1D transparent learning bridge Up to 128 MAC learning addresses Configuration...
- Page 7 PLANET Technology GRT-101 User’s Manual Environmental Operating temperature: 0° to 45°C Storage temperature: -10° to 70°C Housing Plastic Case Dimension 145 mm x 187 mm x 33 mm (L x W x H) - 6 -...
-
Page 8: Chapter 2 Installation
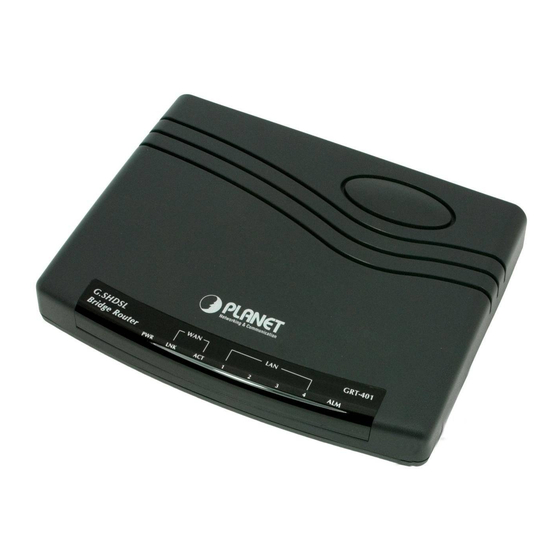
PLANET Technology GRT-101 User’s Manual Chapter 2 Installation 2.1 Front Panel LEDs The LEDs on the front panel indicate the operational status of GRT-101. Figure 2-1 Front Panel The following table describes the LEDs’ functions: Table 2-1 LED Functions LEDs... -
Page 9: Rear Panel Connections
SHDSL interface for WAN port (RJ-11) 2.3 Rear Panel Connections The figure shows the rear panel connections of GRT-101. The STU-R is a standalone and can able to place in desktop. All the external wiring shall be located at the rear panel. The LAN port is a 10 Base-T auto-sensing and half/full duplex configurable Ethernet interface and complied with IEEE 802.3u respectively. -
Page 10: Setting Up The Hardware Environment
PLANET Technology GRT-101 User’s Manual Server File Server Workstation Mobile Device HUB/Switch Non-cross Over Wireless LAN Ethernet Power Wall Jack DB-9 Figure 2-4 Connection with Switch or HUB 2.4 Setting up the hardware environment Step 1: Connect the power adapter to the port labeled DC-IN on the rear panel of the product. -
Page 11: Chapter 3 Configuration
GRT-101 and select one of the following procedures to access GRT-101. Note: It is recommended that only one configuration application is used to setup GRT-101 at any given time, that is, Telnet, serial console and the web management interfaces should not be used simultaneously. -
Page 12: Telnet
3.6.1 Bridge management and 3.7.1 LAN setting for routing mode operation. If you have not set any user profile for GRT-101, enter the factory default user “admin”. When the system prompts you for a password, type “admin” to enter GRT-101. For more security issues for remote management interfaces such as Telnet and web interface, see section 3.11 Management Security. -
Page 13: Quick Installation
PLANET Technology GRT-101 User’s Manual 3.3 Quick Installation 3.3.1 Bridge Mode - 12 -... - Page 14 Click OK to write the new configuration data to the flash memory of GRT-101. Note: You have to do that otherwise the new configuration parameters will not affect GRT-101. Click Restart GRT-101 will reboot with the new setting. Console Configuration Do the following steps: User : admin...
-
Page 15: Routing Mode For Pppoa And Pppoe With Ip Sharing
PLANET Technology GRT-101 User’s Manual 3.3.2 Routing Mode for PPPoA and PPPoE with IP Sharing Web UI Configuration For Route Mode with Point-to-Point Protocol over ATM and Ethernet, follow the following setting. First select ROUTE and then click Next for setting others parameters. - Page 16 Enter DHCP Client Start IP: 192.168.0.2 Enter DHCP Client End IP: 192.168.0.200 Enter Name Server: 192.168.0.1 The DNS server is embedded in GRT-101. Click Next to write the new setting. Click OK to write the new configuration data to the flash memory.
-
Page 17: Routing Mode For Ipoa Or Eoa
PLANET Technology GRT-101 User’s Manual 3.3.3 Routing Mode for IPoA or EoA Web UI Configuration For Route Mode with Classical IP over ATM and Ethernet over ATM, follow the following setting. First select ROUTE and then click Next for setting others parameters. - Page 18 GRT-101 User’s Manual Note: You have to do that otherwise the new configuration parameters will not affect GRT-101. Click Restart to reboot GRT-101. GRT-101 will reboot with the new setting. Console Configuration Do the following settings: 1. User : admin password: admin 2.
-
Page 19: Lan-To-Lan Connection With Bridge Mode
PLANET Technology GRT-101 User’s Manual 3.3.4 LAN-to-LAN Connection with Bridge Mode Web UI Configuration STU-R (CO) side Click setup to setup the bridge as CO. Follow the instruction. Click SHDSL in left side scroll bar to setup the SHDSL operation mode. - Page 20 PLANET Technology GRT-101 User’s Manual STU-C (CPE) side Follow the above instruction. The only difference in this configuration is that users have to choose CPE SIDE instead of CO SIDE. Setup the CPE Router in bridge mode. The gateway of CPE Router is pointed to LAN IP, 192.168.0.1, of CO Router.
-
Page 21: Operation Interface
When operating in the menu driven interface, just select the corresponding command items from the menu hierarchy to configure the same setting. Note: GRT-101 invokes menu driven interface when first time logon with default user profile “admin”. Both interfaces - 20 -... -
Page 22: Multi-Level Password Protection
Note: The supervisor password is the same as that for web management interface. If you have not change password setting for the web interface of GRT-101, enter “root” to enter GRT-101. For more security issues for remote management interfaces such as Telnet and web interface, see section 3.11 Management Security. -
Page 23: Connection Mode
3.6 Bridging Mode Note: This section is for bridging mode operation only. When GRT-101 operates in bridging mode, it behaves like a wire connecting a local PC directly to a service provider’s network. Bridge data is encapsulated using the RFC1483 protocol to enable data transport. GRT-101 currently supports IEEE 802.1D transparent learning bridge. -
Page 24: Static Bridge Table
Note: The IP address that is assigned to GRT-101, must be an IP address that is on the same network segment (subnet) that is being bridged. Assigning IP addresses in this fashion enables access via Telnet/web to GRT-101 for management functions. -
Page 25: Routing Mode
Also, several applications, such as NAT/PAT, DHCP server, and DNS proxy, etc., are included for LAN management and control. 3.7.1 LAN setting To setup GRT-101 LAN interface with IP address of 192.168.0.1 and subnet mask of 255.255.255.0, use the following command: admin# setup lan 1 address 192.168.0.1 255.255.255.0... -
Page 26: Static Routing Table
Note: For most WAN protocols, a valid default route with resolvable gateway on WAN side must be set to work properly. However, for PPP connections, GRT-101 will add default route to ISP gateway automatically, and hence it is unnecessary to add a default route manually. -
Page 27: Nat/Pat
GRT-101. You could configure GRT-101 such that it acts as follows. Each time a request is made from a host on the LAN, which is included in virtual IP pool, e.g., pool 3: 192.168.0.2~192.168.0.25. - Page 28 PLANET Technology GRT-101 User’s Manual GRT-101 working for the above situation where WAN 1 is used to connect to the corresponding ISP, use the below commands: admin# setup lan 1 attrib Virtual admin# setup ip_share nat global interface 3 1 admin# setup ip_share nat global range 3 69.210.1.2 6...
- Page 29 Internet, but does not actually have any services (other than NAT off course) running on GRT-101, it is said to be a virtual server. For example, requests with TCP made to 69.210.1.8:80 are remapped to the server 1 on 192.168.0.2:80, other requests with UDP made to 69.210.1.8:25...
-
Page 30: Dhcp Server
168.95.1.1 In most applications, the value of gateway IP address is the same as the LAN IP address of GRT-101. The value of name server IP address should point towards a valid host that provides DNS lookup service. These parameters should be configured correctly, or computers on the LAN may not access Internet. -
Page 31: Wan And Atm Virtual Connection
GRT-101 User’s Manual admin# setup dns_proxy 168.95.1.1 168.95.192.1 140.92.61.55 Note: For PPP connections, GRT-101 will get DNS server IPs from ISP and assign them into DNS proxy automatically if they have been pre-configured by the local ISP. The maximum number of DNS servers is limited to 3. To save your changes,... -
Page 32: Atm Virtual Connection
PVC creation is very economical. Note: Each VC is expressed as WAN x, where x is a number between 1 and 8. GRT-101 comes pre-configured with one ATM VC (WAN 1 with VPI/VCI = 0/32) already established. The WAN 1 port is ready to send and receive network traffic via IPoA protocol with LLC encapsulation. - Page 33 PLANET Technology GRT-101 User’s Manual bridged Ethernet) as the ATM protocol. For routing mode operation, GRT-101 supports Ethernet over ATM (RFC 1483 bridged Ethernet), IP over ATM (RFC 1483 routed IP/RFC 1577), PPP over ATM (RFC 2364), and PPP over Ethernet (RFC 2516).
-
Page 34: Atm Traffic Shaping
The objectives of ATM traffic management are to deliver quality-of-service (QoS) guarantees for the multimedia applications and provide overall optimization of network resources. Currently, GRT-101 supports two kinds of ATM QoS service: constant bit rate (CBR) and unspecified bit rate (UBR). The CBR connection involves a static amount of bandwidth allocated for those applications of video, voice, and circuit emulation. -
Page 35: Wan Ip Address
PLANET Technology GRT-101 User’s Manual 3.8.4 WAN IP address Note: This sub-section is for routing mode operation with protocol of “Ethernet” and/or “IPoA” only. For PPP connections, it is unnecessary to set the WAN port IP address and subnet mask. -
Page 36: System Status And Performance
“dial-on-demand”. Each time a request is made from a host on the LAN, GRT-101 checks the link status of the WAN ports and transfers the packets if the link status is active. When the link status is not active, it performs login procedure with the account information of ISP profiles and then transfers the packets if login successfully. - Page 37 PLANET Technology GRT-101 User’s Manual shdsl <CR> Show SHDSL status wan <CR> Show WAN interface status route <CR> Show routing table To display specific information, for example, for the SHDSL interface status and performance, enter: admin# status shdsl <SHDSL Status>...
-
Page 38: User Profile
127.0.0.1 Loopback 3.10 User Profile GRT-101 comes pre-configured with user profile 1 already established, that is, user “admin” with password of “admin” and menu driven user interface. The maximum number of user profiles is limited to 5. You can add, delete, modify, or list the user profiles with the commands in the following examples. -
Page 39: Management Security
LAN interface or from WAN interface, the management security is important that it prevents invalid access to GRT-101 from Internet. There are extra two levels of protection for GRT-101 Telnet and web servers except login password control: 3.11.1 Telnet port number... -
Page 40: Legal Client Ip
To save your changes, enter: admin# write Note: GRT-101 comes pre-configured without any constraint on the legal access IP addresses of Telnet clients and web browsers for convenience. However, it is very important to setup management security to prevent invalid access to GRT-101 from Internet. -
Page 41: Snmp Support
PLANET Technology GRT-101 User’s Manual 3.12 SNMP Support In addition to managing GRT-101 by means of the command-line applications and web browsers, you can manage the unit by using a simple network management protocol (SNMP) management station. GRT-101 can generate SNMP traps to indicate alarm conditions, and it relies on SNMP community strings to implement SNMP security. -
Page 42: Backup And Restore Configuration
3.13 Backup and Restore Configuration Remember to backup a copy of your configuration file after you have completed configuration of GRT-101 so you can easily recover it when necessary. 3.13.1 Backup configuration Use “show script” command to dump the system current configuration in script commands. -
Page 43: Restore Configuration
You should save your password in a safe place for any eventuality. 3.13.2 Restore configuration Before you restore the old configuration back to GRT-101, make sure to clear the whole setting back to the factory defaults first with the following command:... -
Page 44: Software Upgrade
System Time :152DAY/18HR/12MIN If GRT-101 is out of date, get the latest version from your service provider by the trivial file transfer protocol (TFTP). The TFTP allows you to transfer new software images to upgrade GRT-101. Refer to section 3.13.1 Backup configuration to backup a copy of your configuration file before upgrading it so you can easily recover the configuration when necessary. - Page 45 Be sure to write the new image to NVRAM and immediately reboot the device to activate it. When you log back onto GRT-101 after the reboot, then you can use the “show system” command to verify the version of the new firmware that is active, and restore your configuration.