
Related Manuals for iOptron SmartStar Cube


Summary of Contents for iOptron SmartStar Cube
- Page 1 ® ® SmartStar Cube -A Series Mount and Telescopes (For 8600, 8602, 8603 and 8604) Instruction Manual...
-
Page 2: Table Of Contents
Table of Content Table of Content ..........................2 ® 1. SmarStar Cube -A Series Overview..................4 ® 1.1. SmartStar Cube -A Series Features ................4 1.2. Assembly Terms ........................6 2. Telescope Assembly........................7 ® 3. GoToNova 8401 Hand Controller ................... 10 3.1. - Page 3 Star List....................32 Appendix D. Set Up USB-PC Connection ..................38 Appendix E. Firmware Upgrade ....................45 Appendix F. Use a PC to Control an iOptron Mount ..............48 WARNING! NEVER USE A TELESCOPE TO LOOK AT THE SUN! Looking at or near the Sun will cause instant and irreversible damage to your eye.
-
Page 4: Smarstar Cube Tm -A Series Overview
® 1. SmarStar Cube -A Series Overview ® 1.1. SmartStar Cube -A Series Features Alt-Azimuth Mount– The Cube™, with AltAzi/EQ dual application ® The SmartStar Cube -A series come with our patented Alt-Azimuth (AltAzi) mount, a.k.a. The Cube™. This compact mount design is probably the most functional and flexible unit on the market. - Page 5 -A GOTO AltAzi mount. If you do not have a dovetail connection -- attach your OTA using mounting rings and dovetail available at your local telescope store or the OTA manufacturer. Contact iOptron for expert’s advice on compatibility issues. USB Port The 8401 hand controller equipped with a USB port that tremendously expands the functionalities of the already powerful system.
-
Page 6: Assembly Terms
1.2. Assembly Terms 1. Telescope tube 2. Dovetail lock 3. Hand controller 4. Altitude lock Zenith 5. Mount Polaris 6. Tripod 7. Tripod shaft 8. Tray 9. Tray lock 10. Azimuth lock screw 11. Wedge tilt screw 12. Tilt locks 13. -
Page 7: Telescope Assembly
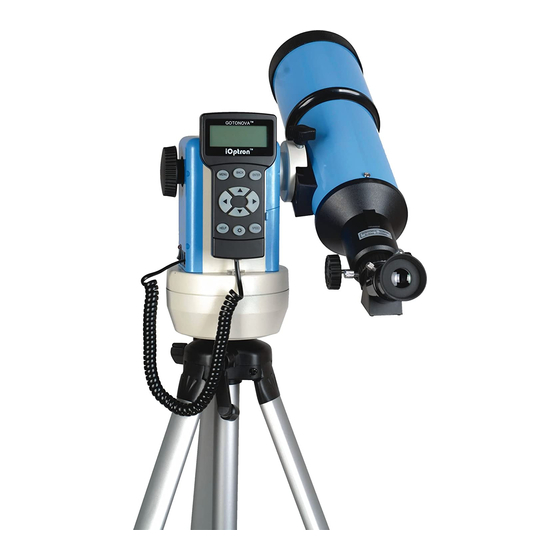
(See arrow in photo). Use only fresh batteries. Using/mixing old or low batteries may cause error messages. Optional AC Adapter and Car Charger accessories are available at www.ioptron.com Step 4. Attaching Telescope Attach telescope to mount using the dovetail lock knob (#2). Dovetail lock (#2) (Picture shows 80mm refractor. - Page 8 The other HBX is reserved for accessories, such as Plug in AC external GPS module, electronic focuser or laser pointer. adaptor DO NOT plug non-iOptron accessories into the unit to here avoid damaging the mount or accessories. For 80mm Refractor (#8502)…….............
- Page 9 For 90mm Maksutov-Cassegrain (#8504)…………………………………. Diagonal Install Diagonal by screwing it onto the back end of the scope. You can adjust the position of the diagonal by loosening the free-spinning threader on the diagonal. Install the Finderscope by sliding the dovetail plate onto Eyepiece the sleeve (see arrow) and tightening the side screw.
-
Page 10: Gotonova ® 8401 Hand Controller
8401 hand controller (HC) is the standard controller for a SmartStar Cube -A series mount and telescope, as shown in Figure 1. (The earlier version equipped with a 8402 hand controller. Contact iOptron for instruction.) 3.1. Key Description • MENU: Press “MENU” to enter the Main Menu. -
Page 11: The Lcd Screen
3.2. The LCD Screen The 8401 HC is designed to use for SmartStar-A GOTO mount and telescopes. It can ® also be used for iOptron’s equatorial (EQ) mount, such as the SmartStar -PR GOTO German ® Equatorial Mount and the GoToNova Equatorial Kit, as well as all other AltAzimuth (A/A) ®... -
Page 12: Getting Started
▼ button. A torpedo level may help. Then turn the mount power off and turn it on. 4.2. Setting Up the Mount A SmartStar Cube-A is equipped with a GPS receiver, which will receive the local time, longitude and latitude information from a satellite after the link is established. However, manual input is still needed for time zone and Daylight Saving setting. -
Page 13: Set Up Local Time And Site Info
4.2.1. Set Up Local Time and Site Info Press MENU button, from the main menu, scroll down and select “Set up controller” Select and Slew Sync. to Target Electronic Focuser Set Up Controller Align Set Up Tracking User Objects Auto Guide Press ENTER. -
Page 14: Set Mount Type
To adjust minutes, move the cursor to each digit and use ▲ or ▼ key to change the number. To change the “behind” or “ahead of” UT, move the cursor to “ahead of” and using ▲ or ▼ key to toggle between “behind” and “ahead of”. For other parts of the world, you can find out your “time zone”... -
Page 15: Set Anti-Backlash
Press Enter. Equatorial Mount Alt/Azi Mount Select Alt/Azi mount and press ENTER to go back the previous screen. 4.2.3. Set Anti-backlash For an Alt/Azi operation, both R.A. and DEC anti-backlash should be set to 0 step. Scroll down and select “Set anti-backlash” Set Up Local Time Set Up Site Set N/S Hemisphere... -
Page 16: Using Your Telescope
4.2.4. Using your telescope Selecting an Eyepiece: 1. Always begin viewing with the lowest power eyepiece. (Note: a 25 mm focal length eyepiece has a lower power than a 10 mm one.) A formula can be used to determine the power of each eyepiece: Telescope focal length divided by eyepiece focal length equals magnification. -
Page 17: Initial Star Alignment
4.2.6. Initial Star Alignment A simple alignment/synchronization can be performed to improve the GOTO and tracking accuracy. To do so, press MENU button, scroll down to “Align”, select “One Star Align” and press ENTER. A list of three bright objects, such as Moon, Venus, and other stars, will be displayed for you to select from. -
Page 18: Operate Smartstar Cube Tm -A Mount In Eq Mode
® 5. Operate SmartStar Cube -A mount in EQ Mode The SmartStar can precisely track a celestial object while in the alt-az position. The integrated wedge of an A-series telescope allows the telescope to be operated in an equatorial mode, which is a great option for those who want get familiar with the EQ operation. Please Note: the Park Position of an EQ mode is different from that of an A/A mode. - Page 19 5. Align the altitude axle (with or without counterweight) that is pointing straight down, in line with the north-facing tripod leg. This can be done by either loosen the azimuth lock (10) or turn the mount using left or right arrow key. The altitude axle will served as the DEC axis of the EQ mode.
-
Page 20: Use Smartstar Cube Tm -A Telescopes
® 6. Use SmartStar Cube -A Telescopes 6.1. Manual Operation of a Telescope You may observe land and astronomical objects using GoToNova’s arrow keys. After the telescope was assembled (referring to Section 2. Telescope Assembly), flip the I/O switch on the telescope mount to turn on the mount. Use ►,◄,▼ or ▲ buttons to point the telescope to desired object. -
Page 21: Asteroids
6.2.4. Asteroids I his catalog contains up to 4,096 asteroids. This database is customer upgradeable. 6.2.5. Stars • Named Stars: It consists of 191 stars with their common names. They are listed alphabetically. A list is attached in Appendix C. •... -
Page 22: Set Up Controller
Set the mount as Equator Mount or Alt/Azi Mount. 6.5.10. Reset All Reset all settings to factory default data. 6.5.11. Update Firmware Firmware updating using iOptron Downloader through USB port on hand controller. (Refer to Appendix E.) 6.5.12. Set gear ratio Not supported. -
Page 23: Set Language
6.5.13. Set Language Select hand controller display language in English or French. 6.6. Align This function is used for align the telescope. Before star alignment, please make sure the mount is well leveled. The system also provides “One Star Align” and “Two Star Align”. Any one can be selected for telescope alignment. -
Page 24: Test Anti-Backlash
it means the polar axis of the mount is pointing 7.5” lower and 4.3” to the east to the North Pole. Pointing error is zero when you power on the mount (unless you “Park Telescope” before powering off). 6.6.5. Test Anti-backlash This command tests the backlashes in both R.A. -
Page 25: Maintenance And Servicing
7. Maintenance and Servicing 7.1. Maintenance ® The SmartStar Cube-A mount or telescope is a precision instrument designed to yield a lifetime of rewarding applications. Given the care and respect due any precision instrument, your telescope will rarely require factory servicing or maintenance. Maintenance guidelines include: Using wet cloth to clean the mount and hand controller. -
Page 26: Troubleshooting
7.3. Troubleshooting ® The following suggestions may be helpful with operation of the SmartStar Cube-A mount or telescope. The power indicator light on the mount does not come on or there is no response when pressing hand controller’s arrow keys: (1) Verify that the power switch on the mount is in the ON position. -
Page 27: Ioptron Customer Service
7.4. iOptron Customer Service If you have a question concerning your telescope, contact the iOptron Customer Service Department. Customer Service hours are 9:00 AM to 5:00 PM, Easter Time, Monday through Friday. In the unlikely event that the telescope requires factory servicing or repairs, write or call... - Page 28 The great majority of servicing issues can be resolved by telephone, avoiding return of the telescope to the factory. also strongly suggested that send your technical questions support@ioptron.com.
-
Page 29: Appendix A. Technical Specifications
Appendix A. Technical Specifications ® SmartStar Cube -A GOTO Mount Mount AltAzimuth/Equatorial Dual Mount Body Materials Die-cast Aluminum Motor Dual-Axis DC Servo motor with encoders Gear Acetal worm wheel/Nylon 6 worm gear Bearing 4 steel ball bearings Dual-Axis, 9-Gear, Electronic Slew Speed (1X,2X,8X,16X,64X,128X,256X,512X,MAX) ®... -
Page 30: Appendix B. Gotonova ® 8401 Hc Menu Structure
® Appendix B. GoToNova 8401 HC MENU STRUCTURE MENU Select and Slew Select and Slew Planets, Sun, Moon Planets, Sun, Moon Mercury Mercury Venus Venus Mars Mars Jupiter Jupiter Saturn Saturn Uranus Uranus Neptune Neptune Pluto Pluto Moon Moon Deep Sky Objects Deep Sky Objects Named Deepsky Object Named Deepsky Object... - Page 31 Set Up Controller Set Up Controller Set Up Local Time Set Up Local Time Set Up Site Set Up Site Set N/S Hemisphere Set N/S Hemisphere Set Display Contrast Set Display Contrast Set Eyepiece Light Set Eyepiece Light Set Backlight Set Backlight Set Anti-backslash Set Anti-backslash...
-
Page 32: Appendix C. Gotonova Star List
® Appendix C. GoToNova Star List GoToNova Deep Sky Object List for 8401 ID No. OBJECT NGC # Messier # A(Abell) U(UGC) Andromeda Galaxy Barnards Galaxy 6822 Beehive Cluster 2632 Blackeye Galaxy 4926 Blinking Planetary Nebula 6826 Blue Flash Nebula 6905 Blue Planetary 3918... - Page 33 Lagoon Nebula 6523 Little Gem 6445 Little Gem Nebula 6818 Little Ghost Nebula 6369 North American Nebula 7000 Omega Nebula 6618 Orion Nebula 1976 Owl Nebula 3587 Pelican Nebula 5070 Phantom Streak Nebula 6741 Pinwheel Galaxy Pleiades Ring Nebula 6720 Ring Tail Galaxy 4038 Rosette Nebula...
- Page 34 Messier This table is licensed under the GNU Free Documentation License. It uses material from the Wikipedia article List of Messier objects...
- Page 35 Modern Constellations Constellation Abbreviation Constellation Abbreviation Andromeda Lacerta Antlia Apus Leo Minor Aquarius Lepus Aquila Libra Lupus Aries Lynx Auriga Lyra Boötes Mensa Caelum Microscopium Camelopardalis Monoceros Cancer Musca Canes Venatici Norma Canis Major Octans Canis Minor Ophiuchus Capricornus Orion Carina Pavo Cassiopeia...
- Page 36 GoToNova Named Star List 001 Acamar 049 Ascella 097 Kaus Australis 145 Rassalas 002 Achernar 050 Asellus Australis 098 Kaus Borealis 146 Rasagethi 003 Acrux 051 Asellus Borealis 099 Kaus Media 147 Rasalhague 004 Acubens 052 Aspidiske 100 Keid 148 Rastaba 005 Adhafera 053 Atik 101 Kitalpha...
- Page 37 GoToNova Double Star List Object Const Name Achird 21732 Alrisha Alpha 110291 Theta 38288 Alpha 168373 Fornacis Capella Alpha 40186 Sigma 132406 113389 Alpha 151881 Sirius Wasat Delta 79294 Alpha 60198 Castor Alpha 115756 Epsilon 117112 HR 3579 42642 Kapa 42661 221234 Algieba...
-
Page 38: Appendix D. Set Up Usb-Pc Connection
Appendix D. Set Up USB-PC Connection 1. Download USB2COM driver (cp2102.zip file for 8401) from iOptron Website 2. Install CP210x (usb2com) driver Choose the appropriate driver for your OS. In this case is a Windows XP operation system. Double click on it, and you will see:... - Page 39 Select “I accept the terms of license agreement”, and click “Next” Using the default installation path, c:\SiLabs\MCU\CP210x, or specify your own path by click “Change”. Click “Next”. Then click “Install”.
- Page 40 When finished installation, click “Finish” 3. Plug the USB cable in to the USB port on your PC, plug the other end of the USB cable to hand controller. Turn on the power on the mount. 4. Install the Hardware The computer will find a new hardware and show the following screen Select “No, not this time”...
- Page 41 Select “Install from a list or specific location” and click “Next”. Select “Search for the best driver in these locations,” and check “Include this location in the search.” Click on “Browse” and select the CP210x driver from directory c:\SiLabs\MCU\CP210x\Win2K_XP, click OK.
- Page 42 Click “Next”. The computer will start to install the driver for the USB2COM. When the installation is done, click “Finish”. If the computer shows “find a new hardware” screen again, just repeat the steps in this section again.
- Page 43 Now you computer should be ready for Firmware Upgrading, computer communication with the mount via ASCOM platform and planetarium software applications. However, you need to find assigned COM port number for the USB connection. To do so, right click “My Computer”, and click “Properties”...
- Page 44 Double click on “Ports(COM & LPT)”, find out the COM number and write it down (in the following figure, it is COM3)
-
Page 45: Appendix E. Firmware Upgrade
Appendix E. Firmware Upgrade 1. Download and install Firmware Downloader from iOptron Website 2. Double click and open “iOptron Downloader” On the interface, select appropriate port using pull-down menu (in this case, COM3):... - Page 46 Click “Open Data File”, and select appropriate “.bin” file that matches your hand controller, and click “Open”. Select “Main Program” ONLY in Update Type. Click “Start Download”. iOptronDownload will display: “Please reset GoToNova[GOTOSTAR], waiting for connection…” On the hand controller, press “MENU”, and using ▼▲ scroll to select “Set up controller”, press “ENTER”, then select “Upgrade firmware”, press “ENTER”...
- Page 47 What can I do if the firmware is not loading or the screen is blank, due to any reason? Turn on the mount to power on the hand controller (the key pad should be lit) Click on the iOptron Downloader. Change the Serial Port to the right COM port in the pull-down menu (example: COM4) Click on Open Data ile(O) button to select the right Firmware for your hand controller.
-
Page 48: Appendix F. Use A Pc To Control An Ioptron Mount
4. iOptron ASCOM drive (download it from iOptron website; and 5. Planetarium software. Some company has integrated iOptron’s products into their planetarium software, such as Voyage and The Sky X Pro. Therefore, an ASCOM plug-in will not be needed. Most planetarium software can be used to control iOptron’s product via ASCOM.