Minolta Maxxum Dynax 7 User Manual
Hide thumbs
Also See for Maxxum Dynax 7:
- User manual (102 pages) ,
- Instruction manual (103 pages) ,
- Repair manual (66 pages)
Table of Contents
Advertisement
Quick Links
Advertisement
Chapters
Table of Contents

Related Manuals for Minolta Maxxum Dynax 7


Summary of Contents for Minolta Maxxum Dynax 7
-
Page 2: For Proper And Safe Use
Do not disassemble. Electric shock may occur if a high voltage circuit then read the Basic Operation section. Once you’ve mastered basic inside the camera is touched. Take your camera to a Minolta Service operation, move on to the Detailed Operation section to expand Facility when repairs are required. -
Page 3: Table Of Contents
TABLE OF CONTENTS Table of Contents ................4 Metering Name of Parts ...................8 Selectable Metering .............74 Quick Operation ................14 Exposure Compensation .............77 Automatic Exposure Lock (AEL)..........81 BASIC OPERATION Setting the ISO Manually .............86 Batteries ..................17 Drive Loading Film..................20 Continuous ................88 Handling the Camera ..............23 Self-Timer................90 Taking Pictures in Full-Auto ............24 Exposure Bracketing............92... -
Page 4: Table Of Contents
TABLE OF CONTENTS Memory Exposure compensation control with rear control dial Storing memory ..............135 in P, A, and S mode Recalling settings in memory..........137 Control dial - exchanged control Data memory Flash-metering Storing the data ..............141 AF illuminator Film area and data number ..........143 Tasking on the focus-mode switch - AF-A position Data recall................146 AF using shutter-release button... -
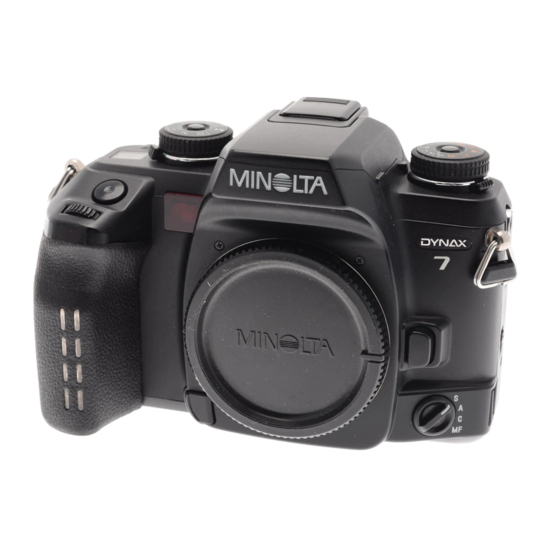
Page 5: Name Of Parts
NAMES OF PARTS For information on specific parts, refer to the page numbers shown in parenthesis. Camera Body Built-in Exposure-compensation dial AF illuminator (59)/Self- Diopter-adjustment dial (130) Metering-mode switch (75) flash* (31) lock-release button (77) timer lamp (90) Exposure-compensation Eyepiece cup (15) AE-lock button (81) dial (77) Shutter-release... -
Page 6: Names Of Parts
NAMES OF PARTS Control Panel Navigation Display Shutter-speed display Drive-mode indi- Release-priority indicator (158) cators (87) Exposure-mode indicator (60) Audio-on indicator (131) Aperture display Exposure-com- Flash-mode indicators pensation display (99) (77) Data-memory button Custom button (154) (141) AF-mode indicator (46) Enter button (135) Flash-compen- Metering-mode indicator... -
Page 7: Quick Operation
NAMES OF PARTS QUICK OPERATION Viewfinder 1. Insert the batteries. • The camera uses two CR123A batter- ies. Spot-metering area (75) Local focus area (56) Spot-focus area (55, 56) 2. Attach a lens. • Align the red marks, then turn it gen- Wide focus frame tly clockwise until it clicks. - Page 8 QUICK OPERATION 5. Set the camera for automatic If the camera is turned on and the date and operation. time have not been set, this message appears. See page 121 for instructions for set- • While pressing the exposure-mode dial lock-release button, set the ting the date and time.
-
Page 9: Basic Operation
BATTERIES BASIC Installing the Batteries Your camera uses two 3V CR123A lithium batteries to supply power OPERATION for all camera operations. 1. Turn the main switch off. Then slide the battery chamber release as shown, and open the door. Attach the strap as shown. 2. - Page 10 BATTERIES LENS Battery Condition Indicators Attaching the Lens 1. Remove the body and rear lens The battery condition indicator displays the power status of the bat- caps. teries when the main switch is set to ON. Full-battery indicator Power is sufficient for all camera operations. 2.
-
Page 11: Loading Film
LOADING FILM Remove and discard the protective 3. Extend the leader between the cover on the film gate before loading guide rails to the index mark. film for the first time. • If the film tip extends beyond the index mark, push the excess film back into the cartridge. -
Page 12: Handling The Camera
LOADING FILM HANDLING THE CAMERA • Once the film is loaded, the back cover will lock until film rewind- Holding the Camera ing is complete, preventing accidental opening. Grip the camera firmly with your right • ISO is set automatically if DX-coded film is loaded. See page 86 hand, while supporting the lens with for changing ISO manually. -
Page 13: Taking Pictures In Full-Auto
TAKING PICTURES IN FULL-AUTO 1. Turn the main switch to ON. 4. If using a zoom lens, rotate the zooming ring to frame your subject as desired. 2. While pressing the exposure- 5. Center your subject in the mode dial lock-release button, focus frame. - Page 14 TAKING PICTURES IN FULL-AUTO • The number of frames remaining is displayed in the Function Full-Auto Settings Page No. viewfinder for the last 19 frames on the roll. This countdown does not appear for non-DX-coded film. Exposure +/- 0.0EV compensation •...
-
Page 15: Focusing
FOCUSING Focus Signals Focus Lock The following signals appear in the Use focus lock when your subject is viewfinder to indicate the focus status outside the focus frame or when auto- when the shutter-release button is focus is difficult to confirm. pressed partway down. -
Page 16: Using The Built-In Flash
FOCUSING USING THE BUILT-IN FLASH Special Focus Situations The built-in flash provides coverage for focal lengths as wide as 24mm. The camera may not be able to focus in situations like those 1. Turn the main switch to ON described below. When the focus signal blinks, use focus lock and set the exposure-mode (p. -
Page 17: Rewinding The Film
USING THE BUILT-IN FLASH REWINDING THE FILM Flash Range Automatic Rewind The film is automatically rewound after the last frame is exposed. The range of the built-in flash depends on the speed of the film and the selected aperture. Make sure your subject is within the flash 1. -
Page 18: Detailed Operation
REWINDING THE FILM DETAILED Manual Rewind OPERATION Use manual rewind to rewind the film before the roll is finished. Gently press the manual-rewind button. • Use a blunt object. A sharp object may Once you have mastered the basic opera- cause damage. -
Page 19: Navigation Display
DISPLAY SELECTION When the camera is first turned on, NAVIGATION the detailed display is shown. Pressing the display-selection button DISPLAY causes the displays to change as fol- lows: Detailed display Your camera uses the navigation dis- Large icon display Display-selection button play (a dot-matrix presentation in the large LCD panel on the back of the Meter-index display... -
Page 20: Display Selection
DISPLAY SELECTION Detailed Display Detailed display Detailed display The detailed display shows all the settings. Switch By selecting Custom 27-2 (p. 182), you can • horizontal/ show only those settings which differ from vertical the standard settings. Display selec- tion button Large icon display Display selection button... - Page 21 DISPLAY SELECTION Meter-Index Display Exposure-History Display The meter index display shows the values of compensation and The exposure data for the next frame appears in the top of the dis- bracketing that you have selected. The lower part shows compen- play, followed by the those of the last 5 frames.
-
Page 22: When Upper Part Turns Black
DISPLAY SELECTION DISPLAY (WHEN UPPER PART TURNS BLACK) Vertical Display When the exposure-mode dial is turned to P ,A, S, or M, the upper part The horizontal/vertical operation automatically changes the orienta- of the display remains normal. But tion of the navigation display, when the camera’s position is when , 1, 2, or 3 is selected, the changed to a vertical or horizontal position. -
Page 23: Display Brightness/Contrast
DISPLAY BRIGHTNESS AND CONTRAST Display Illumination FOCUSING If desired, the display can be illuminated. Press the navigation display illu- minator. • The display illuminator shuts off approximately 5 seconds after the last camera operation. • If the button is pressed again before the 5 seconds, it will shut off. -
Page 24: Focus Mode
FOCUS MODE Your camera has 3 autofocus modes plus manual focus. With the Continuous Autofocus (C) camera set to other than , you can select one of the following Use continuous autofocus when shooting modes. sporting events or when you know the Automatic autofocus (A) subject will be in constant motion. - Page 25 FOCUS MODE 1. Turn the focus-mode switch to 2. Turn the focusing ring until your subject appears sharp 2. Press the shutter-release but- and focused. ton partway down to activate autofocus. • appears in the dis- play. • appears in the viewfinder when the subject in the focus frame is in •...
-
Page 26: Af/Mf Control Button
AF/MF CONTROL BUTTON The AF/MF control button is located on the back allowing an instant MF to AF selection of focus mode with the right thumb without changing the In MF mode (focus-mode switch holding position. set to MF), when the AF/MF con- •... -
Page 27: Focus Area
FOCUS AREA Smooth Focusing The camera’s standard focus mode, wide focus area, covers the entire The advance total focus control system has many advantages over center area making it easier for the the conventional system. However, when used with certain lenses, camera to focus on moving subjects. - Page 28 FOCUS AREA Choose the wide or local focus area as desired. By simply pressing 2. Press the focus-area selec- the spot-AF button, the center spot-focus area is selected. tor to focus using the wide focus area. Press the spot- Wide Focus Area AF button to use the center The camera automatically decides which spot-focus area.
- Page 29 FOCUS AREA Local Focus Area • Viewfinder shows which sensor is being used for focusing. Any one of the 9 local focus areas can be • While pressing the spot-AF button or selected. the focus-area selector, the focus is locked. 3.
-
Page 30: Af Illuminator
FOCUS AREA AF ILLUMINATOR How to Lock the Local/Spot Focus Area In low-light/low subject contrast situa- tions, the AF illuminator automatically 1. Turn the wide/local focus area projects a pattern of lines onto the switch to local, and select the subject for the camera’s AF sensors focus area you want to lock. -
Page 31: Exposure
P MODE Select P mode (Programmmed AE) when you want to give your full attention to your subject and composition. The P mode software EXPOSURE analyzes the subject’s size, motion, and magnification as well as the focal length of your lens, then sets the shutter speed and aperture according to the requirements of the scene. -
Page 32: A Mode
P MODE A MODE P-Mode Flash In A mode (aperture priority), you select the aperture and the cam- era automatically sets the shutter speed required for proper When the built-in flash is up or an attached accessory flash is on, it will exposure. - Page 33 A MODE • When pressing the shutter-release button part- Aperture Control f 8000 or 30” blinks or the printing way down, i reverses, the required setting is beyond the camera’s shutter speed range. Turn the con- trol dial until the blinking/reversing stops. A-Mode Flash Large Aperture Small Aperture...
-
Page 34: S Mode
S MODE In S mode (shutter priority), you select the shutter speed and the • (Time exposure) should be used when in the M mode. camera automatically sets the aperture for the proper exposure. Use S mode when you want to control the blur caused by subject movement. - Page 35 S MODE M MODE Shutter Control M mode (Manual) gives you full control of the exposure. The cam- era’s meter index displays how your settings compare to the exposure determined by the camera’s metering system. 1. While pressing the exposure- mode dial lock-release button, turn the exposure-mode dial to Fast Shutter Speed...
-
Page 36: M Mode
M MODE Metering in M Mode • appears in the viewfinder, next to the shutter-speed and aperture display, indicating that both can be changed. The meter index displays the EV difference between your settings and • The aperture setting changes in 1/2 or 1/3 EV increments depending the ‘correct’... -
Page 37: Metering
M MODE Manual Shift METERING Manual shift lets you shift to equivalent aperture/shutter speed com- binations without changing the exposure value (EV). 1. Select a desired shutter speed and aperture. 2. Press the AE-lock button and turn the front control dial until the desired aperture/shutter speed combination appears in the display. -
Page 38: Selectable Metering
SELECTABLE METERING Your camera takes meter readings of the light in the scene to deter- Turn the metering-mode switch to mine the correct exposure. It has three methods of taking meter readings. Use the method most appropriate for your subject. 14-Segment Honeycomb-Pattern Metering Fourteen-segment honeycomb-pattern metering uses information from the autofocus system to set the metering pattern according to the... -
Page 39: Exposure Compensation
SELECTABLE METERING EXPOSURE COMPENSATION Center-Weighted Average Metering Center-weighted average mode bases the exposure on an average of the readings from each of the honeycomb segments - with emphasis placed on the center of the image. Care should be taken when photographing backlit, spotlighted, or off- center subjects, as non-subject areas may be included in the exposure Under exposure calculation. - Page 40 EXPOSURE COMPENSATION Changing to 1/3 Increments Meter Index The meter index displays the exposure compensation value you set. 1/3EV increment 1/2EV increment Exposure compensation Exposure compensation value of -1.5 value of +1.3 (1/2EV increment) (1/3EV increment) Example below shows changing from 1/2EV to 1/3EV increment. •...
-
Page 41: Automatic Exposure Lock (Ael)
EXPOSURE COMPENSATION AUTOMATIC EXPOSURE LOCK (AEL) Press the AE-lock button to lock the exposure using the currently Comparison between exposure compensation and flash selected metering pattern without locking the focus. The exposure compensation. remains locked until the AE-lock button is released. 1. - Page 42 AUTOMATIC EXPOSURE LOCK (AEL) • If you keep pressing the AE-lock button after taking the picture, the 14-Segment Honeycomb-Pattern and Center-Weighted exposure remains locked. Average Metering • Pressing the AE-lock button sets the flash to slow-shutter sync mode Keep pressing AE-lock button (p.
- Page 43 AUTOMATIC EXPOSURE LOCK (AEL) • The EV scale is marked in 1/2 or 1/3EV increments depending on the Shutter speed Aperture Exposure compensation current setting of the exposure compensation dial (p. 77). • will blink in the meter index if the settings will over or underex- 3 EV over Difference is between -1EV pose the subject by more than 3.0EV.
-
Page 44: Setting The Iso Manually
SETTING THE ISO MANUALLY Set the ISO manually to override the DX-coded ISO or when using non- DX coded film. DRIVE • Film must be loaded before the ISO can be changed. • Non-DX coded film is initially set to the previous roll’s ISO. 1. -
Page 45: Continuous
CONTINUOUS This camera has both single-frame and continuous advance drive • Press the shutter-release button partway down to enter the setting. HI remains for high con- modes. Select single-frame advance to expose and advance the tinuous, LO remains for low continuous film one frame at a time. -
Page 46: Self-Timer
SELF-TIMER Use the self-timer to delay the shutter release for 2 or 10 seconds • Press the shutter-release button partway down to enter the setting. remains for 2 second (approx.) after the shutter-release button is pressed all the way delay, remains for 10 second delay. -
Page 47: Exposure Bracketing
EXPOSURE BRACKETING Exposure bracketing automatically exposes a series of frames with 3. Turn the front control dial to exposures above and below the metered exposure value. Bracket set the bracketing increment your exposures when shooting slides and other films with a low tol- (0.3, 0.5, 0.7, 1.0 EV). - Page 48 EXPOSURE BRACKETING • To cancel, move the drive-mode lever to a different mode. Meter Index • The normal sequence (for a 5 frame bracket in 1/2 increments) is; When bracketing is selected, the meter index appears in the Normal -0.5EV +0.5EV -1.0EV +1.0EV...
-
Page 49: Multiple Exposure
MULTIPLE EXPOSURE The multiple exposure function makes The meter in your camera determines exposure (EV) based on the it possible to expose 2 or more assumption that only one exposure will be made on each frame. images on the same frame. When making multiple exposures, the EV for each additional exposure may need to be reduced or over exposure can result. -
Page 50: Flash Mode Switch
FLASH MODE SWITCH Flash pictures can be taken using the built-in flash or with separate- ly sold accessory flash units. FLASH Built-in flash - Raise the built-in flash. This section of your manual covers the operation of accessory Accessory flash - Turn the flashes as well as the built-in flash. -
Page 51: Red-Eye Reduction
RED-EYE REDUCTION REAR FLASH SYNC When photographing people or animals at night or in other low-light situations, the effect called red-eye may occur due to the flash reflecting off the inside of the subject’s eyes. To reduce this effect, the flash fires a series of small bursts before the main flash burst. This causes the subject’s pupils to close, greatly reducing the amount of light which will reflect off the retina. -
Page 52: Slow-Shutter Sync
SLOW-SHUTTER SYNC FLASH COMPENSATION Use flash compensation to increase or decrease the output of the built-in or an attached accessory flash up to +/–2 EV in 1/2EV incre- ments. This function is especially useful when shooting with slide film, because of the film’s low tolerance for exposure error. Flash compensation changes the flash exposure by the amount set relative to the ambient exposure. -
Page 53: Flash Bracketing
FLASH BRACKETING Flash bracketing lets you expose a series of frames with exposures 4. Turn the front control dial to below and above the normal metered exposure while using flash. set the bracketing increment You can choose a series of 3, 5, or 7 frame flash exposure brackets (0.3, 0.5, 0.7, 1.0 EV). -
Page 54: Accessory Flash
FLASH BRACKETING ACCESSORY FLASH • The normal sequence (for a 5 frame bracket in 1/2 increments) is; By using an optional accessory flash, such as the 5600HS(D), you Normal -0.5EV +0.5EV -1.0EV +1.0EV can get improved flash performance over the built-in flash. The However by selecting Custom 11-2, the following sequence is possi- accessory flash units fit in the shoe located on the top of your cam- ble;... -
Page 55: Flash Metering
FLASH METERING Flash metering changes according to the flash unit and lens being When using an accessory flash with HSS function, and if HSS is used. turned on, then pre-flash fires and ADI/Pre-flash metering will occur (blue area of the chart ). -
Page 56: High Speed Sync
HIGH-SPEED SYNC • When using flash and color meters, high-speed sync is not possible. Turn the flash’s HSS off or use a shutter speed of 1/200 second or slower. • Shutter speeds faster than 1/200 second are not available when the 2 second self-timer or rear flash sync has been selected. -
Page 57: Wireless/Remote Off-Camera Flash
WIRELESS/REMOTE OFF-CAMERA FLASH Wireless/Remote Flash is available 1. Attach the accessory flash to with the Minolta 5600HS(D), 5400HS, the camera, then turn the cam- 3600HS(D), 5400xi, and 3500xi era and the flash on. accessory flashes. Wireless/Remote flash lets you experience the creative control available with an accessory flash. - Page 58 WIRELESS/REMOTE OFF-CAMERA FLASH 4. Press the shutter-release but- 6. Position your camera and flash unit using the information ton partway down. on this page. • Navigation display returns to the pre- • Wireless/Remote flash is most effective when used in dark or poorly vious display.
- Page 59 WIRELESS/REMOTE OFF-CAMERA FLASH 7. Wait until both flash units are Canceling the Wireless/Remote Flash fully charged. 1. Attach the accessory flash to the camera, and turn both • appears in the viewfinder when the the camera and flash on. built-in flash is charged. 2.
-
Page 60: Pc Terminal
PC TERMINAL Flash units which can not be connect- ADDITIONAL ed to the accessory shoe can be con- nected to the camera via the PC ter- FEATURES minal. • Set the exposure mode dial to M. • Set the shutter speed to 1/200 or slow- •... -
Page 61: Date/Time Imprinting
DATE/TIME IMPRINTING The Quartz-data function lets you record the • When you press the shutter-release button partway down, the display returns to the previ- date or time onto the lower left-hand corner ous display. of the photograph. The automatic calendar is •... - Page 62 DATE/TIME IMPRINTING 2. Press the ADJ button. When appears at the top right side, it is possible to use the focus-area selector instead of the dial. • The date adjust win- dow appears and the year is high-lighted. If you press the right/left side of the selector, the high-lighted 3.Turn the front control dial to area moves.
-
Page 63: Eye-Start
DATE/TIME IMPRINTING EYE-START Changing the Format Eye-start automatically activates the Eyepiece sensor camera’s focus and exposure systems The order of the year/month/day can be changed. as you bring the camera to your eye. 1. Open the control-panel door When an object is detected near the and press the DATE button. -
Page 64: Time Exposures (Bulb)
TIME EXPOSURES (BULB) Set the shutter speed to bulb when 3. Turn the rear control dial to you want to take time exposures. select the aperture. When selected, the shutter remains open as long as the shutter-release button is held down. •... -
Page 65: Depth-Of Field Preview
DEPTH-OF-FIELD PREVIEW When the lens is focused on a subject, there is a range behind and • If blinks or glows in the viewfinder (ie; focus not confirmed), in front of the subject that appears sharp. This is the depth-of-field. then the shutter cannot be released. -
Page 66: Diopter Adjustment
• The navigation display returns to the previous • If additional correction is needed, attach a Minolta Eyepiece Corrector display when the shutter-release button is (optional accessory) to the camera’s eyepiece. There are 4 types pressed partway down.