
Related Manuals for THOMSON TG784


Summary of Contents for THOMSON TG784
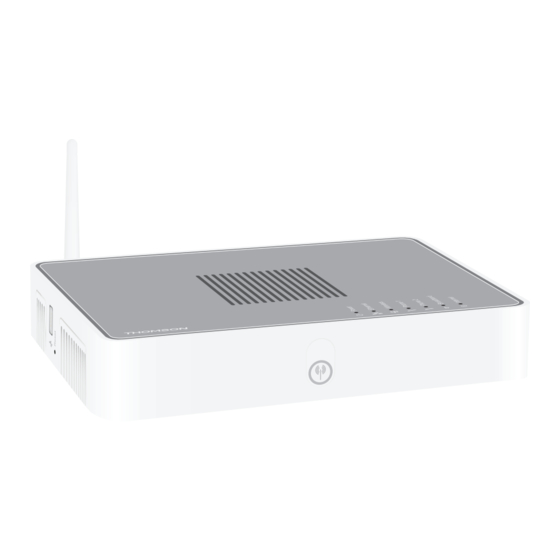
- Page 1 THOMSON TG784 Wireless Multi-Service VoIP Ethernet WAN & ADSL2+ Gateway Setup and User Guide...
- Page 3 THOMSON TG784 Setup and User Guide...
- Page 4 Distribution and copying of this document, use and communication of its contents is not permitted without written authorization from THOMSON. The content of this document is furnished for informational use only, may be subject to change without notice, and should not be construed as a commitment by THOMSON. THOMSON assumes no responsibility or liability for any errors or inaccuracies that may appear in this document.
-
Page 5: Table Of Contents
Configuring WPA-PSK Encryption ...................... 30 3.3.2 Configuring WEP Encryption ....................... 31 4 Telephony................... 33 Setting Up Your Telephone Network ............34 4.1.1 Connection to the Traditional Telephone Network................35 4.1.2 Configuring the Thomson Gateway VoIP Settings ................36 Address Book ....................39 E-DOC-CTC-20090619-0010 v1.0... - Page 6 Telephony Services ..................40 4.3.1 Services supported by Your Service Provider ................... 41 4.3.2 Activating a Telephony Service on your Thomson Gateway ............42 4.3.3 Using Telephony Services ........................43 Viewing Telephony Statistics ............... 46 5 Saving Energy with Your Thomson Gateway ......47 6 Sharing Content on your Thomson Gateway......
- Page 7 Contents Wireless Connection Troubleshooting ............81 Voice over IP Troubleshooting..............82 Reset to Factory Defaults ................83 E-DOC-CTC-20090619-0010 v1.0...
- Page 8 Contents E-DOC-CTC-20090619-0010 v1.0...
-
Page 9: About This Setup And User Guide
Example: On the File menu, click Open to open a file. Documentation and software updates THOMSON continuously develops new solutions, but is also committed to improving its existing products. For more information on THOMSON's latest technological innovations, documents and software releases, visit us at www.thomson.net. - Page 10 About this Setup and User Guide E-DOC-CTC-20090619-0010 v1.0...
-
Page 11: Installation
In a few minutes you will be able to access the Internet using your Thomson Gateway. This Setup and User Guide will show you how to set up your Thomson Gateway and how to connect your computer(s) to the Internet. -
Page 12: Before You Start
User-specific requirements You can use your Thomson Gateway as: DSL Gateway: The Thomson Gateway is connected to the DSL network of your service provider and brings the Internet to your home. Thomson Gateway To use the Thomson Gateway in this setup, make sure that the requirements in “1.1.1 DSL... -
Page 13: Dsl Requirements
Installation 1.1.1 DSL Requirements Applicability This section is only applicable if you are using your Thomson Gateway as DSL gateway. For more information, see “User-specific requirements” on page DSL Service The DSL service must be activated on your telephone line by your service provider. - Page 14 With an integrated filter have PSTN port on their back panel. Without integrated filter have a PSTN port on their back panel. PSTN Here you will have to put a filters/splitter between the telephone outlet and your Thomson Gateway. E-DOC-CTC-20090619-0010 v1.0...
-
Page 15: Connection Requirements
Installation 1.1.2 Connection Requirements Wireless connection If you want to connect your computer using a wireless connection, you will need a WiFi-certified wireless client adapter for each computer you want to connect wirelessly. Wired connection If you want to connect one or more computer using a wired connection, make sure those computers are equipped with an Ethernet Network Interface Card (NIC). -
Page 16: Installing Your Thomson Gateway
Thomson Gateway. This is the recommended way to install your Thomson Gateway. Manual Installation The Setup and User Guide will first help you to connect your computer to the Thomson Gateway. After this is done, you can configure your Thomson Gateway using your web browser. -
Page 17: Guided Installation
The Setup wizard will now guide you through the installation of your Thomson Gateway. At the end of the installation, the following screen appears: Select Go to the Thomson Gateway Web Interface if you want to go to the Thomson Gateway GUI after closing the wizard. - Page 18 Setup my computer to connect your computer to the Thomson Gateway network. View Documentation to view a list of the documentation that is available for your Thomson Gateway. This list will be automatically updated if you are connected to the Internet.
-
Page 19: Manual Installation
Proceed as follows: Take the DSL cable with the grey connectors. This cable is included in your box. Plug one end of the cable in the grey DSL port on the back of your Thomson Gateway. If you are: Using a splitter, plug the other end of the cable into the Modem/ADSL out put of your splitter. - Page 20 “3 Wireless Access” on page Setting up a wired connection For more information on how to setup a wired connection (i.e. an Ethernet connection) to your Thomson Gateway, see “1.4 Connecting a Computer Using the Ethernet Cable” on page Configure the Thomson Gateway Proceed as follows: Open your web browser.
-
Page 21: Adding A New Computer To Your Network
Guided Installation, use the same procedure on the computer that you want to add. When the Setup wizard informs you that the Thomson Gateway has already been configured, select No and click Next to continue. Manual Installation Setting up a wireless connections For more information on how to setup a wireless connection to your Thomson Gateway, see “3 Wireless... -
Page 22: Connecting A Computer Using The Ethernet Cable
Installation Connecting a Computer Using the Ethernet Cable Requirements Both your computer and Thomson Gateway must have a free Ethernet port. Your computer must be configured to obtain an IP address automatically. This is the default setting. Ethernet cable In your package, you will find a cable with yellow connectors. This is the Ethernet cable. -
Page 23: Thomson Gateway Basics
Thomson Gateway Basics Thomson Gateway Basics In this chapter Topic Page Thomson Gateway LED Behaviour Thomson Gateway GUI Backing Up/Restoring your Configuration E-DOC-CTC-20090619-0010 v1.0... -
Page 24: Thomson Gateway Led Behaviour
Thomson Gateway Basics Thomson Gateway LED Behaviour Content This chapter describes the behaviour of: Status LEDs WPS Button LED Ethernet LEDs E-DOC-CTC-20090619-0010 v1.0... -
Page 25: Status Leds
Thomson Gateway Basics 2.1.1 Status LEDs Introduction On the top panel of your Thomson Gateway, you can find a number of status LEDs, indicating the state of the device. Power LED Colour State Description Green Solid on Power on, normal operation... - Page 26 Thomson Gateway Basics Phone LED Colour State Description Green Solid on VoIP service up Blinking VoIP activity VoIP service down Broadband LED Colour State Description Green Solid on DSL line synchronised Blinking Pending DSL line synchronisation No DSL line Internet LED...
-
Page 27: Wps Button Led
Thomson Gateway Basics 2.1.2 WPS Button LED WPS button The Wi-Fi Protected Setup (WPS) button allows you to add new wireless clients to your network. For more information, see “3.1 Connecting Your Wireless Client via WPS” on page WPS Button LED... -
Page 28: Ethernet Leds
Thomson Gateway Basics 2.1.3 Ethernet LEDs Ethernet LED A LED may be provided per Ethernet port to indicate link integrity (or activity). LED Status Description No connection on this port Solid on Ethernet link up Blinking Data is flowing from/to this port... -
Page 29: Thomson Gateway Gui
Enter your user name and password and click OK. Thomson Gateway GUI appears. Access the Thomson Gateway via UPnP You can also access the Thomson Gateway GUI using the Internet Gateway Device (IGD) icon if your computer runs one of the following operating systems: Windows 7 Windows Vista... - Page 30 Provides basic information on the Thomson Gateway. Broadband Connection: Allows you to view/configure your broadband connections. Toolbox: Allows you to configure the network services and Internet security settings of your Thomson Gateway. Home Network: Allows you to manage your local network. Help: Allows you to view context-related help information.
- Page 31 Tasks To allow a quick configuration of your Thomson Gateway, some pages may offer you a number of related tasks in the Pick a task list. These tasks will guide you to the page where you can perform the selected task.
-
Page 32: Backing Up/Restoring Your Configuration
Thomson Gateway Basics Backing Up/Restoring your Configuration Introduction Once you have configured your Thomson Gateway to your needs, it is recommended to backup your configuration for later use. This way you can always return to your working configuration in case of problems. -
Page 33: Wireless Access
Your Wireless Client without WPS” on page Secure your wireless connection! Because you no longer need a physical connection, everyone who is within the range of your Thomson Gateway can access your network. If you do not protect your wireless network, the following could happen: People can use your connection to access the Internet. -
Page 34: Connecting Your Wireless Client Via Wps
Shortly press the WPS button on the Thomson Gateway: The WPS button LED starts blinking orange. This indicates that the Thomson Gateway is now searching for wireless clients that are in registration mode. You now have two minutes to start WPS on your wireless client. - Page 35 Wireless Access The WPS button LED is blinking red This indicates that the Thomson Gateway could not find your wireless client. Make sure that the WPS button LED is blinking orange when you start WPS on your wireless client. Troubleshooting If you are having trouble connecting your wireless client via WPS, try to configure it manually.
-
Page 36: Connecting Your Wireless Client Without Wps
If none of your computers is connected to your network, connect a computer using a wired connection and follow the procedure above to find out what your wireless settings are. The last option is to reset your Thomson Gateway (all your changes will be lost!) and reconfigure it. For more information, see “9.6 Reset to Factory Defaults”... -
Page 37: Securing Your Wireless Connection
We strongly recommend you to WPA-PSK. Although the Thomson Gateway allows you to use WEP or no security, it is not recommended to use these settings. Only use WEP if you have wireless clients that don’t support a higher encryption level. -
Page 38: Configuring Wpa-Psk Encryption
Wireless Access 3.3.1 Configuring WPA-PSK Encryption Procedure Continuing from “Configuring the wireless encryption” on page Select Use WPA-PSK Encryption. In the WPA-PSK Encryption Key box, type a the key of your choice. The key must be in one of the following formats: 8 to 63 alphanumeric characters. -
Page 39: Configuring Wep Encryption
Configuring WEP Encryption Warning Although the Thomson Gateway allows you to use WEP or no security, it is not recommended to use these settings. Only use WEP if you have wireless clients that do not support any higher encryption levels. - Page 40 Wireless Access E-DOC-CTC-20090619-0010 v1.0...
-
Page 41: Telephony
Install VoIP software on your computer and make your phone calls via your computer. The THOMSON solution With the Thomson Gateway you can make both VoIP and traditional telephone calls using a traditional analogue phone or If your Thomson Gateway is not powered, the traditional telephone network (if connected) will automatically selected. -
Page 42: Setting Up Your Telephone Network
Setting Up Your Telephone Network Procedure To set up your Thomson Gateway successfully, you must follow the following steps: Connect your traditional phone(s) or fax to the green Phone port(s) on the Thomson Gateway’s back panel. Connect your Thomson Gateway to the traditional network. -
Page 43: Connection To The Traditional Telephone Network
The Thomson Gateway allows you to use both the traditional telephone network (PSTN) as the VoIP network on the same device. This way, you can still make calls over the traditional network if the VoIP service is down (e.g. your Thomson Gateway is powered off). -
Page 44: Configuring The Thomson Gateway Voip Settings
Installation, the VoIP settings may already be configured by the Setup wizard. If you choose to configure your Thomson Gateway manually or you still need to configure the VoIP settings, you can follow the procedure below. How can I check if the VoIP settings have already been configured? If the Phone LED is: Solid or blinking green then the telephony service has already been configured. - Page 45 The phone(s) attached to the Thomson Gateway can only receive incoming VoIP calls, as long as your Thomson Gateway is turned on and the Phone LED is lit.
- Page 46 Telephony Click Add. Enter another URI, your user name and password. Choose the phone port for which you want to use this telephone number. Click Apply. E-DOC-CTC-20090619-0010 v1.0...
-
Page 47: Address Book
All information provided per contact is optional except for the last and first name, and can be updated or completed at any time. The Address book resides on the Thomson Gateway, so everyone with access to the Thomson Gateway web interface can view and use the Address book. -
Page 48: Telephony Services
Must be activated on your Thomson Gateway. For more information, see “4.3.2 Activating a Telephony Service on your Thomson Gateway” on page Only if these two conditions are met, you will be able to use all functions associated to the service. For more information, see “4.3.3 Using Telephony Services”... -
Page 49: Services Supported By Your Service Provider
Under Telephony Services, you can see the services that are supported by your provider. Activation If you want to use one of the supported services, make sure it is activated. For more information, see “4.3.2 Activating a Telephony Service on your Thomson Gateway” on page E-DOC-CTC-20090619-0010 v1.0... -
Page 50: Activating A Telephony Service On Your Thomson Gateway
Telephony 4.3.2 Activating a Telephony Service on your Thomson Gateway How can I (de)activate a service on my Thomson Gateway? You can (de)activate services in two ways: Via (de)activation codes on your phone. Via the Thomson Gateway GUI. Activating a Telephony Service via Your Phone... -
Page 51: Using Telephony Services
Telephony 4.3.3 Using Telephony Services Introduction This section provides an overview of the functions that will be available if you activate one of the following services: Call Hold service Call Waiting service Conference Call (3 Party) service Call Transfer For more information on the other services, please contact your service provider. Call Hold service If the Call Hold service is activated, you can use the following functions: To... - Page 52 Telephony Call Waiting service If the Call Waiting service is activated, you can use the following functions: To... Press... Illustration Terminate an active call and switch to an R, 1 incoming call You press R, 1 active active incoming Reject an incoming call R, 0 You press R, 0...
- Page 53 Telephony Call Transfer If the Call Transfer service is activated, you can use the following functions: To... Press... Illustration Transfer a call R, 4 active You press R, 4 active on hold E-DOC-CTC-20090619-0010 v1.0...
-
Page 54: Viewing Telephony Statistics
Telephony Viewing Telephony Statistics Introduction The Telephony Statistics page on the Thomson Gateway GUI lists: Successful incoming calls. Missed incoming calls. Successful outgoing calls. Failed outgoing calls. Viewing the telephony statistics Proceed as follows: Browse to the Thomson Gateway GUI. -
Page 55: Saving Energy With Your Thomson Gateway
The user switches off his computer at 20:00. There are no other devices connected to the Thomson Gateway. The Thomson Gateway switches to low power mode. This results in a considerable drop in the overall power consumption of the Thomson Gateway. - Page 56 Saving Energy with Your Thomson Gateway Example: If we use the same example as in the previous section, you can see that the Thomson Gateway is now able to further reduce the power consumption in periods where there is less action required from the Thomson Gateway (for example: no wireless devices connected, low user traffic,...).
-
Page 57: Sharing Content On Your Thomson Gateway
Sharing Content on your Thomson Gateway Sharing Content on your Thomson Gateway Introduction The Thomson Gateway allows you to store your data on a centralised place in the network. This way you can share your files with everyone that is connected to your network. Requirements Your USB storage device must be formatted as FAT32. -
Page 58: Using The Network File Server
Server Name: You will use this name to access the Thomson Gateway. If you leave this field empty you can only access your USB storage device by entering the IP address (by default: 192.168.1.253) Server Description: Here you can add a short description for what kind of data is stored on the USB storage device. - Page 59 If you did not provide a server name, type \\192.168.1.253. All storage devices that are attached to your Thomson Gateway are listed as folders. If the storage device has multiple partitions an index number will be added at the end (for example: Disk_a1 and Disk_a2).
- Page 60 In the Server Address box, type smb://<server name>, where <server name> is the Server Name you assigned to your USB storage device. So in our example we will type smb://Thomson. If you did not provide a server name, type smb://192.168.1.253.
-
Page 61: Using The Upnp Av Media Server
All UPnP AV clients that are connected to your network are now able to view this list and play or view items from this list. On your UPnP AV client, the Thomson Gateway’s UPnP AV media server will be listed as THOMSON TGXXX or Thomson MediaGateway. Below you can find a screenshot taken on a smartphone with a UPnP AV client. -
Page 62: Using The Ftp Server
Sharing Content on your Thomson Gateway Using the FTP Server Introduction The Thomson Gateway allows you to access your shared content by FTP. This can be useful if you want to be able to access your shared content from the Internet. Via FTP you can... - Page 63 FTP. If you are connected to the Internet, the link to the FTP server is displayed under FTP Server: On the Thomson Gateway network, you can also access the FTP server using its local address (192.168.1.253). Additional configuration Because most service providers use dynamic IP addresses, the IP address of your Internet connection may change frequently.
-
Page 64: Managing Your Shared Content
Sharing Content on your Thomson Gateway Managing your Shared Content Managed Partition If you select your drive or partition as managed partition, users only have access to the following folders: Media Shared All other folders will be hidden from the user. These hidden folders are still on the USB storage device, but you can not access them. - Page 65 Sharing Content on your Thomson Gateway Setting up the managed partition Proceed as follows: Browse to the Thomson Gateway GUI. On the Tools menu, click Content Sharing. In the Navigation bar, click Configure. Under List of connected disks, click the radio button next to the partition you want to configure as Managed Partition.
-
Page 66: Safely Removing Your Usb Storage Device
Safely Removing your USB Storage Device Introduction If you just unplug your USB storage device from the Thomson Gateway you may loose your data. To avoid this you must first unmount your USB storage device. Unmounting your USB storage device... -
Page 67: Thomson Gateway Tools
Assigning a service (HTTP, FTP,...) to a Computer Dynamic DNS Feature availability Depending on the configuration offered by your service provider, some features may not be available on your Thomson Gateway. For more information, contact your service provider. E-DOC-CTC-20090619-0010 v1.0... -
Page 68: Upnp
With UPnP: You can access the Thomson Gateway GUI without having to remember the address of the Thomson Gateway. For more information, see “7.1.1 Accessing Your Thomson Gateway with UPnP” on page You can connect/disconnect without having to open the Thomson Gateway GUI. -
Page 69: Accessing Your Thomson Gateway With Upnp
Windows 7/Vista If you computer runs Windows 7/Vista: On the Windows Start menu, click Network. The Network window appears: Right-click your Thomson Gateway (displayed as THOMSON TGXXX) and click View device web page. Thomson Gateway GUI appears. Windows XP If you computer runs Windows XP: Go to My Network Places. -
Page 70: Managing Your Internet Connection With Upnp
If you right-click the Internet Connection icon, you can connect/disconnect your connection to the Internet. Disabling this feature To prevent that users can connect/disconnect you can enable Extended Security. For more information, see “7.1.3 Configuring UPnP on the Thomson Gateway” on page E-DOC-CTC-20090619-0010 v1.0... -
Page 71: Configuring Upnp On The Thomson Gateway
Clear the Use UPnP check box, to disable UPnP. Click Apply. Extended Security If Extended Security is enabled only limited UPnP operation between the host and the Thomson Gateway is allowed: A local host is not allowed to connect/disconnect the Thomson Gateway Internet connection. You can... -
Page 72: Installing Upnp On Windows Xp
Thomson Gateway Tools 7.1.4 Installing UPnP on Windows XP Adding UPnP If you are running Microsoft Windows XP, it is recommended to add the UPnP component to your system. Proceed as follows: In the Start menu, click (Settings >) Control Panel. - Page 73 Adding IGD Discovery and Control Your Windows XP system is able to discover and control Internet Gateway Devices (IGD), like the Thomson Gateway on your local network. Therefore, it is recommended to add the IGD Discovery and Control client to your system.
-
Page 74: Assigning A Service (Http, Ftp
If your are running a server or an application that acts as a server (for example a HTTP server, internet game), the initial message will come from the internet and the Thomson Gateway has to decide to which computer he should forward the incoming message. - Page 75 Assign a game or application to a local networking device If you assign a game or application to a local networking device, you will basically tell the Thomson Gateway that if it receives requests for a specific game or application, it has to forward these messages to a specific computer.
-
Page 76: Dynamic Dns
Thomson Gateway Tools Dynamic DNS Introduction The Dynamic DNS service allows you to assign a dynamic DNS host name (for example mywebpage.dyndns.org) to a broadband connection even if it is using a dynamic IP address. As soon as the device gets a new IP address, the dynamic DNS server updates its entry to the new IP address. -
Page 77: Internet Security
Internet Security Internet Security Overview The Thomson Gateway offers you various options to secure your network: Topic Page Firewall Parental Control E-DOC-CTC-20090619-0010 v1.0... -
Page 78: Firewall
Internet Security Firewall Introduction The Thomson Gateway comes with an integrated firewall. This firewall has a number of predefined levels to allow you to adjusted the firewall to your needs. The Firewall is disabled by default. Changing the security level... -
Page 79: Parental Control
Internet Security Parental Control Introduction The Thomson Gateway allows you to deny access to specific web sites. Access Denied page When a user tries to access a page that is being blocked, the following page is displayed: Address-based filtering With address-based filtering (or URL-filtering) you can... - Page 80 “8.2.2 Adding Rules for the Address-Based Filter” on page Option 2: address-based filter only Take this option if content filtering is not available on your Thomson Gateway or you don’t want to use it. To configure address-based filtering: Browse to the Thomson Gateway GUI.
-
Page 81: Configuring The Content-Based Filter
Internet Security 8.2.1 Configuring The Content-based Filter Accessing the configuration page Proceed as follows: Browse to the Thomson Gateway GUI. On the Toolbox menu, click Parental Control. On the Navigation bar, click Configure. Under Content-Based Filtering you can change the settings of the content-based filter. -
Page 82: Adding Rules For The Address-Based Filter
Deny access to a specific web site Proceed as follows: Browse to the Thomson Gateway GUI. On the Toolbox menu, click Parental Control. Make sure the Use Address-Based Filter check box is selected. Type the URL of the Web site you want to block (for example “mail.provider.com”) in the Web Site box. - Page 83 Redirect box. Click Add. Redirect all web sites Proceed as follows: Browse to the Thomson Gateway GUI. On the Toolbox menu, click Parental Control. Make sure the Use Address-Based Filter check box is selected. Type “*” in the Web Site box.
- Page 84 Internet Security E-DOC-CTC-20090619-0010 v1.0...
-
Page 85: Troubleshooting
If the suggestions do not resolve the problem, look at the support pages on www.thomson.net or contact your service provider. Topics This chapter describes the following topics: Topic Page Setup Troubleshooting General Thomson Gateway Troubleshooting Voice over IP Troubleshooting Reset to Factory Defaults E-DOC-CTC-20090619-0010 v1.0... -
Page 86: Setup Troubleshooting
Your computer has a valid IP address, that is any address but 0.0.0.0. For more information, consult the help of your operating system. No dedicated firewall device or router is placed between your computer and the Thomson Gateway. No personal network security software (for example firewall software) is running on your computer. -
Page 87: General Thomson Gateway Troubleshooting
Thomson Gateway. Only use the power adaptor supplied with your Thomson Gateway. The Thomson Gateway is turned on via the push button or rocker switch on the back panel. The Broadband LED does not light up Make sure that: The DSL cable is correctly connected. -
Page 88: Wired Connection Troubleshooting
Ethernet LED does not light up Make sure that: The Ethernet cable is securely connected to the Ethernet port on your Thomson Gateway and your computer. You are using the correct cable type for your Ethernet equipment, that is UTP CAT5 with RJ-45 connectors. -
Page 89: Wireless Connection Troubleshooting
Check the signal strength, indicated by the wireless client manager. If the signal is low, try repositioning the Thomson Gateway or directing the Thomson Gateway’s antenna(s) for optimal performance. Make sure that the wireless client adapter is enabled (message like “radio on”). -
Page 90: Voice Over Ip Troubleshooting
Troubleshooting Voice over IP Troubleshooting Introduction If you cannot make or receive any phone calls via your Thomson Gateway, try the suggestions in the following sections. Calling over VoIP If you have problems calling via VoIP, check whether: Your phone is correctly connected to the Thomson Gateway. -
Page 91: Reset To Factory Defaults
Reset to Factory Defaults Resetting your Thomson Gateway If at some point you can no longer connect to the Thomson Gateway or you want to make a fresh install, it may be useful to perform a reset to factory defaults. - Page 92 Push the Reset button until the Power LED lights red - this will take about 7 seconds. Release the Reset button. The Thomson Gateway restarts. Your system administrator may have disabled the physical reset button of the Thomson Gateway. In this case, a hardware reset to defaults is not possible. E-DOC-CTC-20090619-0010 v1.0...
- Page 94 THOMSON Telecom Belgium Prins Boudewijnlaan 47 2650 Edegem Belgium www.thomson.net © THOMSON 2010. All rights reserved. E-DOC-CTC-20090619-0010 v1.0.