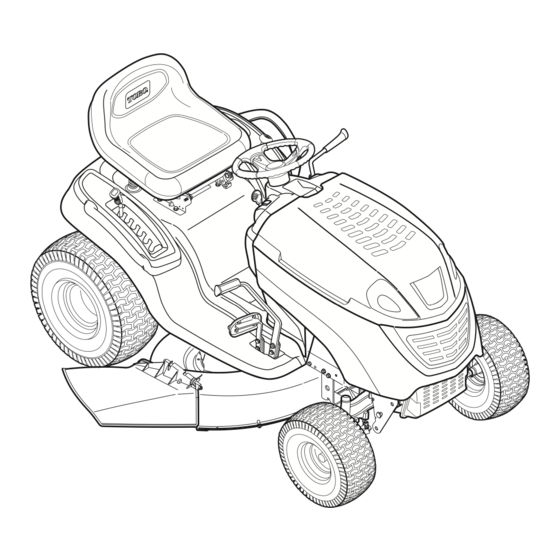
Toro LX420, LX460 Operator's Manual
Toro lawn tractor operator's manual
Hide thumbs
Also See for LX420, LX460:
- Service manual (236 pages) ,
- Operator's manual (60 pages) ,
- Operator's manual (37 pages)

Related Manuals for Toro LX420, LX460


Summary of Contents for Toro LX420, LX460
- Page 1 Form No. 3354-969 LX420 & LX460 Lawn Tractors Model No. 13AX60RG744 Model No. 13AX60RH744 Original Instructions (EN) Register your product at www.Toro.com 769-02247F (01/11/06)
-
Page 2: Table Of Contents
A sample model plate is also illustrated below. You can locate the model plate by looking at the underside of the tractor‘s seat. This information will be necessary to use the manufacturer’s web site and/or help from a Toro Service Dealer. MODEL NUMBER... -
Page 3: Important Safe Operation Practices
(Section 4442 of the California Public Resources Code). Other states may have similar laws. Federal laws apply on federal lands. A spark arrester for the muffler is available through your Toro service dealer or contact Toro at 8111 Lyndale Avenue South, Bloomington, IN 55420-0019. -
Page 4: Slope Operation
29. If situations occur which are not covered in this manual, use care and good judgment. Contact a Toro Service Dealer for assistance. SLOPE OPERATION Slopes are a major factor related to loss of control and tip-over accidents which can result in severe injury or death. - Page 5 CHILDREN 1. Tragic accidents can occur if the operator is not alert to the presence of children. Children are often attracted to the machine and the mowing activity. They do not understand the dangers. Never assume that children will remain where you last saw them.
- Page 6 If the blades do not stop within the this time frame, your unit should be serviced professionally by a Toro Service Dealer. 4. Check brake operation frequently as it is subjected to wear during normal operation. Adjust and service as required.
- Page 7 SECTION 2: SAFETY LABELS Safety labels found on your lawn tractor are illustrated below (3/4 actual size). Always follow their instructions and heed their warnings. If you discover a safety label is scratched, damaged or missing, order a replacement immediately. TO REDUCE THE RISK OF INJURY, DO NOT OPERATE UNLESS DISCHARGE COVER OR GRASS CATCHER IS IN ITS PROPER PLACE.
- Page 8 SECTION 3: INSTRUCTIONAL LABELS Instructional labels found on your lawn tractor are illustrated below (3/4 actual size). Always follow their instructions and heed their warnings. If you discover a label is scratched, damaged or missing, order a replacement immediately. LX420 LX460...
-
Page 9: Slope Gauge
SECTION 4: SLOPE GAUGE... -
Page 10: Tractor Set-Up
SECTION 5: TRACTOR SET-UP Gas and Oil Fill-up Use only clean, fresh (under 30 days old), unleaded gasoline. Fill tank to no more than 1/2 inch below the top of the filler neck to allow space for fuel expansion. WARNING: Use extreme care when handling gasoline. -
Page 11: Tire Pressure
Tire Pressure WARNING: Maximum tire pressure under any circumstances is 30 psi. Equal tire pressure should be maintained at all times. The tires on your unit may be over-inflated for shipping purposes. Reduce the tire pressure before operating the tractor. Recommended operating tire pressure is approximately 10 p.s.i for the rear tires &... - Page 12 Setting the Gauge Wheels Tools Required (2) 9/16" wrenches Select the height position of the cutting deck by placing the deck lift lever in any of the six different cutting height notches on the right fender. Adjust the deck wheels so that they are between ¼-inch and ½-inch above the ground as follows.
-
Page 13: Know Your Lawn Tractor
SECTION 6: KNOW YOUR LAWN TRACTOR A Systems Indicator Monitor/Hour Meter B PTO (Blade Engage) Lever C Parking Brake Lever D Cruise Control Lever E Shift Lever F Cup Holder NOTE: Any reference in this manual to the RIGHT or LEFT side of the tractor is observed from operator’s position. NOTE: Steering Wheel not shown for clarity. -
Page 14: Brake Pedal
Throttle / Choke Control The throttle/choke control is located on the right side of the tractor’s dash panel. This lever controls the speed of the engine and, when pushed all the way forward, the choke control also. When set in a given position, the throttle will maintain a uniform engine speed. -
Page 15: Cruise Control
Refer to the MAINTENANCE section of this manual for the proper battery charging procedure or have the charging system checked by an authorized Toro Service Dealer. PTO (Blade Engage) Lever PTO / BLADE ENGAGE The PTO (Blade Engage) lever is located on the left side of the dash, next to the steering wheel. -
Page 16: Operating Your Lawn Tractor
Before each use, check the safety interlock system for proper operation. If the interlock system should ever malfunction, do not operate the tractor. Contact a Toro service dealer. • The safety interlock system prevents the engine... -
Page 17: Starting The Engine
Starting the Engine WARNING: Do not operate the tractor if the interlock system is malfunctioning. This system was designed for your safety and protection. NOTE: Refer to the TRACTOR SET-UP on page 10 of this manual for Gasoline and Oil fill-up instructions. •... -
Page 18: Engaging The Parking Brake
Stop machine if anyone enters the area. This tractor is equipped with one of Toro’s quality cutting decks. The following information will be helpful when using the cutting deck with your tractor. -
Page 19: Making Adjustments
SECTION 8: MAKING ADJUSTMENTS WARNING: Never attempt to make any adjustments while the engine is running, Seat Adjustment To adjust the position of the seat, loosen the two knobs on the bottom of the seat. See Figure 9. Slide the seat forward or rearward as desired. -
Page 20: Parking Brake Adjustment
Side to Side If the cutting deck appears to be mowing unevenly, a side to side adjustment can be performed. Adjust if necessary as follows: • With the tractor parked on a firm, level surface, place the deck lift lever in the top notch (highest position) and rotate both blades so that they are perpendicular with the tractor. -
Page 21: Steering Adjustment
Steering Adjustment If the tractor turns tighter in one direction than the other, or if the ball joints are being replaced due to damage or wear, the steering drag links may need to be adjusted. Adjust the drag links so that equal lengths are threaded into the ball joint on the left side and the ball joint on the right side: •... -
Page 22: Maintaining Your Lawn Tractor
Warranty repairs must be performed by a Toro Dealer. Engine Oil The engine-crankcase is filled with 10W-30 ship-away oil at the factory. -
Page 23: Changing The Engine Oil
The engine may overheat and/or damage IMPORTANT: may result if the oil level is below the ADD or over the FULL on the dipstick. • Reinstall the oil fill cap/dipstick securely onto the oil fill tube. The oil fill cap/dipstick must be installed IMPORTANT: securely onto the tube at all times when the engine is operating. -
Page 24: Air Filter
If leaks are present, have your engine IMPORTANT: serviced by your Toro dealer before operating the tractor. Air Filter The engine is equipped with a replaceable, high density paper air cleaner element and an oiled, foam precleaner. -
Page 25: Cleaning The Engine
• Check the gap using a feeler gauge and adjust, if necessary, by carefully bending the ground electrode. See Figure 16. Set the spark plug gap to .76 mm (0.030 in.). Feeler Gauge Spark Plug Ground Electrode Figure 16 • Reinstall the spark plug into the cylinder head. -
Page 26: Service
SECTION 10: SERVICE Tires WARNING: Never exceed the maximum inflation pressure shown on the sidewall of the tire. The recommended operating tire pressure is approximately 10 psi for the rear tires and 14 psi for the front tires. Do not overinflate. Uneven tire pressure could cause the cutting deck to mow unevenly. -
Page 27: Battery
When replacing the blade, be sure to IMPORTANT: install the blade with the side of the blade marked ‘‘Bottom’’ (or with a part number stamped in it) facing the ground when the mower is in the operating position. Use a torque wrench to tighten the blade IMPORTANT: spindle hex flange nut to between 70 lbs-ft. -
Page 28: Changing Deck Belt
Changing the Lower Deck Belt (Model LX460 only) NOTE: Several components must be removed in order to change the lower deck belt (Model LX460). See a Toro Service Dealer to have this drive belt replaced. - Page 29 LX420 Belt Cover Idler Pulleys LX460 Belt Cover Idler Pulleys...
-
Page 30: Off-Season Storage
SECTION 11: OFF-SEASON STORAGE Clean and lubricate the tractor as instructed in Section 7: MAINTAINING YOUR LAWN TRACTOR on page 22 of this manual before storing for an extended period. Engine If the engine will be out of service for two months or more, use the following storage procedure: •... -
Page 31: Maintenance Chart
SECTION 12: MAINTENANCE CHART Before After Initial Every Every Every Every Prior Each Use 24 Hours 10 Hours 25 Hours 50 Hours Season to Storing Clean Hood/Dash Louvers Check Engine Oil Level Clean and Re-oil Air Filter’s Foam Precleaner Replace Air Filter Element Change Engine Oil &... -
Page 32: Troubleshooting
SECTION 13: TROUBLESHOOTING Trouble Possible Cause(s) Engine fails to start PTO (Blade Engage) lever engaged. Parking brake not engaged. Spark plug wire disconnected. Throttle/choke control not in correct starting position. Choke not activated Fuel tank empty, or stale fuel. Blocked fuel line. Faulty spark plug. -
Page 33: Specifications
Weight (approximate) * Toro reserves the right to change product specifications, design, and standard equipment without notice and without incurring obligation ** Kohler’s horsepower ratings exceed Society of Automotive Engineers Small Engine Test Code J1940. Actual engine horsepower is lower and affected by, but not limited to, accessories (air cleaner, exhaust, charging, cooling, fuel pump, etc.), application, engine speed and ambient... - Page 34 NOTES...
-
Page 35: Warranty Information
CALIFORNIA EMISSION CONTROL WARRANTY STATEMENT The California Air Resources Board and MTD Consumer Group Inc are pleased to explain the evaporative emission control system warranty on your 2006 lawn mower. In California, new lawn mower must be designed, built and equipped to meet the State’s stringent anti-smog standards. MTD Consumer Group Inc must warrant the EECS on your lawn mower for the period of time listed below provided there has been no abuse, neglect or improper maintenance of your lawn mower. - Page 36 Please see the operator’s manual for information on required maintenance and service intervals. The limited warranty set forth below is given by The Toro Company (“Toro”) and The Toro Warranty Company, pursuant to an agreement between them, with respect to new merchandise purchased or leased and used in the United...