Samsung CLX-3175FW User Manual
Multi functional printer
Hide thumbs
Also See for CLX-3175FW:
- User manual (537 pages) ,
- Manual del usuario (227 pages) ,
- Service manual (216 pages)

Related Manuals for Samsung CLX-3175FW


Summary of Contents for Samsung CLX-3175FW
- Page 1 Click the model name of your machine: CLX-3170FN, CLX-3175FN, CLX-3175FW CLX-3175, CLX-3175N Multi Functional Printer User’s Guide imagine the possibilities Thank you for purchasing a Samsung product.
-
Page 2: Features Of Your New Laser Product
features of your new laser product Your new machine is equipped with a number of special features that improve the quality of the documents you print. With the machine, you can: SPECIAL FEATURES Scan the originals and send it right away Print with excellent quality and speed •... -
Page 3: Features By Models
The machine is designed to support all of your document needs – from printing and copying, to more advanced networking solutions for your business. Basic features of this machine include: FEATURES CLX-3170FN CLX-3175FN CLX-3175FW USB 2.0 USB Memory Interface PictBridge ADF (Automatic Document Feeder) Network Interface Ethernet 10/100 Base TX wired LAN Network interface 802.11b/g wireless LAN... -
Page 4: Finding More Information
Provides you with help information on printer driver properties and instructions for setting up the properties for printing. To access a Printer Driver Help printer driver help screen, click Help from the printer properties dialog box. If you have Internet access, you can get help, support, printer drivers, manuals, and order information from the Samsung website, Samsung website www.samsungprinter.com. -
Page 5: Safety Information
safety information IMPORTANT SAFETY SYMBOLS AND PRECAUTIONS What the icons and signs in this user’s guide mean: Hazards or unsafe practices that may result in severe personal injury or death. WARNING Hazards or unsafe practices that may result in minor personal injury or property damage. CAUTION To reduce the risk of fire, explosion, electric shock, or personal injury when using your laser MFP, follow these basic safety precautions:... -
Page 6: Laser Safety Statement
13. Unplug the machine from the telephone jack, PC and AC wall outlet and refer servicing to qualified service personnel under the following conditions: • When any part of the power cord, plug or connecting cable is damaged or frayed. •... -
Page 7: Ozone Safety
During normal operation, this machine produces ozone. The ozone produced does not present a hazard to the operator. However, it is advisable that the machine be operated in a well ventilated area. If you need additional information about ozone, request your nearest Samsung dealer. MERCURY SAFETY Contains Mercury, Dispose According to Local, State or Federal Laws.(U.S.A. -
Page 8: Radio Frequency Emissions
RADIO FREQUENCY EMISSIONS FCC Information to the User This device complies with Part 15 of the FCC Rules. Operation is subject to the following two conditions: • This device may not cause harmful interference, and • This device must accept any interference received, including interference that may cause undesired operation. This equipment has been tested and found to comply with the limits for a Class B digital device, pursuant to Part 15 of the FCC Rules. -
Page 9: Ringer Equivalence Number
FAX BRANDING The Telephone Consumer Protection Act of 1991 makes it unlawful for any person to use a computer or other electronic device to send any message via a telephone facsimile machine unless such message clearly contains in a margin at the top or bottom of each transmitted page or on the first page of the transmission the following information: (1) the date and time of transmission (2) identification of either business, business entity or individual sending the message;... - Page 10 PBXs of the European countries: In the event of problems, you should contact the Euro QA Lab of Samsung Electronics Co., Ltd. in the first instance. The product has been tested against TBR21. To assist in the use and application of terminal equipment which complies with this standard, the European Telecommunication Standards Institute (ETSI) has issued an advisory document (EG 201 121) which contains notes and additional requirements to ensure network compatibility of TBR21 terminals.
- Page 11 European Radio Approval Information (for products fitted with EU-approved radio devices) Low power, Radio LAN type devices (radio frequency (RF) wireless communication devices), operating in the 2.4 GHz/5 GHz band, may be present (embedded) in your printer system which is intended for home or office use. This section is only applicable if these devices are present.
- Page 12 REGULATORY COMPLIANCE STATEMENTS Wireless Guidance Low power, Radio LAN type devices (radio frequency (RF) wireless communication devices), operating in the 2.4 GHz/5 GHz Band, may be present (embedded) in your printer system. The following section is a general overview of considerations while operating a wireless device. Additional limitations, cautions, and concerns for specific countries are listed in the specific country sections (or country group sections).
-
Page 13: Openssl License
OPENSSL LICENSE Copyright (c) 1998-2001 The OpenSSL Project. All rights reserved. Redistribution and use in source and binary forms, with or without modification, are permitted provided that the following conditions are met: 1. Redistributions of source code must retain the above copyright notice, this list of conditions and the following disclaimer. 2. - Page 14 14_Safety information...
- Page 15 Safety information_15...
-
Page 16: Table Of Contents
Printing Configuration report Setting IP address Network parameter setting Installing the driver software Using a wireless network(Windows/CLX-3175FW only) Checking your network environments Installing the printer on an Ad-Hoc wireless network Installing the printer on a wireless network with an Access Point... - Page 17 Gray enhance copying Setting copy timeout SCANNING Scanning basics Scanning from the control panel Setting scan information in Samsung Scan Manager. Scanning to application programs Scanning by a network connection Scanning to Email Changing the settings for each scan job...
- Page 18 Cleaning the inside Cleaning the scan unit Maintaining the cartridge Toner cartridge storage Handling instructions Use of non-Samsung and refilled toner cartridge Estimated cartridge life Redistributing toner Replacing the toner cartridge Replacing the imaging unit Replacing the waste toner container...
- Page 19 In the paper exit area Understanding display messages Solving other problems Paper feeding Printing problems Printing quality problems Copying problems Scanning problems Samsung Scan Manager problems Fax problems Common Windows problems Common Linux problems Common Macintosh problems ORDERING SUPPLIES Supplies How to purchase...
-
Page 20: Introduction
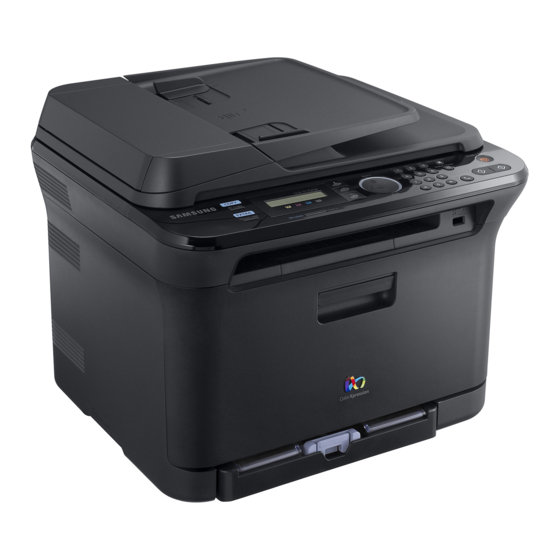
introduction These are the main components of your machine: This chapter includes: • Machine overview • Menu overview • Control panel overview • Supplied software • Understanding the Status LED • Printer driver features • Acknowledging the status of the toner cartridge MACHINE OVERVIEW Front view Rear view... -
Page 21: Control Panel Overview
Starts a job in Color mode. Color Start Display operation. a. CLX-3175FW only. The toner colors shown below the LCD display co-works with the display messages. See Status • All illustrations on this user’s guide may differ from your machine LED with the toner cartridge messages. -
Page 22: Understanding The Status Led
• A problem has occurred such as a paper jam, repair required as a result of using non-genuine Samsung toner cover is open or no paper in the tray, so that cartridges will not be covered under the machine warranty. -
Page 23: Menu Overview
Supplies Info Date & Time Clear Setting Scan Setup Address Book Clock Mode Network Info System Setup Send Report Language a. CLX-3175FW Network Setup Sent Report Default Mode only Address Book Fax RCV Report Power Save Sent Report Schedule Jobs... -
Page 24: Supplied Software
SUPPLIED SOFTWARE PRINTER DRIVER FEATURES You must install the machine software using the supplied CD to use your Your printer drivers support the following standard features: machine as a printer and a scanner, after you have set up your machine and •... -
Page 25: Getting Started
This chapter gives you step-by-step instructions for setting up the machine. This chapter includes: • Setting up the hardware • Using a wireless network(Windows/CLX-3175FW only) • System requirements • Using a wireless network(CLX-3175FW only) • Setting up the network •... -
Page 26: System Requirements
SYSTEM REQUIREMENTS Linux Before you begin, ensure that your system meets the following ITEM REQUIREMENTS requirements: RedHat 8.0, 9.0 (32bit) Operating system Windows RedHat Enterprise Linux WS 4, 5 (32/64bit) Fedora Core 1~7 (32/64bit) Your machine supports the following Windows operating systems. Mandrake 9.2 (32bit), 10.0, 10.1 (32/64bit) Mandriva 2005, 2006, 2007 (32/64bit) REQUIREMENT (RECOMMENDED) -
Page 27: Setting Up The Network
If the report shows that the IP address has changed, the refer to 'Using a wired network'. If you use your network printer in the assignment was successful. You will see the new IP address on the wireless network, refer to "Using a wireless network(Windows/CLX-3175FW report. only)" on page 29. -
Page 28: Network Parameter Setting
5. After the installation is finished, a window appears asking you to print a 6. Click Apply, and then click OK. The machine will automatically print test page and to register yourself as a user of Samsung machines in the Configuration report. Confirm that all the settings are correct. -
Page 29: Using A Wireless Network(Windows/Clx-3175Fw Only)
USING A WIRELESS NETWORK(WINDOWS/CLX- Installing the printer on an Ad-Hoc wireless network 3175FW ONLY) If you do not have a Access Point (AP), you may still connect the printer wirelessly to your computer by setting up an Ad-Hoc wireless network by You must set up the network protocols on your machine to use it on your following these simple directions. -
Page 30: Installing The Printer On A Wireless Network With An Access Point
13. After the installation is finished, a window appears asking you to print differ according to its security mode, WEP or WPA. a test page and to register yourself as a user of Samsung Printers in • In case of WEP order to receive information from Samsung. -
Page 31: Using A Wireless Network(Clx-3175Fw Only)
Checking your Network Environments part. 13. After the installation is finished, a window appears asking you to print a test page and to register yourself as a user of Samsung Printers in Checking your Network Environments order to receive information from Samsung. If you desire, select the corresponding checkbox(es) and click Finish. -
Page 32: Printing Configuration Report
assign the IP address and set other network parameters. Setting IP address Firstly, you have to set up an IP address for network printing and managements. In most cases a new IP address will be automatically assigned by a DHCP (Dynamic Host Configuration Protocol Server) located on the network. -
Page 33: Network Parameter Setting
Turn firewall off. Web Service. You may need to reset the machine to the factory default 3. From the Windows Start menu, select All Programs > Samsung settings when machine that you are using is connected to new network Network Printer Utilities > SetIP > SetIP. - Page 34 4. Press the left/right arrow to select the setup method you want suggested by IEEE 802.11 standard for security. Static WEP security appears and press OK. mode requires a proper WEP key for data encryption, decryption, and IEEE 802.11 authentication. Press the left/right arrow to select •...
-
Page 35: Installing The Driver Software
5. Click Next. 3. Click Wireless and Select Wizard. Then, click Next. If wireless security setting window appears, enter the registered Wizard will help you setup the wireless network configuration. password (network key) and click Next. However, if you want to set the wireless network directly, select Custom. - Page 36 5. After the installation is finished, a window appears asking you to print a test page and to register yourself as a user of Samsung machines in order to receive information from Samsung. If you wish to do so, select the corresponding checkbox(es) and click Finish.
-
Page 37: Machine's Basic Settings
Key Sound: Turns the key sound on or off. With this option set to On • on and ready to work. For the CLX-3170FN/CLX-3175FN/CLX-3175FW, all tone sounds each time a key is pressed. of your faxes will have the date and time printed on them. -
Page 38: Entering Characters Using The Number Keypad
Comm. which means “Common,” the speaker is on until the remote ASSIGNED NUMBERS, LETTERS, OR CHARACTERS machine answers. You can adjust the volume level using On Hook Dial. Ringer: Adjusts the ringer volume. For the ringer volume, you can • select Off, Low, Mid, and High. -
Page 39: Loading Originals And Print Media
loading originals and print media This chapter introduces you how to load originals and print media into your machine. This chapter includes: • Loading originals • Printing on special print materials • Selecting print media • Setting the paper size and type •... -
Page 40: Selecting Print Media
Some print media may meet all of the guidelines in this section and still not produce satisfactory results. This may be the result of improper handling, unacceptable temperature and humidity levels, or other variables over which Samsung has no control. • Before purchasing large quantities of print media, ensure that it meets the requirements specified in this user’s guide. -
Page 41: Specifications On Print Media
Specifications on print media TYPE SIZE DIMENSIONS WEIGHT CAPACITY Letter 216 x 279 mm (8.5 x 11 inches) 60 to 105 g/m (16 to 28 lb bond) • 150 sheets of 75 g/m Plain paper (20 lb bond) paper for the Legal 216 x 356 mm (8.5 x 14 inches) tray... -
Page 42: Media Sizes Supported In Each Mode
Media sizes supported in each mode MEDIA TYPE GUIDELINES • Envelopes with a peel-off adhesive strip or with MODE SIZE SOURCE Envelopes more than one flap that folds over to seal must use (Continue) Letter, A4, Legal, tray 1 adhesives compatible with the machine’s fusing Copy mode Oficio, US Folio, temperature for 0.1 second. -
Page 43: Changing The Size Of The Paper In The Paper Tray
During the fusing process, wet ink can come off preprinted paper, reducing print quality. Using photographic paper or coated paper may cause problems, requiring repairs. Such repairs are not covered by Samsung’s warranty or service agreements. CHANGING THE SIZE OF THE PAPER IN THE If the paper that you need to print is shorter than length 222 mm (8.74... - Page 44 Slide the tray 1 back into the machine. The tray is preset to Letter or A4 size, depending on your country. To 7. After loading paper, set the paper type and size for the tray. See "Setting change the size to A4 or Letter, you must adjust the lever and paper width guide properly.
-
Page 45: Printing On Special Print Materials
PRINTING ON SPECIAL PRINT MATERIALS SETTING THE PAPER SIZE AND TYPE The machine can hold special sizes and types of print material, such as After loading paper in the paper tray, you need to set the paper size and postcards, note cards, and envelopes. Especially, it is useful for single page type using the control panel buttons. -
Page 46: Copying
copying This chapter gives you step-by-step instructions for copying documents. This chapter includes: • Copying • Using special copy features • Changing the settings for each copy • Setting copy timeout • Changing the default copy settings COPYING Original Type The original type setting is used to improve the copy quality by selecting the 1. -
Page 47: Changing The Default Copy Settings
5. Turn the original over and place it on the scanner glass, where arrows CHANGING THE DEFAULT COPY SETTINGS indicate as shown. Then, close the scanner lid. The copy options, including darkness, original type, copy size, and number of copies, can be set to those most frequently used. When you copy a document, the default settings are used unless they have been changed by using the corresponding buttons on the control panel. -
Page 48: Clone Copying
5. Press Stop/Clear to return to ready mode. SETTING COPY TIMEOUT Your original is divided into 9 portions. Each portion is You can set the time the machine waits before it restores the default copy scanned and printed one by one in the following order: settings, if you do not start copying after changing them on the control panel. -
Page 49: Scanning 49 Scanning Basics
Manager." on page 49. network. Scanned images can be saved as BMP, JPEG, TIFF, PDF files. Samsung Scan Manager: You just walk to the machine with the • originals and scan them from the control panel then, the scanned data Setting scan information in Samsung Scan Manager. -
Page 50: Scanning By A Network Connection
Enter the server port number, from 1 to 65535. The default enter the PIN. Press OK. port number is 25. • ID is the same ID as the registered ID for Samsung Scan Manager. Registering authorized users • PIN is the 4 digit number registered for Samsung Scan 1. -
Page 51: Changing The Settings For Each Scan Job
10. Press the left/right arrow until the file format you want appears and press Registering speed email numbers OK or Start. 1. Enter your machine’s IP address as the URL in a browser and click Go The machine begins scanning and then sends the email. to access the web site of your machine. -
Page 52: Printing Address Book
Searching with a particular first letter 1. If necessary, press Scan/Email. 2. Press Address Book until Search & Send appears on the bottom line of the display and press OK. 3. Press the left/right arrow until the number category you want appears and press OK. -
Page 53: Basic Printing
For Windows XP/2003, select Printers and Faxes. For Windows Vista, select Control Panel > Hardware and Sound > Printers. 3. Double-click the Samsung CLX-3170 Series icon. 4. From the Document menu, select Cancel. You can also access this window by simply double-clicking the printer icon at the bottom right corner of the Windows desktop. -
Page 54: Faxing
faxing This chapter gives you information about using your machine as a fax machine. This chapter includes: • Sending a fax • Fax setup • Receiving a fax Adjusting the document settings We recommend you to use traditional analog phone services (PSTN: Before starting a fax, change the following settings according to your public switched telephone network) when connecting telephone lines original’s status to get the best quality. -
Page 55: Sending A Fax Automatically
Darkness Confirming a transmission You can select the default contrast mode to fax your originals lighter or When the last page of your original has been sent successfully, the machine darker. beeps and returns to ready mode. 1. Press Fax. When something goes wrong while sending your fax, an error message 2. -
Page 56: Sending A Delayed Fax
9. When you have finished entering fax numbers, press the left/right arrow 3. Press the left/right arrow until Add Page appears and press OK. to select No at the Another No.? prompt and press OK. 4. Press the left/right arrow until the fax job you want appears and The original is scanned into memory before transmission. -
Page 57: Receiving A Fax
RECEIVING A FAX Receiving manually using an extension telephone This features works best when you are using an extension telephone Changing receiving modes connected to the EXT socket on the back of your machine. You can receive a fax from someone you are talking to on the extension telephone without 1. -
Page 58: Receiving In Secure Receiving Mode
6. When your machine begins to ring, do not answer the call. The machine Forwarding faxes requires several rings to learn the pattern. You can forward your incoming and outgoing faxes to another fax machine When the machine completes learning, the display shows Completed or email address. -
Page 59: Fax Setup
Forwarding received faxes to email address OPTION DESCRIPTION You can set your machine to forward incoming faxes to the email address you entered. You can set your machine to print a confirmation Send Report 1. Press Fax. report showing whether a transmission was successful, how many pages were sent, and 2. -
Page 60: Changing The Default Document Settings
Setting up Address Book OPTION DESCRIPTION You can set up Address Book with the fax numbers you use most frequently. Your machine provides you with the following features for setting When receiving a fax containing pages as long as Discard Size up Address Book: or longer than the paper in your machine, you can set the machine to discard a specific length from... - Page 61 6. Enter a speed dial number and press OK. 6. Press the left/right arrow until the name you want appears and press 7. Press OK when speed dial information appears correctly. 8. Press OK when Yes appears. Deleting a Address Book entry 9.
-
Page 62: Using Usb Memory Device
using USB memory device This chapter explains how to use a USB memory device with your machine. This chapter includes: • About USB memory • Backing up data • Plugging in a USB memory device • Managing USB memory • Scanning to a USB memory device •... -
Page 63: Scanning To A Usb Memory Device
7. When you have finished, press Stop/Clear to return to ready mode. SCANNING TO A USB MEMORY DEVICE You can change the default scan settings. For details, see "Changing the You can scan a document and save the scanned image onto a USB default scan settings"... -
Page 64: Backing Up Data
6. Press OK when Yes appears to confirm your selection. BACKING UP DATA 7. Press Stop/Clear to return to ready mode. Data in the machine’s memory can be accidentally erased due to power failure or storage failure. Backup helps you protect your Address Book Formatting a USB memory device entries and the system settings by storing them as backup files on a USB 1. -
Page 65: Maintenance
maintenance This chapter provides information for maintaining your machine and the toner cartridge. This chapter includes: • Printing reports • Replacing the imaging unit • Clearing memory • Replacing the waste toner container • Cleaning your machine • Maintenance parts •... -
Page 66: Clearing Memory
To maintain print and scan quality, follow the cleaning procedures below each time the toner cartridge is replaced or if print and scan quality For CLX-3170FN/CLX-3175FN/CLX-3175FW users, before clearing problems occur. the memory, make sure that all fax jobs have been completed, or you will lose those jobs. - Page 67 4. Pull the waste toner container out of the machine using its handle. 7. Holding the groove on the front of the imaging unit, push imaging unit in to the machine. 5. Pull the imaging unit out of the machine using the groove on the front of the imaging unit.
-
Page 68: Cleaning The Scan Unit
7. Push the ADF sheet back into the machine smoothly. Cleaning the scan unit Keeping the scan unit clean helps ensure the best possible copies. We suggest that you clean the scan unit at the start of each day and during the day, as needed. -
Page 69: Maintaining The Cartridge
Use of non-Samsung and refilled toner cartridge Samsung Electronics does not recommend or approve the use of non- Samsung brand toner cartridges in your printer including generic, store brand, refilled, or remanufactured toner cartridges. -
Page 70: Replacing The Toner Cartridge
The status LED and the toner-related message on the display indicates which each individual toner cartridge should be replaced. • For the CLX-3170FN/CLX-3175FN/CLX-3175FW, incoming faxes are saved in memory. At this stage, the toner cartridge needs to be replaced. Check the type of toner cartridge for your machine. -
Page 71: Replacing The Imaging Unit
5. Pull the imaging unit out of the machine using the groove on the front of REPLACING THE IMAGING UNIT the imaging unit. When the life span of the imaging unit has expired, the Smart Panel program window appears on the computer, indicating the imaging unit needs to be replaced. -
Page 72: Replacing The Waste Toner Container
8. Insert the waste toner container into position and then push it to make REPLACING THE WASTE TONER CONTAINER sure that it is firmly seated in place. When the life span of the waste toner container has expired, the Smart Panel program window appears on the computer, indicating the waste toner container needs to be replaced. -
Page 73: Maintenance Parts
CHECKING THE MACHINE’S SERIAL NUMBER Approx. 100,000 black pages or Fuser unit When you call for service or register as a user on the Samsung website, the 25,000 color pages machine’s serial number may be required. You can check the serial number by taking the following steps: Approx. -
Page 74: Troubleshooting
troubleshooting This chapter gives helpful information for what to do if you encounter an error. This chapter includes: • Tips for avoiding paper jams • Understanding display messages • Clearing document jams • Solving other problems • Clearing paper jams 3. -
Page 75: Roller Misfeed
Roller misfeed In the tray 1 1. Open the scanner lid. 1. Open and close the front cover. The jammed paper is automatically ejected from the machine. 2. Seize the misfeed paper, and remove the paper from the feed area by If the paper does not exit, go to the next step. -
Page 76: In The Paper Exit Area
2. Open the inner cover. In the paper exit area 1. Open and close the front cover. The jammed paper is automatically ejected from the machine. 2. Gently pull the paper out of the output tray. 3. Carefully take the jammed paper out of the machine. If you do not see the jammed paper or if there is any resistance when you pull, stop and go to the next step. - Page 77 6. Open the scan unit. 9. Pull down the fuser lever. 7. Carefully take the jammed paper out of the machine. 10. Close the rear cover. Printing automatically resumes. 8. Lowering down the scan unit gently and slowly until it is completely closed.
-
Page 78: Understanding Display Messages
A problem has Turn the power switch ADC Not The toner cartridge Install the a Samsung- Invalid Toner occurred in the ADC off and on. If the problem Confirm Error you have installed is genuine toner cartridge in the machine. - Page 79 Stop or Continue with cartridge. from the genuine. We Toner indicates is not a the left/right arrow. recommend Samsung- Samsung-genuine genuine color toner If you select Stop by cartridge. cartridge. pressing OK on the Press OK to toggle...
- Page 80 SUGGESTED SUGGESTED MESSAGE MEANING MESSAGE MEANING SOLUTIONS SOLUTIONS There is a problem in Configure the POP3 A problem has Turn the power switch Send Error Transfer Belt POP3. setting. occurred in the off and on. If the problem (POP3) Error transfer belt in the persists, call for service.
-
Page 81: Solving Other Problems
CONDITION SUGGESTED SOLUTIONS The machine is not Select Samsung CLX-3170 Clear the paper jam. (See "Tips for avoiding Paper is jammed selected as the Series as your default printer paper jams" on page 74.) during printing. -
Page 82: Printing Quality Problems
POSSIBLE POSSIBLE CONDITION SUGGESTED SOLUTIONS CONDITION SUGGESTED SOLUTIONS CAUSE CAUSE The paper source For many software Incompatibility Printing the PDF file as an The machine The printer does selection in the applications, the paper between the PDF image may solve this selects print not print PDF file printer properties... - Page 83 CONDITION SUGGESTED SOLUTIONS CONDITION SUGGESTED SOLUTIONS If faded areas, generally rounded, occur If marks repeatedly appear on the printed side Dropouts Vertical repetitive randomly on the page: of the page at even intervals: defects • A single sheet of paper may be defective. •...
-
Page 84: Copying Problems
CONDITION SUGGESTED SOLUTIONS CONDITION SUGGESTED SOLUTIONS • Ensure that the paper is loaded properly. Character voids are white areas within parts of Curl or wave Character Voids characters that should be solid black: • Check the paper type and quality. Both high •... -
Page 85: Scanning Problems
• “Invalid handle.” • “Scanning has failed.” Samsung Scan Manager problems CONDITION SUGGESTED SOLUTIONS Check your operating system. Supporting I cannot use the operating systems are Windows 2000/XP/ Samsung Scan Vista. -
Page 86: Fax Problems
Fax problems CONDITION SUGGESTED SOLUTIONS CONDITION SUGGESTED SOLUTIONS You may have chosen the wrong paper Blank areas appear settings in the user option setting. For details at the bottom of each • Unplug the power cord and plug it in again. about paper settings, see "Selecting print The machine is not page or on other... -
Page 87: Common Linux Problems
Common Linux problems CONDITION SUGGESTED SOLUTIONS CONDITION SUGGESTED SOLUTIONS This is a known bug in Ghostscript (until GNU Some color images Ghostscript version 7.xx) when the base color come out in • Check if the printer driver is installed in your space of the document is indexed RGB color The machine does unexpected color. -
Page 88: Common Macintosh Problems
CONDITION SUGGESTED SOLUTIONS CONDITION SUGGESTED SOLUTIONS • Check if your machine is attached to your • Check if a document is loaded into the The machine does The machine does computer. Make sure that it is connected machine. not appear on the not scan. -
Page 89: Ordering Supplies
To order Samsung-authorized supplies or accessories, contact your local country. Samsung dealer or the retailer where you purchased your machine, or visit www.samsung.com/supplies and select your country/region to obtain information on calling for technical support. -
Page 90: Specifications
specifications This chapter guides you about this machine’s specifications such as various features. This chapter include: • General specifications • Copier specifications • Printer specifications • Facsimile specifications • Scanner specifications GENERAL SPECIFICATIONS ITEM DESCRIPTION The symbol * optional feature depending on machines. Waste toner Approx. -
Page 91: Printer Specifications
Interface scanning length • Ethernet 10/100 Base TX (embedded type) • 802.11 b/g Wireless LAN (CLX-3175FW only) Max. 208 mm (8.2 inches) Effective scanning width a. It will be affected by operating system used, computing performance, application software, connecting method, media type, media size and... -
Page 92: Facsimile Specifications
FACSIMILE SPECIFICATIONS The fax feature may not be supported depending on machines. ITEM DESCRIPTION ITU-T G3 Compatibility Public Switched Telephone Network (PSTN) or Applicable line behind PABX MH/MR/MMR/JBIG/JPEG Data coding 33.6 Kbps Modem speed Transmission Up to 3 seconds/page speed 356 mm (14 inches) Maximum document length... -
Page 93: Glossary
glossary DADF The following glossary helps you get familiar with the product by understanding the terminologies commonly used with printing as well A Duplex Automatic Document Feeder (DADF) is a mechanism that will as mentioned in this user's guide. automatically feed and flip over an original sheet of paper so that the machine can scan on both sides of the paper. - Page 94 An emulator duplicates the functions of one system with a different Intranet system, so that the second system behaves like the first system. A private network that uses Internet Protocols, network connectivity, and Emulation focuses on exact reproduction of external behavior, which is possibly the public telecommunication system to securely share part of in contrast to simulation, which concerns an abstract model of the an organization's information or operations with its employees.
- Page 95 PABX A Light-Emitting Diode (LED) is a semiconductor device that indicates A private automatic branch exchange (PABX) is an automatic telephone the status of a machine. switching system within a private enterprise. MAC address Media Access Control (MAC) address is a unique identifier associated Printer Command Language (PCL) is a Page Description Language with a network adapter.
- Page 96 Subnet Mask The subnet mask is used in conjunction with the network address to determine which part of the address is the network address and which part is the host address. TCP/IP The Transmission Control Protocol (TCP) and the Internet Protocol (IP); the set of communications protocols that implement the protocol stack on which the Internet and most commercial networks run.
- Page 97 index loading originals ADF 39 Address Book scanner glass 39 group dial numbers 60 speed dial numbers 60 Erasing background, special copy Address Book, use machine ID, set Maintenance ADF, load fax header, set maintenance parts 73 toner cartridge 69 adjustment Fax mode, receiving mode altitude 37...
- Page 98 problem, solve tray copying 84 adjusting the width and length 43 faxing 86 Linux 87 Network Scan 85 paper feeding 81 USB flash memory printing quality 82 data backup 64 scanning 85 managing 64 Windows 86 printing 63 scanning 63 using receiving a fax SetIP 27...
-
Page 99: Contact Samsung Worldwide
SAMSUNG worldwide If you have any comments or questions regarding Samsung products, contact the Samsung customer care center. COUNTRY/ CUSTOMER CARE COUNTRY/ CUSTOMER CARE WEB SITE WEB SITE REGION CENTER REGION CENTER 06-80-SAMSUNG (726- www.samsung.com/hu HUNGARY 0800-333-3733 www.samsung.com/ar ARGENTINE... - Page 100 SINGAPORE 7864) 0800-SAMSUNG (726- www.samsung.com/sk SLOVAKIA 7864) 0860 SAMSUNG (726- www.samsung.com/za SOUTH AFRICA 7864) 902-1-SAMSUNG(902 172 www.samsung.com/es SPAIN 678) 075-SAMSUNG (726 78 64) www.samsung.com/se SWEDEN 0848-SAMSUNG (7267864, www.samsung.com/ch SWITZERLAND CHF 0.08/min) 8-10-800-500-55-500 TADJIKISTAN 0800-329-999 www.samsung.com/tw TAIWAN 1800-29-3232 www.samsung.com/th THAILAND...
-
Page 101: Special Features
features of your new laser product Your new machine is equipped with a number of special features that improve the quality of the documents you print. With the machine, you can: SPECIAL FEATURES Scan the originals and send it right away Print with excellent quality and speed •... - Page 102 FEATURES BY MODELS The machine is designed to support all of your document needs – from printing and copying, to more advanced networking solutions for your business. Basic features of this machine include: FEATURES CLX-3175 CLX-3175N USB 2.0 USB Memory Interface PictBridge Network Interface Ethernet 10/100 Base TX wired LAN ( : Included, Blank: Not Available)
- Page 103 Help from the printer properties dialog box. Samsung website If you have Internet access, you can get help, support, printer drivers, manuals, and order information from the Samsung website, www.samsungprinter.com. Please visit www.samsung.com for open source information.
- Page 105 safety information IMPORTANT SAFETY SYMBOLS AND PRECAUTIONS What the icons and signs in this user’s guide mean: Hazards or unsafe practices that may result in severe personal injury or death. WARNING Hazards or unsafe practices that may result in minor personal injury or property damage. CAUTION To reduce the risk of fire, explosion, electric shock, or personal injury when using your laser MFP, follow these basic safety precautions:...
- Page 106 13. Unplug the machine from the telephone jack, PC and AC wall outlet and refer servicing to qualified service personnel under the following conditions: • When any part of the power cord, plug or connecting cable is damaged or frayed. •...
- Page 107 During normal operation, this machine produces ozone. The ozone produced does not present a hazard to the operator. However, it is advisable that the machine be operated in a well ventilated area. If you need additional information about ozone, request your nearest Samsung dealer. MERCURY SAFETY Contains Mercury, Dispose According to Local, State or Federal Laws.(U.S.A.
- Page 108 RADIO FREQUENCY EMISSIONS FCC Information to the User This device complies with Part 15 of the FCC Rules. Operation is subject to the following two conditions: • This device may not cause harmful interference, and • This device must accept any interference received, including interference that may cause undesired operation. This equipment has been tested and found to comply with the limits for a Class B digital device, pursuant to Part 15 of the FCC Rules.
- Page 109 FAX BRANDING The Telephone Consumer Protection Act of 1991 makes it unlawful for any person to use a computer or other electronic device to send any message via a telephone facsimile machine unless such message clearly contains in a margin at the top or bottom of each transmitted page or on the first page of the transmission the following information: (1) the date and time of transmission (2) identification of either business, business entity or individual sending the message;...
- Page 110 PBXs of the European countries: In the event of problems, you should contact the Euro QA Lab of Samsung Electronics Co., Ltd. in the first instance. The product has been tested against TBR21. To assist in the use and application of terminal equipment which complies with this standard, the European Telecommunication Standards Institute (ETSI) has issued an advisory document (EG 201 121) which contains notes and additional requirements to ensure network compatibility of TBR21 terminals.
- Page 111 European Radio Approval Information (for products fitted with EU-approved radio devices) Low power, Radio LAN type devices (radio frequency (RF) wireless communication devices), operating in the 2.4 GHz/5 GHz band, may be present (embedded) in your printer system which is intended for home or office use. This section is only applicable if these devices are present.
- Page 112 REGULATORY COMPLIANCE STATEMENTS Wireless Guidance Low power, Radio LAN type devices (radio frequency (RF) wireless communication devices), operating in the 2.4 GHz/5 GHz Band, may be present (embedded) in your printer system. The following section is a general overview of considerations while operating a wireless device. Additional limitations, cautions, and concerns for specific countries are listed in the specific country sections (or country group sections).
- Page 113 OPENSSL LICENSE Copyright (c) 1998-2001 The OpenSSL Project. All rights reserved. Redistribution and use in source and binary forms, with or without modification, are permitted provided that the following conditions are met: 1. Redistributions of source code must retain the above copyright notice, this list of conditions and the following disclaimer. 2.
- Page 114 15_Safety information...
- Page 115 contents Features of your new laser product Safety information INTRODUCTION Machine overview Front view Rear view Control panel overview Understanding the Status LED Acknowledging the status of the toner cartridge Menu overview Supplied software Printer driver features Printer driver GETTING STARTED Setting up the hardware System requirements Windows...
- Page 116 Gray enhance copying Setting copy timeout SCANNING Scanning basics Scanning from the control panel Setting scan information in Samsung Scan Manager. Scanning to application programs Changing the settings for scan job Changing the default scan settings BASIC PRINTING Printing a document...
- Page 117 In the paper exit area Understanding display messages Solving other problems Paper feeding Printing problems Printing quality problems Copying problems Scanning problems Samsung Scan Manager problems Common Windows problems Common Linux problems Common Macintosh problems ORDERING SUPPLIES Supplies How to purchase SPECIFICATIONS...
-
Page 118: Front View
introduction These are the main components of your machine: This chapter includes: • Machine overview • Menu overview • Control panel overview • Supplied software • Understanding the Status LED • Printer driver features • Acknowledging the status of the toner cartridge MACHINE OVERVIEW Front view Rear view... - Page 119 36.) Allows you to access a list of your PC software programs that an image can be scanned to. You must create the scan list using the Samsung Scan to software (Printer Settings Utility) provided with this machine.
-
Page 120: Toner Cartridge
Samsung toner cartridge's quality. Service or the machine cannot continue the job. Check repair required as a result of using non-genuine Samsung toner the message on the display, and refer to cartridges will not be covered under the machine warranty. - Page 121 MENU OVERVIEW The control panel provides access to various menus to set up the machine or use the machine’s functions. These menus can be accessed by pressing Menu. Refer to the following diagram. Some menus may not appear in the display depending on options or models. If so, it is not applicable to your machine. Copy Feature Copy Setup Scan Feature...
- Page 122 SUPPLIED SOFTWARE PRINTER DRIVER FEATURES You must install the machine software using the supplied CD to use your Your printer drivers support the following standard features: machine as a printer and a scanner, after you have set up your machine and •...
- Page 123 getting started This chapter gives you step-by-step instructions for setting up the machine. This chapter includes: • Setting up the hardware • Installing the software • System requirements • Machine's basic settings • Setting up the network (CLX-3175N only) SETTING UP THE HARDWARE 3.
- Page 124 SYSTEM REQUIREMENTS Linux Before you begin, ensure that your system meets the following ITEM REQUIREMENTS requirements: Operating system RedHat 8.0, 9.0 (32bit) Windows RedHat Enterprise Linux WS 4, 5 (32/64bit) Fedora Core 1~7 (32/64bit) Your machine supports the following Windows operating systems. Mandrake 9.2 (32bit), 10.0, 10.1 (32/64bit) Mandriva 2005, 2006, 2007 (32/64bit) REQUIREMENT (RECOMMENDED)
-
Page 125: Supported Operating Environments
6. Press the left/right arrow until Static appears and press OK. 7. Press the left/right arrow until IP Address appears and press OK. 2. From the Windows Start menu, select All Programs > Samsung Network Printer Utilities > SetIP > SetIP. -
Page 126: Installing The Software
7. After the installation is finished, a window appears asking you to print a test page and to register yourself as a user of Samsung machines in order to receive information from Samsung. If you wish to do so, select the corresponding checkbox(es) and click Finish. - Page 127 MACHINE'S BASIC SETTINGS Key sound, and alarm sound 1. Press Menu and then OK. After installation is complete, you may want to set the machine's default 2. Press the left/right arrow until System Setup appears and press OK. settings. Refer to the next section if you would like to set or change values. 3.
-
Page 128: Loading Originals
Some print media may meet all of the guidelines in this section and still not produce satisfactory results. This may be the result of improper handling, unacceptable temperature and humidity levels, or other variables over which Samsung has no control. • Before purchasing large quantities of print media, ensure that it meets the requirements specified in this user’s guide. - Page 129 Specifications on print media TYPE SIZE DIMENSIONS WEIGHT CAPACITY Plain paper Letter 216 x 279 mm (8.5 x 11 inches) 60 to 105 g/m (16 to 28 lb bond) • 150 sheets of 75 g/m (20 lb bond) paper for the Legal 216 x 356 mm (8.5 x 14 inches) tray...
- Page 130 Media sizes supported in each mode MEDIA TYPE GUIDELINES MODE SIZE SOURCE Envelopes • Envelopes with a peel-off adhesive strip or with (Continue) more than one flap that folds over to seal must use Copy mode Letter, A4, Legal, tray 1 adhesives compatible with the machine’s fusing Oficio, US Folio, temperature for 0.1 second.
-
Page 131: Paper Tray
During the fusing process, wet ink can come off preprinted paper, reducing print quality. Using photographic paper or coated paper may cause problems, requiring repairs. Such repairs are not covered by Samsung’s warranty or service agreements. CHANGING THE SIZE OF THE PAPER IN THE PAPER TRAY If the paper that you need to print is shorter than length 222 mm (8.74... - Page 132 Slide the tray 1 back into the machine. The tray is preset to Letter or A4 size, depending on your country. To 7. After loading paper, set the paper type and size for the tray. See "Setting change the size to A4 or Letter, you must adjust the lever and paper width guide properly.
- Page 133 PRINTING ON SPECIAL PRINT MATERIALS SETTING THE PAPER SIZE AND TYPE The machine can hold special sizes and types of print material, such as After loading paper in the paper tray, you need to set the paper size and postcards, note cards, and envelopes. Especially, it is useful for single page type using the control panel buttons.
- Page 134 copying This chapter gives you step-by-step instructions for copying documents. This chapter includes: • Copying • Using special copy features • Changing the settings for each copy • Setting copy timeout • Changing the default copy settings COPYING Original Type The original type setting is used to improve the copy quality by selecting the 1.
- Page 135 CHANGING THE DEFAULT COPY SETTINGS 5. Turn the original over and place it on the scanner glass, where arrows indicate as shown. Then, close the scanner lid. The copy options, including darkness, original type, copy size, and number of copies, can be set to those most frequently used. When you copy a document, the default settings are used unless they have been changed by using the corresponding buttons on the control panel.
- Page 136 SETTING COPY TIMEOUT 6. Press Stop/Clear to return to ready mode. Your original is divided into 9 portions. Each portion is You can set the time the machine waits before it restores the default copy scanned and printed one by one in the following order: settings, if you do not start copying after changing them on the control panel.
-
Page 137: Scanning Basics
Scanned images can be saved as BMP, JPEG, TIFF, PDF files. • Samsung Scan Manager: You just walk to the machine with the originals and scan them from the control panel then, the scanned data Setting scan information in Samsung Scan Manager. -
Page 138: Changing The Settings For Scan Job
3. Press the left/right arrow until Scan Setup appears and press OK. enter the PIN. Press OK. 4. Press OK when Change Default appears. • ID is the same ID as the registered ID for Samsung Scan 5. Press OK when USB Default appears. Manager. •... -
Page 139: Basic Printing
For Windows XP/2003, select Printers and Faxes. For Windows Vista, select Control Panel > Hardware and Sound > Printers. 3. Double-click the Samsung CLX-3170 Series icon. 4. From the Document menu, select Cancel. You can also access this window by simply double-clicking the printer icon at the bottom right corner of the Windows desktop. -
Page 140: Using Usb Memory Device
using USB memory device This chapter explains how to use a USB memory device with your machine. This chapter includes: • About USB memory • Backing up data • Plugging in a USB memory device • Managing USB memory • Scanning to a USB memory device •... - Page 141 4. Press OK when Scan to USB appears on the bottom line of the display. • JPEG: JPEG Baseline 5. Press Color Start or Black Start when Ready to Scan to USB • If your USB memory device has certain features (example, appears.
- Page 142 PRINTING DIRECTLY FROM A DIGITAL CAMERA 7. Press the left/right arrow until the file containing the data you want to restore appears and press OK. This machine supports the PictBridge feature. You can print images directly 8. Press OK when Yes appears to restore the backup file to the machine. from any PictBridge-compatible device, such as a digital camera, camera 9.
-
Page 143: Printing Reports
maintenance This chapter provides information for maintaining your machine and the toner cartridge. This chapter includes: • Printing reports • Replacing the imaging unit • Clearing memory • Replacing the waste toner container • Cleaning your machine • Maintenance parts •... - Page 144 CLEANING YOUR MACHINE 4. Pull the waste toner container out of the machine using its handle. To maintain print and scan quality, follow the cleaning procedures below each time the toner cartridge is replaced or if print and scan quality problems occur.
- Page 145 Cleaning the scan unit 7. Holding the groove on the front of the imaging unit, push imaging unit in to the machine. Keeping the scan unit clean helps ensure the best possible copies. We suggest that you clean the scan unit at the start of each day and during the day, as needed.
- Page 146 Use of non-Samsung and refilled toner cartridge Samsung Electronics does not recommend or approve the use of non- Samsung brand toner cartridges in your printer including generic, store brand, refilled, or remanufactured toner cartridges.
- Page 147 4. Slide four toner cartridges back into the machine. 4. Take a new toner cartridge out of its package. • Don't use sharp objects, such as a knife or scissors, to open the toner cartridge package. You could damage the surface of the toner cartridge.
- Page 148 REPLACING THE IMAGING UNIT 5. Pull the imaging unit out of the machine using the groove on the front of the imaging unit. When the life span of the imaging unit has expired, the Smart Panel program window appears on the computer, indicating the imaging unit needs to be replaced.
- Page 149 REPLACING THE WASTE TONER CONTAINER 8. Insert the waste toner container into position and then push it to make sure that it is firmly seated in place. When the life span of the waste toner container has expired, the Smart Panel program window appears on the computer, indicating the waste toner container needs to be replaced.
- Page 150 CHECKING THE MACHINE’S SERIAL NUMBER ITEMS YIELD (AVERAGE) When you call for service or register as a user on the Samsung website, the Fuser unit Approx. 100,000 black pages or machine’s serial number may be required.
- Page 151 troubleshooting This chapter gives helpful information for what to do if you encounter an error. This chapter includes: • Tips for avoiding paper jams • Understanding display messages • Clearing paper jams • Solving other problems TIPS FOR AVOIDING PAPER JAMS In the tray 1 1.
- Page 152 1. Open the scan unit. 5. Lowering down the scan unit gently and slowly until it is completely closed. Make sure that it is securely latched. Be careful not to pinch your fingers! 2. Open the inner cover. If the scan unit is not completely closed, the machine will not operate.
- Page 153 5. Pull up the fuser lever. 8. Lowering down the scan unit gently and slowly until it is completely closed. Make sure that it is securely latched. Be careful not to pinch your fingers! fuser lever 6. Open the scan unit. 9.
- Page 154 Over Heat Error There is a problem in Turn the power switch Invalid Toner The toner cartridge Install the a Samsung- the fuser unit. off and on. If the problem Cycle Power persists, call for service. you have installed is genuine toner cartridge not for your machine.
- Page 155 We printing, but the quality If the black recommend Samsung- cannot be guaranteed. toner cartridge genuine color toner is empty, If you select Black Only, cartridge. Black Only...
- Page 156 CONDITION SUGGESTED SOLUTIONS The machine is not Select Samsung CLX-3170 Paper is jammed Clear the paper jam. (See "Tips for avoiding selected as the Series as your default printer paper jams" on page 52.) during printing.
- Page 157 POSSIBLE POSSIBLE CONDITION SUGGESTED SOLUTIONS CONDITION SUGGESTED SOLUTIONS CAUSE CAUSE The machine The paper source For many software The printer does Incompatibility Printing the PDF file as an selection in the applications, the paper between the PDF image may solve this selects print not print PDF file printer properties...
- Page 158 CONDITION SUGGESTED SOLUTIONS CONDITION SUGGESTED SOLUTIONS Dropouts If faded areas, generally rounded, occur Vertical repetitive If marks repeatedly appear on the printed side randomly on the page: of the page at even intervals: defects • A single sheet of paper may be defective. •...
- Page 159 CONDITION SUGGESTED SOLUTIONS CONDITION SUGGESTED SOLUTIONS Curl or wave • Ensure that the paper is loaded properly. Character Voids Character voids are white areas within parts of characters that should be solid black: • Check the paper type and quality. Both high •...
- Page 160 Copying problems Scanning problems CONDITION SUGGESTED SOLUTIONS CONDITION SUGGESTED SOLUTIONS Copies are too light Use Darkness to darken or lighten the The scanner does • Make sure that you place the original to be background of the copies. or too dark. not work.
- Page 161 Samsung Scan Manager problems Common Linux problems CONDITION SUGGESTED SOLUTIONS CONDITION SUGGESTED SOLUTIONS I cannot use the Check your operating system. Supporting The machine does • Check if the printer driver is installed in your operating systems are Windows 2000/XP/ Samsung Scan not print.
- Page 162 CONDITION SUGGESTED SOLUTIONS CONDITION SUGGESTED SOLUTIONS Some color images This is a known bug in Ghostscript (until GNU The machine does • Check if your machine is attached to your Ghostscript version 7.xx) when the base color come out in not appear on the computer.
- Page 163 CONDITION SUGGESTED SOLUTIONS The machine does • Check if a document is loaded into the not scan. machine. • Check if your machine is connected to the computer. Make sure if it is connected properly if I/O error is reported while scanning. •...
- Page 164 To order Samsung-authorized supplies or accessories, contact your local country. Samsung dealer or the retailer where you purchased your machine, or visit www.samsung.com/supplies and select your country/region to obtain SUPPLIES information on calling for technical support.
- Page 165 specifications This chapter guides you about this machine’s specifications such as various features. This chapter include: • General specifications • Scanner specifications • Printer specifications • Copier specifications GENERAL SPECIFICATIONS ITEM DESCRIPTION The symbol * optional feature depending on machines. External 415 x 360 x 311 mm dimension...
- Page 166 PRINTER SPECIFICATIONS SCANNER SPECIFICATIONS ITEM DESCRIPTION ITEM DESCRIPTION Compatibility TWAIN standard/WIA standard Printing method Color laser beam printing Scanning method Color CIS Printing speed • Black & White: Up to 16 ppm (A4), 17 ppm (Letter) • Color: Up to 4 ppm(A4), 4 ppm (Letter) TWAIN 1,200 x 1,200 dpi Resolution...
-
Page 167: Control Panel
glossary DADF The following glossary helps you get familiar with the product by understanding the terminologies commonly used with printing as well A Duplex Automatic Document Feeder (DADF) is a mechanism that will as mentioned in this user's guide. automatically feed and flip over an original sheet of paper so that the machine can scan on both sides of the paper. -
Page 168: Fuser Unit
Intranet An emulator duplicates the functions of one system with a different system, so that the second system behaves like the first system. A private network that uses Internet Protocols, network connectivity, and Emulation focuses on exact reproduction of external behavior, which is possibly the public telecommunication system to securely share part of in contrast to simulation, which concerns an abstract model of the an organization's information or operations with its employees. -
Page 169: Mac Address
PABX A Light-Emitting Diode (LED) is a semiconductor device that indicates A private automatic branch exchange (PABX) is an automatic telephone the status of a machine. switching system within a private enterprise. MAC address Media Access Control (MAC) address is a unique identifier associated Printer Command Language (PCL) is a Page Description Language with a network adapter. -
Page 170: Toner Cartridge
Subnet Mask The subnet mask is used in conjunction with the network address to determine which part of the address is the network address and which part is the host address. TCP/IP The Transmission Control Protocol (TCP) and the Internet Protocol (IP); the set of communications protocols that implement the protocol stack on which the Internet and most commercial networks run. - Page 171 index adjustment key sound replacing components altitude 28 toner cartridge 48 alarm sound reports, print ringer Status 21 background image, adjust Linux problems loading originals scanner glass scanner glass 29 cleaning 46 loading documents 29 cleaning scanning inside 45 outside 45 default setting, change 39 Maintenance scan unit 46...
- Page 172 SAMSUNG worldwide If you have any comments or questions regarding Samsung products, contact the Samsung customer care center. COUNTRY/ CUSTOMER CARE COUNTRY/ CUSTOMER CARE WEB SITE WEB SITE REGION CENTER REGION CENTER HUNGARY 06-80-SAMSUNG (726- www.samsung.com/hu ARGENTINE 0800-333-3733 www.samsung.com/ar...
- Page 173 7864) SLOVAKIA 0800-SAMSUNG (726- www.samsung.com/sk 7864) SOUTH AFRICA 0860 SAMSUNG (726- www.samsung.com/za 7864) SPAIN 902-1-SAMSUNG(902 172 www.samsung.com/es 678) SWEDEN 075-SAMSUNG (726 78 64) www.samsung.com/se SWITZERLAND 0848-SAMSUNG (7267864, www.samsung.com/ch CHF 0.08/min) TADJIKISTAN 8-10-800-500-55-500 TAIWAN 0800-329-999 www.samsung.com/tw THAILAND 1800-29-3232 www.samsung.com/th 02-689-3232 TRINIDAD &...
- Page 174 This user’s guide is provided for information purposes only. All information included herein is subject to change without notice. Samsung Electronics is not responsible for any direct or indirect damages, arising from or related to use of this user’s guide.
- Page 175 REV 2.00...
-
Page 176: Software Section
Samsung Printer Software section... - Page 177 OFTWARE SECTION ONTENTS NSTALLING RINTER OFTWARE IN INDOWS Chapter 1: Installing Printer Software ......................4 Installing Software for Local Printing ................. 4 Installing Software for Network Printing ................7 Reinstalling Printer Software ....................10 Removing Printer Software ..................... 11 Installing mono printer driver ....................11 ASIC RINTING Chapter 2:...
- Page 178 Setting Up a Host Computer ....................22 Setting Up a Client Computer ....................22 CANNING Chapter 5: Scanning Using Samsung SmarThru ..................23 Uninstalling Samsung SmarThru ..................23 Using Samsung SmarThru ..................... 23 Using Onscreen Help File ....................24 Scanning Process with TWAIN-enabled Software ................ 25 Scanning Using the WIA Driver ....................
- Page 179 SING RINTER IN INUX Chapter 7: Getting Started ........................28 Installing the Unified Linux Driver .................... 28 Installing the Unified Linux Driver ................... 28 Uninstalling the Unified Linux Driver ................29 Using SetIP program ......................30 Starting the program ....................30 Using the Unified Driver Configurator ..................
-
Page 180: Installing Printer Software In Windows
Make sure that the printer is connected to your computer Installing Printer and powered on. Software in Windows Insert the supplied CD-ROM into your CD-ROM drive. The CD-ROM should automatically run, and an installation window appears. This chapter includes: If the installation window does not appear, click Start and then Run. -
Page 181: Custom Installation
If the test page prints out correctly, click Yes. If not, click No to reprint it. To register yourself as a user of Samsung Printers in order to receive information from Samsung, select the checkbox and click Finish. You are now sent to the Samsung web site. - Page 182 If the test page prints out correctly, click Yes. If not, click No to reprint it. To register yourself as a user of Samsung Printers in order to receive information from Samsung, select the checkbox and click Finish. You are now sent to the Samsung web site.
-
Page 183: Installing Software For Network Printing
Installing Software for Network Select Typical installation for a network printer. Click Next. Printing When you connect your printer to a network, you must first configure the TCP/IP settings for the printer. After you have assigned and verified the TCP/IP settings, you are ready to install the software on each computer on the network. - Page 184 After the installation is finished, a window appears asking you to print a test page and to register yourself as a user of Samsung Printers in order to receive information from Samsung. If you so desire, select the corresponding checkbox(es) and click Finish.
- Page 185 Click Next. network, enter the port name and the IP address for the printer. To verify your printer’s IP address or the MAC address, print a Network Configuration page. • To find a shared network printer (UNC Path), select Shared Printer [UNC] and enter the shared name manually or find a shared printer by clicking the Browse button.
-
Page 186: Reinstalling Printer Software
After the installation is finished, a window appears asking you to print a test page and to register yourself as a user of Samsung Printers in order to receive information from • If you do not see your printer on the list, click Update to Samsung. -
Page 187: Removing Printer Software
will start and a test page will not be printed at the end of the Click Cancel. installation. • The reinstallation window that appears in this User’s Guide may differ depending on the printer and interface in use. Select the components you want to reinstall and click Next If you installed the printer software for local printing you select your printer driver name, the window... -
Page 188: Basic Printing
Open the document you want to print. Basic Printing Select Print from the File menu. The Print window is displayed. It may look slightly different depending on your this chapter explains the printing options and common printing application. tasks in windows. The basic print settings are selected within the Print window. -
Page 189: Printing To A File (Prn)
Printing to a file (PRN) Printer Settings You will sometimes need to save the print data as a file for your You can use the printer properties window, which allows you to purpose. access all of the printer options you need when using your printer. -
Page 190: Layout Tab
Layout Tab Paper Tab The Layout tab provides options to adjust how the document Use the following options to set the basic paper handling appears on the printed page. The Layout Options includes specifications when you access the printer properties. See Multiple Pages per Side, Poster Printing and Booklet “Printing a Document”... -
Page 191: Advanced Options
• Color Adjust : You can adjust the appearance of images by Color Paper: 20 lb to 24 lb (75~90 g/m ) color-backgrounded changing the settings in the Levels option. paper. • Color Matching : You can adjust the appearance of images by Archive Paper: If you need to keep print-out for a long period changing the settings in the Settings option. -
Page 192: Extras Tab
Extras Tab About Tab You can select output options for your document. See “Printing Use the About tab to display the copyright notice and the a Document” on page 12 for more information about accessing version number of the driver. If you have an Internet browser, the printer properties. -
Page 193: Advanced Printing
Advanced Printing Printing Multiple Pages on One Sheet of Paper (N-Up Printing) This chapter explains printing options and advanced printing tasks. You can select the number of pages to print on a single sheet of paper. To print more than one page per sheet, the pages will be reduced in size and arranged in the order you specify. -
Page 194: Printing Posters
Printing Posters Printing Booklets This feature allows you to print a single-page document onto 4, 9, or 16 sheets of paper, for the purpose of pasting the sheets together to form one poster-size document. To change the print settings from your software application, access printer properties. -
Page 195: Printing On Both Sides Of Paper
Printing on Both Sides of Paper Printing a Reduced or Enlarged Document You can print on both sides of a sheet of paper. Before printing, decide how you want your document oriented. You can change the size of a page’s content to appear larger or The options are: smaller on the printed page. -
Page 196: Using Watermarks
Editing a Watermark Using Watermarks To change the print settings from your software application, access printer properties. See “Printing a The Watermark option allows you to print text over an existing Document” on page 12. document. For example, you may want to have large gray letters reading “DRAFT”... -
Page 197: Using Overlays
Using a Page Overlay Using Overlays After an overlay has been created, it is ready to be printed with your document. To print an overlay with a document: Create or open the document you want to print. What is an Overlay? To change the print settings from your software An overlay is text and/or images stored in the computer hard application, access printer properties. -
Page 198: Sharing The Printer Locally
Sharing the Printer Setting Up a Host Computer Locally Start Windows. From the Start menu select Printers and Faxes. You can connect the printer directly to a selected computer, Double-click your printer driver icon. which is called “host computer,” on the network. From the Printer menu, select Sharing. -
Page 199: Scanning
Samsung SmarThru is the accompanying software for your files, display them on your web site or use them to create machine. With SmarThru, scanning is the proverbial piece of projects that you can print using Samsung SmarThru software cake. or the WIA driver. -
Page 200: Using Onscreen Help File
The SmarThru 4 window opens. : To send an image by e-mail, you must have a mail client program, like Outlook Express, which has been set up with your e-mail account. Make sure that your printer is selected. •Folder Scanning an image and saving it to a folder. Allows you to scan an image, preview it, and save it to the folder of your choice. -
Page 201: Scanning Process With Twain-Enabled Software
Choose your scanning preferences and click Preview to Scanning Process with TWAIN- see how your preferences affect the picture. Click Next. enabled Software Enter a picture name, and select a file format and If you want to scan documents using other software, you will destination to save the picture. -
Page 202: Using Smart Panel
OTES status of the printer, and allows you to customize the printer’s • If you have already installed more than one Samsung settings. Smart Panel is installed automatically when you printer, first select the printer model you want in order to install the printer software. -
Page 203: Opening The Troubleshooting Guide
Driver Setting (Only for Windows) You can use the printer properties window, which allows you to Changing the Smart Panel access all of the printer options you need for using your Program Settings printer. For details, See “Printer Settings” on page 13. Right-click (in Windows or Linux) or click (in Mac OS X) the Smart Panel icon and select Options. -
Page 204: Using Your Printer In Linux
When the Terminal screen appears, type in: The supplied CD-ROM provides you with Samsung’s Unified If the CD-ROM is secondary master and the location to Linux Driver package for using your machine with a Linux mount is /mnt/cdrom, computer. -
Page 205: Uninstalling The Unified Linux Driver
Click Uninstall. Click Next. The installation program has added the Unified Driver Configurator desktop icon and Samsung Unified Driver group to the system menu for your convenience. If you have any difficulties, consult the onscreen help that is available through your system menu or can otherwise be... -
Page 206: Using Setip Program
You can also click the Startup Menu icon and select Enter the network card's MAC address, IP address, subnet Samsung Unified Driver and then Unified Driver mask, default gateway, and then click Apply. Configurator. Press each button on the Modules pane to switch to the : when you enter the MAC address, enter it without corresponding configuration window. -
Page 207: Printers Configuration
• Set as Default: sets the current printer as a default In this window, you can monitor the activity of scanner devices, printer. view a list of installed Samsung MFP devices, change device properties, and scan images. • Stop/Start: stops/starts the printer. -
Page 208: Ports Configuration
The Samsung Unified Linux Driver package provides an •Connection: allows you to view or select another port. If appropriate port sharing mechanism that is used by Samsung you change the printer port from USB to parallel or vice printer and scanner drivers. The drivers address their devices versa while in use, you must re-configure the printer port via so-called MFP ports. -
Page 209: Printing A Document
To abort the current job, click Cancel. Printing Files You can print many different types of files on the Samsung machine device using the standard CUPS way - directly from the command line interface. The CUPS lpr utility allows you do that. -
Page 210: Scanning A Document
The document is scanned and the image preview appears in the Preview Pane. Scanning a Document You can scan a document using the Unified Driver Configurator window. Double-click the Unified Driver Configurator on your desktop. Click the button to switch to Scanners Configuration. Drag the pointer to Select the scanner on the list. -
Page 211: Using The Image Manager
Using the Image Manager If you want to edit the scanned image, use the toolbar. For further details about editing an image, see page 35. The Image Manager application provides you with menu When you are finished, click Save on the toolbar. commands and tools to edit your scanned image. - Page 212 Tools Function Allows you to adjust the brightness or contrast of the image, or to invert the image. Shows the properties of the image. For further details about the Image Manager application, refer to the onscreen help. Using Your Printer in Linux...
-
Page 213: Using Your Printer With A Macintosh
Enter the password and click OK. which supports the PostScript driver), for printing on a The Samsung Installer window opens. Click Continue. Macintosh computer. Select Uninstall and click Uninstall. Also, it provides you with the Twain driver for scanning on a The message which warns all application will close on your Macintosh computer. -
Page 214: Using Setip Program
Enter the queue name in the Queue Name field. If you includes your machine’s MAC address. cannot determine the queue name for your printer server, Open the Library folder → Printers → Samsung → Your try using the default queue first. printer model name → SetIP. -
Page 215: For A Usb-Connected
Samsung in Printer Model and your printer name in Model Name. •For MAC OS 10.4, if Auto Select does not work properly, select Samsung in Print Using and your printer name in Model. •For MAC OS 10.5, if Auto Select does not work properly, select Select a driver to use... -
Page 216: Printing
Changing Printer Settings Printing You can use advanced printing features when using your printer. From your Macintosh application, select Print from the File menu. The printer name which appears in the printer properties OTES window may differ depending on the printer in use. Except for •... -
Page 217: Printing Multiple Pages On One Sheet Of Paper
Printing Multiple Pages on One Sheet Graphics The Graphics tab provides options for selecting Quality and of Paper Color Mode. Select Graphics form the Presets' drop-down You can print more than one page on a single sheet of paper. list to access the graphic features. This feature provides a cost-effective way to print draft pages. -
Page 218: Scanning
For MAC OS X 10.5: Make sure that Connected checkbox is checked beside Scanning your machine in Bonjour Devices. If you want to scan using TWAIN, refer to the MAC OS X You can scan docoments using Image Capture program. 10.4 procedure above. - Page 219 OFTWARE SECTION NDEX print 33 poster, print 18 advanced printing, use 17 Layout properties, set print Windows 14 document 12 Linux fit to page 19 driver, install 28 from Macintosh 40 printer properties 32 booklet printing 18 from Windows 12 printing 33 N-up scanning 34...
- Page 220 Linux 34 SmarThru 23 TWAIN 25 WIA driver 25 scanning from Macintosh 42 setting darkness 15 favorites 16 image mode 15 resolution Windows 15 toner save 15 true-type option 15 software install Macintosh 37 Windows 4 reinstall Windows 10 system requirements Macintosh 37 uninstall Macintosh 37...