Honda HS520A Owner's Manual
Honda snow thrower owner's manual
Hide thumbs
Also See for HS520A:
- Owner's manual (60 pages) ,
- Owner's manual (24 pages) ,
- Owner's manual (60 pages)

Related Manuals for Honda HS520A


Summary of Contents for Honda HS520A
- Page 1 ® Owner's Manual Snowthrower HS520A • HS520AS See page 39 for instructions on setting up your Snowthrower. © 1999–2005 American Honda Motor Co., Inc.—All Rights Reserved...
- Page 2 WARNING: The engine exhaust from this product contains chemicals known to the State of California to cause cancer, birth defects, or other reproductive harm. Keep this owner's manual handy, so you can refer to it any time. This owner's manual is considered a permanent part of the snowthrower and should remain with the snowthrower if resold.
- Page 3 INTRODUCTION Congratulations on your selection of a Honda snowthrower. We are certain you will be pleased with your purchase of one of the finest snowthrowers on the market. We want to help you get the best results from your new snowthrower and to operate it safely.
- Page 4 INTRODUCTION A FEW WORDS ABOUT SAFETY Your safety and the safety of others is very important, and using this snowthrower safely is an important responsibility. To help you make informed decisions about safety, we have provided operating procedures and other information on labels and in this manual.
-
Page 5: Table Of Contents
SNOWTHROWER SAFETY ..........4 IMPORTANT SAFETY INFORMATION. -
Page 6: Snowthrower Safety
SNOWTHROWER SAFETY IMPORTANT SAFETY INFORMATION Honda snowthrowers are designed to clear snow from driveways and walkways. Other uses can result in injury to the operator or damage to the snowthrower and other property. Most accidents with snowthrowers can be prevented if you follow all instructions in this manual and on the snowthrower. -
Page 7: Operation On Slopes
SNOWTHROWER SAFETY Keep Shields in Place Guards and shields are designed to protect you from being hit by thrown objects and to keep you from touching hot engine parts and moving components. For your safety and the safety of others, keep all shields in place when the engine is running. - Page 8 SNOWTHROWER SAFETY Operating Near Roads Always watch for vehicle traffic when operating the snowthrower near roads and driveways. Never operate the snowthrower on public roads. Operator Responsibility Know how to stop the snowthrower quickly in case of emergency. Understand the use of all snowthrower controls. Never permit anyone to operate the snowthrower without proper instruction.
-
Page 9: Safety Label Locations
SAFETY LABEL LOCATIONS These labels warn you of potential hazards that can cause serious injury. Read them carefully. If a label comes off or becomes hard to read, contact your Honda snowthrower dealer for a replacement. CAUTION HOT MUFFLER CAN BURN YOU. Stay away if engine has been running. -
Page 10: Controls & Features
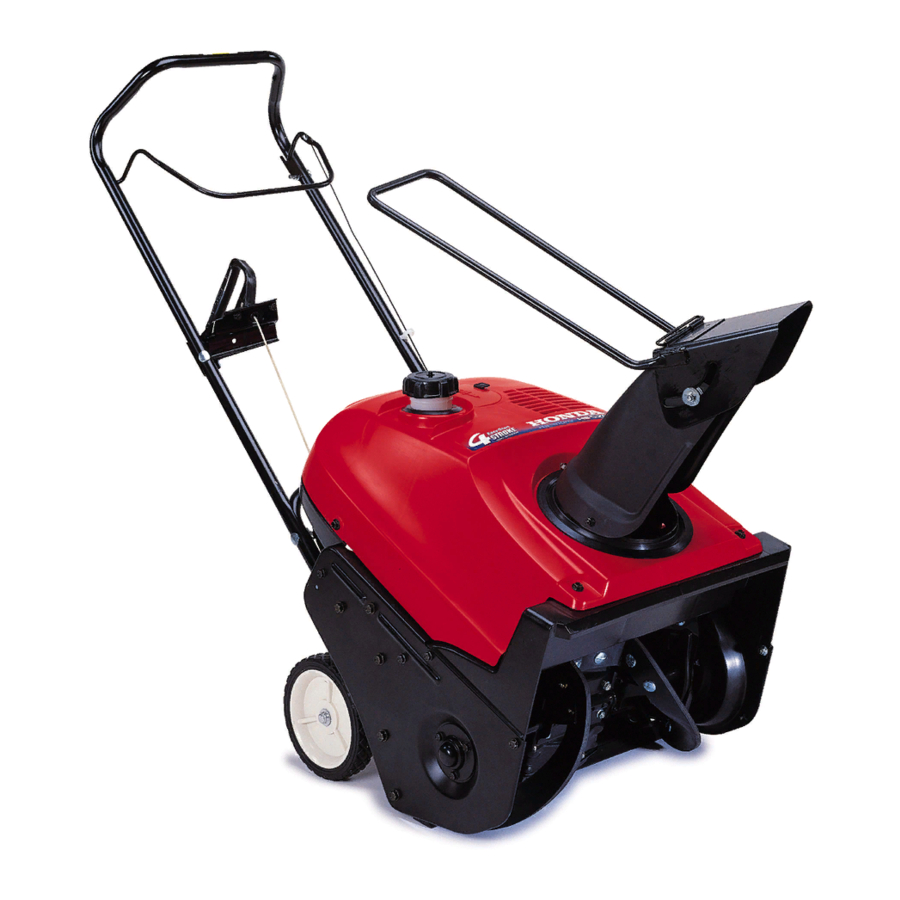
CONTROLS & FEATURES COMPONENT & CONTROL LOCATIONS Use the two illustrations on this page to locate and identify the most frequently used controls. AUGER CLUTCH HANDLEBAR LEVER STARTER GRIP OIL FILLER CAP ENGINE OIL DRAIN PLUG HS520AS STARTER BUTTON (P. 15) CHUTE GUIDE HANDLE SPARK PLUG... -
Page 11: Controls
OFF position to reduce the possibility of fuel leakage. Engine Switch The engine switch controls the ignition system. The HS520A has an OFF-ON-OFF switch, while the HS520AS has a key that controls an OFF-ON switch. OFF — Stops the engine. -
Page 12: Choke Knob
CONTROLS & FEATURES Choke Knob The choke knob is used to open or close the choke. CLOSED is used when the engine is cold. The OPEN position provides the correct fuel mixture for operation after the engine has warmed up, and for starting a warm engine. -
Page 13: Before Operation
ARE YOU READY TO GET STARTED? Your safety is your responsibility. A little time spent in preparation will significantly reduce your risk of injury. Knowledge Read and understand this manual. Know what the controls do and how to operate them. Familiarize yourself with the snowthrower and its operation before you begin using it. -
Page 14: Check Your Work Area
BEFORE OPERATION Check the General Condition of the Snowthrower • Look around and underneath the snowthrower for signs of oil or gasoline leaks. • Check the auger housing and the discharge chute for accumulation of packed snow or ice. Clean the auger housing and discharge chute before starting the snowthrower. -
Page 15: Operation
SNOWTHROWING PRECAUTIONS Before operating the snowthrower for the first time, please review both the SNOWTHROWER SAFETY chapter (page 4) and the BEFORE OPERATION chapter (page 11). Even if you have operated other snowthrowers, take time to become familiar with how this snowthrower works, and practice in a safe area until you build up your skills. - Page 16 OPERATION 2. If the engine is cold, pull the choke knob out to the CLOSED position. 3. Start the engine. Electric Start (AS model only): a. Connect an extension cord (commercially available) to the starter box first, then to a 120 volt ac outlet. 120 VAC OUTLET EXTENSION CORD (COMMERCIALLY...
- Page 17 10 minutes before operating it again. Manual (Pull) Starting a. Turn the engine switch to the ON position. HS520A b. Pull the starter grip slowly until you feel resistance, then pull briskly. c. Return the starter grip gently.
-
Page 18: Stopping The Engine
Under normal conditions, use the following procedure. 1. Release the auger clutch lever. The auger will stop operation. 2. Turn the engine switch to the OFF position. HS520A 3. Turn the fuel valve to the OFF position. RELEASE HS520AS... -
Page 19: Clearing Snow
CLEARING SNOW 1. Press down on the handlebar to raise the front of the snowthrower slightly. Roll the snowthrower over to the snow area. 2. Use the chute guide handle (page 10) to adjust the direction for the discharged snow to travel. 3. -
Page 20: Snow-Clearing Tips
OPERATION SNOW-CLEARING TIPS For best efficiency, clear snow before it melts, refreezes and hardens. Operating tips for clearing hard or deep snow: • Clear snow with a back and forth motion. Release the auger clutch lever, then press down on the handlebar to raise the auger housing when pulling the snowblower backwards. -
Page 21: Servicing Your Snowthrower
SERVICING YOUR SNOWTHROWER THE IMPORTANCE OF PROPER MAINTENANCE Proper maintenance is essential for safe, economical, and trouble-free operation. It will also help reduce air pollution. To help you properly care for your snowthrower, the following pages include a maintenance schedule, routine inspection procedures, and simple maintenance procedures using basic hand tools. -
Page 22: Maintenance Safety
SERVICING YOUR SNOWTHROWER MAINTENANCE SAFETY Some of the most important safety precautions follow. However, we cannot warn you of every conceivable hazard that can arise in performing maintenance. Only you can decide whether or not you should perform a given task. Failure to properly follow maintenance instructions and precautions can cause you to be seriously hurt or killed. -
Page 23: Maintenance Schedule
MAINTENANCE SCHEDULE REGULAR SERVICE PERIOD Before Perform at every ITEM indicated interval Check Engine oil Change Check-Adjust Spark plug Replace Auger clutch Check-Adjust lever freeplay Auger paddles Check Scraper blade Check-Adjust Fuel tank and Drain carburetor Moving parts Apply oil Engine speed Check-Adjust Fuel filter... -
Page 24: Refueling
SERVICING YOUR SNOWTHROWER REFUELING FUEL TANK CAPACITY: 0.3 US gallon (1.3 liters) Stop the engine, remove the cap, and check the fuel level. Refill the tank if the fuel level is low. Do not fill above the base of the filler neck. Gasoline is highly flammable and explosive. -
Page 25: Fuel Recommendations
SERVICING YOUR SNOWTHROWER FUEL RECOMMENDATIONS Use unleaded gasoline with a pump octane rating of 86 or higher. The engines is certified to operate on unleaded gasoline. Unleaded gasoline produces fewer engine and spark plug deposits and extends exhaust system life. Never use stale or contaminated gasoline or an oil/gasoline mixture. - Page 26 SERVICING YOUR SNOWTHROWER Engine Oil Change Drain the oil while the engine is still warm to assure rapid and complete draining. 1. Place the snowthrower on a level surface. 2. Place a suitable container below the drain bolt to catch the used oil, then remove the oil filler cap/dipstick and the drain plug.
-
Page 27: Spark Plug Service
SERVICING YOUR SNOWTHROWER Engine Oil Recommendations Oil is a major factor affecting performance and service life. Use a high quality 4-stroke automotive detergent oil. SAE 5W-30 is recommended for general use. Other viscosities shown in the chart may be used when the average temperature in your area is within the indicated range. - Page 28 SERVICING YOUR SNOWTHROWER 2. Inspect the spark plug. Replace it if the electrodes are worn or if the insulator is cracked, chipped, or fouled with deposits. Make sure that the spark plug washer is in good condition. NOTICE Use only the recommended spark plugs or equivalent. Spark plugs which have an improper heat range may cause engine damage.
-
Page 29: Auger
AUGER Clutch Lever Free Play Inspection 1. Move the clutch lever until you feel resistance from the cable. Measure the distance as shown. CLUTCH LEVER DISTANCE: 7-1/2 ~ 8 inches (190 ~ 205 mm) Adjustment 1. Pull the spring cover up to expose the tension spring. - Page 30 SERVICING YOUR SNOWTHROWER Belt Tension Inspection & Adjustment 1. Pull the spring cover up to expose the belt tension spring. Have a helper engage the auger clutch lever. Measure the length of the exposed coil as shown. 2. If the coil length is less than 78 mm, remove the z-bend fitting from the upper hole on the auger clutch lever, and install it into the lower hole.
-
Page 31: Scraper Blade
SERVICING YOUR SNOWTHROWER SCRAPER BLADE The scraper blade wears with normal use and must be replaced when it reaches its service limit. The scraper blade thickness and adjustment determine the clearance between the rubber paddles and the ground. Inspection 1. Turn the engine switch to the OFF position and disconnect the spark plug cap so the engine cannot be accidentally started. - Page 32 SERVICING YOUR SNOWTHROWER Scraper blade adjustment 1. Tilt the snowblower forward to provide access the underside of the scraper blade. 2. Loosen (don’t remove) the three flange nuts on the scraper blade. 3. Move the scraper blade down slightly. Tighten the self-locking nuts and recheck the clearance.
-
Page 33: Storage
STORAGE STORAGE PREPARATION Proper storage preparation is essential for keeping your snowthrower trouble-free and looking good. The following steps will help to keep rust and corrosion from impairing your snowthrower’s function and appearance, and will make the engine easier to start when you use the snowthrower again. - Page 34 STORAGE Adding a Fuel Stabilizer to Extend Fuel Storage Life When adding a fuel stabilizer, fill the fuel tank with fresh gasoline. If only partially filled, air in the tank will promote fuel deterioration during storage. If you keep a container of gasoline for refueling, be sure that it contains only fresh gasoline.
- Page 35 Engine Oil 1. Change the engine oil (page 24). 2. Remove the spark plug (page 25). 3. Pour a tablespoon (5 ~ 10 cc) of clean engine oil into the cylinder. 4. Pull the starter rope slowly several times to distribute the oil. 5.
-
Page 36: Storage Precautions
STORAGE STORAGE PRECAUTIONS If your snowthrower will be stored with gasoline in the fuel tank and carburetor, it is important to reduce the hazard of gasoline vapor ignition. Select a well-ventilated storage area away from any appliance that operates with a flame, such as a furnace, water heater, or clothes dryer. -
Page 37: Transporting
TRANSPORTING BEFORE LOADING If the engine has been running, allow it to cool for at least 15 minutes before loading the snowthrower on the transport vehicle. A hot engine and exhaust system can burn you and can ignite some materials. Turn the fuel valve to OFF. -
Page 38: Taking Care Of Unexpected Problems
TAKING CARE OF UNEXPECTED PROBLEMS Electric starter does not operate Possible cause No electric power from the outlet. Defective power cord. Starter operates, but the engine will not start Possible cause Fuel valve is OFF. Stale or old fuel. Spark plug cap is off. Improper gap or deposits in the spark plug gap. -
Page 39: Taking Care Of Unexpected Problems
TAKING CARE OF UNEXPECTED PROBLEMS Engine has low power Possible cause Fast ground speed puts excessive load on the engine. Wet, deep snow puts an excessive load on the engine. Discharge chute is restricted. Spark plug cap is not secure. Improper electrode gap or deposits on the gap. - Page 40 TAKING CARE OF UNEXPECTED PROBLEMS Snow not discharging properly Possible cause Discharge chute is restricted. Foreign object stopping the auger from rotating. Auger not engaging because the drive belt is worn, broken, or not on the pulleys. Swath is too wide for wet, deep snow conditions.
-
Page 41: Set-Up
Tools Required 12 mm wrench, 10 mm wrench, and a Phillips screwdriver Unpacking 1. Remove all the cardboard. Inspect the loose parts. Missing parts can be obtained from the Honda dealer who sold you the snowthrower. Qty. Description Curved head bolt 8 x 40 mm Flange nut, 8 mm Curved washer, 9 mm Phillips head shoulder screw 6 x 12 mm... - Page 42 For the HS520AS, snap the starter rope into the rope guide on the handlebar and install the two cable ties. Trim the cable ties to a length of 3/8 inch (10 mm). HS520A CURVED HEAD BOLT...
- Page 43 4. Install the discharge chute using the three 6 mm Phillips-head screws and 6 mm self-locking nuts. Make sure the screws go on the inside and the nuts on the outside. Tighten the nuts securely: HEX NUT TORQUE: 7 ft-lbs (10 N•m) 6 mm NUT (3) PHILLIPS-HEAD SCREW (3)
-
Page 44: Technical & Consumer Information
TECHNICAL & CONSUMER INFORMATION TECHNICAL INFORMATION Serial Number Locations Record the engine and frame serial numbers in the spaces below. You may need these serial numbers when ordering parts, and when making technical or warranty inquiries (page 55). ENGINE SERIAL NUMBER Use a flashlight to view through the hole for the exhaust pipe. -
Page 45: Carburetor Modification For High Altitude Operation
TECHNICAL & CONSUMER INFORMATION Carburetor Modification for High Altitude Operation At high altitude, the standard carburetor air-fuel mixture will be too rich. Performance will decrease, and fuel consumption will increase. A very rich mixture will also foul the spark plug and cause hard starting. Operation at an altitude that differs from that at which this engine was certified, for extended periods of time, may increase emissions. -
Page 46: Oxygenated Fuels
TECHNICAL & CONSUMER INFORMATION Oxygenated Fuels Some conventional gasolines are being blended with alcohol or an ether compound. These gasolines are collectively referred to as oxygenated fuels. To meet clean air standards, some areas of the United States and Canada use oxygenated fuels to help reduce emissions. -
Page 47: Emission Control System
TECHNICAL & CONSUMER INFORMATION EMISSION CONTROL SYSTEM Source of Emissions The combustion process produces carbon monoxide, oxides of nitrogen, and hydrocarbons. Control of hydrocarbons and oxides of nitrogen is very important because, under certain conditions, they react to form photochemical smog when subjected to sunlight. Carbon monoxide does not react in the same way, but it is toxic. -
Page 48: Replacement Parts
TECHNICAL & CONSUMER INFORMATION Replacement Parts The emission control systems on your new Honda engine were designed, built, and certified to conform with EPA, California and Canadian emission regulations. We recommend the use of genuine Honda parts whenever you have maintenance done. These original- design replacement parts are manufactured to the same standards as the original parts, so you can be confident of their performance. - Page 49 TECHNICAL & CONSUMER INFORMATION Air Index An Air Index Information hang tag/label is applied to engines certified to an emission durability time period in accordance with the requirements of the California Air Resources Board. The bar graph is intended to provide you, our customer, the ability to compare the emissions performance of available engines.
-
Page 50: Specifications
SZBG 49.5 inches (1258 mm) 20.7 inches (527 mm) 40.4 inches (1026 mm) HS520A: 82 lbs (37 kg) HS520AS: 88 lbs (40 kg) 12 x 20 inches (306 x 500 mm) front: 26 feet (8 m) left/right: 16 feet (5 m) 1.6 hours... -
Page 51: Consumer Information
TECHNICAL & CONSUMER INFORMATION CONSUMER INFORMATION Dealer Locator Information To find an Authorized Honda Servicing Dealer anywhere in the United States: Call (800) 426-7701 or visit our website: www.hondapowerequipment.com and click Dealer Locator. Customer Service See page 55. Honda Publications These publications will give you additional information for maintaining and repairing your snowthrower. - Page 52 TECHNICAL & CONSUMER INFORMATION Distributor's Limited Warranty LENGTH OF WARRANTY PRODUCTS COVERED BY THIS (from date of original retail purchase) WARRANTY Noncommercial/Nonrental Commercial/Rental Snowthrower 24 months 3 months To Qualify for this Warranty: The product must be purchased in the United States, Puerto Rico, or the U.S. Virgin Islands from American Honda or a dealer authorized by American Honda to sell those products.
- Page 53 Apparel will be repaired or replaced under warranty without any charge. To Obtain Warranty Service: You must take the Honda Power Equipment accessory, replacement part, apparel or the power equipment on which the accessory or replacement part is installed, and proof of purchase, at your expense, to any Honda Power Equipment dealer in the United States, Puerto Rico, or the U.S.
-
Page 54: Emission Control System Warranty
You are responsible for presenting your power equipment engine to a Honda Power Equipment dealer as soon as a problem exists. The warranty repairs should be completed in a reasonable... - Page 55 To Obtain Warranty Service: You must take your Honda Power Equipment engine or the product on which it is installed, along with your sales registration card or other proof of original purchase date, at your expense, to any Honda Power Equipment dealer who is authorized by Honda to sell and service that Honda product during his normal business hours.
- Page 56 TECHNICAL & CONSUMER INFORMATION Exclusions: FAILURES OTHER THAN THOSE RESULTING FROM DEFECTS IN MATERIAL OR WORKMANSHIP ARE NOT COVERED BY THIS WARRANTY. THIS WARRANTY DOES NOT EXTEND TO EMISSION CONTROL SYSTEMS OR PARTS WHICH ARE AFFECTED OR DAMAGED BY OWNER ABUSE, NEGLECT, IMPROPER MAINTENANCE, MISUSE, MISFUELING, IMPROPER STORAGE, ACCIDENT AND/OR COLLISION, THE INCORPORATION OF, OR ANY USE OF, ANY ADD-ON OR MODIFIED PARTS, UNSUITABLE ATTACHMENTS, OR THE UNAUTHORIZED ALTERATION OF ANY PART.
- Page 57 TECHNICAL & CONSUMER INFORMATION Customer Service Information Honda Power Equipment dealership personnel are trained professionals. They should be able to answer any question you may have. If you encounter a problem that your dealer does not solve to your satisfaction, please discuss it with the dealership's management.
-
Page 58: Index
INDEX Air index ....47 Altitude, modifications for . . 43 Assembly ....39 auger paddle service limit . - Page 59 Transporting ... . 35 Troubleshooting ..37 Unloading ....35 Warranty Accessories and parts .
- Page 60 INDEX...
-
Page 61: Quick Reference Information
QUICK REFERENCE INFORMATION Type Fuel Capacity Type Engine oil Capacity Type Spark plug Electrode gap Before each use/ Maintenance subsequent Unleaded gasoline with a pump octane rating of 86 or higher (page 23) 0.3 US gal (1.3 l) Above 15°F (-9°C): SAE 5W-30 Below 15°F (-9°C): SAE 0W-30 API SJ or later (page 25) 0.63 US qt (20.3 fl oz, 0.6 l) - Page 62 HS520A HS520K1AS POM53091-C IPC 5500.2005.07 31V10610 Printed on PRINTED IN U.S.A. 00X31-V10-6100 Recycled Paper...