Table of Contents
Advertisement
TABLE OF CONTENTS
. . . . . . . . . . . . . . . . . . . . . . . . . . . . . . . . . . . . . . . . . . . . . . . . . . . . . . . . . . . . . . . . . . . 2
. . . . . . . . . . . . . . . . . . . . . . . . . . . . . . . . . . . . . . . . . . . . . . . . . . . . . . . . . . . . 3
. . . . . . . . . . . . . . . . . . . . . . . . . . . . . . . . . . . . . . . . . . . . . . . . . . . . . . . . . . . . . . 3
. . . . . . . . . . . . . . . . . . . . . . . . . . . . . . . . . . . . . . . . . . . . . . . . . . . . 4
Key Functions . . . . . . . . . . . . . . . . . . . . . . . . . . . . . . . . . . . . . . . . . . . . . . . . . . . . . . . . . . . . . . . 4
Key Table. . . . . . . . . . . . . . . . . . . . . . . . . . . . . . . . . . . . . . . . . . . . . . . . . . . . . . . . . . . . . . . . . . . 6
. . . . . . . . . . . . . . . . . . . . . . . . . . . . . . . . . . . . . . . . . . . . . . . . . . . . . . . . . 9
. . . . . . . . . . . . . . . . . . . . . . . . . . . . . . . . . . . . . . . . . . . . . . . . . 10
. . . . . . . . . . . . . . . . . . . . . . . . . . . . . . . . . . . . . . . . . . . . . . . . . . . . . . . 10
. . . . . . . . . . . . . . . . . . . . . . . . . . . . . . . . . . . . . . . . . . . . . . . . . . . . . . . . . . . . . . 11
Programming A Learning Key. . . . . . . . . . . . . . . . . . . . . . . . . . . . . . . . . . . . . . . . . . . . . . . . . . . 11
Deleting A Function From A Learning Key . . . . . . . . . . . . . . . . . . . . . . . . . . . . . . . . . . . . . . . . . . 12
. . . . . . . . . . . . . . . . . . . . . . . . . . . . . . . . . . . . . . . . . . . . . . . . . . . . . . . . 12
Programming Volume Lock . . . . . . . . . . . . . . . . . . . . . . . . . . . . . . . . . . . . . . . . . . . . . . . . . . . . 12
Programming Volume Unlock. . . . . . . . . . . . . . . . . . . . . . . . . . . . . . . . . . . . . . . . . . . . . . . . . . . 13
. . . . . . . . . . . . . . . . . . . . . . . . . . . . . . . . . . . . . . . . . . . . . . . . . . . . . . . . . . . . . . . . 13
Programming A Favorite Channel . . . . . . . . . . . . . . . . . . . . . . . . . . . . . . . . . . . . . . . . . . . . . . . 13
Programming A Master Power Key With Instant Channel Selection . . . . . . . . . . . . . . . . . . . . . . . 14
Clearing A Macro. . . . . . . . . . . . . . . . . . . . . . . . . . . . . . . . . . . . . . . . . . . . . . . . . . . . . . . . . . . . 14
. . . . . . . . . . . . . . . . . . . . . . . . . . . . . . . . . . . . . . . . . . . . . . . . . . . . . . . . . . . . . . 15
Programming Keymover. . . . . . . . . . . . . . . . . . . . . . . . . . . . . . . . . . . . . . . . . . . . . . . . . . . . . . . 15
Restoring A Single Keymoved Key. . . . . . . . . . . . . . . . . . . . . . . . . . . . . . . . . . . . . . . . . . . . . . . . 15
Restoring All Keymoved Keys In A Single Mode. . . . . . . . . . . . . . . . . . . . . . . . . . . . . . . . . . . . . . 15
. . . . . . . . . . . . . . . . . . . . . . . . . . . . . . . . . . . . . . . . . . . . 16
. . . . . . . . . . . . . . . . . . . . . . . . . . . . . . . . . . . . . . . . . . . . . . . . . . . . . . . . . . 16
. . . . . . . . . . . . . . . . . . . . . . . . . . . . . . . . . . . . . . . . . . . . . . . . . . . . . . . . . . . . . 17
Control Organization . . . . . . . . . . . . . . . . . . . . . . . . . . . . . . . . . . . . . . . . . . . . . . . . . . . . . . . . . 17
Programming My System . . . . . . . . . . . . . . . . . . . . . . . . . . . . . . . . . . . . . . . . . . . . . . . . . . . . . 17
Operating My System . . . . . . . . . . . . . . . . . . . . . . . . . . . . . . . . . . . . . . . . . . . . . . . . . . . . . . . . 18
. . . . . . . . . . . . . . . . . . . . . . . . . . . . . . . . . . . . . . . . . . . . . . . . . . . . . . . 19
. . . . . . . . . . . . . . . . . . . . . . . . . . . . . . . . . . . . . . . . . . . . . . 20
. . . . . . . . . . . . . . . . . . . . . . . . . . . . . . . . . . . . . . . . . . . . . . 20
Setting Up The IR/RF Command Center . . . . . . . . . . . . . . . . . . . . . . . . . . . . . . . . . . . . . . . . . . . 20
Adding The IR Signal Extension Cord . . . . . . . . . . . . . . . . . . . . . . . . . . . . . . . . . . . . . . . . . . . . . 21
Optimizing IR/RF Command Center Reception . . . . . . . . . . . . . . . . . . . . . . . . . . . . . . . . . . . . . . 21
. . . . . . . . . . . . . . . . . . . . . . . . . . . . . . . . . . . . . . . . . . . . . . . . . . . . . . . . . . . . . . . . 21
. . . . . . . . . . . . . . . . . . . . . . . . . . . . . . . . . . . . . . . . . . . . . . . . . . . . . . . . . . . . . . 22
. . . . . . . . . . . . . . . . . . . . . . . . . . . . . . . . . . . . . . . . . . . . . . . . . . . . . . . . . . . . . . . 22
. . . . . . . . . . . . . . . . . . . . . . . . . . . . . . . . . . . . . . . . . . . . . . . . . . . . . . . . . . . . . . . . . . . . . . . . 23
. . . . . . . . . . . . . . . . . . . . . . . . . . . . . . . . . . . . . . . . . . . . . . . . . . . . . . . . 23
. . . . . . . . . . . . . . . . . . . . . . . . . . . . . . . . . . . . . . . . . . . . . . . . . . . . . . . . . . . . . 23
Guía Del Usuario
. . . . . . . . . . . . . . . . . . . . . . . . . . . . . . . . . . . . . . . . . . . . . . . . . . . . . . . . . . . . . 24
Manufacturer's Codes (Códigos De Fabricantes)
Setup Codes For Audio Amplifiers (Códigos De Configuración Para Amplificadores De Audio) . . 48
Setup Codes For Audio Cassette Decks (Códigos De Configuración Para Reproductores De
Audiocasetes) . . . . . . . . . . . . . . . . . . . . . . . . . . . . . . . . . . . . . . . . . . . . . . . . . . . . . . . . . . . . . . 48
Setup Codes For Audio Receivers (Códigos De Configuración Para Receptores De Audio) . . . . . . 48
Setup Codes For Audio Services (Códigos De Configuración Para Servicios De Audio). . . . . . . . . 48
Setup Codes For Audio Turntables (Códigos De Configuración Para Tornamesas De Audio) . . . . 48
Setup Codes For Cable Converters (Códigos De Configuración Para Convertidores De Cable) . . . 48
Setup Codes For CD Players (Códigos De Configuración Para Reproductores De CDs) . . . . . . . . 49
Setup Codes For DAT Decks (Códigos De Configuración Para Reproductores DAT) . . . . . . . . . . . 49
Setup Codes For DVD Players (Códigos De Configuración Para Reproductores DVD) . . . . . . . . . . 49
Setup Codes For Home Automation (Códigos De Configuración Para La Automatización
Del Hogar) . . . . . . . . . . . . . . . . . . . . . . . . . . . . . . . . . . . . . . . . . . . . . . . . . . . . . . . . . . . . . . . . . 50
Setup Codes For Home-Theater-In-A-Box Devices (Códigos De Configuración Para
Dispositivos Home-Theater-In-A-Box). . . . . . . . . . . . . . . . . . . . . . . . . . . . . . . . . . . . . . . . . . . . . 50
Setup Codes For LD Players (Códigos De Configuración Para Reproductores LD) . . . . . . . . . . . . 50
Setup Codes For Satellite Receivers (Códigos De Configuración Para Receptores De Satélite) . . 50
Setup Codes For TVs (Códigos De Configuración Para Televisores) . . . . . . . . . . . . . . . . . . . . . . . 50
Setup Codes For TV/VCR Combos (Códigos De Configuración Para Aparatos Combinados
Televisor/Videograbadora) . . . . . . . . . . . . . . . . . . . . . . . . . . . . . . . . . . . . . . . . . . . . . . . . . . . . . 51
Setup Codes For VCRs (Códigos De Configuración Para Videograbadoras) . . . . . . . . . . . . . . . . . 52
Setup Codes For Video Accessories (Códigos De Configuración Para Accesorios De Vídeo) . . . . . 53
2
Table Of Contents/Introduction
8-
-O
R
IN
NE
EMOTE
. . . . . . . . . . . . . . . . . . . . . . . . . . . . . . . . . . . 48
INTRODUCTION
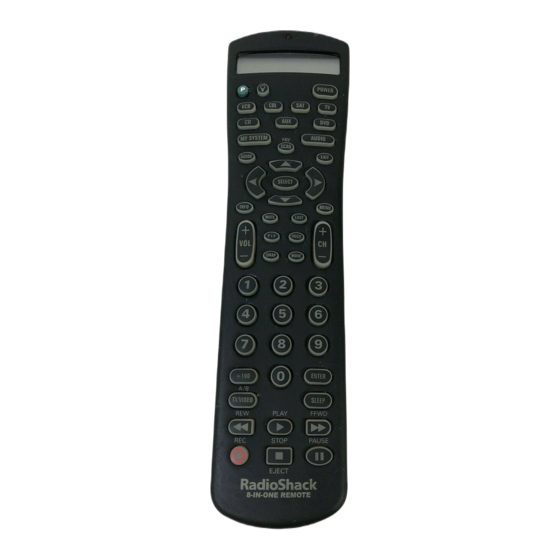
The RadioShack 8-in-One Remote is our latest high-performance universal
remote control. It is designed to operate up to eight home entertainment
devices, including TV, video, and audio components. Moreover, this remote
control contains sophisticated technology that will allow you to consolidate
the clutter of all of the original remote controls into one easy-to-use prod-
uct. It's packed with advanced features such as:
•
Liquid Crystal Display (LCD) - with 15 alphanumeric characters,
real-time clock, and icons for constant visual feedback of operations
and programming sequences
•
My System - a unique mode that combines different device controls
under one mode for operating convenience
•
Macros - for instant activation of favorite key sequences
•
Learning - to capture unique functions from your devices' original
remote controls
•
Key Mover - for copying keys from one device to another, or to a dif-
ferent position in the same mode
•
Code Search and Verification - help you quickly set up the remote
control to operate your devices
•
Channel Scan and Favorite Channel Scan - let you "channel surf " all
available and favorite channels
•
Volume Lock - to assign volume controls to individual devices or to
one global device
•
Dedicated Menu/Guide Keys - for instant access to cable and satellite
program guides and menus
•
IR/RF Command Center - to extend the remote's signal range
•
Searchable Code Library - contains world's largest and most efficient
group of infrared remote control codes for virtually every current
brand and make.
•
Low Battery Icon - to notify you when batteries are getting low
•
Backlighting - to aid operation in low ambient light
After installing four (4) new AAA alkaline batteries (not included, see
next page), you can immediately use the remote to control an RCA TV,
VCR, and satellite receiver, a Motorola (General Instruments) cable con-
verter, and Pioneer CD and DVD players, and audio devices.
To control other brands, please perform the instructions in Programming
A Device on page 9 and Programming A TV/VCR Combo on page 10.
Advertisement
Table of Contents

Related Manuals for Radio Shack 8-IN-ONE REMOTE


Summary of Contents for Radio Shack 8-IN-ONE REMOTE
-
Page 1: Table Of Contents
..............2 The RadioShack 8-in-One Remote is our latest high-performance universal Installing Batteries . -
Page 2: Installing Batteries
’ UIDE INSTALLING BATTERIES SETTING THE CLOCK On the remote, press and hold P until the display changes Your remote requires four AAA batteries (not supplied) for power. For the from the default device and time to [CODE SET]. best performance and longest life, we recommend using RadioShack alkaline batteries. -
Page 3: A Quick Look At The Controls
EMOTE A QUICK LOOK AT THE CONTROLS UNCTIONS The red LED (Light Emitting Diode) Use the illustration below to locate controls and then study the Key blinks to show that the remote control is Functions (on the right and the next two pages) to learn how they function. sending signals. - Page 4 ’ UIDE Press EXIT once to exit the selected Use PIP to switch the Picture-In-Picture device’s program, guide, or menu. feature on or off (if available on your TV). During programming, press EXIT once to Press FREEZE once to capture a frame of exit the program mode.
-
Page 5: Key Table
EMOTE A QUICK LOOK AT THE CONTROLS (Continued) ABLE KEY FUNCTIONS FOR SELECTED DEVICE DVD/LD VCR/ UDIO UDIO UDIO UDIO ABLE ATELLITE ./ C ./DVD T ASSETTE URNTABLE ONVERTER LAYER LAYER UTOMATION ECEIVER OMBO /HTIB DAT D UNER OMBO IDEO Power Power Power... - Page 6 ’ UIDE ABLE ONTINUED KEY FUNCTIONS FOR SELECTED DEVICE DVD/LD VCR/ UDIO UDIO UDIO UDIO ABLE ATELLITE ./ C ./DVD T ASSETTE URNTABLE ONVERTER LAYER LAYER UTOMATION ECEIVER OMBO /HTIB DAT D UNER OMBO IDEO Band – Repeat – Last Random –...
-
Page 7: A Quick Look At The Controls
EMOTE A QUICK LOOK AT THE CONTROLS ABLE ONTINUED KEY FUNCTIONS FOR SELECTED DEVICE DVD/LD VCR/ UDIO UDIO UDIO UDIO ABLE ATELLITE ./ C ./DVD T ASSETTE URNTABLE ONVERTER LAYER LAYER UTOMATION ECEIVER OMBO /HTIB DAT D UNER OMBO IDEO Rewind Rewind Skip Rev. -
Page 8: Programming A Device
’ UIDE PROGRAMMING A DEVICE The remote is preprogrammed at the factory to operate an RCA TV,VCR, and satellite receiver, a Motorola (General Instruments) cable converter, Press EXIT to exit the programming mode.An [EXIT SETUP] and Pioneer CD and DVD players, and audio devices. To control devices message appears as the remote returns to normal operation. -
Page 9: Programming A Tv/Vcr Combo
EMOTE PROGRAMMING A TV/VCR COMBO If you cannot find a code that works, try Searching For Your Code in the next section. Find the codes for the devices you want to program in Setup For future reference, write down the working TV/VCR Codes for TV/VCR Combos on page 51 and write them down combo code in the below boxes: or highlight them. -
Page 10: Using Learning
’ UIDE ROGRAMMING EARNING On the remote, press and hold P until the display changes NOTE: In the manual search mode, the remote will send IR codes from the default device and time to [CODE SET]. from its library to the selected device, starting with the most popular code first. -
Page 11: Deletinga Function Froma Learning Key
EMOTE USING LEARNING Press SELECT once to begin programming. The last-selected device (e.g., TV) appears. ROGRAMMING EARNING ONTINUED On the original remote control, press and hold the key (i.e., feature) to be learned until [SUCCESS] appears on the Press a device key once (e.g.,TV) for the mode that contains the remote. -
Page 12: Programming Volume Unlock
’ UIDE b. Press a mode key once (e.g., TV) to unlock it. [UNLOCKED] Press four times until [VOL LOCK] appears. and then [SEL MODE] appear. (x 4) NOTE: If you go past [VOL LOCK], press one or more times to return to it. -
Page 13: Programminga Master Power Key With Instant Channel Selection
EMOTE USING MACROS Enter a macro sequence of up to 15 keys. For our example, press the following keys once in this order: CBL - POWER - TV - POWER - 0 - 3 - CBL- 1 - 1 ROGRAMMING AVORITE HANNEL ONTINUED... -
Page 14: Using Keymover
’ UIDE USING KEYMOVER Select a destination key (e.g., VOL+) and press it once. [SUCCESS] appears, followed by [EXIT SETUP]. The remote The remote includes a Keymover feature that allows you to map will automatically exit the programming mode and return to (or copy) keys from one mode (i.e., source mode) to another mode (i.e., normal operation. -
Page 15: Programming Favorite Channel Scan
EMOTE PROGRAMMING FAVORITE CHANNEL SCAN If desired, repeat step 5 for each favorite channel to be stored, up to a total of 10 channels. In the TV, VCR, DVD, SAT, or CBL mode, the remote can store a list of up to NOTE: Once the tenth channel is entered, the remote will 10 favorite channels, in any order, that will be immediately scanned when automatically exit the programming mode. -
Page 16: Using My System
’ UIDE USING MY SYSTEM ROGRAMMING YSTEM For example, let’s assume you have a TV, a cable converter, and a VCR in The remote includes a custom My System mode for your devices.After the your home theater system.You can program the My System mode so that MY SYSTEM key is programmed, it will allow you to access five groups of selected controls are assigned to these devices as follows: remote control keys without having to change device modes. -
Page 17: Operating My System
EMOTE USING MY SYSTEM b. Press SELECT once to accept the assignment in step 6a. The next Control Group assignment, [PIP]) appears. ROGRAMMING YSTEM ONTINUED Press SELECT once to enter Audio Control Group assignment. The last-selected device (e.g., [VCR]) appears. Press SELECT once to enter the PIP Control Group assign- ment. -
Page 18: Reassigning Device Keys
’ UIDE REASSIGNING DEVICE KEYS Press EXIT to exit the programming mode.An [EXIT SETUP] message appears as the remote returns to normal operation. The remote can be set up to control a second TV, VCR, DVD player, or other device not listed on the device keys. For example, to control a TV, a cable converter, and two VCRs,you can reassign the unused AUX key to operate the second VCR as follows: To verify the code works, aim the remote at the desired... -
Page 19: Restoring Factory Default Settings
EMOTE RESTORING FACTORY DEFAULT SETTINGS USING THE IR/RF COMMAND CENTER The remote includes an Operation Reset program that you can use to The remote package includes an IR/RF Command Center which receives restore the unit to factory default settings. radio-frequency (RF) signals from the remote control, anywhere in your home, up to 100 feet away. -
Page 20: Adding The Ir Signal Extension Cord
’ UIDE IR S IR/RF C DDING IGNAL XTENSION PTIMIZING OMMAND ENTER ECEPTION Also included with the remote package is an IR Signal Extension Cord for To optimize the operation of your IR/RF Command Center, try use with a home entertainment device that is not in direct line-of-sight of the following: the IR/RF Command Center. -
Page 21: Troubleshooting
EMOTE TROUBLESHOOTING PROBLEM: The remote turns on audio devices and controls volume, but does not change preset channels. PROBLEM: LCD (Liquid Crystal Display) begins to fade, does not appear, SOLUTION: Some products may need both a Tuner (or Receiver) code or the LOW BATTERY ( )icon appears. -
Page 22: Care
’ UIDE CARE LIMITED 90-DAY WARRANTY This product is warranted by RadioShack against manufacturing defects in material and • Keep the remote dry. If the remote gets wet, wipe it dry immediately. workmanship under normal use for ninety (90) days from the date of purchase from •...