Honda HS55 Owner's Manual
Honda snow blower owner's manual
Hide thumbs
Also See for HS55:
- Owner's manual (37 pages) ,
- Owner's manual (41 pages) ,
- Owner's manual (37 pages)
Table of Contents
Advertisement
Advertisement
Table of Contents

Related Manuals for Honda HS55


Summary of Contents for Honda HS55
- Page 2 Read and understand failure to do so could HS55 your this...
-
Page 3: Table Of Contents
CONTENTS 1. POWER EQUIPMENT SAFETY ... 2. WARNING LABEL LOCATION 3. COMPONENT IDENTIFICATION ENGINE SWITCH AND AC STARTER BUTTON FUEL VALVE ... CHOKE LEVER ... STARTER GRIP ... THROTTLE LEVER (ENGINE SPEED) ... SHIFT.LEVER AUGER CLUTCH LEVER AND DRIVE CLUTCH LEVER ... CHUTE CRANK CHUTE GUIDE ... -
Page 4: Power Equipment Safety
To ensure safe operation- Before operating the snowblower, ing to clear snow. Remove might strike or throw, snowblower. Inspect the snowblower rect malfunction operating the snowblower, damage. Damaged ing operation. Do not use the snowblower poor visibility, there is a greater injury. - Page 5 Know how to stop the snowblower tion of all controls. Never permit anyone to operate the snowblower tion. If people or pets suddenly it is in operation, immediately stop the snowblower blades. If the snow discharge wooden stick to unclog it. Never put your hand into the snow discharge chute while the engine Gasoline is extremely...
-
Page 6: Warning Label Location
2. WARNING LABEL LOCATION &WARNING I STAND CLEAR DISCHARGE INE IS RUNNING. I DO BYSTANDERS OR WINDOW. I BEFORE LEAVING OPERATOR’S 1. DISENGAGE THROWER CLUTCH. 2. STOP ENGINE. I STOP ENGINE, WAIT FOR ALL MOVEMENT TO STOP AND REMOVE SPARK PLUG IG- NITION WIRE BEFORE SERVICING MACHINE. -
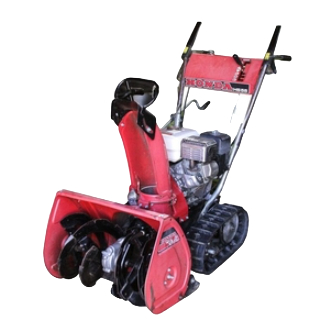
Page 7: Component Identification And Function
3. COMPONENT WHEEL TYPE ENGINE SWITCH THROTTLE LEVER CHOKE LEVER FUEL VALVE CHUTE CRANK STARTER GRIP IDENTlFlCATlON FUEL CAP AUGER CLUTCH ENGINE DRAIN PLUG AND FUNCTION DRIVE CLUTCH LEVER ‘SHIFT LEVER LEVER ENGINE OIL FILLER SKID PLATE... - Page 8 TRACK TYPE CHUTE AUGER ENGINE SWITCH THROTTLE LEVER CHOKE LEVER FUEL VALVE CHUTE CRANK STARTER i;RIP HEIGHT ADJUSFMENT DRIVE CLUTCH FUEL CAP AUGER.CLUTCH LEVER ENGINE DRAIN PEDAL LEVER SHIFT LEVER ENGINE FILLER CAP AC STARTER BUTTON (TAS Type1 ID PLATE PLUG...
-
Page 9: Engine Switch And Ac Starter Button
ENGINE SWITCH Use the engine switch STOP the engine. A.C. STARTER BUTTON Push the A.C. starter button to operate the electric starter. FUEL VALVE and closes the fuel line leading from the fuel tank to The fuel valve opens the carburetor. Make ON or OFF position. -
Page 10: Choke Lever
CHOKE LEVER/ROD Close the choke when the engine is cold or difficult to start. STARTER GRIP Pull this grip to start the engine. STARTER GRIP... -
Page 11: Throttle Lever (Engine Speed)
THROTTLE LEVER (ENGINE Use the throttle lever to select engine speed. In normal operation, FAST position. SHIFT LEVER Use the shift lever to select drive speed or direction. 1: LOW SPEED 2: MEDIUM SPEED 3: HIGH SPEED N: NEUTRAL R: REVERSE SPEED) use the... -
Page 12: Auger Clutch Lever And Drive Clutch Lever
AUGER CLUTCH LEVER AND DRIVE CLUTCH Use these controls to engage the snow blowing drive mechanism. AUGER CLUTCH LEVER Squeeze to engage the snow blowing mechanism. NOTE: When both levers are squeezed, auger clutch lever down. Releasing the drive clutch lever then unlocks and releases the auger clutch lever. -
Page 13: Chute Crank
CHUTE CRANK Use the chute crank to turn the snow discharge To throw snow To throw snow to the left CHUTE GUIDE ,The chute guide controls Low and near,,- the snow discharge High and far CHUTE chute right or left. angle. -
Page 14: Skid Plate
SKID PLATE Adjust the skid plates for the auger housing ground clearance best suited to your snow removal conditions. AUGER SNOW REMOVAL CONDITIONS For general use For use on uneven surfaces For use on flat surfaces NOTE: Track model only - The position of the height adjustment 14) also affects auger housing ground clearance. -
Page 15: Height Adjustment Pedal (Track Model Only)
HEIGHT ADJUSTMENT Use the pedal for adjusting to the tracks. 1. Hold the handles and step on the pedal. 2. Raise or lower the machine to the desired position and release the pedal. : Hard snow or fine finish MIDDLE: Normal HIGH : Deep snow or for transporting... -
Page 16: Pre-Operation Check
FUEL LEVEL Unscrew the fuel cap. Check the fuel level. Your enginf is designed number ) of tane number gf 91 or higher. Gasoline pumps at service station display the pump octane number. We recommend that you use unleaded engine and spark plug deposits components. - Page 17 Gasoline is extremely Refuel in a well-ventilated allow flames or sparks in the area where the engine is refueled or where gasoline is stored. Do not overfill the fuel tank (there should be no fuel in the filler neck). After refueling, make sure the tank cap is closed properly and securely.
-
Page 18: Engine Oil Level
ENGINE OIL LEVEL Inspection: With the snowblower the dipstick clean. Insert the dipstick into the filler neck, but do not screw it in. Remove the dipstick If the level is low, fill to the top of the oil filler neck with the recommended oil. -
Page 19: Starting The Engine
5. STARTING Never run the engine in an enclosed contains poisonous sciousness and may lead to death. 1. Turn the engine switch Connect the female end of your power cord to the switch male end to a properly grounded CAUTION ONLY WITH GROUNDED... - Page 20 2.Turn the fuel valve to the ON position. 3. In cold weather and when the engine is cold, move the choke to the CLOSE position. CHOKE LEVER...
- Page 21 4. Pull the starter grip lightly until you feel resistance, CAUTION: Don’t allow the rope to snap back; return it gently by hand. Otherwise, the starting mechanism Damage result running. Push the starter button 5. Let the engine warm up for several minutes. If the choke has been turned to the CLOSE position, engine warms up.
-
Page 22: Snowblower Opekatlon
Before operating stand the POWER EQUIPMENT 1. Move the throttle lever (p. IO) to the FAST position for normal operation. 2. Move the shift lever (p. IO) to select .the desired drive sljeed. DRIVE SPEED WITH THROTTLE LEVER IN THE FAST POSITION 1 Wheel type 0.43 m/s (0.9 mile/h) 0.74 m/s (I .6 mile/h) - Page 23 Adjust snow bystanders, windows, of the snow discharge If the snow discharge wooden stick to unclog it. Never put your hand into the snow discharge chute while the engine NOTE: To move the machine without squeeze the drive clutch lever only. Do this when moving the machine to or frpm the area to be cleared.
-
Page 24: Stopping The Engine
7. STOPPING THE ENGINE To stop engine in an emergency, turn engine switch immediately. 1. Turn the throttle lever to the SLOW position and turn the engine switch to the OFF position. 2. Turn the fuel valve to the OFF positon. -
Page 25: Maintenance
8. MAINTENANCE The purpose of inspection the best operating condition. Inspect or service as scheduled Shut off the engine before performing disconnect the spark plug wire from the plug so the engine started. If the engine must be run, make sure the area is well ventilated. gas contains poisonous consciousness... - Page 26 SPARK PLUG WRENCH WRENCH HANDLE 14 X 10 mm WRENCH 12 mm WRENCH TOOL...
-
Page 27: Engine Oil Change
ENGINE OIL CHANGE Drain the oil while the engine is still warm to assure rapid and complete draining. 1. Remove the drain plug and filler cap, and drain the oil. Retighten the plug securely. 2. Fill the crankcase with the recommended level. -
Page 28: Spark Plug Service
SPARK PLUG SERVICE Recommended spark plug: If the engine has been running, m!am careful not to touch the muffler To ensure proper engine operation, and free of deposits. 1. Remove the spark plug cap. 2. Clean any dirt from around the spark plug base. 3. -
Page 29: Track-Adjustment (Track Model Only)
TRACK-ADJUSTMENT Clean and thaw the tracks before ad- justment. The tracks cannot rectly adjusted if clogged with snow or debris, or coated with ice. Check track deflection ween the wheels. When correctly justed, the track will deflect mm (3/4- 1 in) when pressed with a force of 15 Kg (33 lb). -
Page 30: Storage
Before storing the snowblower 1. Be sure the storage area is free of excessive 2. Drain the fuel- Gasoline is extremely tions. Do not smoke or allow flames or sparks in the area. Do not drain the fuel tank when the exhaust a. - Page 31 Remove the spark plug and pour three tablespoonsful to the cylinder. Pull the starter rope slowly two or three times to distribute the oil. Reinstall the spark plug. Pull the starter grip until resistance tects the engine from internal corrosion. of clean motor oil in- is felt.
- Page 32 Apply oil to the following parts for lubrication and rust prevention. AUGER AND DRIVE CLUTCH CHUTE ADJUSTING BOLT LEVER PIVOT AUGER BLOWER...
-
Page 33: Troubleshooting
IO. TROUBLESHBOUUNG When the engine will not start: 1. Is there enough fuel? 2. Is the fuel valve on? 3. Is gasoline reaching the carburetor? To check, loosen the drain screw with the fuel valve on. Fuel should flow freely. If any fuel is spilled, make sure the area is dry before testing the spark plug or starting the engine. -
Page 34: 1 . Specifications
Engine Model: Maximum output: Displacement: Bore x stroke: Starting method: Ignition system: Oil capacity: Fuel tank capacity: Spark plug: Frame Overall length Overall width Overall height Dry weight Width of snow clearance Height of snow clearance Snow throwing distance (differs according the kind of snow) Clearing capacity Continuous... -
Page 35: Warranty Service
12. WARRANTY Owner Satisfaction Your satisfaction and goodwill Honda warranty details are explained Normally, any problems dealer’s service department. been handled to ,your satisfaction, action: Discuss your problem with a member of dealership complaints can be quickly already been reviewed the dealership or the General Manager.