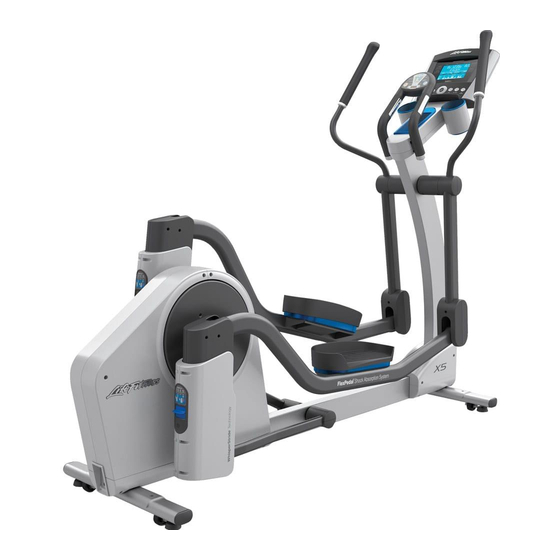
Life Fitness X5 Owner's Manual
Total-body elliptical cross-trainer
Hide thumbs
Also See for X5:
- Assembly & operation manual (28 pages) ,
- User manual (23 pages) ,
- Assembly instructions manual (20 pages)
Table of Contents
Advertisement
Advertisement
Table of Contents

Related Manuals for Life Fitness X5


Summary of Contents for Life Fitness X5
- Page 1 X5 TOTAL-BODY ELLIPTICAL CROSS-TRAINER Owner’s Manual 8973801 REV B-3...
- Page 3 5100 River Road Schiller Park, Illinois 60176 • U.S.A. 847.288.3300 • FAX: 847.288.3703 Service phone number: 800.351.3737 (toll-free within U.S.A., Canada) Bijdorpplein 25-31 Siemensstraße 3 2992 LB Barendrecht 85716 Unterschleißheim 5100 N River Road THE NETHERLANDS GERMANY Schiller Park, IL 60176 U.S.A Telephone: (+31) 180 646 644 Telephone: (+49) 89.31 77 51.0 (Germany) Telephone: (847) 288 3300...
- Page 4 Thank you for purchasing a Life Fitness Total-Body Elliptical Cross-Trainer. Before using this product, please read this owner’s manual in its entirety to ensure that you have the knowledge to safely and properly operate all of the features of your Total-Body Elliptical Cross-Trainer. We hope you achieve the product experience that you expect, but if you do have any service issues, please go to the How to Obtain Product Service section which will provide information on obtaining product service.
-
Page 5: Table Of Contents
X5 Total Body Elliptical Cross-Trainer Overview ........ - Page 6 This Operation Manual describes the functions of the following product: Life Fitness Cross-Trainer Model: Statement of Purpose: The Life Fitness Total-Body Elliptical Cross-Trainer is an exercise machine that combines low- impact elliptical pedaling, where resistance is independent of speed, with push/pull arm motion to provide an efficient, effective total body workout.
-
Page 7: Important Safety Instructions
Never insert objects into any openings in this product. If an object should drop inside, turn off the power, unplug the power cord from the outlet and carefully retrieve it. If the item cannot be reached, contact Life Fitness Customer Support Services. - Page 8 • Never operate this appliance if it has a damaged cord or plug, if it is not working properly, if it has been dropped or damaged, or dropped into water. Contact Life Fitness Customer Support Services. • Never operate the appliance with the air openings blocked. Keep the air openings free of lint, hair, and the like.
-
Page 9: X5 Total Body Elliptical Cross-Trainer Overview
X5 T OTAL LLIPTICAL ROSS RAINER VERVIEW X5 with Track Console Pedal... -
Page 10: Assembly
SSEMBLY & H OOLS ARDWARE Identify the following components after unpacking your cross-trainer: M3.5 X 12MM BLACK PHILLIPS HEAD SCREW (QTY. 4) M5 X 8MM BLACK PHILLIPS HEAD SCREW (QTY. 4) M3.5 X 8MM CLEAR ZINC PHILLIPS HEAD SCREW (QTY. 4) M10 HEX NUT (QTY. -
Page 11: Packaging
ACKAGING Parts: None Remove all packaging and place main components to the side of the box. Break box down in each of the four corners. Note: Support pedal levers when removing internal packaging to prevent damage to the pedals. SSEMBLE THE TABILIZERS Parts: Hardware Bag #1 (4, M10 X 15mm Silver Hex Head Bolts) -
Page 12: Assemble The Rocker Arms; Moving Arm Pivot Covers
SSEMBLE THE OCKER OVING IVOT OVERS Parts: Hardware Bag #3 (2, Wave Washers, 2 Large Flat Washers) (2, Flat Washers) (2, M10 X 20mm Silver Hex Head Bolts) (4, M3.5 X 12mm Black Phillips Head Screws) Tools: 17mm Socket Wrench, Phillips Screwdriver Slide one large Flat Washer (4) and one Wave Washer (5) onto the user right pivot shaft (F). -
Page 13: Assemble Moving Arms To Pedal Arms; Pedal / Moving Arm Joint Pivot Covers
SSEMBLE OVING RMS TO EDAL EDAL OVING OINT IVOT OVERS Parts: Hardware Bag #4 (2, M10 X 74mm Silver Hex Head Bolts) (2, M10 Hex Nuts) (4, M5 X 8mm Black Phillips Screws) Tools: 17mm Socket Wrench, Phillips Screwdriver Lift the front end of the user left pedal lever (K) to meet the left rocker arm clevis (L). Secure the pedal lever to the rock- er arm clevis using one M10 X 74mm Silver Hex Head Bolt (9) and one M10 Hex Nut (10). -
Page 14: Assemble Front Base Shroud; Console Bracket To The Upright
SSEMBLE RONT HROUD ONSOLE RACKET TO THE PRIGHT Parts: Hardware Bag #5 (8, M5 X 12mm Silver Phillips Head Screws) (2, M10 X 15mm Silver Hex Head Bolts) Tools: Phillips Screwdriver, 17mm Socket Wrench Position the left side base shroud (N) over the metal bracket (O) and screw in with four M5 X 12mm Silver Phillips Head Screws (12). -
Page 15: Connect All Console Wiring; Console To Console Bracket; Back Plastic Shell
ONNECT ALL ONSOLE IRING ONSOLE TO ONSOLE RACKET LASTIC HELL Parts: Hardware Bag #6 (4, M5 X 12mm Black Phillips Screws) (4, M3.5 X 8mm Clear Zinc Screws) Go Console Tools: Phillips Screwdriver Connections Position the console (Q) close to the console bracket (P) and follow the below instructions to connect all wiring. -
Page 16: Initial Setup
SERS The X5 has stride lengths from 18 inches to 24 inches (46 cm to 61 cm). While it is fine for all size users to utilize any of the stride lengths, research has shown that shorter users may prefer a shorter stride length while taller users may prefer a... -
Page 17: Main Features
EART The X5 includes hand pulse sensors on the stationary handle bar that are a built-in heart rate monitoring system. During a workout grasp the hand pulse sensors to monitor your heart rate.We recommend using the heart rate chest strap provided with your console during workouts and using the hand pulse sensors to only occasionally monitor your heart rate when not using the chest strap. -
Page 18: Selectstride
TRIDE The X5 features SelectStride Technology which provides the user with the ability to adjust the stride length to any increment between 18 and 24 inches (46 cm to 61 cm). By adjusting the stride length, you can personalize the motion to your body or to your specific workout. -
Page 19: Coachzone
OACH ™ OACH ONE ™ VERVIEW The CoachZone is designed to provide extra workout variety and motivation through additional instruction and feedback. The ArmToner and GluteToner workout enhancements help users target specific muscle groups and break the workout into manageable increments. The appropriate muscle groups that you should be using will illuminate when you perform specific movements. -
Page 20: Armtoner
Coach Indicator Muscle Indicator Push Chest; Tricep Pull Bicep Use Fixed Handles Upper body gets a rest... -
Page 21: Glutetoner
™ LUTE ONER The GluteToner selection utilizes a pre-programmed series of prompts and intervals focused on lower body muscles and glutes. CTIVATE LUTE ONER Press the GluteToner key during any workout to activate the selection. AUSE LUTE ONER Press the GluteToner key once while using the GluteToner selection. PAU will display on the CoachZone Timer. Press the GluteToner key again to resume. -
Page 22: Timer
RESS The Resistance Level UP/DOWN Arrow Keys only function after a user selects and begins a workout using the X5 main console. The UP/DOWN Level Arrow Keys control the brake resistance level (1-20) during a Quick Start or Manual workout. -
Page 23: Service And Product Maintenance
& P ERVICE RODUCT AINTENANCE ROUBLESHOOTING Problem Cause / Solution Check to see that the power cord is fully plugged into the back of the Total-Body Elliptical Cross-Trainer and into the wall. Make sure the power cord is fully seated into the back of the Total-Body Elliptical Cross-Trainer. You may be in “Energy Saver Mode”. -
Page 25: Preventative Maintenance Tips
REVENTATIVE AINTENANCE The Life Fitness Total Body Elliptical Cross-Trainer is backed by the engineering excellence and reliability of Life Fitness and is one of the most rugged and trouble-free pieces of exercise equipment on the market today. Note: Safety of the equipment can be maintained only if the equipment is examined regularly for damage or wear. Keep the equipment out of use until the defective parts are required or replaced. -
Page 26: Specifications
PECIFICATIONS X5 C ITNESS ROSS RAINER PECIFICATIONS Designed Use: Home Max User Weight: 400 lbs / 182 kilograms Resistance System: Eddy Current Stride Length: 18 inches to 24 inches (46 cm to 61cm) (Adjustable in any increment, marked at 18, 19, 20,21, 22, 23, and 24.) -
Page 27: Warranty Information
WHO PAYS SHIPPING & INSURANCE FOR SERVICE: If the Product or any warranted part must be returned to a service facility for repairs, Life Fitness will pay all shipping and insurance charges during the warranty period (within the United States only). The purchaser is responsible for ship- ping and insurance charges after the warranty has expired. - Page 28 Product. Some states do not allow the exclusion or limitation of implied warranties or of liability for incidental or consequential damages, so the above limitations or exclusions may not apply to you. Warranties may vary outside the U.S. Contact Life Fitness for details. CHANGES IN WARRANTY NOT AUTHORIZED: No one is authorized to change, modify or extend the terms of this limited warranty.