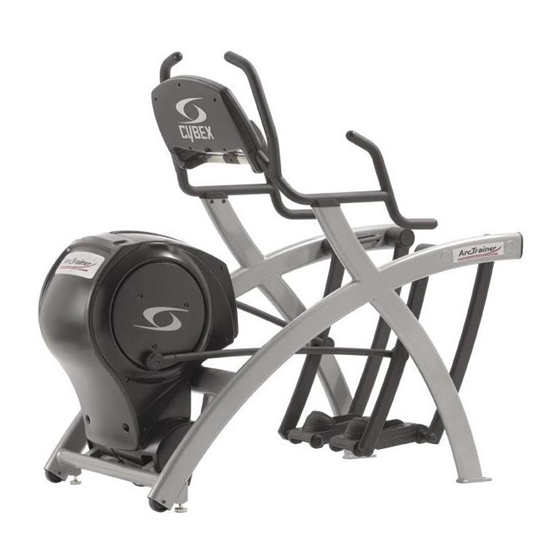
CYBEX Arc Trainer 600A Owner's Service Manual
Cardiovascular systems
Hide thumbs
Also See for Arc Trainer 600A:
- Owner's service manual (62 pages) ,
- Installation instructions manual (4 pages)
Table of Contents
Advertisement
Quick Links
Cybex Arc Trainer 600A
Owner's & Service Manual
Cardiovascular Systems
Part Number LT-17070-4
Cybex and the Cybex logo are registered trademarks of Cybex International, Inc. Polar is a registered trademark of Polar.
DISCLAIMER:
Cybex International, Inc. makes no representations or warranties regarding the contents of this manual. We reserve
the right to revise this document at any time or to make changes to the product described within it without notice or obligation to notify
any person of such revisions or changes.
© 2004, Cybex International, Inc. All rights reserved. Printed in United States of America.
10 Trotter Drive Medway, MA 02053 • 800-766-3211 • 508-533-4300 • FAX 508-533-5183
www.cybexinternational.com • techhelp@cybexintl.com • techpubs@cybexintl.com • LT-17070-4 • June 2004
Advertisement
Chapters
Table of Contents

Related Manuals for CYBEX Arc Trainer 600A


Summary of Contents for CYBEX Arc Trainer 600A
- Page 1 Cardiovascular Systems Part Number LT-17070-4 Cybex and the Cybex logo are registered trademarks of Cybex International, Inc. Polar is a registered trademark of Polar. DISCLAIMER: Cybex International, Inc. makes no representations or warranties regarding the contents of this manual. We reserve the right to revise this document at any time or to make changes to the product described within it without notice or obligation to notify any person of such revisions or changes.
-
Page 3: About This Manual
Cybex Arc Trainer Owner’s & Service Manual About This Manual An Owner’s & Service Manual is shipped with each Cybex Arc Trainer. To purchase additional copies of this manual or any other Cybex manual, please do one of the following: •... - Page 4 Cybex Arc Trainer Owner’s & Service Manual This page intentionally left blank Page ii...
-
Page 5: Table Of Contents
Schematic ..... 7-51 Cleaning Your Cybex Arc Trainer ..4-2 Drive Belt Maintenance ... . 4-3 Lubrication . - Page 6 This page intentionally left blank...
-
Page 7: Safety
Cybex Arc Trainer Owner’s & Service Manual Table of Contents ..iii 1- Safety 1 Safety Important Voltage Information 1-1 Grounding Instructions ..1-1 Important Safety Instructions 1-2 IMPORTANT: Read all instructions and warnings before using the unit. -
Page 8: Important Safety Instructions
Cybex Arc Trainer Owner’s & Service Manual circuit. Make sure that the unit is connected to an outlet having the same configuration as the plug. Do not use a ground plug adapter to adapt the power cord to a non-grounded outlet. - Page 9 • Make sure there is enough room for safe access and operation of this unit. • Do not attempt repairs, electrical or mechanical. Seek qualified repair personnel when servicing. If you live in the USA, contact Cybex Customer Service at 800-766-3211 (then press 64). If you live outside the USA, contact Cybex Customer Service at 508-533-4300.
-
Page 10: Warning Decals
Cybex web site at ecybex.com. Warning decals indicate a potentially hazardous situation, which, if not avoided, could result in death or serious injury. The warning decals used on the Cybex Arc Trainer are shown below. Warning decal part number -... - Page 11 Cybex Arc Trainer Owner’s & Service Manual Table of Contents ..iii 1 Safety Important Voltage Information 1-1 Grounding Instructions ..1-1 Important Safety Instructions 1-2 Warning Decals ..1-4 Caution Decals .
- Page 12 Cybex Arc Trainer Owner’s & Service Manual Warning decal part number - DE-16928 SERIOUS INJURY COULD OCCUR IF THESE PRECAUTIONS ARE NOT OBSERVED High voltage is present under this shield. This shield should only be removed by a qualified service technician.
-
Page 13: Caution Decals
Grounding Instructions ..1-1 Important Safety Instructions 1-2 may result in minor or moderate injury. The caution decals used on the Cybex Warning Decals ..1-4 Arc Trainer are shown below. - Page 14 Cybex Arc Trainer Owner’s & Service Manual This page intentionally left blank Page 1-8...
-
Page 15: Technical Specifications Specifications
Cybex Arc Trainer Owner’s & Service Manual 2 - Technical Specifications Table of Contents ..iii Specifications 2 Technical Specifications Specifications ... . 2-1 Length: 67"... - Page 16 Cybex Arc Trainer Owner’s & Service Manual This page intentionally left blank Page 2-2...
-
Page 17: Operation
Cybex Arc Trainer Owner’s & Service Manual 3 - Operation Table of Contents ..iii Read and understand all instructions and warnings prior to using the unit. See all of the safety related information located in chapter 1. -
Page 18: Quick Operation Guide
Cybex Arc Trainer Owner’s & Service Manual Quick Operation Guide NOTE: Maximum user weight is 400 lbs. (181 kg). The following is a quick overview of the operation of the unit. For more information read Detailed Operation Guide in this chapter. NOTE: Times specified in this chapter reflect the unit’s defaults. - Page 19 Cybex Arc Trainer Owner’s & Service Manual 4. You now have the option to select a program or to select Quick Start, skip Table of Contents ..iii Program Setup Mode, and enter Manual Mode.
- Page 20 Cybex Arc Trainer Owner’s & Service Manual Figure 1 7. Press the Resistance — keys to change the load at any time. Pressing the key will make your workout harder. Pressing the — key will make your workout easier. The right display will show the current resistance in increments of 1 from 0 to 100.
-
Page 21: Stopping The Arc Trainer
Cybex Arc Trainer Owner’s & Service Manual Table of Contents ..iii Stopping the Arc Trainer Press Stop once to pause your workout for 20 seconds (default setting) and to enter the Workout Review. As you stop striding the foot plates will stop and the elevation will return to the level 3 incline (starting position), but all workout settings and data will remain in memory for the pre-selected time. -
Page 22: Data Readouts
Cybex Arc Trainer Owner’s & Service Manual keys to change the level. The level will change immediately and will continue to accumulate performance data without interruption. NOTE: If you change the level during the Manual Mode the level and resistance will change at once. -
Page 23: Displaying Heart Rate
Hill Interval ....3-10 movement can cause interference on the contacts. Cybex does not recommend Interval ....3-12 Weight Loss . -
Page 24: Use Of Programs
Cybex Arc Trainer Owner’s & Service Manual Blue = 0-69 beats per minute Heart LED Green = 70-93 beats per minute The color of the heart Yellow = 94-120 beats per minute (FAT BURN ZONE) indicates the range of Red = 121-170 beats per minute (CARDIO ZONE) beats per minute as Purple = 171 &... -
Page 25: Manual Mode
Cybex Arc Trainer Owner’s & Service Manual Table of Contents ..iii Manual Mode Manual Mode is not a preprogrammed workout. Instead, it allows you to choose settings as you workout. You may choose your settings according to how you feel or your endurance level. -
Page 26: Hill Interval
Cybex Arc Trainer Owner’s & Service Manual NOTE: Stride length always remains 24" (61 cm). Figure 3 Hill Interval Program Overview The Hills program is designed to give the user the experience of hiking in a hilly terrain. This program uses intervals of moderate resistance and incline to simulate relatively flat areas and intervals of substantially greater incline and resistance to simulate steeper grades. - Page 27 Cybex Arc Trainer Owner’s & Service Manual Table of Contents ..iii Hills Time Segments :30 :30 :30 :30 2:00 2:00 2:00 2:00 :30 :30 :30 :30 Warm Up Program Segments Cool Down...
-
Page 28: Interval
Cybex Arc Trainer Owner’s & Service Manual Interval Program Overview The Interval program utilizes a 1:2 (work:rest) ratio with the work period lasting for 30 seconds. This allows for moderate and balanced taxation of both the aerobic and anaerobic energy systems. As such this program is useful to those who desire improving both their aerobic and anaerobic capabilities. -
Page 29: Manual Mode
Cybex Arc Trainer Owner’s & Service Manual Table of Contents ..iii Intervals Profiles Show Level 10 at 10 Minutes (Longer workout repeats the program segment) 3 Operation Terms & Symbols Used ..3-1 Quick Operation Guide . -
Page 30: Weight Loss
Cybex Arc Trainer Owner’s & Service Manual Weight Loss Program Overview The Weight Loss program is designed for low to medium intensity training that the user can sustain for an extended period of time. It builds from a low intensity baseline to include segments of higher incline and resistance as well as segments that use higher resistance with the baseline incline. -
Page 31: Manual Mode
Cybex Arc Trainer Owner’s & Service Manual Table of Contents ..iii Weight Loss Profiles Show Level 10 at 10 Minutes 3 Operation Terms & Symbols Used ..3-1 Quick Operation Guide . -
Page 32: Cardio
Cybex Arc Trainer Owner’s & Service Manual Cardio Program Overview The Cardio program is designed for experienced users that desire a high intensity cardiovascular training experience. The two-minute work interval with high resistance ensures that the aerobic energy system is completely taxes, while the subsequent two-minute rest interval allows for recovery enabling a repeat at the higher work rate. - Page 33 Cybex Arc Trainer Owner’s & Service Manual Table of Contents ..iii Cardio Profiles Show Level 10 at 10 Minutes 3 Operation Terms & Symbols Used ..3-1 Quick Operation Guide ..3-2 Detailed Operation Guide .
-
Page 34: Strength
Cybex Arc Trainer Owner’s & Service Manual Strength Program Overview The program is designed with the specific goal of taxing the anaerobic energy system and encouraging maximal power development. This program uses a 1:3 (work:rest) ratio having 15-second work periods. The work periods use high resistance settings to maximally tax their anaerobic energy system and rest periods with very low resistance to encourage recuperation. - Page 35 Cybex Arc Trainer Owner’s & Service Manual Table of Contents ..iii Strength Profiles Show Level 10 at 10 Minutes (Longer workout repeats the program segment) 3 Operation Terms & Symbols Used ..3-1 Quick Operation Guide .
-
Page 36: Manual
Cybex Arc Trainer Owner’s & Service Manual Manual Program Overview Manual Mode is available both through Quick Start and through the Manual program where it includes the program time and user weight adjustment. NOTE: There is no diagram because resistance and incline are user-controlled. -
Page 37: Preventive Maintenance
NOTE: Worn or damaged components shall be replaced immediately or the unit removed from service until the repair is made. NOTE: Cybex is not responsible for performing regular inspection and maintenance actions for your unit. Instruct all personnel in equipment inspection and maintenance actions and also in accident reporting/recording. -
Page 38: Cleaning Your Cybex Arc Trainer
Cybex Arc Trainer Owner’s & Service Manual Cleaning Your Cybex Arc Trainer ! WARNING: To prevent electrical shock, be sure that power is shut off and the unit is unplugged from the electrical outlet before performing any cleaning or maintenance procedures. -
Page 39: Drive Belt Maintenance
Cybex Arc Trainer Owner’s & Service Manual Table of Contents ..iii Drive Belt Maintenance There are two drive belts that may become loose, worn or cracked. See Figure 1. Primary Belt — This is the wider of the two belts. - Page 40 Cybex Arc Trainer Owner’s & Service Manual 3. Remove the access cover. Access Cover A. Using a Phillips head screwdriver, remove the four screws securing the access cover in place. See Figure 2. B. Remove the access cover. ! WARNING: The flywheel may be hot. Wait until it cools before servicing.
-
Page 41: Lubrication
Cybex Arc Trainer Owner’s & Service Manual Table of Contents ..iii Lubrication The Arc Trainer is designed with no-maintenance parts. Although there are grease fittings on the pillow blocks, re-lubrication of the bearings is not required. -
Page 42: Service Schedule
Cybex Arc Trainer Owner’s & Service Manual Service Schedule Page 4-6... -
Page 43: Setup & Assembly
Cybex Arc Trainer Owner’s & Service Manual 5 - Setup & Assembly Table of Contents ..iii Warnings/Cautions All warnings and cautions listed in this chapter are as follows: ! WARNING: Use extreme caution when assembling the unit. Failure to do so could result in injury. -
Page 44: Electrical Power Requirements
Cybex Arc Trainer Owner’s & Service Manual Electrical Power Requirements The power requirements for the Cybex Arc Trainer are a grounded circuit rated for one of the following: 115 VAC ±5%, 50/60 Hz and 15 amps; or 230 VAC ±10%, 50/60 Hz. Contact your electrician to ensure the power supply complies with local building codes. - Page 45 Cybex Arc Trainer Owner’s & Service Manual D. Check to be sure that the following items are present. Check off ( Table of Contents ..iii each item as you find it. See Figure 1. If any of the parts are missing contact Cybex Customer Service.
- Page 46 Cybex Arc Trainer Owner’s & Service Manual E. Check off ( ) each item in the hardware pack as you find it. See Figure 2. Item Qty Part Number Description HC660417 BHSCS 5-16-18 x 1.00 HS327300 Lock washer external tooth HT552515 Screw, 5-16-18 x 0.75 PNHD ACR Phil...
-
Page 47: Assembling The Cybex Arc Trainer
Cybex Arc Trainer Owner’s & Service Manual ! CAUTION: A minimum of two people are required to lift, move and Table of Contents ..iii assemble the unit. Always use proper lifting methods when moving heavy items. - Page 48 Cybex Arc Trainer Owner’s & Service Manual C. Using a 3/16” hex key, loosely attach the console with the four 5-16-18 x 1.00 Console screws and four starwashers. NOTE: Do not securely tighten the screws until step 6D. See Figure 5.
- Page 49 Cybex Arc Trainer Owner’s & Service Manual 8. Attach the foot covers. Table of Contents ..iii A. Remove the paper backing from the tape on each foot cover. B. Have one person lift the unit while a second person adheres a foot cover on each of the two back feet.
- Page 50 Cybex Arc Trainer Owner’s & Service Manual 9. Level the unit. A. Confirm that the unit is on a level surface. If it is not, use a 9/16” open-end wrench wrench to adjust the leveling feet up or down. See Figure 9.
-
Page 51: Testing The Operation
(I). 3. The control panel will light up and be in the Dormant Mode. NOTE: Cybex recommends that the unit be unplugged or the on/off (I/O) Service Schedule..4-6 power switch turned off (O) when it is not in use. -
Page 52: Setting Operation Options
Cybex Arc Trainer Owner’s & Service Manual 9. Press Stop twice to bring the incline back to its start position, end the workout review, and return the display to Dormant Mode. 10. Wait until foot plates come to a complete stop before dismounting the unit. Hold the handrails to steady yourself while you step off the unit. -
Page 53: Customer Service
Your serial number can be found on the front of the unit. Your voltage can be found near the power inlet. For your convenience record your serial number and voltage below so that you will have it ready if you call Cybex Customer Service. - Page 54 The serial number begins with a letter, for example: R09-101331100. 4. At Cybex’s discretion, the technician may request that you return the problem part(s) to Cybex for evaluation and repair or replacement. The technician will assign you an RMA number and will send you an ARS label.
-
Page 55: Damaged Parts
Cybex Arc Trainer Owner’s & Service Manual Table of Contents ..iii Damaged Parts Materials damaged in shipment should not be returned for credit. Shipping damages are the responsibility of the carrier (UPS, Federal Express, trucking companies, etc.). - Page 56 Cybex Arc Trainer Owner’s & Service Manual This page intentionally left blank Page 6-4...
-
Page 57: Service
Cybex Arc Trainer Owner’s & Service Manual 7 - Service Table of Contents ..iii Warnings/Cautions All warnings and cautions listed in this chapter are as follows: ! WARNING: All maintenance activities shall be performed by qualified personnel. -
Page 58: Test Mode
Cybex Arc Trainer Owner’s & Service Manual ! WARNING: All maintenance activities shall be performed by qualified personnel. Failure to do so could result in serious injury. For any service related concerns, call Cybex Customer Service at 800-766-3211 (for Cybex customers living within the USA). -
Page 59: Led Functions
Cybex Arc Trainer Owner’s & Service Manual Table of Contents ..iii LED Functions LEDs are used to indicate the status of many of the unit inputs. After entering Test Mode refer to the following list to check that these LEDs are functioning properly: Heart LED —... -
Page 60: Error Codes
Cybex Arc Trainer Owner’s & Service Manual Error Codes Error codes notify you of a problem condition and are displayed on the center of the console. These codes can also help to indicate the part of the unit most likely to be causing the problem. -
Page 61: Speed Sensor Adjustment
Cybex Arc Trainer Owner’s & Service Manual Table of Contents ..iii Speed Sensor Adjustment Tools Required • Phillips head screwdriver ! WARNING: Disconnect the power cord before beginning this procedure. Keep wet items away from inside parts of the unit. Electrical shock could occur even if the unit is unplugged. - Page 62 Cybex Arc Trainer Owner’s & Service Manual 5. Adjust the speed sensor gap (if needed). A. Using a Phillips head screwdriver, loosen the screw securing the speed sensor in place. See Figure 3. NOTE: Gently bend the side cover to get at the speed sensor screw.
-
Page 63: Drive Belts
Cybex Arc Trainer Owner’s & Service Manual Table of Contents ..iii Drive Belts NOTE: This procedure will cover the primary and secondary drive belts. Tools Required • Phillips head screwdriver • 3/16” Hex key •... - Page 64 Cybex Arc Trainer Owner’s & Service Manual B. Place a cloth on the frame where each Gasket Side Cover connecting rod will rest. Screw (6) C. Rest each rod on a cloth to prevent scratches. See Figure 4. 4. Remove the side covers.
- Page 65 Cybex Arc Trainer Owner’s & Service Manual NOTE: If you are not replacing the Table of Contents ..iii Secondary Drive Belt primary belt skip to step 14. (Removed in Step 7)
- Page 66 Cybex Arc Trainer Owner’s & Service Manual Bolt (4) Pillow Block (2) NOTE: Nuts (4) and flat washers (4) are behind the pillow blocks. Flat Washer (8) Figure 12 B. Remove the crank shaft assembly Crank Shaft Assembly along with the primary belt, pillow...
- Page 67 Cybex Arc Trainer Owner’s & Service Manual ! CAUTION: Do not pinch your fingers between the belt and pulley during Table of Contents ..iii this procedure. 13. Attach the lower board assembly.
- Page 68 Cybex Arc Trainer Owner’s & Service Manual NOTE: Do not This Side adjust the idler This Side of Bracket pulley unless it is of Bracket obvious that your belt is not tensioned Idler properly. Pulley Top Screw Bottom Screw Figure 14 18.
-
Page 69: Eddy Current Brake
Cybex Arc Trainer Owner’s & Service Manual B. Using a Phillips head screwdriver, tighten the four screws securing the Table of Contents ..iii access cover. See Figure 2. Eddy Current Brake Tools Required •... - Page 70 Cybex Arc Trainer Owner’s & Service Manual 5. Remove the left crank cover. A. Using a Phillips head screwdriver, remove the three screws securing the left crank cover in place. See Figure 6. Loosen Screws B. Remove the left crank cover.
- Page 71 D. Support the brake with your hand while removing the two top screws so that it does not fall. E. Remove the eddy current brake from the unit. NOTE: Cybex may want the old parts for evaluation. Call Cybex Customer Service to get an RMA number.
-
Page 72: Elevation Motor
Cybex Arc Trainer Owner’s & Service Manual ! CAUTION: Do not pinch your fingers between the belt and pulley during this procedure. D. Use your hand to slowly turn the flywheel and ensure that the belt is on straight. 12. Attach the left crank cover. - Page 73 Cybex Arc Trainer Owner’s & Service Manual 1. Elevate the unit and disconnect the power source. Table of Contents ..iii A. Plug the power cord into the power outlet. B. Enter Test Mode.
- Page 74 Figure 17 E. Remove the elevation motor. NOTE: Cybex may want the old parts for evaluation. Call Cybex Customer Service to get an RMA number. 8. Calibrate the elevation motor. A. Connect the elevation motor to the lower board and temporarily connect the power.
- Page 75 Cybex Arc Trainer Owner’s & Service Manual D. Using a 9/16” open end wrench and a 9/16” socket wrench, tighten a Table of Contents ..iii nut on each bolt. 10. Connect the elevation cable.
-
Page 76: Power Switch
Cybex Arc Trainer Owner’s & Service Manual Power Switch Tools Required • Phillips head screwdriver ! WARNING: Disconnect the power cord before beginning this procedure. Keep wet items away from inside parts of the unit. Electrical shock could occur even if the unit is unplugged. - Page 77 Cybex Arc Trainer Owner’s & Service Manual Table of Contents ..iii NOTE: Shown from inside the unit. See the schematic at the end of Brown Blue this chapter for more detail.
-
Page 78: Upper Pillow Blocks
Cybex Arc Trainer Owner’s & Service Manual Upper Pillow Blocks Tools Required • Phillips head screwdriver • 3/16” Hex key • 1/8” Hex key • 7/16” Socket wrench • 9/16” Socket wrench • 9/16” Open end wrench • 3/8” Nutdriver or socket wrench ! WARNING: Disconnect the power cord before beginning this procedure. - Page 79 Cybex Arc Trainer Owner’s & Service Manual 5. Remove the crank covers. Table of Contents ..iii A. Using a Phillips head screwdriver, remove the three screws securing each crank cover in place. See Figure 6.
- Page 80 Cybex Arc Trainer Owner’s & Service Manual Pin (2) Nut (4) Pillow Block (2) Shaft Set Screws Crank Arm (2 Each Side) Screw (2) Flat Washer (8) Bolt (4) Figure 21 10. Remove the crank shaft assembly. A. Using a 9/16” socket wrench and a 9/16” open end wrench, remove the two bolts, four flat washers and two nuts from each of the top pillow blocks.
-
Page 81: Caution: Do Not Pinch Your Fingers Between The Belt And Pulley During
Cybex Arc Trainer Owner’s & Service Manual E. Using a 1/8” hex key, tighten the two set screws on each pillow block. Table of Contents ..iii ! CAUTION: Do not pinch your fingers between the belt and pulley during this procedure. -
Page 82: Lower Pillow Blocks
Cybex Arc Trainer Owner’s & Service Manual B. Using a 3/16” hex key, attach each connecting rod with a screw removed in step 3A. See Figure 4. 21. Attach the access cover. A. While being sure not to pinch any cables, place the access cover in position. -
Page 83: Remove Both Side Covers. Note: The Gasket Will Come Off With One Of The Side Covers. See Figure
Cybex Arc Trainer Owner’s & Service Manual 3. Detach the connecting rods. Table of Contents ..iii A. Using a 3/16” hex key, remove the screw securing each connecting rod to each crank. See Figure 4. -
Page 84: Pedal Arm & Linkagearm
Cybex Arc Trainer Owner’s & Service Manual 7. Secure the side covers. A. Place the two side covers and gasket in position. B. Using a Phillips head screwdriver, attach each side cover with the six screws and six washers removed in step 4A. -
Page 85: Lower Control Board
Cybex Arc Trainer Owner’s & Service Manual Table of Contents ..iii Shaft Large Cap Screw Screw Large Cap Linkage Arm Shaft Small Cap Screw Pedal Arm Foot Plate Shafts Foot Plate... - Page 86 A. Using a Phillips head screwdriver, remove the top two screws from the lower board assembly and loosen the bottom two screws. B. Slide the lower board assembly left and off the two bottom screws. NOTE: Cybex may want the old parts for evaluation. Call Cybex Customer Service to get an RMA number.
-
Page 87: Upper Display Board
C. Gently pull the display board up to disconnect it from the CSAFE board. Pedal Arm & Linkage Arm . 7-28 NOTE: Cybex may want the old parts for evaluation. Call Cybex Lower Control Board ..7-29 Customer Service to get an RMA number. - Page 88 Cybex Arc Trainer Owner’s & Service Manual Upper Switch Membrane Ports Upper Display Board Display Cable Ports Lower Display Board Heart Rate RJ-45 Port Board Lower Switch Contact Heart Upper to CSAFE Board Membrane Rate Port Connects to Lower Board...
-
Page 89: Contact Heart Rate Board
Cybex Arc Trainer Owner’s & Service Manual Table of Contents ..iii Contact Heart Rate Board Tools Required • Phillips head screwdriver • ESD (Electro Static Discharge) grounding strap 1. Disconnect the external power source. - Page 90 Cybex Arc Trainer Owner’s & Service Manual B. Lift the console front off the unit and place Screw it on a clean, flat surface. Jumper Terminal 5. Remove the heart rate board and bracket. Starwasher A. Using a Phillips head screwdriver, remove...
-
Page 91: Csafe Board
Cybex Arc Trainer Owner’s & Service Manual 9. Secure the console backs. Table of Contents ..iii A. While being sure not to pinch any cables, use a Phillips head screwdriver to secure the lower console back to the handrail with three screws removed during step 2C. -
Page 92: Upper Display Cable
Cybex Arc Trainer Owner’s & Service Manual Upper Display Cable NOTE: Display cables have a revision number label so that you can verify part number and latest revision of the cable. The upper display cable part number is AW-17007. Tools Required •... -
Page 93: Access Cover
Cybex Arc Trainer Owner’s & Service Manual Table of Contents ..iii P3 and P8 Connectors on Upper Display Board Top Console Back Cover Screws (5) Exit Handrail Upper Display Gasket Gasket... -
Page 94: Lower Display Cable
Cybex Arc Trainer Owner’s & Service Manual B. Push the single Handrail connector down into the Opening top handrail hole. See Figure 31. C. Push the display cable down through the Upper handrail and out the Display handrail’s bottom hole. - Page 95 Cybex Arc Trainer Owner’s & Service Manual ! WARNING: Disconnect the power cord before beginning this procedure. Table of Contents ..iii Keep wet items away from inside parts of the unit. Electrical shock could occur even if the unit is unplugged.
- Page 96 Cybex Arc Trainer Owner’s & Service Manual B. Tape the new 10 pin connector to the old lower display cable. NOTE: Be sure to tape the correct Gasket ends together. See Figure 33. Lower C. Gently pull both cables through the unit. NOTE:...
-
Page 97: Display Overlays
Cybex Arc Trainer Owner’s & Service Manual Table of Contents ..iii Display Overlays NOTE: This procedure will cover the upper and/or lower display overlay. They are removed and replaced the same. - Page 98 Cybex Arc Trainer Owner’s & Service Manual 6. Test the new display overlay. A. Turn the main power switch to the on (I) position. B. Plug the unit into the power outlet. C. Try each key to be sure that it functions properly.
-
Page 99: Parts List
Cybex Arc Trainer Owner’s & Service Manual Table of Contents ..iii Parts List NOTE: Parts lists and exploded views are on the pages that follow. 7 Service Warnings/Cautions ..7-1 Test Mode . - Page 100 Cybex Arc Trainer Owner’s & Service Manual Page 7-44...
- Page 101 Cybex Arc Trainer Owner’s & Service Manual Page 7-45...
- Page 102 Cybex Arc Trainer Owner’s & Service Manual Page 7-46...
- Page 103 Cybex Arc Trainer Owner’s & Service Manual Page 7-47...
- Page 104 Cybex Arc Trainer Owner’s & Service Manual Page 7-48...
- Page 105 Cybex Arc Trainer Owner’s & Service Manual Page 7-49...
- Page 106 Cybex Arc Trainer Owner’s & Service Manual This page intentionally left blank Page 7-50...
-
Page 107: Schematic
ROW 2 SWITCH SIG (GREEN) ROW 3 SWITCH WIRELESS COL 1 SWITCH EW600001 COL 2 SWITCH CABLE, CHR TO DISPLAY EW000002 BOTTOM SWITCH MEMBRANE ASSY, CHR BOARD SW-17006 Cybex Arc Trainer Schematic Cybex Arc Trainer Owner’s & Service Manual Page 7-51...